Love this? Save it for later!
Share the inspiration with your friends
I was standing in the dairy aisle last Saturday, staring at a block of cream cheese like it held the secrets to the universe, when the smell hit me. Not from the grocery store — I mean, it smells like recycled air and cleaning solution in there — but from my memory. That greasy, salty, utterly irresistible scent of a bacon cheeseburger fresh off the grill. And suddenly I was twenty-two, in my first tiny apartment with the cracked linoleum floor, and my buddy Marcus had just dropped by with a bag of drive-thru burgers and a six-pack. We sat on the floor because we didn’t have a couch yet, and I remember thinking, this is the best thing I’ve ever tasted. Honestly, it probably wasn’t. But the company, the moment, the sheer joy of it — that stuck.
Fast forward a decade or so, and I’ve been trying to capture that same energy in a dip. Not a burger. A dip. Because let’s face it, dips are the great equalizer of any gathering. Nobody fights over the last burger, but people will absolutely hover near a slow cooker full of cheesy, meaty goodness. This Loaded Bacon Cheeseburger Dip with Toasted Baguette is my attempt to bottle that specific feeling — the messy, satisfying, can’t-stop-eating-it energy of a good burger — and turn it into something you can share with a crowd. Maybe you’ve been there too, chasing a flavor memory through a dozen recipe tests. I burnt the first batch of bacon. I used the wrong cheese and ended up with a greasy puddle. But I kept going, because I knew the payoff was worth it.
This dip is that payoff. It’s got the beef, the bacon, the melty cheese, the tangy pickles, and that little pop of freshness from tomato and onion. And the toasted baguette? Non-negotiable. It’s the perfect vessel for scooping up every last bit. This isn’t just another party dip. This is the dip that makes people close their eyes and go mmm without realizing they’re doing it. And I’m pretty proud of that.
Why You’ll Love This Recipe
I’ve tested this Loaded Bacon Cheeseburger Dip more times than I care to admit. My friends have been willing taste-testers, my neighbors have benefited from the overflow, and my waistline has definitely taken a hit for the cause. But you know what? It was worth every single bite. Here’s why this recipe is different from the other cheeseburger dips floating around the internet.
- Quick & Easy: From start to finish, this dip comes together in about 30 minutes. Seriously. Brown the beef, crisp the bacon, stir everything together, and bake. It’s perfect for those last-minute cravings or when you realize the game starts in an hour and you have nothing to bring.
- Simple Ingredients: No weird stuff here. Ground beef, bacon, cream cheese, cheddar, a few seasonings, and a baguette. You probably have most of this in your kitchen right now. I mean, who doesn’t have cream cheese in their fridge? It’s practically a staple.
- Perfect for Game Day: This is the ultimate crowd-pleaser for Super Bowl parties, March Madness, or just a regular Tuesday when you need something comforting. It’s hearty enough to be a meal, but it’s definitely best as a shareable appetizer.
- Crowd-Pleaser: I’ve served this to kids, adults, picky eaters, and food snobs. The reaction is always the same — silence, followed by a flurry of baguette slices reaching for more. It’s the kind of dip that disappears in minutes.
- Unbelievably Delicious: The combination of savory beef, smoky bacon, creamy cheese, and that little tang from the pickles is just next-level. It’s comfort food at its finest, and it hits every single note you want from a bacon cheeseburger.
What makes this dip truly special is the texture. I use a blend of cream cheese and cheddar to get that ultra-creamy, scoopable consistency without it being too runny or too thick. And the toasted baguette? It adds that perfect crunch that contrasts with the soft, warm dip. It’s not just another version of a cheeseburger dip — it’s the best version. Trust me on this one.
What Ingredients You Will Need
This recipe uses simple, honest ingredients to build layers of flavor. Nothing fancy, just good, solid staples that come together to create something truly special. Most of these are pantry or fridge staples, so you might not even need a grocery run.
- For the Dip Base:
- 1 lb (450g) ground beef — I prefer 80/20 for the best flavor, but leaner works too. Just don’t go too lean or the dip might be dry.
- 8 slices (about 8 oz / 225g) bacon — Thick-cut is my go-to. It holds its texture better. I’ve used Wright Brand bacon and it’s fantastic.
- 1 small yellow onion, finely diced (about 1/2 cup / 75g) — Adds sweetness and depth. Don’t skip it.
- 2 cloves garlic, minced — Because garlic makes everything better.
- 8 oz (226g) cream cheese, softened — This is the key to the creamy texture. Let it sit out for 30 minutes before you start.
- 1/2 cup (120ml) sour cream — Adds tang and helps keep the dip luscious.
- 1 cup (100g) shredded sharp cheddar cheese — I like Kraft or Sargento for consistent melting. Sharp cheddar gives the most flavor.
- 1/2 cup (50g) shredded Monterey Jack cheese — For that extra creamy melt. You can use all cheddar if that’s what you have.
- 2 tablespoons (30ml) ketchup — Adds that classic burger sweetness.
- 1 tablespoon (15ml) yellow mustard — For that unmistakable cheeseburger tang.
- 1 tablespoon (15ml) Worcestershire sauce — Adds umami depth. Don’t skip this one.
- 1/2 teaspoon salt — Adjust to taste, especially if your bacon is salty.
- 1/4 teaspoon black pepper — Freshly ground is best.
- 1/4 teaspoon garlic powder — Because you can never have too much garlic.
- For the Toppings:
- 1/2 cup (60g) dill pickle slices, chopped — The acidity cuts through the richness. I use Claussen for the crunch.
- 1/4 cup (30g) diced tomato — Adds freshness and color.
- 2 tablespoons (8g) chopped fresh parsley or chives — For a pop of green and a fresh finish.
- Extra shredded cheddar and crumbled bacon for garnish — Because presentation matters, and more cheese never hurts.
- For Serving:
- 1 large baguette (about 12 oz / 340g), sliced into 1/2-inch rounds — Toasted until golden. You can also use tortilla chips, crackers, or veggie sticks.
- 2 tablespoons (30ml) olive oil or melted butter — For brushing the baguette slices before toasting.
- Pinch of salt and garlic powder for the baguette — Optional, but highly recommended.
Ingredient Selection Tips: For the best texture, use block cream cheese, not the spreadable kind. And when it comes to bacon, look for thick-cut slices — they crisp up beautifully and add a meaty bite to the dip. If you’re using pre-shredded cheese, that’s totally fine, but freshly shredded melts smoother and has better flavor. I’ve tested both, and honestly, the difference is noticeable but not a dealbreaker.
Equipment Needed
You don’t need a fancy kitchen to make this dip. Most of these tools are things you probably already have. But let me share a few tips based on my own trial and error.
- Large Skillet or Frying Pan: For browning the beef and cooking the bacon. A 12-inch skillet works great. If you have a cast iron one, even better — it holds heat beautifully.
- Baking Dish: An 8×8 or 9×9 square dish works perfectly. I’ve also used a 9-inch pie plate in a pinch. Just make sure it’s oven-safe.
- Mixing Bowls: One large bowl for the dip mixture, one small bowl for the toppings. Nothing fancy.
- Wooden Spoon or Spatula: For stirring and breaking up the beef.
- Cheese Grater: If you’re shredding your own cheese from a block. It takes an extra minute, but the melt is so much better.
- Baking Sheet: For toasting the baguette slices. A rimmed baking sheet works best to catch any stray crumbs.
- Pastry Brush: For brushing the baguette slices with oil or butter. You can also just use a spoon.
- Paper Towels: For draining the bacon. Don’t use the same paper towels for the beef — you want to keep the beef fat for flavor.
Budget-Friendly Alternatives: If you don’t have a pastry brush, just drizzle the oil over the baguette slices and toss them with your hands. If you’re using a glass baking dish, just be careful when you take it out of the oven — glass gets incredibly hot. I learned that the hard way.
Preparation Method
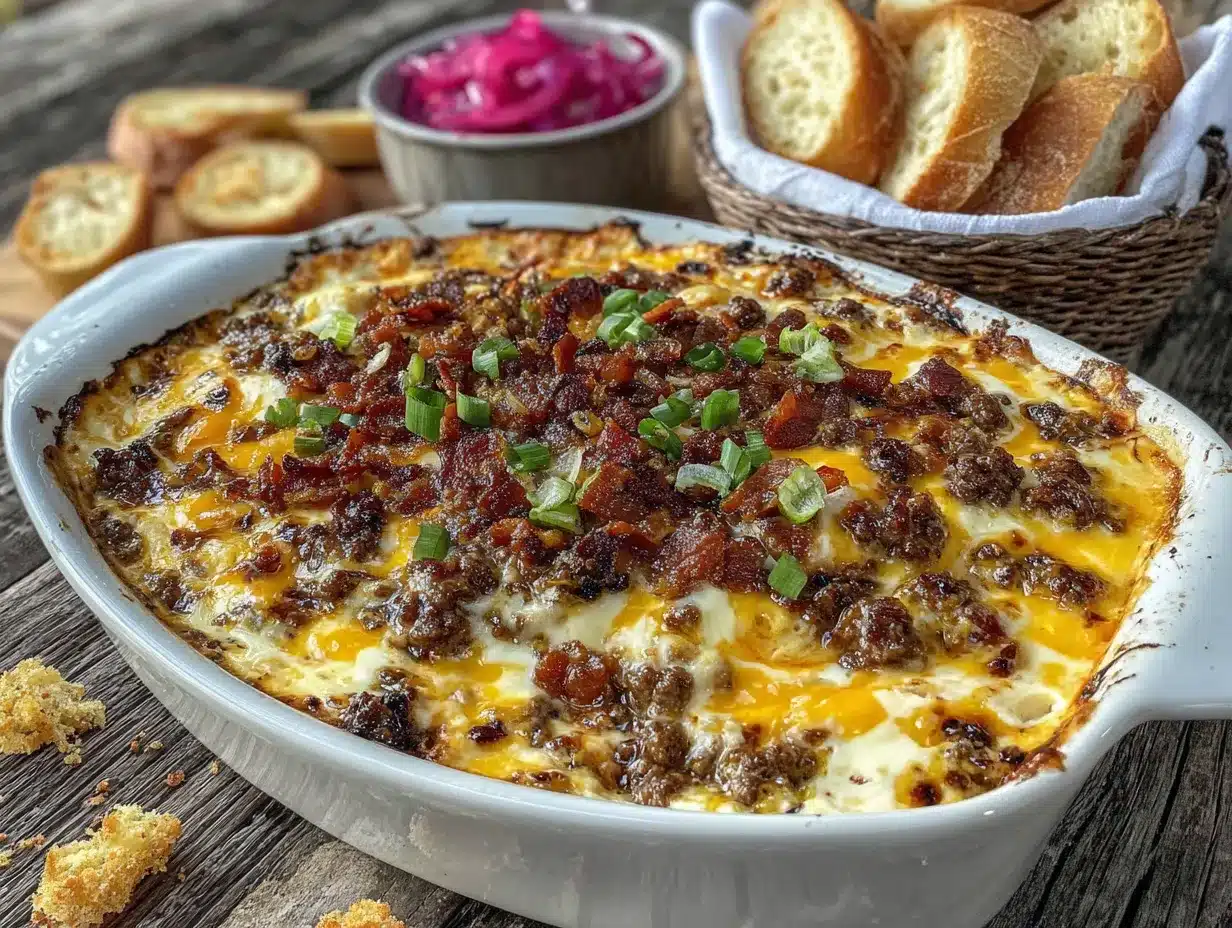
Alright, let’s get cooking. This recipe is straightforward, but I’ve added some cues and tips along the way to make sure your dip turns out perfect. Take your time, and don’t rush the browning — that’s where the flavor lives.
- Preheat your oven to 375°F (190°C). This gives it time to come to temperature while you prep everything. Position a rack in the middle of the oven.
- Cook the bacon. Place the bacon slices in a cold skillet. Turn the heat to medium and cook, flipping occasionally, until crispy, about 8-10 minutes. Transfer the bacon to a paper towel-lined plate to drain. Once cool, crumble or chop it into small pieces. Pro tip: Save about 1 tablespoon of the bacon fat in the skillet for cooking the beef — it adds incredible flavor.
- Brown the ground beef. In the same skillet (with that reserved bacon fat), add the ground beef. Cook over medium-high heat, breaking it up with a wooden spoon, until browned and cooked through, about 6-8 minutes. You want some nice brown bits on the bottom of the pan — that’s flavor. Drain off excess fat if needed, but leave a little for moisture. Season with salt, pepper, and garlic powder.
- Cook the onion and garlic. Add the diced onion to the skillet with the beef. Cook for 2-3 minutes until softened. Add the minced garlic and cook for another 30 seconds until fragrant. Your kitchen should smell amazing at this point.
- Make the dip base. In a large mixing bowl, combine the softened cream cheese, sour cream, ketchup, mustard, and Worcestershire sauce. Mix until smooth and well combined. It should look like a thick, pinkish sauce.
- Combine everything. Add the beef and onion mixture to the bowl with the cream cheese mixture. Add 3/4 cup of the shredded cheddar and 1/4 cup of the Monterey Jack cheese (reserve the rest for topping). Add half of the crumbled bacon and half of the chopped pickles. Stir until everything is evenly distributed. The mixture should be thick and chunky.
- Transfer to baking dish. Spoon the dip mixture into your prepared baking dish and spread it into an even layer. Top with the remaining shredded cheddar and Monterey Jack cheese.
- Bake the dip. Place the dish in the preheated oven and bake for 15-20 minutes, until the cheese is melted and bubbly and the edges are just starting to brown. If you want a deeper golden top, switch the oven to broil for the last 1-2 minutes. Watch it carefully so it doesn’t burn.
- While the dip bakes, toast the baguette. Arrange the baguette slices on a baking sheet. Brush both sides with olive oil or melted butter. Sprinkle with a pinch of salt and garlic powder. Bake in the same oven for 8-10 minutes, flipping halfway, until golden and crispy. Keep an eye on them — they go from golden to burnt fast.
- Finish and serve. Remove the dip from the oven. Top with the remaining crumbled bacon, chopped pickles, diced tomato, and fresh parsley or chives. Serve immediately with the toasted baguette slices.
Troubleshooting Tip: If your dip looks a little greasy after baking, don’t panic. Just give it a quick stir before serving, and it will come back together. This can happen if the cheese separates slightly, but it’s totally normal and still delicious.
Cooking Tips & Techniques
I’ve made this dip more times than I can count, and I’ve definitely made my share of mistakes. Here are the lessons I’ve learned so you don’t have to repeat them.
Don’t Overcook the Beef. I know it’s tempting to let it go until it’s super dark and crispy, but you want it just browned. Overcooked beef becomes dry and tough, and that texture doesn’t improve in the dip. Cook it until it’s no longer pink, then pull it off the heat.
Use Room Temperature Cream Cheese. This is a big one. Cold cream cheese is lumpy and won’t blend smoothly with the other ingredients. Let it sit on the counter for at least 30 minutes before you start. If you forget, you can microwave it in 10-second bursts until it’s soft, but be careful not to melt it.
Toast the Baguette, Don’t Just Warm It. I made the mistake of just warming the bread once, and it turned into a soggy mess under the dip. Toasting it until it’s golden and crispy creates a barrier that holds up to the thick, creamy dip. It also adds that satisfying crunch that makes the whole experience better.
Balance Your Salt. Bacon, cheese, and Worcestershire sauce are all salty. Go easy on the added salt until you taste the finished mixture. You can always add more, but you can’t take it out. I usually start with 1/4 teaspoon and adjust from there.
Let the Dip Rest for 5 Minutes. I know it’s hard to wait, but letting the dip sit for 5 minutes after it comes out of the oven allows it to set up slightly. It will still be warm and gooey, but it won’t be a runny mess. This also gives the flavors a chance to meld together.
Multitasking Strategy: While the beef is browning, you can chop the pickles and tomatoes. While the dip is baking, toast the baguette. This keeps everything moving and ensures everything is ready at the same time. I’ve learned this the hard way — nothing worse than a cold dip waiting for hot bread.
Variations & Adaptations
This dip is incredibly versatile. I’ve played around with it quite a bit, and here are some of my favorite variations. Feel free to make it your own.
- Spicy Jalapeño Popper Version: Add 2-3 finely diced jalapeños (seeds removed for less heat) to the beef mixture. Swap the Monterey Jack for pepper jack cheese. Top with fresh jalapeño slices before serving. The heat cuts through the richness beautifully.
- Smoky BBQ Twist: Replace the ketchup and mustard with 1/4 cup (60ml) of your favorite barbecue sauce. Use smoked cheddar or gouda instead of regular cheddar. Add 1/2 teaspoon of smoked paprika to the beef. It gives the dip a whole different personality — almost like a pulled pork vibe.
- Low-Carb/ Keto-Friendly: Skip the baguette and serve with celery sticks, cucumber rounds, bell pepper strips, or pork rinds. Use full-fat cream cheese and sour cream. Add an extra 1/2 cup of shredded cheese for richness. It’s just as satisfying without the carbs.
- Turkey or Chicken Version: Swap the ground beef for ground turkey or chicken. Add 1 tablespoon of olive oil to the pan since lean poultry needs a little help. Use turkey bacon instead of pork bacon. It’s lighter but still packed with flavor.
- Vegetarian Option: Use a plant-based ground meat substitute (like Beyond Meat or Impossible) and vegan bacon bits or tempeh bacon. Use dairy-free cream cheese, sour cream, and shredded cheese. It’s not exactly the same, but it’s surprisingly good.
I personally love the spicy jalapeño version. I made it for a Super Bowl party last year, and it disappeared so fast I barely got a scoop. The heat just makes it more addictive.
Serving & Storage Suggestions
This dip is best served hot, right out of the oven. The cheese is melty, the bacon is crispy, and the baguette is warm and crunchy. It’s a beautiful thing.
Serving Temperature: Serve immediately after baking. If you’re making it for a party, you can keep it warm in a small slow cooker on the “warm” setting, but it’s best fresh. The texture changes slightly after sitting.
Presentation Ideas: I like to serve it in a cast iron skillet or a colorful ceramic baking dish. Arrange the toasted baguette slices on a separate platter or board around the dip. Sprinkle the top with extra crumbled bacon, chopped pickles, and fresh herbs for a pop of color. It makes for a gorgeous, Instagram-worthy spread.
What to Serve With It: Besides the baguette, try tortilla chips, pita chips, pretzel bites, or even sturdy crackers like Triscuits or Wheat Thins. Veggie sticks like carrot and celery are great for a lighter option. For a full game day spread, pair it with slow cooker buffalo chicken dip and homemade guacamole.
Storage Instructions: Leftover dip can be stored in an airtight container in the refrigerator for up to 3 days. The texture will firm up as it cools. To reheat, microwave in 30-second bursts, stirring in between, until warm. You can also reheat it in a 350°F (175°C) oven for 10-15 minutes. The toasted baguette is best eaten fresh, but you can re-crisp it in the oven or toaster.
Freezing: I don’t recommend freezing this dip. The cream cheese and sour cream can separate and become grainy when thawed. It’s really best made fresh. But if you have a lot left over, you can freeze it — just know the texture won’t be the same.
Flavor Development: Honestly, this dip tastes even better the next day. The flavors meld together overnight, and the dip becomes even more cohesive. Just reheat it gently, and you’ll have an amazing lunch or snack.
Nutritional Information & Benefits
Let’s be real — this is not a health food. It’s a decadent, indulgent treat meant for sharing on special occasions. But that doesn’t mean we can’t look at the numbers. Here’s an approximate breakdown per serving (based on 8 servings, with baguette).
| Nutrient | Amount Per Serving |
|---|---|
| Calories | ~480 |
| Total Fat | ~35g |
| Saturated Fat | ~16g |
| Cholesterol | ~95mg |
| Sodium | ~950mg |
| Total Carbohydrates | ~22g |
| Dietary Fiber | ~1g |
| Sugars | ~4g |
| Protein | ~22g |
Health Benefits: On the plus side, this dip does provide a good amount of protein from the beef, bacon, and cheese. Protein helps keep you full and satisfied. The tomato and pickles add a small amount of vitamins and fiber. And if you’re using a whole wheat baguette, you’ll get a little extra fiber there too.
Dietary Considerations: This recipe is not gluten-free (due to the baguette), but you can easily make it so by serving with gluten-free crackers or veggie sticks. It’s also not low-fat or low-sodium, so if you’re watching those, enjoy in moderation. For a lighter option, you can use reduced-fat cream cheese and sour cream, and lean ground beef.
Potential Allergens: This recipe contains dairy (cream cheese, sour cream, cheddar, Monterey Jack) and gluten (baguette). It may also contain traces of soy and other allergens depending on the specific brands you use. Always check labels if you have allergies.
My personal take? I don’t make this every week. It’s a treat. But when I do make it, I savor every single bite and don’t feel an ounce of guilt. Life is about balance, and sometimes that balance includes a big scoop of bacon cheeseburger dip.
Conclusion
So there you have it — my Loaded Bacon Cheeseburger Dip with Toasted Baguette. It’s messy, it’s indulgent, and it’s absolutely worth every single calorie. This isn’t just a recipe I developed; it’s a recipe I lived. From that first memory with Marcus on the floor of my apartment to the countless game days and gatherings since, this dip has become a staple in my kitchen.
What I love most about it is how it brings people together. There’s something about a warm, cheesy dip that makes everyone relax and dig in. No formality, no fuss — just good food and good company. And that toasted baguette? It’s the perfect partner, soaking up all that cheesy, meaty goodness without falling apart.
I encourage you to make this your own. Add more bacon. Throw in some jalapeños. Use a different cheese blend. The beauty of a recipe like this is that it’s forgiving and adaptable. And if you come up with a variation you love, I’d honestly love to hear about it. Drop a comment below and let me know how it turned out. Did you add something unexpected? Did your family fight over the last bite? I want to know.
Thanks for stopping by, and happy dipping! 🧀🥓
Frequently Asked Questions
Can I make this dip ahead of time?
Absolutely! You can assemble the dip completely (without the toppings) up to 24 hours in advance. Cover and refrigerate. When you’re ready to bake, let it sit at room temperature for 20 minutes, then bake as directed. You may need to add 5-10 minutes to the baking time since it’s starting from cold.
Can I use ground turkey instead of beef?
Yes, you can. Ground turkey works well, but it’s leaner, so I recommend adding a tablespoon of olive oil to the pan when browning. Also, season it a bit more aggressively since turkey is milder in flavor. Turkey bacon is a great swap for the bacon too.
What can I use instead of a baguette for dipping?
So many options! Tortilla chips, pita chips, pretzel bites, sturdy crackers like Triscuits, or even veggie sticks like celery, carrots, and bell peppers. If you’re going low-carb, pork rinds are a surprisingly good option — they’re light and crunchy.
How do I prevent the dip from being too greasy?
Drain the excess fat from the ground beef after browning. You want a little bit for flavor, but too much will make the dip greasy. Also, use full-fat cream cheese and sour cream — the low-fat versions can separate and release liquid during baking.
Can I make this in a slow cooker?
Yes! Brown the beef and cook the bacon first. Then combine everything in a slow cooker (except the toppings). Cook on low for 2-3 hours or on high for 1-2 hours, stirring occasionally. Stir in the remaining cheese just before serving. The slow cooker version is great for parties because it stays warm.
Pin This Recipe!
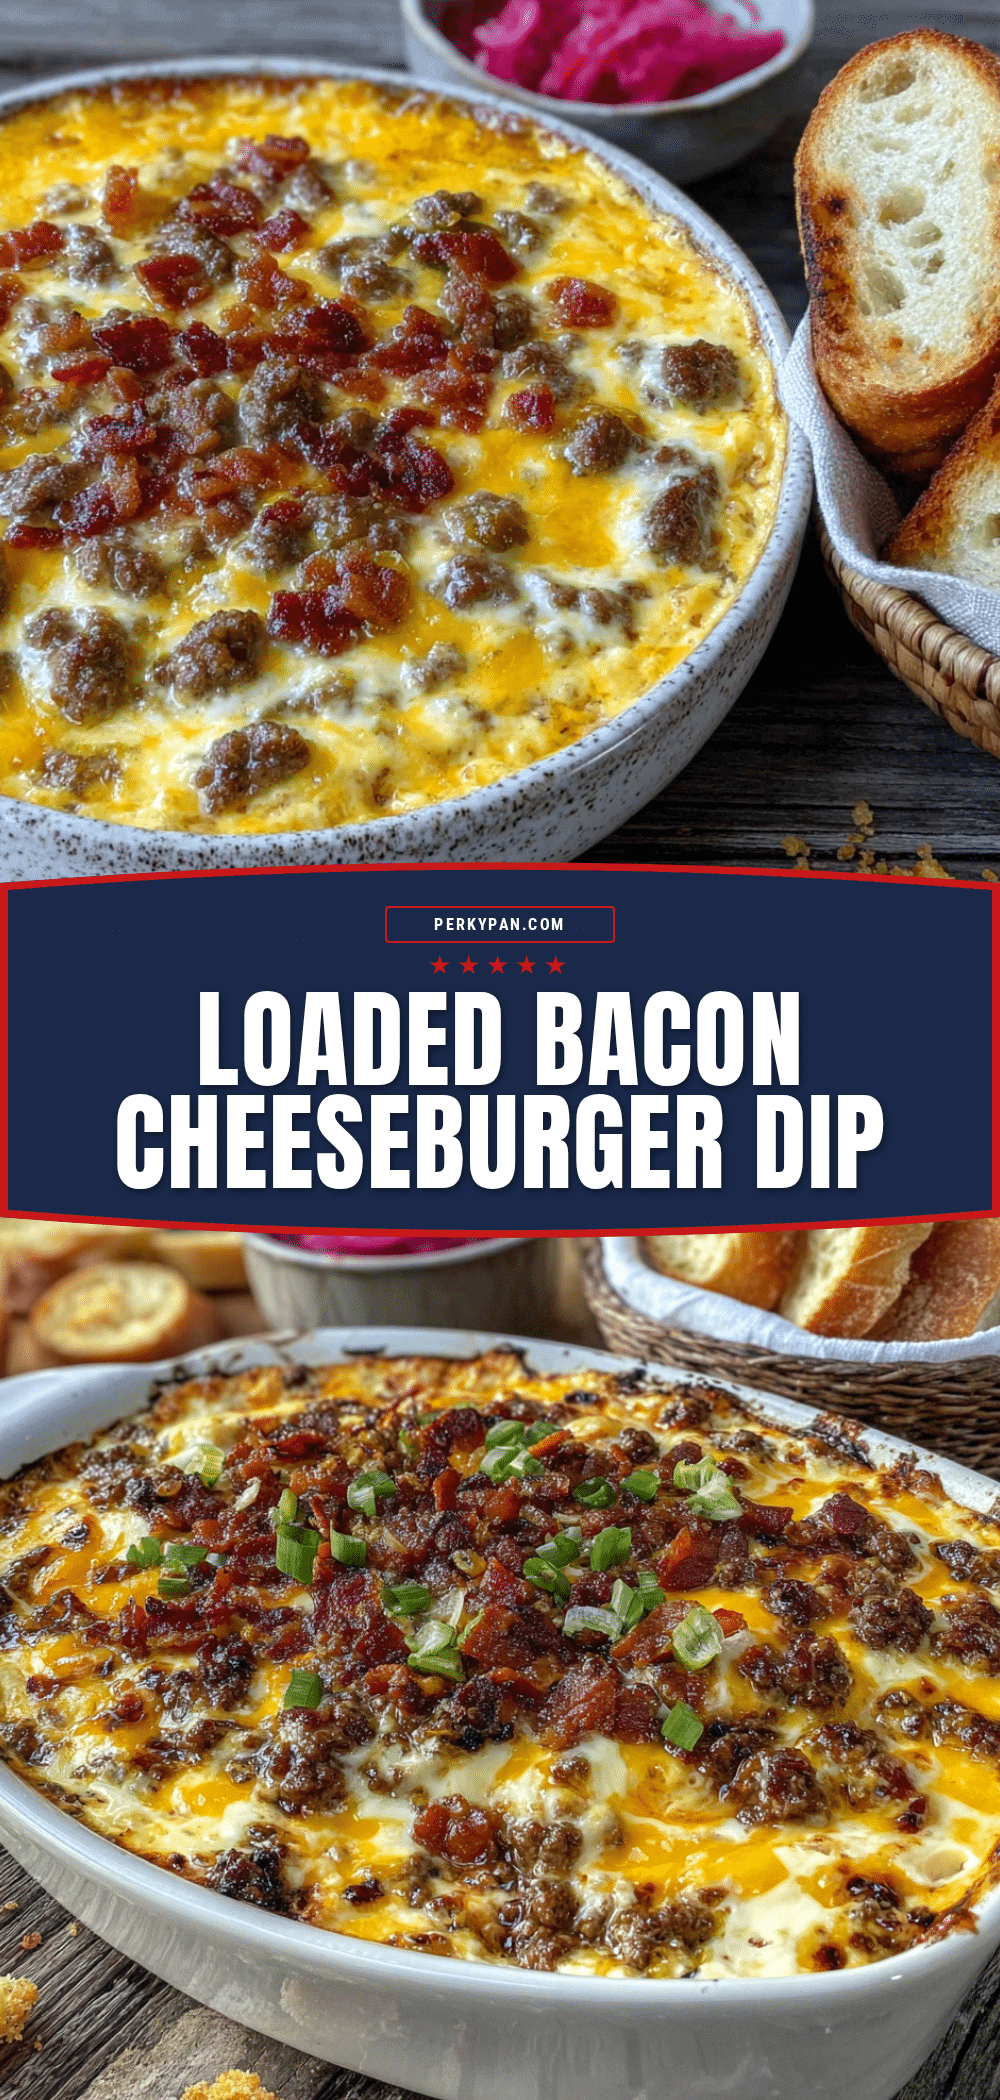
Loaded Bacon Cheeseburger Dip – Best Easy Game Day Appetizer

This Loaded Bacon Cheeseburger Dip with Toasted Baguette captures the messy, satisfying, can’t-stop-eating-it energy of a good burger in a shareable dip. It’s the ultimate crowd-pleaser for game day, featuring savory beef, smoky bacon, melty cheese, and tangy pickles.
- Prep Time: 15 minutes
- Cook Time: 30 minutes
- Total Time: 45 minutes
- Yield: 8 servings 1x
- Category: Appetizer
- Cuisine: American
Ingredients
- 1 lb (450g) ground beef (80/20 preferred)
- 8 slices (about 8 oz / 225g) thick-cut bacon
- 1 small yellow onion, finely diced (about 1/2 cup / 75g)
- 2 cloves garlic, minced
- 8 oz (226g) cream cheese, softened
- 1/2 cup (120ml) sour cream
- 1 cup (100g) shredded sharp cheddar cheese
- 1/2 cup (50g) shredded Monterey Jack cheese
- 2 tablespoons (30ml) ketchup
- 1 tablespoon (15ml) yellow mustard
- 1 tablespoon (15ml) Worcestershire sauce
- 1/2 teaspoon salt
- 1/4 teaspoon black pepper
- 1/4 teaspoon garlic powder
- 1/2 cup (60g) dill pickle slices, chopped
- 1/4 cup (30g) diced tomato
- 2 tablespoons (8g) chopped fresh parsley or chives
- Extra shredded cheddar and crumbled bacon for garnish
- 1 large baguette (about 12 oz / 340g), sliced into 1/2-inch rounds
- 2 tablespoons (30ml) olive oil or melted butter
- Pinch of salt and garlic powder for the baguette
Instructions
- Preheat your oven to 375°F (190°C). Position a rack in the middle of the oven.
- Cook the bacon: Place bacon slices in a cold skillet. Turn heat to medium and cook, flipping occasionally, until crispy, about 8-10 minutes. Transfer to a paper towel-lined plate to drain. Once cool, crumble or chop into small pieces. Reserve about 1 tablespoon of bacon fat in the skillet.
- Brown the ground beef: In the same skillet with reserved bacon fat, add ground beef. Cook over medium-high heat, breaking it up, until browned and cooked through, about 6-8 minutes. Drain excess fat if needed, leaving a little for moisture. Season with salt, pepper, and garlic powder.
- Cook the onion and garlic: Add diced onion to the skillet with the beef. Cook for 2-3 minutes until softened. Add minced garlic and cook for another 30 seconds until fragrant.
- Make the dip base: In a large mixing bowl, combine softened cream cheese, sour cream, ketchup, mustard, and Worcestershire sauce. Mix until smooth and well combined.
- Combine everything: Add the beef and onion mixture to the bowl with the cream cheese mixture. Add 3/4 cup of the shredded cheddar and 1/4 cup of the Monterey Jack cheese (reserve the rest for topping). Add half of the crumbled bacon and half of the chopped pickles. Stir until evenly distributed.
- Transfer to baking dish: Spoon the dip mixture into a prepared 8×8 or 9×9 baking dish and spread into an even layer. Top with remaining shredded cheddar and Monterey Jack cheese.
- Bake the dip: Place dish in preheated oven and bake for 15-20 minutes, until cheese is melted and bubbly and edges are just starting to brown. For a deeper golden top, switch to broil for the last 1-2 minutes, watching carefully.
- While the dip bakes, toast the baguette: Arrange baguette slices on a baking sheet. Brush both sides with olive oil or melted butter. Sprinkle with a pinch of salt and garlic powder. Bake for 8-10 minutes, flipping halfway, until golden and crispy.
- Finish and serve: Remove dip from oven. Top with remaining crumbled bacon, chopped pickles, diced tomato, and fresh parsley or chives. Serve immediately with toasted baguette slices.
Notes
For best texture, use block cream cheese (not spreadable) and let it come to room temperature. Thick-cut bacon holds its texture better. If dip looks greasy after baking, give it a quick stir before serving. Let dip rest for 5 minutes after baking to set up slightly. Leftover dip can be stored in an airtight container in the refrigerator for up to 3 days. Not recommended for freezing.
Nutrition
- Serving Size: 1 serving (with bagu
- Calories: 480
- Sugar: 4
- Sodium: 950
- Fat: 35
- Saturated Fat: 16
- Carbohydrates: 22
- Fiber: 1
- Protein: 22
Keywords: bacon cheeseburger dip, game day appetizer, loaded dip, easy party dip, cheesy bacon dip


