Love this? Save it for later!
Share the inspiration with your friends
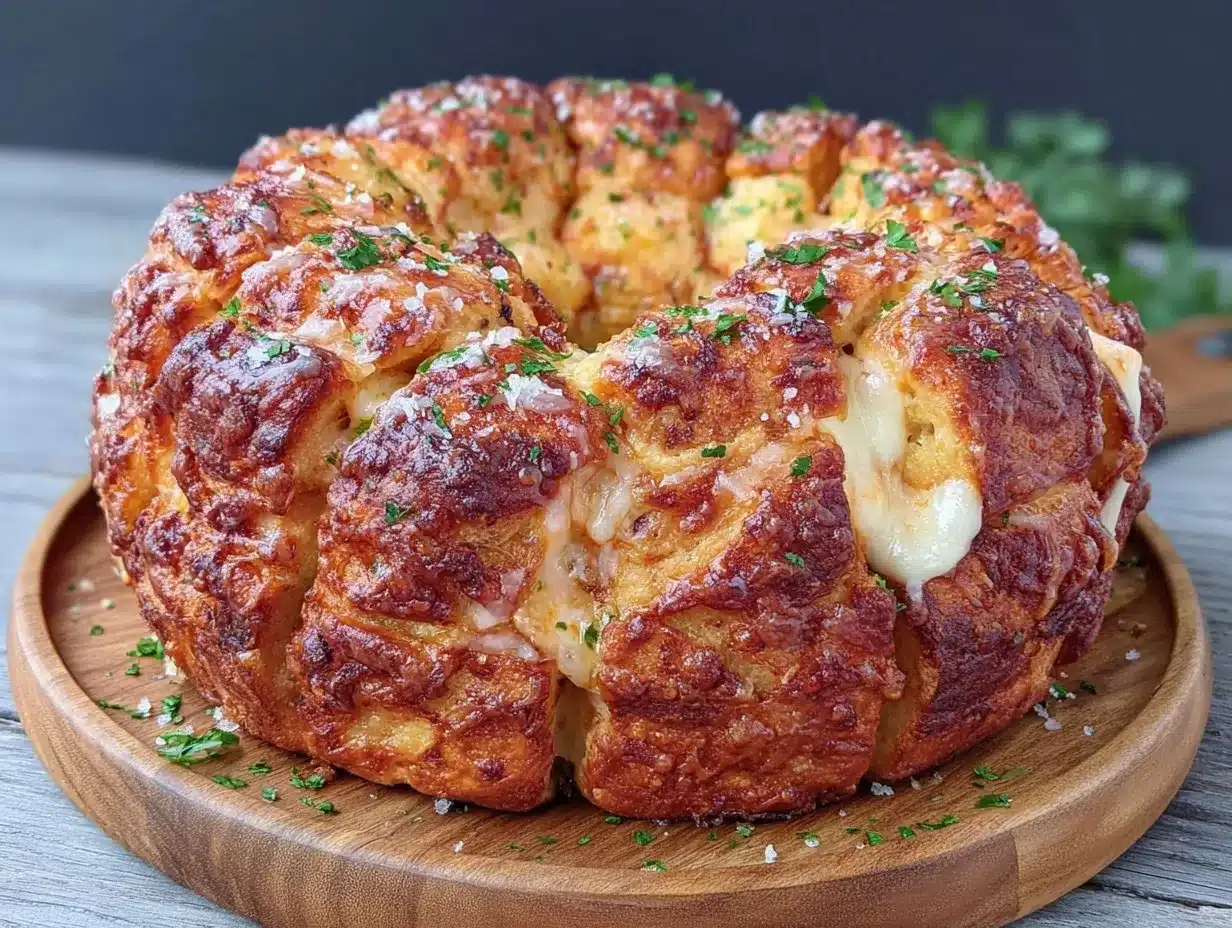
“You’ve got to try this,” said my buddy Mike one Friday evening as he tossed a golden, glistening wreath onto the table. I wasn’t expecting much—just another garlic bread, right? But honestly, that crispy pull-apart cheesy garlic bread wreath stole the show. It wasn’t just the aroma filling the room; it was the way the bread effortlessly tore apart, each piece dripping with buttery garlic goodness and gooey melted cheese. Mike whipped this up last minute for a casual Father’s Day gathering, and let me tell you, it was the kind of treat that turned a simple dinner into a celebration.
That night, I forgot half my prep notes and almost burnt the first batch. Classic me. But Mike just laughed, grabbed the bread, and said, “It’s all about the layers and the cheese.” Maybe you’ve been there—rushing to make something impressive for Dad but wanting to keep it simple. This recipe is exactly that: easy to make, ridiculously tasty, and perfect for sharing. It’s the kind of dish that brings everyone together, no matter if Dad’s into fancy steak or just good old comfort food.
Since that night, I’ve made this crispy pull-apart cheesy garlic bread wreath every Father’s Day (and a few times in between). It’s become my go-to for impressing guests without the stress, and honestly, it’s a crowd-pleaser every single time. Let me tell you why this recipe sticks with me and why it might just become your new favorite too.
Why You’ll Love This Recipe
This crispy pull-apart cheesy garlic bread wreath isn’t your run-of-the-mill garlic bread. After testing dozens of variations, here’s why this version wins hands down:
- Quick & Easy: Comes together in about 30 minutes, perfect for busy weeknights or those last-minute Father’s Day celebrations.
- Simple Ingredients: No need for fancy or hard-to-find items. Most of these are pantry staples or easy to grab from any grocery store.
- Perfect for Father’s Day: A festive centerpiece that’s casual but still feels special—great for brunch, snack time, or alongside your main dishes.
- Crowd-Pleaser: Kids love pulling it apart, and adults can’t stop sneaking bites. The combo of crispy edges and melty cheese is irresistible.
- Unbelievably Delicious: The garlic butter seeps into every nook, and the perfectly browned cheese forms a crust that’s both crunchy and gooey.
What makes this recipe different? It’s all about the layering and the way the dough is cut and stuffed. The cheese isn’t just sprinkled on top; it’s tucked inside each little segment, giving every bite that satisfying gooey pull. I also love using a blend of mozzarella and sharp cheddar for that perfect balance of melt and flavor. Trust me, this isn’t just another garlic bread recipe—it’s the best version you’ll find anywhere.
Whether you’re trying to impress Dad or just craving some seriously good comfort food, this wreath hits all the right notes. It’s the kind of recipe that makes you close your eyes after the first bite and say, “Yeah, this is exactly what I needed.”
What Ingredients You Will Need
This recipe uses simple, wholesome ingredients to deliver bold flavor and a satisfying texture without the fuss. Most of these are easy to find and probably already in your kitchen.
- For the Bread:
- 1 large round loaf of sourdough or Italian bread (about 12 inches diameter) – I like La Brea Bakery for its perfect crust and crumb
- For the Garlic Butter:
- 1/2 cup (1 stick or 115g) unsalted butter, softened (adds richness)
- 4 cloves garlic, finely minced or pressed (fresh is best for punchy flavor)
- 2 tbsp fresh parsley, chopped (for a fresh, herby note)
- 1/2 tsp salt
- 1/4 tsp black pepper
- For the Cheese Filling:
- 1 cup shredded mozzarella cheese (for that classic gooey melt)
- 1/2 cup shredded sharp cheddar cheese (adds depth and tang)
- Optional: 1/4 cup grated Parmesan (for a nutty finish)
- Extras (optional):
- Pinch of red pepper flakes for a little heat
- Chopped green onions or chives for garnish
If you want a gluten-free version, you can grab a gluten-free round loaf or use gluten-free breadsticks arranged in a wreath shape. For dairy-free, swap butter with vegan margarine and use dairy-free cheese alternatives—though honestly, the classic version is hard to beat!
Equipment Needed
- Sharp bread knife – crucial for making clean, even cuts without squishing the loaf
- Baking sheet or round pizza pan – I prefer a rimmed sheet for easy cleanup
- Mixing bowl for the garlic butter – any medium-sized bowl will do
- Pastry brush or spoon for spreading the garlic butter evenly
- Grater for shredding cheese (if not pre-shredded)
- Aluminum foil – handy for covering the wreath if it browns too fast
I’ve used a standard serrated bread knife for years, but if you have a bread lame (those razor blades), it can make precise cuts easier. For budget-friendly options, a simple serrated knife and an old cookie sheet work perfectly. Just keep your knife sharp to avoid tearing the bread instead of slicing it.
Preparation Method
- Preheat your oven to 350°F (175°C). This moderate heat lets the bread crisp slowly while melting the cheese perfectly.
- Prepare the garlic butter: In a mixing bowl, combine the softened butter, minced garlic, chopped parsley, salt, and pepper. Mix well until smooth and evenly blended.
- Cut the bread: Place your round loaf on a cutting board. Using your sharp serrated knife, make cuts vertically and horizontally, like a tic-tac-toe grid, but don’t slice all the way through—stop about 1 inch (2.5 cm) from the bottom crust so the loaf stays intact. Then, make diagonal cuts both ways, creating diamond-shaped segments. This should give you about 16-20 pull-apart pieces.
- Spread the garlic butter: Using a small spoon or pastry brush, gently pry open each cut section and spread garlic butter inside the cracks. Be generous! This step is key for flavor and moistness.
- Stuff the cheese: Stuff shredded mozzarella and cheddar cheese into every opening. If using Parmesan, sprinkle some on top as well. The cheese should be tucked inside the cuts, so it melts and creates that irresistible gooey pull.
- Wrap and bake: Place the stuffed loaf on your baking sheet or pizza pan. Tent it loosely with aluminum foil to prevent the cheese from burning while the bread crisps. Bake for 15 minutes.
- Uncover and crisp: After 15 minutes, remove the foil and bake for another 10-15 minutes until the bread is golden and crispy, and the cheese is bubbly and slightly browned.
- Garnish and serve: Remove from oven, sprinkle with extra parsley or green onions if you like, and serve warm. Watch your guests pull apart the wreath with smiles!
Pro tip: If you find the bread isn’t crispy enough, pop it under the broiler for 1-2 minutes—just keep an eye on it so it doesn’t burn. Also, if your first attempt feels too buttery, reduce the garlic butter slightly next time. This recipe invites little tweaks to match your taste perfectly.
Cooking Tips & Techniques
Let me share some tricks I’ve learned after a few messy attempts (including that time I forgot the garlic in the butter—oops!).
- Use room temperature butter: Soft butter mixes more evenly with garlic and herbs, spreading smoothly into the bread without tearing.
- Sharp knife is your friend: Dull knives crush the bread, making it hard to stuff. Take your time slicing carefully.
- Don’t overstuff: Too much cheese can spill out and burn on the pan. Aim for a good balance so every pull-apart piece is cheesy but not dripping.
- Cover the bread initially: The foil tent traps moisture, letting the cheese melt before the crust crisps. Removing the foil later ensures that perfect crunch.
- Timing matters: Keep an eye on the last 10 minutes of baking. Ovens vary, so check often to avoid burning.
- Multitasking tip: While the bread bakes, use the time to prep sides or mix drinks—no need to hover, but don’t wander too far!
One lesson I learned the hard way: skipping the garlic butter step makes the bread dry and boring. Honestly, that garlic butter is the soul of this recipe, so don’t skimp on it.
Variations & Adaptations
This recipe is super flexible, so you can tweak it for different tastes or diets.
- Spicy Kick: Add red pepper flakes or a dash of cayenne to the garlic butter for a subtle heat that wakes up the flavors.
- Herb Lover’s: Mix fresh rosemary, thyme, or oregano into the butter for an earthy twist—perfect for spring or summer gatherings.
- Vegan Version: Use vegan butter and dairy-free mozzarella. Nutritional yeast sprinkled on top adds a cheesy flavor punch.
- Stuffed with Extras: Try adding cooked bacon bits, caramelized onions, or sun-dried tomatoes inside for a savory surprise.
- Gluten-Free: Use a gluten-free sourdough loaf or arrange gluten-free breadsticks in a circular wreath shape and stuff similarly.
I once made a version with extra garlic and swapped cheddar for smoked gouda. It was a hit at a game day party—sometimes a little indulgence pays off!
Serving & Storage Suggestions
This cheesy garlic bread wreath is best served warm and fresh from the oven when the cheese is gooey and the bread crispy. It makes a fantastic appetizer or side dish, perfect alongside a fresh salad, a bowl of soup, or even a hearty pasta.
If you’re planning ahead, you can bake it fully, let it cool, then wrap tightly in plastic wrap and foil to store in the refrigerator for up to 2 days. Reheat in a 350°F (175°C) oven for about 10 minutes to refresh the crispiness and melt the cheese again.
For longer storage, freeze the unbaked stuffed wreath wrapped well for up to 3 months. Thaw overnight in the fridge, then bake as usual. This makes it an easy make-ahead treat for busy days.
Flavors actually deepen after resting a bit, so if you make it ahead, letting it sit wrapped for a few hours can enhance the garlicky, cheesy notes.
Nutritional Information & Benefits
This crispy pull-apart cheesy garlic bread wreath is a treat best enjoyed in moderation, but it does bring some benefits:
- Provides a good source of protein and calcium from the cheese.
- Butter adds rich flavor and vitamin A, though it’s best used in balance with other foods.
- Garlic offers immune-boosting properties and antioxidants.
- For those watching carbs, consider swapping the bread for a low-carb alternative or serving smaller portions alongside protein-rich dishes.
Remember, recipes like this are about joy and sharing—perfect for special occasions like Father’s Day. I believe food should nourish both body and soul, and this wreath does just that.
Conclusion
If you’re hunting for a simple yet show-stopping recipe for Father’s Day, this crispy pull-apart cheesy garlic bread wreath is a winner. It combines easy prep, familiar ingredients, and that special something that gets everyone reaching for seconds. Honestly, it’s one of those recipes I keep coming back to because it brings people together—whether it’s a casual dinner or a festive brunch.
Feel free to tweak the cheeses, add your favorite herbs, or even sneak in some extras like bacon or sun-dried tomatoes. This wreath is your canvas for delicious creativity. I hope it becomes a staple for your family celebrations and that, like me, you find comfort and joy in every cheesy, garlicky pull-apart piece.
Don’t forget to share your own twists or questions below—I love hearing how you make this recipe your own. Here’s to many cozy, tasty Father’s Days ahead!
FAQs
Can I use any type of bread for this recipe?
While sourdough or Italian round loaves work best for structure and flavor, you can experiment with other crusty breads. Just make sure it’s sturdy enough to hold the cheese and butter without falling apart.
How do I prevent the bread from getting soggy?
Using softened butter instead of melted helps control moisture. Also, baking with foil at first then uncovering ensures the bread crisps without drying out or getting soggy.
Can I prepare this wreath ahead of time?
Yes! You can assemble it, wrap tightly, and refrigerate for up to 24 hours before baking. Just add a few extra minutes to bake if chilled.
What cheeses are best for melting in this recipe?
Mozzarella is a classic for meltiness, while sharp cheddar adds flavor. Feel free to mix in Parmesan or gouda for a unique twist, but keep the cheese shredded for even melting.
Is this recipe kid-friendly?
Absolutely! Kids love the pull-apart nature and gooey cheese. You can reduce garlic intensity if preferred, and it’s a great way to get picky eaters excited about bread and cheese.
Pin This Recipe!
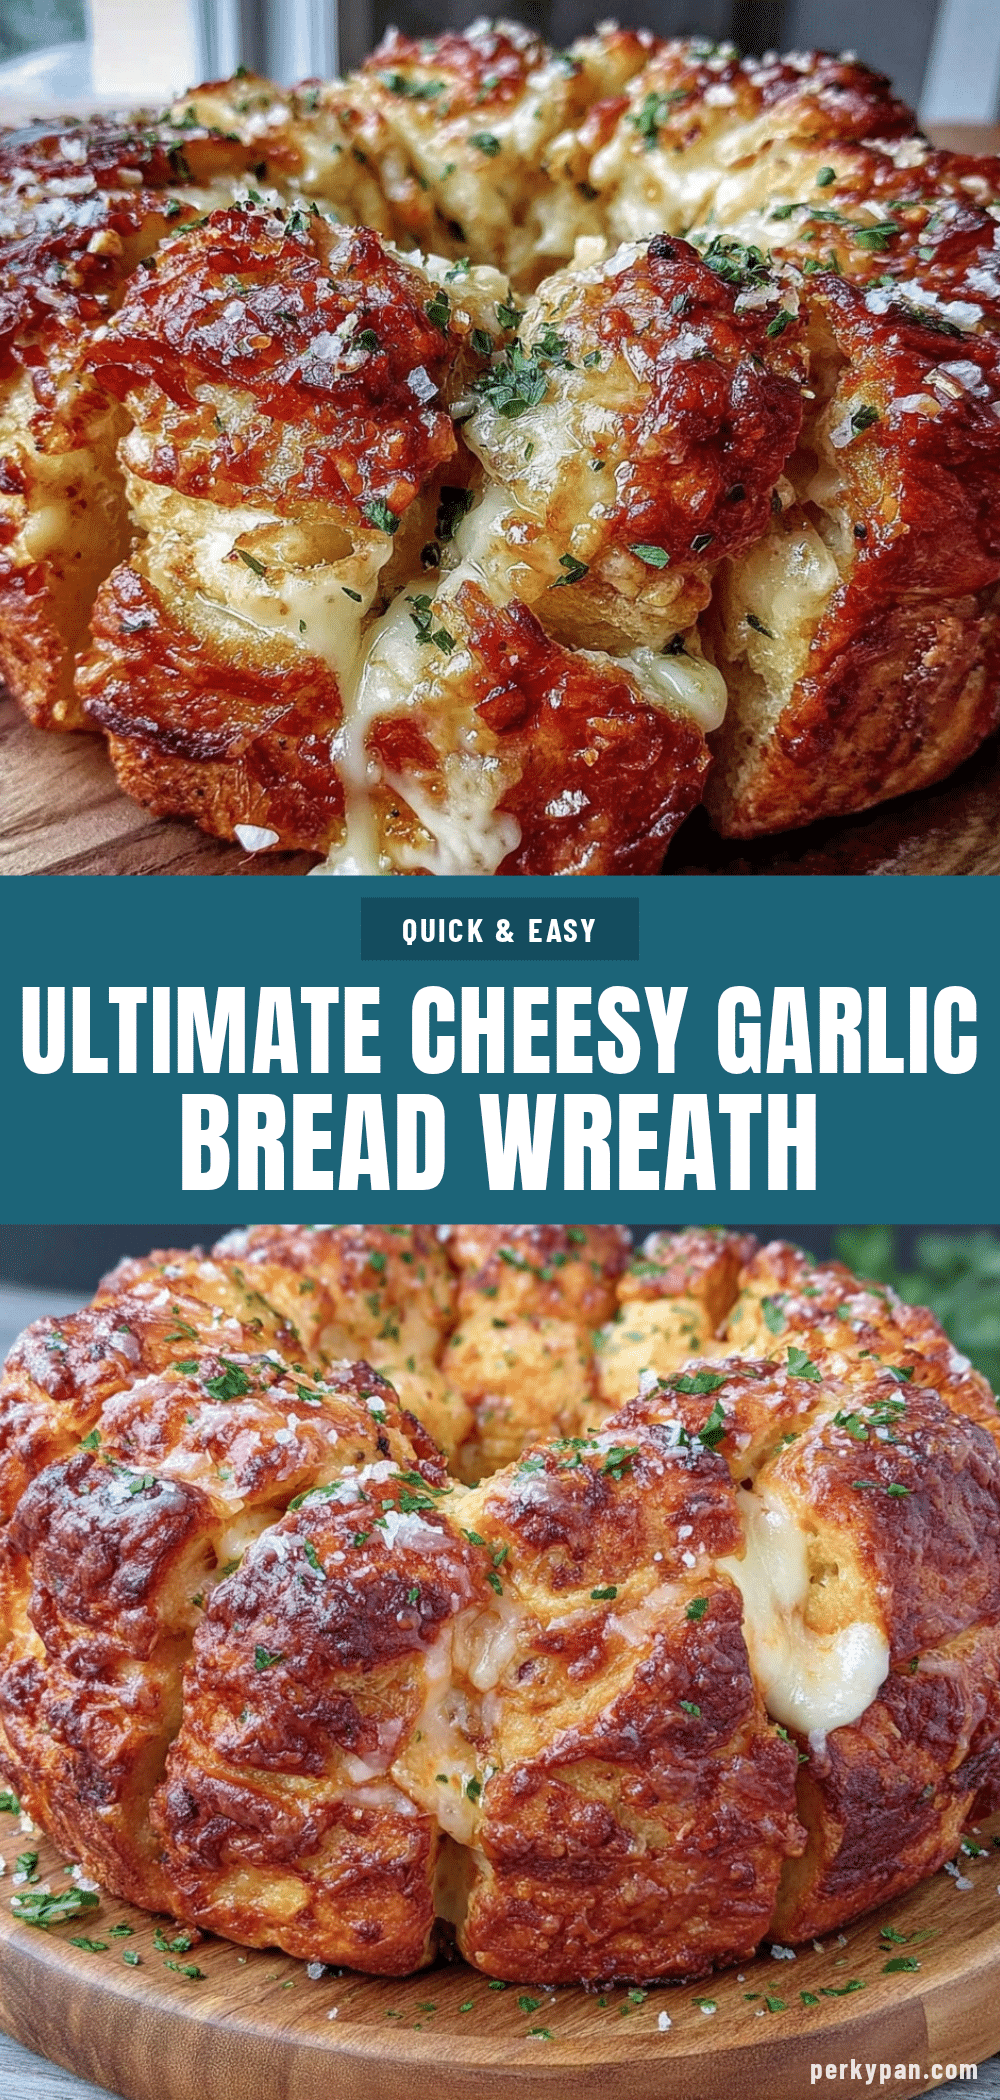
Crispy Pull-Apart Cheesy Garlic Bread Wreath
A crispy, cheesy garlic bread wreath that’s easy to make and perfect for sharing, especially on Father’s Day. This pull-apart bread features layers of garlic butter and a blend of mozzarella and sharp cheddar cheese for a gooey, flavorful treat.
- Prep Time: 10 minutes
- Cook Time: 25-30 minutes
- Total Time: 35-40 minutes
- Yield: 6-8 servings 1x
- Category: Appetizer
- Cuisine: American
Ingredients
- 1 large round loaf of sourdough or Italian bread (about 12 inches diameter)
- 1/2 cup (1 stick or 115g) unsalted butter, softened
- 4 cloves garlic, finely minced or pressed
- 2 tbsp fresh parsley, chopped
- 1/2 tsp salt
- 1/4 tsp black pepper
- 1 cup shredded mozzarella cheese
- 1/2 cup shredded sharp cheddar cheese
- Optional: 1/4 cup grated Parmesan cheese
- Optional: pinch of red pepper flakes
- Optional: chopped green onions or chives for garnish
Instructions
- Preheat your oven to 350°F (175°C).
- In a mixing bowl, combine the softened butter, minced garlic, chopped parsley, salt, and pepper. Mix well until smooth and evenly blended.
- Place your round loaf on a cutting board. Using a sharp serrated knife, make vertical and horizontal cuts like a tic-tac-toe grid, stopping about 1 inch from the bottom crust so the loaf stays intact. Then make diagonal cuts both ways to create diamond-shaped segments, about 16-20 pieces.
- Using a small spoon or pastry brush, gently pry open each cut section and spread garlic butter inside the cracks generously.
- Stuff shredded mozzarella and cheddar cheese into every opening. If using Parmesan, sprinkle some on top as well.
- Place the stuffed loaf on a baking sheet or round pizza pan. Tent loosely with aluminum foil to prevent burning and bake for 15 minutes.
- Remove the foil and bake for another 10-15 minutes until the bread is golden and crispy and the cheese is bubbly and slightly browned.
- Remove from oven, garnish with extra parsley or green onions if desired, and serve warm.
Notes
Use room temperature butter for easier spreading. Be careful not to overstuff with cheese to avoid spilling and burning. Tent with foil initially to melt cheese before crisping the crust. If bread isn’t crispy enough, broil for 1-2 minutes watching closely. Can be made ahead and refrigerated or frozen before baking.
Nutrition
- Serving Size: 1 pull-apart piece (
- Calories: 280
- Sugar: 2
- Sodium: 400
- Fat: 18
- Saturated Fat: 10
- Carbohydrates: 22
- Fiber: 1
- Protein: 10
Keywords: cheesy garlic bread, pull-apart bread, garlic bread wreath, Father's Day recipe, easy appetizer, cheesy bread, party food