Love this? Save it for later!
Share the inspiration with your friends
My neighbor Rosa watched me wrestle with a flimsy baking sheet for what felt like forever. I was trying to get the oven hot enough to roast chicken, but the smoke alarm had other plans. She didn’t say anything at first. Then she just pointed to her kitchen window and mouthed, “air fryer.”
Rosa is in her seventies, and she’s been cooking for her family since she was a teenager. She doesn’t do trends. So when she told me she uses an air fryer for chicken thighs almost every week, I paid attention. She didn’t hand me a recipe card or a link. She just said, “You season them right, you cook them hot, and you don’t mess with them. That’s it.”
Honestly, I was skeptical. I mean, I’d seen the glossy social media posts, but I figured real crispy skin required a deep fryer or at least a screaming hot oven. Rosa proved me wrong. The first time I tried her method, I pulled out a batch of crispy air fryer chicken thighs that had skin so shatteringly crunchy I actually laughed. And the meat? Juicy, tender, and not greasy at all. Let me tell you, it felt like a small miracle.
There was one hiccup, though. I forgot to pat the chicken dry that first time. The skin came out more steamed than crispy, and I was so annoyed at myself. But that mistake taught me the most important step, and now I never skip it. Maybe you’ve been there, too—trying to get that perfect crunch without a vat of oil. This recipe is for those nights.
This isn’t just another chicken recipe. It’s the one that made me finally trust my air fryer for more than frozen fries. It’s the weeknight dinner that feels like a cheat meal but isn’t. And honestly, it’s the dish I keep coming back to because it works every single time.
Why You’ll Love This Recipe
These crispy air fryer chicken thighs are the answer to your busy weeknight prayers. After testing this method at least a dozen times, I can tell you it delivers consistent results that beat any takeout. Here’s why this recipe stands out:
- Quick & Easy: From prep to plate in about 25 minutes. No marinating overnight, no complicated steps. It’s faster than waiting for delivery.
- Simple Ingredients: You likely have everything in your pantry right now. Salt, pepper, garlic powder, and a little oil. That’s it. No fancy grocery run required.
- Perfect for Busy Weeknights: This is the meal you make when you’re tired but still want something satisfying. It pairs with a quick salad, roasted veggies, or even just some rice.
- Crowd-Pleaser: My kids devour these. My husband requests them weekly. Even my mom, who usually prefers white meat, asked for the recipe.
- Unbelievably Delicious: The skin gets incredibly crispy without being greasy. The meat stays juicy and flavorful. It’s comfort food that happens to be lighter.
What makes this recipe different from the rest? It’s the technique. Most recipes tell you to just toss the chicken in the basket and hope for the best. I tested different temperatures, times, and seasonings to find the sweet spot. The key is a simple dry brine and a hot air fryer that’s preheated. No complicated gadgets or special tricks. Just smart cooking that respects the ingredient.
This recipe isn’t just good—it’s the kind that makes you close your eyes after the first bite. The skin cracks when you bite into it, and the seasoned meat is so tender it practically falls off the bone. It’s comfort food reimagined—healthier, faster, but with the same soul-soothing satisfaction. Perfect for impressing guests without stress, or turning a simple Tuesday into something memorable.
What Ingredients You Will Need
This recipe uses simple, wholesome ingredients to deliver bold flavor and satisfying texture without the fuss. Most of these are pantry staples, so you can whip this up on a whim.
For the Chicken
- 4 bone-in, skin-on chicken thighs (about 1.5 pounds total). Look for thighs that are roughly the same size for even cooking. I prefer organic or pasture-raised when I can find them, but conventional works perfectly fine.
- 1 teaspoon kosher salt (use half if using table salt). Salt is crucial for drawing out moisture and seasoning the meat all the way through.
- 1/2 teaspoon black pepper, freshly ground if possible.
- 1 teaspoon garlic powder. I recommend using garlic powder, not garlic salt, so you can control the sodium.
- 1 teaspoon onion powder. Adds a subtle sweetness that balances the savory flavors.
- 1/2 teaspoon paprika. Use smoked paprika for a deeper flavor, or sweet paprika for a milder taste.
- 1/2 teaspoon dried thyme (optional, but adds an earthy note).
- 1 tablespoon olive oil or avocado oil. Just enough to help the seasoning stick and encourage browning.
For Serving (Optional)
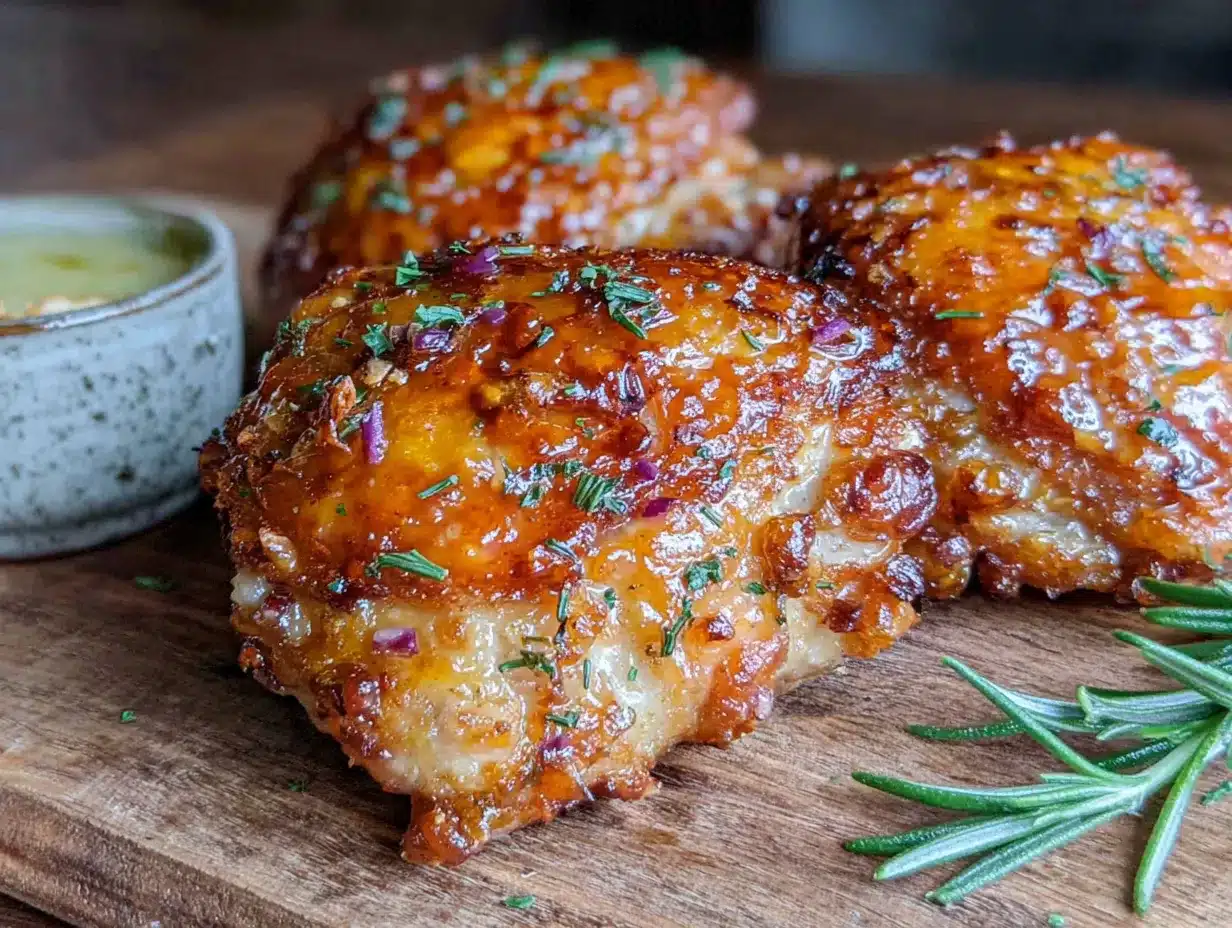
- Fresh parsley or chives, chopped for garnish.
- Lemon wedges for squeezing over the top. The acidity cuts through the richness beautifully.
- Flaky sea salt for finishing, if you want that extra crunch.
Ingredient Selection Tips: When choosing chicken thighs, look for ones with the skin still attached and intact. The skin is what gets gloriously crispy, so you want it in good condition. If the thighs are huge (over 8 ounces each), you might need to add a couple of minutes to the cooking time. I’ve used both Kirkland and Bell & Evans brands with great results.
Substitution Guidance: You can use boneless, skinless chicken thighs, but the cooking time will be shorter (about 12-15 minutes) and you won’t get that crispy skin. If you’re avoiding oil, try using an oil spray instead of tossing in oil—it’ll still work but the browning might be slightly less even. For a dairy-free option, this recipe is already dairy-free as written.
Equipment Needed
You don’t need much to make these crispy air fryer chicken thighs. Here’s what I use:
- Air fryer. Any basket-style air fryer works well. I use a 5.8-quart Cosori, but a smaller one works if you cook in batches. Avoid overcrowding the basket—that’s the number one mistake.
- Tongs. Silicone-tipped tongs are great for flipping the chicken without scratching the non-stick basket.
- Paper towels. Essential for patting the chicken dry. Don’t skip this step—it’s the secret to crispy skin.
- Small bowl for mixing the seasoning.
- Cutting board and knife for any trimming or garnishing.
- Instant-read thermometer (optional but highly recommended). This takes the guesswork out of doneness. Chicken thighs are safe at 165°F, but I prefer taking them to 175-185°F for the most tender texture.
Budget-Friendly Options: If you don’t have an air fryer, you can use a convection oven or even a regular oven set to 425°F. The cooking time will be longer (about 30-35 minutes), and you’ll need to flip the chicken halfway. A wire rack set inside a baking sheet helps with airflow. I’ve done it both ways, and the air fryer is definitely faster and crispier, but the oven method still works in a pinch.
Maintenance Tip: Clean your air fryer basket after each use. I soak mine in warm soapy water for a few minutes, then scrub with a soft sponge. Built-up grease can cause smoking and affect the flavor of your next batch.
Preparation Method
Follow these steps carefully for the best crispy air fryer chicken thighs. I’ve included all the little details I wish someone had told me the first time.
- Prep the chicken. Remove the chicken thighs from the refrigerator about 15-20 minutes before cooking. This helps them cook more evenly. Pat each thigh dry with paper towels—really get in there and remove all the moisture. Wet skin equals soggy skin, and we don’t want that.
- Season the chicken. In a small bowl, mix together the kosher salt, black pepper, garlic powder, onion powder, paprika, and dried thyme (if using). Sprinkle this mixture evenly over both sides of the chicken thighs. Don’t be shy—get it into every nook and cranny.
- Add the oil. Drizzle the olive oil over the seasoned chicken and use your hands to rub it in. The oil helps the seasoning stick and promotes browning. You don’t need much—just enough to lightly coat the surface.
- Preheat the air fryer. Set your air fryer to 400°F (200°C) and let it preheat for 3-5 minutes. A hot start is crucial for getting that initial sear on the skin. I learned this the hard way when I skipped preheating and ended up with pale, sad-looking chicken.
- Arrange the chicken. Place the chicken thighs skin-side down in the air fryer basket. Make sure they’re in a single layer with a little space between each piece. If they’re touching, they won’t crisp properly. Depending on the size of your air fryer, you may need to work in batches.
- Cook the first side. Cook at 400°F for 12 minutes. Don’t open the basket to check too early—let the heat do its magic. The skin should start looking golden and crispy by the end of this time.
- Flip and continue cooking. Using tongs, carefully flip each thigh over. The skin side should be nicely browned. Cook for another 8-10 minutes, or until the internal temperature reaches 175-185°F (80-85°C) when measured at the thickest part of the thigh. The skin should be deep golden brown and very crispy.
- Rest the chicken. Remove the chicken from the air fryer and let it rest on a cutting board or plate for 5 minutes. This allows the juices to redistribute, keeping the meat moist. I know it’s tempting to dig in immediately, but trust me—those 5 minutes make a difference.
- Serve. Garnish with fresh parsley or chives and a squeeze of lemon juice if desired. Sprinkle with a little flaky sea salt for that extra crunch. Serve hot and enjoy!
Sensory Cues: At the 12-minute mark, the kitchen should smell amazing—garlicky, peppery, and warm. The chicken skin should look tight and slightly blistered. When you flip the thighs, you might hear a satisfying crackle. That’s the sound of success.
Time Estimates: Total active prep time is about 5 minutes. Total cooking time is 20-22 minutes. Resting time is 5 minutes. From start to finish, you’re looking at about 30 minutes for a complete meal.
Cooking Tips & Techniques
After making these crispy air fryer chicken thighs more times than I can count, I’ve picked up a few tricks that make a real difference. Here’s what I’ve learned:
Patience with the skin. The number one mistake I see is people rushing the drying step. Wet skin will never get crispy, no matter how hot your air fryer gets. I use at least three paper towels per thigh and press firmly. Some people even leave the chicken uncovered in the fridge for an hour to dry out the skin further. I’ve done this, and it works beautifully if you have the time.
Don’t overcrowd the basket. This is the second most common mistake. If the chicken thighs are touching, the steam gets trapped and the skin stays soft. Leave at least half an inch of space between each piece. If your air fryer is small, cook in batches and keep the first batch warm in a low oven (200°F) while you finish the second batch.
Temperature matters. I’ve tested these at 375°F, 400°F, and 425°F. 400°F is the sweet spot. At 375°F, the skin doesn’t get as crispy. At 425°F, the outside can burn before the inside is fully cooked. Stick with 400°F for consistent results.
Flip with care. When you flip the chicken, use tongs and be gentle. The skin is delicate at that point, and you don’t want to tear it. If a little bit sticks to the basket, don’t force it. Let it cook another minute and try again.
My biggest failure. I once tried to make these without preheating the air fryer because I was in a hurry. The skin came out rubbery and pale. I ended up putting the chicken back in for an extra 5 minutes, but it never fully recovered. Lesson learned: preheating is non-negotiable.
Timing strategy. While the chicken is cooking, I prep my sides. A simple salad, some steamed broccoli, or quick-cooking rice all come together in under 20 minutes. That way, everything is ready at the same time.
Variations & Adaptations
One of the best things about this recipe is how easy it is to customize. Here are some variations I’ve tried and loved:
Spicy Version
Add 1/2 teaspoon of cayenne pepper or red pepper flakes to the seasoning mix. For extra heat, drizzle with hot honey (mix 2 tablespoons honey with 1 teaspoon sriracha) during the last 2 minutes of cooking. My husband loves this version—he says it’s like buffalo wings but better.
Herb & Lemon
Swap the dried thyme for 1 teaspoon dried rosemary or oregano. Add the zest of one lemon to the seasoning mix. After cooking, squeeze fresh lemon juice over the top and garnish with fresh parsley. This is my go-to for spring and summer—it feels bright and fresh.
Garlic Lovers
Add 2-3 minced garlic cloves to the oil before tossing with the chicken. Be careful not to let the garlic burn—it can turn bitter. I sometimes add a sprinkle of garlic powder on top after cooking for an extra punch.
Dietary Adaptations
This recipe is naturally gluten-free, dairy-free, and low-carb. For a keto-friendly meal, serve with roasted vegetables or a creamy avocado salad. If you need to reduce sodium, use half the salt and add more pepper and herbs for flavor.
Different Cooking Methods
If you don’t have an air fryer, bake the chicken on a wire rack set inside a baking sheet at 425°F for 30-35 minutes, flipping halfway. The skin won’t be quite as crispy, but it’ll still be delicious. For grilling, cook over medium-high heat for 6-8 minutes per side, watching carefully to prevent flare-ups.
Serving & Storage Suggestions
These crispy air fryer chicken thighs are best served hot, right after resting. The skin is at its peak crispiness within the first 15 minutes of coming out of the air fryer.
Serving Suggestions: I love serving these with a simple arugula salad dressed with lemon vinaigrette. The peppery greens and bright dressing cut through the richness of the chicken perfectly. Other great sides include roasted asparagus, garlic mashed potatoes, or a quinoa tabbouleh. For a low-carb option, try cauliflower rice or zucchini noodles.
Beverage Pairing: A crisp white wine like Sauvignon Blanc or a light beer like a pilsner pairs beautifully. For non-alcoholic options, try sparkling water with a squeeze of lemon or iced green tea.
Storage Instructions: Store leftover chicken in an airtight container in the refrigerator for up to 4 days. The skin will soften as it sits, but the flavor will still be great. To reheat, place the chicken back in the air fryer at 375°F for 3-4 minutes, or until heated through. This helps restore some of the crispiness. Avoid microwaving if possible—it makes the skin rubbery.
Freezing: You can freeze cooked chicken thighs for up to 3 months. Wrap each piece individually in plastic wrap, then place in a freezer bag. Thaw overnight in the refrigerator and reheat in the air fryer. The texture won’t be quite as perfect as fresh, but it’s still a great meal prep option.
Flavor Development: Honestly, these are even better the next day. The flavors meld together overnight, and the meat becomes even more tender. I sometimes make a double batch just for leftovers. They’re amazing chopped up over a salad for lunch.
Nutritional Information & Benefits
Here’s the approximate nutritional breakdown for one serving (one chicken thigh, skin on):
- Calories: 250-300
- Protein: 22-25g
- Fat: 18-22g (mostly healthy unsaturated fats)
- Carbohydrates: 1-2g
- Fiber: 0g
- Sodium: 400-500mg (varies based on salt used)
Health Benefits: Chicken thighs are rich in protein, which supports muscle repair and keeps you feeling full. They also contain B vitamins, particularly B6 and B12, which are important for energy metabolism. The skin provides some healthy fats, and by using an air fryer instead of deep frying, you significantly reduce the overall fat and calorie content. This recipe is naturally low in carbohydrates, making it suitable for low-carb and keto diets.
Dietary Considerations: This recipe is gluten-free, dairy-free, and nut-free. It’s also Whole30-friendly if you use a compliant oil. If you’re watching your sodium, reduce the salt and rely on herbs and spices for flavor.
Personal Perspective: I love that this recipe lets me enjoy a satisfying, indulgent-feeling meal without the guilt. It fits perfectly into a balanced eating plan where nothing is off-limits, just prepared smarter. That’s the kind of cooking I can get behind.
Conclusion
These crispy air fryer chicken thighs have become a staple in my kitchen for good reason. They’re fast, foolproof, and deliver that crave-worthy crunch without the mess of deep frying. Whether you’re a seasoned cook or just starting out, this recipe is designed to make you look like a pro.
I love how versatile this dish is. You can change up the spices to match your mood, serve it with whatever you have in the fridge, and it always comes out delicious. It’s the kind of recipe that builds confidence in the kitchen—because when you nail crispy chicken in 20 minutes, you feel like you can handle anything.
Now I want to hear from you. Have you tried making crispy chicken in your air fryer? What’s your favorite seasoning blend? Drop a comment below and let me know. And if you loved this recipe, share it with a friend who needs an easy weeknight win. Happy cooking!
Frequently Asked Questions
Can I use boneless, skinless chicken thighs?
Yes, you can. However, the cooking time will be shorter (about 12-15 minutes total), and you won’t get the crispy skin. The meat will still be juicy and flavorful, just different in texture. I recommend adding a little extra oil to prevent dryness.
Do I need to preheat the air fryer?
Yes, preheating is important for the best results. A hot air fryer helps sear the skin immediately, locking in moisture and creating that crispy exterior. I preheat for 3-5 minutes at 400°F before adding the chicken.
How do I know when the chicken is fully cooked?
The safest way is to use an instant-read thermometer. Insert it into the thickest part of the thigh without touching the bone. The USDA recommends 165°F, but for chicken thighs, I prefer 175-185°F for the most tender texture. The meat should be opaque and the juices should run clear.
Can I make these ahead of time for meal prep?
Absolutely. Cook the chicken as directed, let it cool completely, and store in an airtight container in the refrigerator for up to 4 days. To reheat, use the air fryer at 375°F for 3-4 minutes to restore some crispiness. They’re great for salads, grain bowls, or quick lunches.
Why isn’t my chicken skin getting crispy?
There are a few common culprits. First, make sure you’re patting the chicken very dry before seasoning. Second, don’t overcrowd the air fryer basket—steam needs to escape. Third, make sure your air fryer is fully preheated. If you’re still having trouble, try increasing the temperature to 425°F for the last 2-3 minutes of cooking.
Pin This Recipe!

Crispy Air Fryer Chicken Thighs: Easy 20-Minute Recipe

These crispy air fryer chicken thighs are the answer to your busy weeknight prayers. From prep to plate in about 25 minutes, this recipe delivers shatteringly crunchy skin and juicy, tender meat without the mess of deep frying.
- Prep Time: 5 minutes
- Cook Time: 20 minutes
- Total Time: 30 minutes
- Yield: 4 servings 1x
- Category: Main Course
- Cuisine: American
Ingredients
- 4 bone-in, skin-on chicken thighs (about 1.5 pounds total)
- 1 teaspoon kosher salt
- 1/2 teaspoon black pepper, freshly ground
- 1 teaspoon garlic powder
- 1 teaspoon onion powder
- 1/2 teaspoon paprika (smoked or sweet)
- 1/2 teaspoon dried thyme (optional)
- 1 tablespoon olive oil or avocado oil
- Fresh parsley or chives, chopped for garnish (optional)
- Lemon wedges for serving (optional)
- Flaky sea salt for finishing (optional)
Instructions
- Remove the chicken thighs from the refrigerator about 15-20 minutes before cooking. Pat each thigh dry with paper towels, removing all moisture.
- In a small bowl, mix together the kosher salt, black pepper, garlic powder, onion powder, paprika, and dried thyme (if using). Sprinkle evenly over both sides of the chicken thighs.
- Drizzle the olive oil over the seasoned chicken and rub it in with your hands to lightly coat the surface.
- Preheat the air fryer to 400°F (200°C) for 3-5 minutes.
- Place the chicken thighs skin-side down in the air fryer basket in a single layer with space between each piece. Cook in batches if necessary.
- Cook at 400°F for 12 minutes without opening the basket.
- Using tongs, carefully flip each thigh over. Cook for another 8-10 minutes, until the internal temperature reaches 175-185°F (80-85°C) at the thickest part.
- Remove the chicken from the air fryer and let it rest on a cutting board or plate for 5 minutes.
- Garnish with fresh parsley or chives and a squeeze of lemon juice if desired. Sprinkle with flaky sea salt. Serve hot.
Notes
Pat the chicken very dry for crispy skin. Do not overcrowd the air fryer basket. Preheating is non-negotiable for best results. For boneless, skinless thighs, cook 12-15 minutes total. Leftovers can be stored in the refrigerator for up to 4 days and reheated in the air fryer at 375°F for 3-4 minutes.
Nutrition
- Serving Size: 1 chicken thigh
- Calories: 275
- Sodium: 450
- Fat: 20
- Saturated Fat: 5
- Carbohydrates: 1
- Protein: 23
Keywords: air fryer chicken thighs, crispy chicken thighs, easy chicken recipe, weeknight dinner, gluten-free, dairy-free, low-carb, keto-friendly


