Love this? Save it for later!
Share the inspiration with your friends
I was supposed to be making energy bars. Like, the fancy layered kind with a chocolate drizzle and a sprinkle of sea salt that you see all over Instagram. I had my oats measured, my dates soaking, and my food processor ready to go. Then I realized I was out of dates. Completely out. And the store was a twenty-minute drive away, I had a toddler climbing my leg, and the clock was ticking toward that witching hour when dinner needs to happen and patience runs thin.
So I stood there, staring into my pantry like it owed me something. Peanut butter, check. Honey, check. Rolled oats, check. A half-empty bag of chocolate chips from a baking project last weekend. And then my eyes landed on the flaxseed meal I bought on a whim months ago. I grabbed the peanut butter first—chunky, because that’s what we had—and started mixing things together in a bowl, honestly not expecting much. I mean, I was just throwing stuff together out of desperation. The mixture looked a little dry, so I added more honey. Then it was too sticky, so I added more oats. It was a mess, let me tell you.
I rolled the first ball between my palms, and something clicked. It held together perfectly. I popped one in my mouth—okay, maybe two—and stood there, genuinely confused. This wasn’t what I planned, but it was better. So much better. No baking, no fancy equipment, no soaking or blending or waiting. Just five minutes and a bowl, and I had these little bites of energy that tasted like peanut butter cookie dough but actually had some staying power. That was three years ago, and I haven’t bought a granola bar since. Maybe you’ve been there—staring at a recipe that requires things you don’t have, feeling that little surge of panic. Trust me, this is the kind of happy accident you want to have.
Why You’ll Love This Recipe
Let me tell you why these no-bake peanut butter energy bites have become my most-requested recipe from friends and family. I’ve tested this combination more times than I can count, tweaking the ratios until every batch comes out perfect—not too dry, not too sticky, just right.
- Quick & Easy: We’re talking five minutes of active time. No joke. You can make these during a commercial break or while your coffee brews in the morning. Perfect for those days when you need a snack now.
- Simple Ingredients: Everything in this recipe is probably already in your pantry right now. No trips to specialty stores, no weird ingredients you’ll never use again. Just real food that works.
- Perfect for Busy Weeks: These energy bites are my secret weapon for crazy weeks. Throw a few in your bag before work, stash some in the car for after-school snacks, or keep them in the fridge for when the afternoon slump hits hard.
- Crowd-Pleaser: I’ve brought these to potlucks, playdates, and even office meetings. Kids love them, adults love them, and nobody can believe they’re actually pretty good for you.
- Unbelievably Delicious: Here’s the thing—these taste like dessert. Like, if I served them in a fancy wrapper, you’d think they came from a bakery. The texture is soft and chewy, with little bursts of chocolate in every bite.
What makes this recipe different from the hundreds of other energy ball recipes out there? It’s the ratio. I spent way too many batches figuring out the exact balance of wet to dry ingredients so these hold together without being greasy or falling apart. The flaxseed meal does something magical here—it absorbs moisture just enough to create that perfect, fudgy texture without needing any special equipment. Plus, I use a trick of slightly warming the peanut butter and honey together so everything mixes smooth and easy, no arm workout required.
Honestly, these bites have saved me on more occasions than I can count. They’re the snack I reach for when I’m hangry and need something fast, the treat I pack for road trips, and the thing I make when I want to feel like I’ve got my life together even when everything else is chaos.
What Ingredients You Will Need
This recipe uses simple, wholesome ingredients to deliver that perfect balance of sweetness, saltiness, and chewiness. Most of these are pantry staples, which is exactly what you want in a recipe that’s supposed to be quick and easy.
- 1 cup creamy peanut butter (I prefer Jif or Skippy for the best texture—natural peanut butter that separates can make the bites too oily and they won’t hold together as well. If you use natural, stir it really well and expect a slightly different texture.)
- 1/2 cup honey (Local honey is lovely if you have it, but any liquid honey works. Maple syrup is a great substitute if you want a different flavor profile—just know the bites will be slightly less sweet and a bit more liquidy.)
- 1 1/2 cups rolled oats (Old-fashioned oats work best here. Quick oats can be used in a pinch, but they’ll give you a softer, more paste-like texture. Steel-cut oats are too hard and won’t soften enough.)
- 1/2 cup chocolate chips (Semi-sweet is my go-to because it balances the sweetness of the honey, but milk chocolate or dark chocolate both work. Mini chocolate chips distribute more evenly, but regular ones are fine too.)
- 1/4 cup ground flaxseed meal (This is the secret ingredient that makes everything work. It absorbs moisture and helps the bites hold together while adding fiber and omega-3s. You can substitute chia seeds, but grind them first or they’ll be crunchy.)
- 1/2 teaspoon vanilla extract (Pure vanilla extract adds a warmth that makes these taste more like cookie dough. Imitation vanilla works fine if that’s what you have.)
- 1/4 teaspoon salt (Only add this if your peanut butter is unsalted. The salt really makes the flavors pop and balances the sweetness. Trust me on this one—don’t skip it if you need it.)
Optional add-ins that I’ve tried and loved: a tablespoon of chia seeds for extra crunch, a handful of shredded coconut for texture, or a tablespoon of cocoa powder for a double-chocolate version. You can also swap the chocolate chips for dried cranberries or raisins if that’s more your style. Just keep the total add-in amount around 1/2 cup so the ratio stays balanced.
Equipment Needed
Here’s the beautiful thing about this recipe—you barely need any equipment at all. No food processor, no mixer, no baking sheets. Just a few basic things you already have in your kitchen.
- Large mixing bowl (Any bowl works, but a wider bowl makes mixing easier. I use my grandmother’s old ceramic mixing bowl, but a metal or glass one is fine.)
- Measuring cups and spoons (For accuracy. I’ve eyeballed this recipe before and regretted it—a little too much honey and you’ve got sticky mess instead of bites.)
- Rubber spatula or wooden spoon (For mixing everything together. A rubber spatula is great for scraping the sides and getting every last bit.)
- Small cookie scoop or tablespoon (For portioning the bites evenly. A cookie scoop makes them uniform and speeds up the process. If you don’t have one, just use a regular tablespoon.)
- Parchment paper or wax paper (For rolling the balls without them sticking to everything. You can also use a silicone baking mat if you have one.)
- Baking sheet or large plate (To hold the bites while you roll them. Any flat surface that fits in your fridge works.)
- Airtight container (For storage. A mason jar works great, or any container with a tight-fitting lid.)
That’s it. No special gadgets, no expensive tools. If you can stir and roll, you can make these energy bites. I’ve made them in hotel rooms with a plastic bowl and a spoon, and they turned out just fine.
Preparation Method
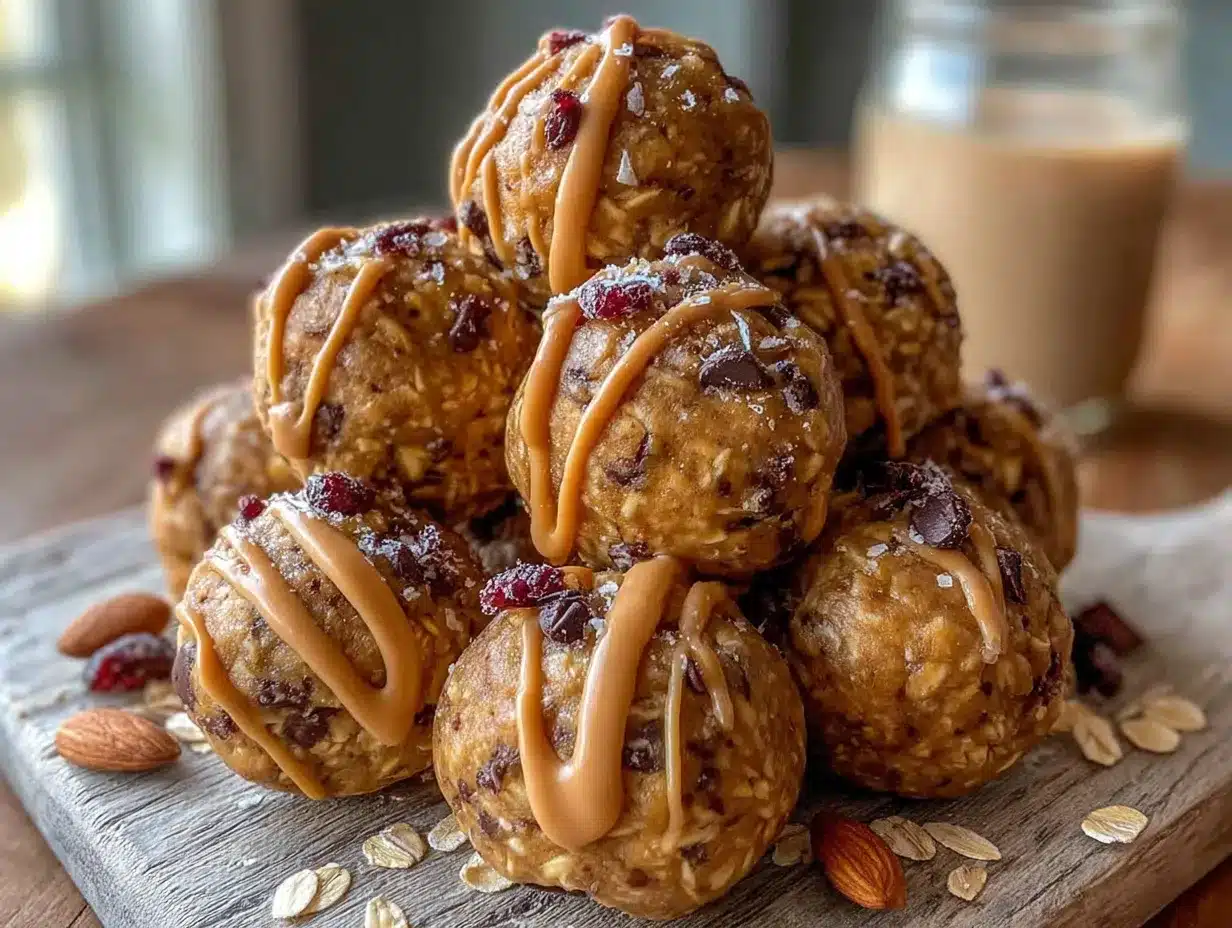
Alright, let’s get rolling—literally. This is about as straightforward as it gets, but I’ll walk you through every step so your first batch comes out perfect.
- Warm the peanut butter and honey together. In your large mixing bowl, combine 1 cup peanut butter and 1/2 cup honey. Microwave for 20-30 seconds, just until they’re slightly warm and easier to stir. Don’t overheat—you’re not trying to cook anything, just loosen it up. If you don’t have a microwave, you can set the bowl over a pot of simmering water for a minute or two, stirring occasionally. This step makes a huge difference in how easily everything comes together.
- Stir in the vanilla and salt. Add 1/2 teaspoon vanilla extract and 1/4 teaspoon salt (if using). Stir until everything is smooth and well combined. The mixture should look glossy and smell amazing at this point. Take a second to appreciate it—this is the easy part.
- Add the dry ingredients gradually. Pour in 1 1/2 cups rolled oats and 1/4 cup ground flaxseed meal. Stir with your rubber spatula until everything is evenly distributed. Start slow to avoid sending oat dust flying everywhere—trust me, I’ve learned this the hard way. The mixture will start to look crumbly at first, but keep stirring. As the oats and flax absorb the moisture, it will come together into a cohesive dough.
- Fold in the chocolate chips. Add 1/2 cup chocolate chips and fold them in gently. You want them distributed throughout, not crushed or melted. If the mixture seems too warm, let it sit for a minute or two before adding the chips so they don’t start melting into everything.
- Check the consistency. The mixture should hold together when you squeeze a small amount in your hand. If it’s too dry and crumbly, add a teaspoon more honey or a splash of milk. If it’s too sticky and wet, add a tablespoon more oats. This is where experience comes in—every brand of peanut butter behaves a little differently, so trust your hands more than the recipe.
- Chill the mixture (optional but recommended). Pop the bowl in the fridge for 15-20 minutes. This makes the mixture easier to handle and less sticky. If you’re in a hurry, you can skip this step, but your hands will get messier. I usually do this step while I’m cleaning up my measuring cups and getting my storage container ready.
- Roll into balls. Using your cookie scoop or a tablespoon, portion out the mixture. Roll each portion between your palms to form a smooth ball, about 1 to 1.5 inches in diameter. If your hands get sticky, lightly dampen them with water or rub a tiny bit of oil on your palms. Place each ball on the parchment-lined baking sheet as you go. This should yield about 18-20 energy bites, depending on how big you make them.
- Set and store. Once all the bites are rolled, place the baking sheet in the refrigerator for at least 30 minutes to firm up. This step is important—it helps them hold their shape. After they’re firm, transfer them to an airtight container and store in the fridge.
A quick note about timing: the active prep time here is about 5-7 minutes. The chilling time is passive. So yes, you can literally have these made and in the fridge in under 10 minutes of actual work. That’s not marketing hype—that’s just how easy this recipe is.
Cooking Tips & Techniques
After making these energy bites dozens of times, I’ve picked up a few tricks that make the process smoother and the results better. Here’s what I wish someone had told me the first time around.
Don’t overmix. I know it’s tempting to keep stirring until everything looks perfectly uniform, but overmixing can break down the oats and make the texture mushy. Just mix until everything is combined and you can’t see dry patches anymore. A few clumps are fine—they’ll work themselves out when you roll the balls.
Watch your honey. Different honeys have different thicknesses. A runny honey will make the mixture wetter, while a thicker, crystallized honey will make it drier. If your honey is thick, warm it slightly before adding it to the peanut butter. I learned this the hard way when I used a jar of honey that had crystallized and ended up with a crumbly mess that wouldn’t hold together.
Room temperature matters. On hot, humid days, the peanut butter will be softer and the mixture will be stickier. On cold, dry days, everything will be firmer. Adjust accordingly—add a splash of milk on dry days, and chill the mixture longer on humid ones. Cooking is about adapting, not following rules blindly.
Keep your hands cool. If you have warm hands like I do, run them under cold water before rolling the balls. The warmth from your hands can start melting the chocolate chips and make the mixture greasy. A quick rinse under cold water and a pat dry will save you from sticky fingers.
Size matters for evenness. Use that cookie scoop I mentioned. It’s not just about speed—it ensures every bite is the same size, which means they’ll all firm up at the same rate. If some are bigger than others, the small ones will be too hard while the big ones stay too soft.
My biggest failure: The first time I made these, I used natural peanut butter straight from the fridge without stirring it. The oil had separated, so I ended up with greasy, crumbly balls that fell apart immediately. I was so frustrated! Now I always stir my peanut butter well or use a processed brand for consistency. Learn from my mistake—it’s worth the extra 30 seconds.
Variations & Adaptations
One of the best things about this recipe is how flexible it is. I’ve tried so many variations over the years, and here are my favorites.
Chocolate Peanut Butter Dream: Add 2 tablespoons of cocoa powder to the dry ingredients and increase the honey by 1 tablespoon. The cocoa powder absorbs some moisture, so you need that extra honey to keep everything together. This version tastes like brownie batter and is dangerously good. I’ve made this for chocolate lovers who claimed they didn’t like “healthy snacks,” and they were converted.
Trail Mix Bites: Replace half the chocolate chips with a mix of dried cranberries, chopped almonds, and sunflower seeds. The texture gets crunchier and more interesting, and the tartness of the cranberries balances the sweetness beautifully. These are my go-to for hiking trips because they hold up well in a backpack.
Coconut Lime: Add 1/4 cup shredded coconut and the zest of one lime. The lime cuts through the richness of the peanut butter and makes these taste surprisingly fresh and tropical. I discovered this combination when I had extra limes from a cocktail night and didn’t want them to go to waste. It’s now one of my most-requested variations.
Vegan Version: Replace the honey with maple syrup or agave nectar. The texture will be slightly different—maple syrup is thinner than honey, so you might need to add a tablespoon more oats. But the flavor is still fantastic, and it’s completely plant-based. I’ve made these for vegan friends and they couldn’t tell the difference.
Gluten-Free Option: Use certified gluten-free rolled oats. That’s literally the only change you need to make. Everything else in this recipe is naturally gluten-free. Just make sure your oats are labeled gluten-free if that’s a concern, because regular oats can be cross-contaminated during processing.
Protein-Packed: Add a scoop of your favorite vanilla or chocolate protein powder. Reduce the oats by 1/4 cup to compensate for the extra dry ingredient. You might also need to add an extra tablespoon of honey or a splash of milk to keep the mixture from getting too dry. This version is perfect for post-workout snacks.
Serving & Storage Suggestions
These energy bites are best served cold straight from the fridge. That’s when they have the perfect texture—firm enough to hold their shape, but soft enough to bite into easily. If you leave them out at room temperature for too long, they’ll get soft and a bit greasy, especially on warm days.
How to serve them: I like to arrange them on a small plate or in a bowl for snacking. They’re perfect for packing in lunchboxes—just pop a few in a small container and they’re good to go. For parties or gatherings, I sometimes roll them in shredded coconut or cocoa powder for a prettier presentation. It’s a small touch that makes them look fancy with almost no extra effort.
What goes well with them: A glass of cold milk is the classic pairing—it’s like eating cookie dough, but better. They’re also great with coffee or tea, especially in the afternoon when you need a little pick-me-up. For a more substantial snack, pair them with apple slices or a banana. The combination of the sweet, nutty bites with fresh fruit is surprisingly satisfying.
Storage instructions: Keep these in an airtight container in the refrigerator. They’ll stay fresh for up to two weeks, though honestly, they never last that long in my house. You can also freeze them for up to three months. Just place them in a single layer on a baking sheet, freeze until solid, then transfer to a freezer bag. They thaw in about 10 minutes at room temperature, so you can grab one straight from the freezer and eat it pretty quickly.
Reheating tips: You don’t need to reheat these—they’re meant to be eaten cold or at room temperature. But if you want a softer texture, let them sit at room temperature for 5-10 minutes before eating. I sometimes pop one in the microwave for 10 seconds on cold winter mornings, and it tastes almost like warm cookie dough. Just don’t overdo it, or the chocolate chips will melt into a mess.
One thing I love about these bites is how the flavors develop over time. The first day, they taste good. By day three, the flavors have melded together and they taste even better. So if you can resist eating them all right away, you’ll be rewarded with an even more delicious snack later in the week.
Nutritional Information & Benefits
Here’s the approximate nutritional breakdown for one energy bite (based on 20 bites per batch):
| Nutrient | Amount per Bite |
|---|---|
| Calories | 145 |
| Total Fat | 8g |
| Saturated Fat | 2g |
| Carbohydrates | 16g |
| Fiber | 2g |
| Sugar | 10g |
| Protein | 5g |
These numbers will vary depending on the specific brands you use and any add-ins you include. The chocolate chips add the most sugar, so if you’re watching your sugar intake, try using sugar-free chocolate chips or reducing the amount.
Health benefits: These little bites pack a surprising nutritional punch. The oats provide complex carbohydrates for sustained energy, while the peanut butter offers protein and healthy fats that keep you full. Flaxseed meal is rich in omega-3 fatty acids and fiber, which supports digestive health. The honey provides quick energy from natural sugars, making these a great pre-workout snack or afternoon pick-me-up.
Dietary considerations: This recipe can easily be made vegan (use maple syrup instead of honey), gluten-free (use certified gluten-free oats), and dairy-free (use dairy-free chocolate chips). It’s naturally egg-free and nut-free if you substitute the peanut butter with sunflower seed butter. Just be aware that sunflower seed butter can react with baking soda if you ever bake with it, but since these are no-bake, you’re fine.
Conclusion
So there you have it—my happy accident that turned into a staple recipe. These no-bake peanut butter energy bites are proof that sometimes the best things in life come from messing up. I mean, I was supposed to make something completely different, and instead I stumbled onto a recipe that’s saved me countless times when I needed a quick, healthy snack.
What I love most about these bites is how forgiving they are. You can tweak them a hundred different ways, and they’ll still turn out delicious. They’re the kind of recipe that builds confidence in the kitchen because they’re so hard to mess up. And on those days when you feel like you can’t get anything right, having a batch of these in the fridge feels like a small victory.
I’d love to hear how your batch turns out. Did you try any of the variations? Did you come up with your own twist? Drop a comment below and let me know—I’m always looking for new ideas to try. And if you make these for someone you love, watch their face when they take that first bite. That look of surprise and delight is exactly why I keep making them, batch after batch.
Now go raid your pantry and make some magic happen. You’ve got this.
Frequently Asked Questions
Can I use crunchy peanut butter instead of creamy?
Absolutely! Crunchy peanut butter adds a nice texture and works just as well. The only difference is the bites will have little peanut pieces throughout, which I personally love. Just make sure your crunchy peanut butter isn’t too dry or oily, or you might need to adjust the honey or oats slightly.
Why did my energy bites turn out too dry?
This usually happens when the peanut butter is too thick or the honey is too crystallized. Try warming your peanut butter and honey together a bit longer next time, or add an extra tablespoon of honey. You can also try adding a splash of milk or water to bring the mixture together. Remember, different brands have different consistencies, so don’t be afraid to adjust as you go.
How long do these energy bites last at room temperature?
They’re best kept in the fridge, but they’ll last at room temperature for about 24 hours. After that, they start to get soft and the chocolate chips might melt if it’s warm. If you’re taking them on the go, pack them in a cooler bag or eat them within a few hours. For longer storage, always keep them refrigerated or frozen.
Can I make these without a microwave?
Yes, absolutely! You can warm the peanut butter and honey in a small saucepan over low heat, stirring constantly until they’re combined and slightly warm. Or you can skip the warming step entirely and just mix everything at room temperature—it’ll just take a bit more elbow grease to get everything incorporated smoothly.
Can I use something other than oats?
If you’re looking for a grain-free option, you can substitute the oats with unsweetened shredded coconut or almond flour. The texture will be different—denser and more coconut-forward—but still delicious. You might need to adjust the wet-to-dry ratio, so start with less and add more as needed. I’ve also used crushed cereal (like Chex or Rice Krispies) in a pinch, and it worked surprisingly well.
Pin This Recipe!
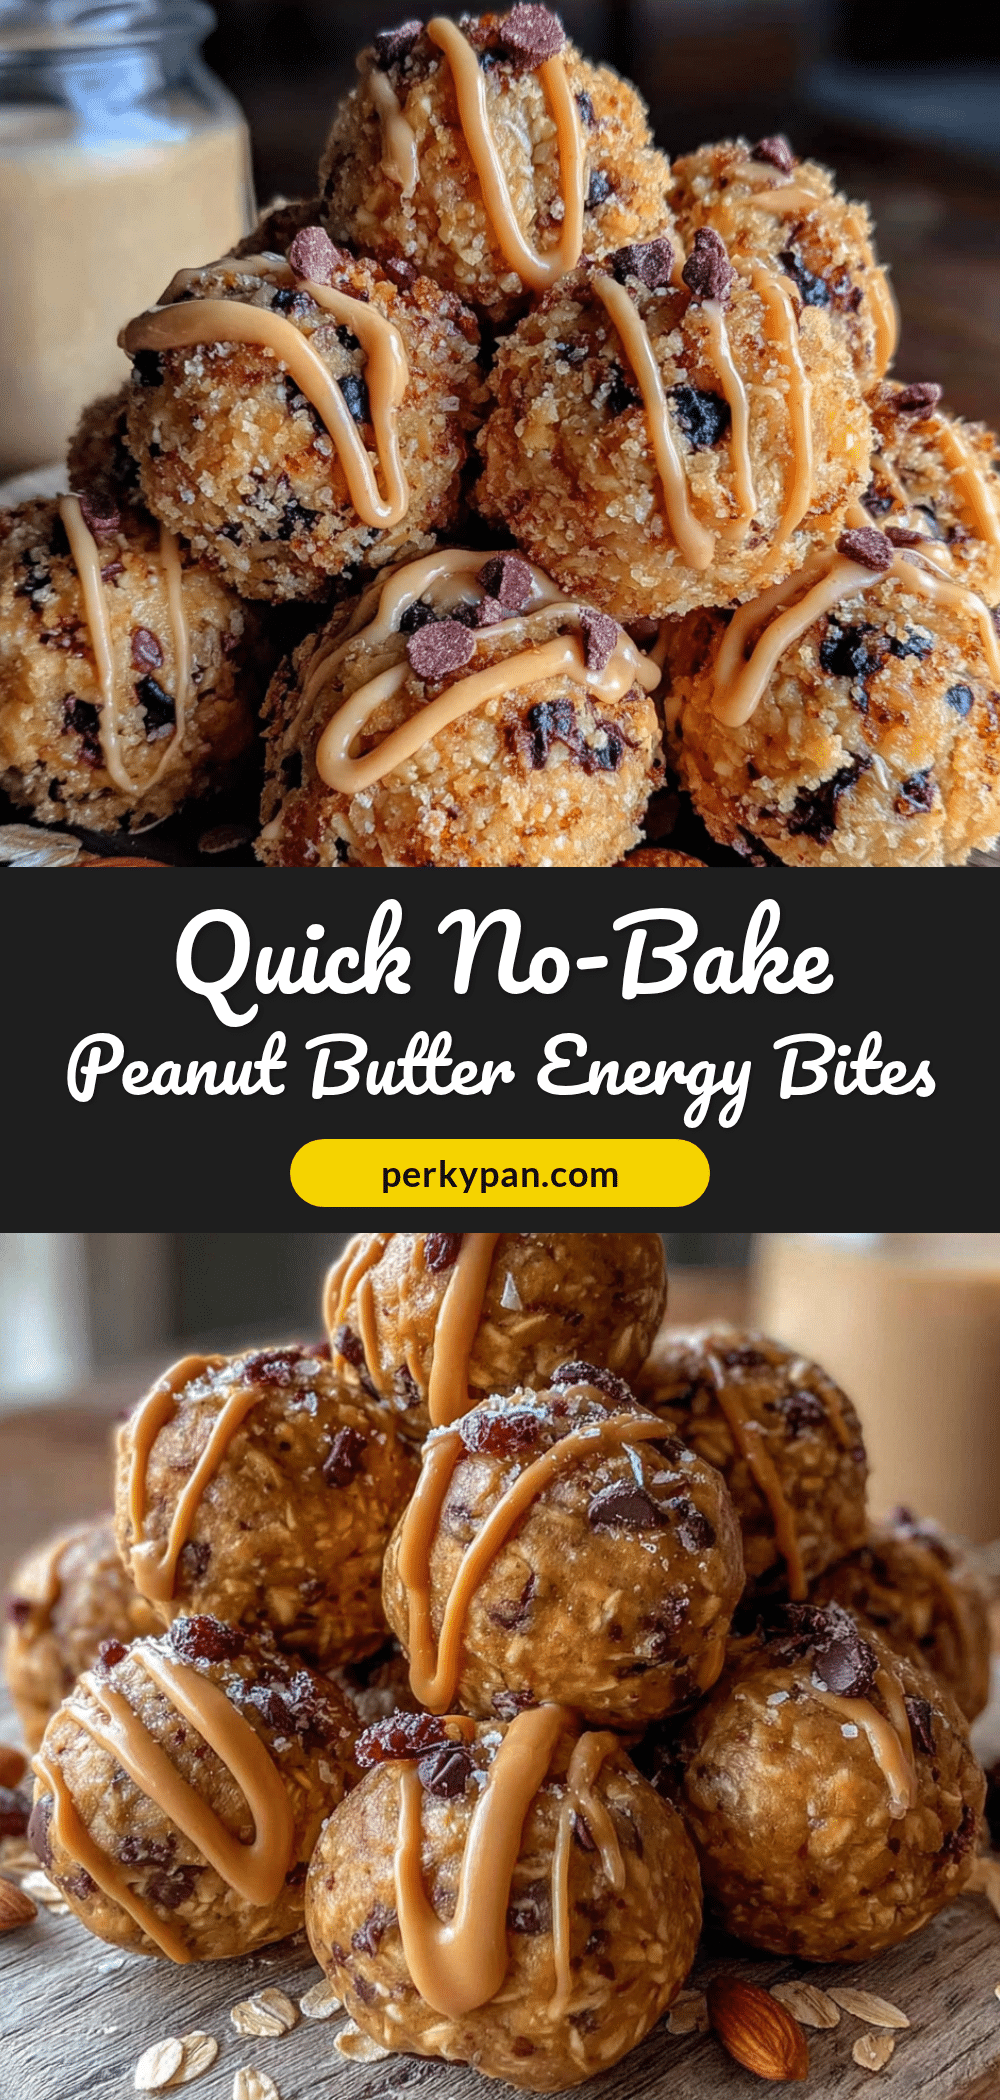
Quick No-Bake Peanut Butter Energy Bites: 5-Minute Easy Recipe

These no-bake peanut butter energy bites are a quick and easy snack made with simple pantry ingredients. They taste like peanut butter cookie dough but are packed with oats, flaxseed, and chocolate chips for sustained energy.
- Prep Time: 5 minutes
- Cook Time: 0 minutes
- Total Time: 5 minutes (plus 30 minutes chilling)
- Yield: 18-20 bites 1x
- Category: Snack
- Cuisine: American
Ingredients
- 1 cup creamy peanut butter (e.g., Jif or Skippy)
- 1/2 cup honey
- 1 1/2 cups rolled oats (old-fashioned)
- 1/2 cup chocolate chips (semi-sweet)
- 1/4 cup ground flaxseed meal
- 1/2 teaspoon vanilla extract
- 1/4 teaspoon salt (if peanut butter is unsalted)
Instructions
- In a large mixing bowl, combine 1 cup peanut butter and 1/2 cup honey. Microwave for 20-30 seconds until slightly warm and easier to stir. Alternatively, warm in a saucepan over low heat.
- Stir in 1/2 teaspoon vanilla extract and 1/4 teaspoon salt (if using) until smooth and glossy.
- Gradually add 1 1/2 cups rolled oats and 1/4 cup ground flaxseed meal. Stir until evenly distributed and the mixture forms a cohesive dough.
- Fold in 1/2 cup chocolate chips gently until distributed.
- Check consistency: squeeze a small amount in your hand. If too dry, add 1 teaspoon more honey or a splash of milk. If too sticky, add 1 tablespoon more oats.
- Optional: Chill the mixture in the fridge for 15-20 minutes for easier handling.
- Using a cookie scoop or tablespoon, portion the mixture and roll into 1 to 1.5-inch balls. Place on a parchment-lined baking sheet. Yield about 18-20 bites.
- Refrigerate the baking sheet for at least 30 minutes to firm up. Transfer to an airtight container and store in the fridge.
Notes
For best texture, use processed peanut butter (like Jif or Skippy) rather than natural separated peanut butter. If using natural peanut butter, stir well and expect a slightly different texture. Warm the peanut butter and honey together for easier mixing. Chill the mixture before rolling if sticky. Store in the fridge for up to 2 weeks or freeze for up to 3 months.
Nutrition
- Serving Size: 1 energy bite
- Calories: 145
- Sugar: 10
- Fat: 8
- Saturated Fat: 2
- Carbohydrates: 16
- Fiber: 2
- Protein: 5
Keywords: no-bake energy bites, peanut butter energy balls, healthy snack, quick snack, no-bake recipe, energy bites, peanut butter oatmeal bites