Love this? Save it for later!
Share the inspiration with your friends
Last October, I wasn’t trying to impress anyone. I’d stopped by my neighbor Maria’s house to borrow a cookie sheet for a bake sale I’d completely forgotten about, and the smell of chocolate hit me before I even got inside. She was standing at her kitchen counter, completely nonchalant, pressing little chocolate legs into warm cookies like it was nothing. I mean, she didn’t even look up—just said, “Grab one, they’re for the kids’ school thing.”
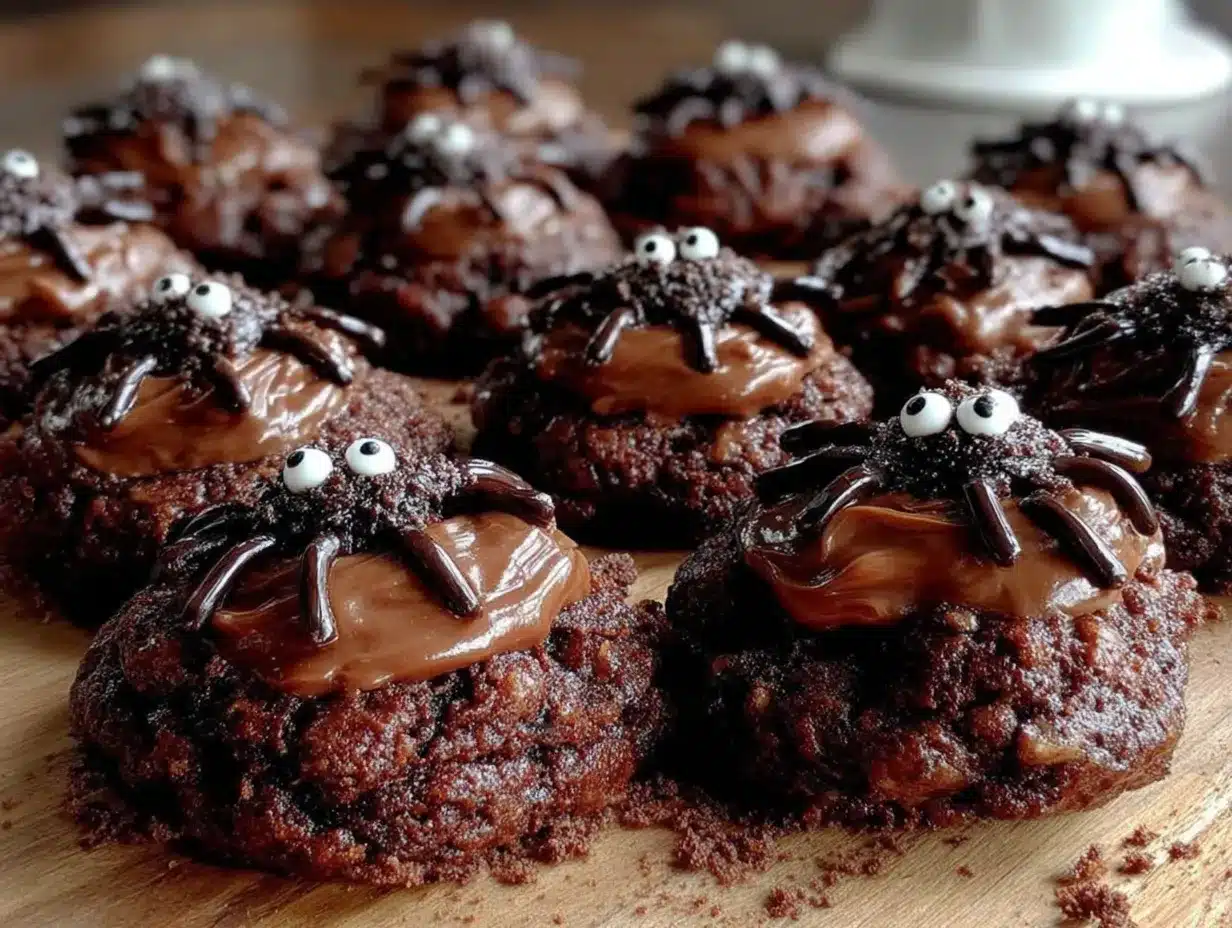
But these weren’t just cookies. They were spooky spider cookies with chocolate legs, and honestly, they stopped me cold. The way the dark chocolate legs curved against the round cookie body, the little candy eyes staring up at me—it was the most adorable, clever thing I’d seen in a while. And Maria? She just shrugged and said she found the idea on a napkin her daughter drew on. You know that feeling when someone makes something extraordinary look completely effortless? That was this moment.
I asked her for the recipe right there, standing in her kitchen with a borrowed cookie sheet under my arm. She scribbled it on a sticky note, and I’ve been making these spooky spider cookies every Halloween since. Maybe you’ve been there—you stumble into a recipe that becomes your thing, the one people ask you to bring every year. That’s what these are for me. They’re fun, they’re a little spooky, and they’re surprisingly easy to pull off. Let me show you how.
Why You’ll Love This Recipe
These spooky spider cookies with chocolate legs are the kind of Halloween treat that makes people do a double-take. Then they grab three. I’ve tested this recipe about seven times now—yes, seven—because I wanted the chocolate legs to snap just right and the cookie base to stay soft without crumbling. Here’s why I think you’ll fall for them too.
- Quick & Easy: From start to finish, you’re looking at about 35 minutes. Perfect for those last-minute Halloween parties or a fun weekend baking project with kids.
- Simple Ingredients: You probably have everything in your pantry right now. No weird extracts, no hard-to-find decorations. Just butter, sugar, flour, chocolate, and candy eyes.
- Perfect for Halloween: These aren’t just cookies—they’re the centerpiece of any spooky spread. Kids go wild for them, and adults can’t resist the nostalgia factor.
- Crowd-Pleaser: I brought a batch to my office potluck last year, and they vanished in under ten minutes. Someone actually asked if I bought them from a bakery.
- Unbelievably Delicious: The combination of a soft, chewy chocolate cookie base with crisp chocolate “legs” is next-level. It’s like two desserts in one.
What makes these different from every other Halloween cookie recipe? It’s the technique. Instead of sticking pretzel sticks into baked cookies (which always fall out, let’s be honest), you’re attaching melted chocolate legs directly to the cookie while it’s still warm. The chocolate hardens into a solid connection that actually stays put. Trust me, I learned this the hard way after my first batch turned into a pile of detached spider legs.
This recipe is comfort food with a spooky twist. It’s the kind that makes you close your eyes after the first bite—chocolatey, slightly crisp on the edges, soft in the middle. Perfect for impressing guests without stress, or turning a simple Tuesday night into something memorable.
What Ingredients You Will Need
This recipe uses simple, wholesome ingredients to deliver bold chocolate flavor and that perfect cookie texture. Most of these are pantry staples, which means you can whip up a batch of spooky spider cookies whenever the Halloween mood strikes. Let me walk you through each one.
For the Cookie Base
- Unsalted butter, softened (1 cup / 226g) — I always use unsalted so I can control the salt level. Let it sit out for about 30 minutes before you start. Cold butter won’t cream properly, and you’ll end up with dense cookies.
- Granulated sugar (¾ cup / 150g) — Regular white sugar gives these cookies a nice spread and a slightly crisp edge. Don’t substitute with brown sugar here; it changes the texture too much.
- Large egg, room temperature (1) — If you forget to take it out of the fridge, place it in a bowl of warm water for 5 minutes. Room temperature eggs incorporate much better into the batter.
- Vanilla extract (1 teaspoon) — Pure vanilla makes a difference, but good quality imitation works fine for baking. I use Nielsen-Massey when I’m feeling fancy.
- All-purpose flour (1½ cups / 188g) — Spoon and level your flour. Scooping directly from the bag can pack in too much, making your cookies dry.
- Unsweetened cocoa powder (½ cup / 50g) — I recommend Dutch-processed cocoa for a darker, richer color and deeper chocolate flavor. Hershey’s Special Dark works great if that’s what you have.
- Baking powder (½ teaspoon) — This gives the cookies a little lift without making them cakey.
- Salt (¼ teaspoon) — Don’t skip this. Salt balances the sweetness and makes the chocolate taste more chocolatey.
For the Spider Legs & Decoration
- Semi-sweet chocolate chips (1 cup / 175g) — These get melted down and piped into spider legs. I prefer Ghirardelli or Guittard for smooth melting. Avoid chocolate with a high cocoa butter content (like baking bars), as it can seize when melted.
- Candy eyes (about 24 pairs) — You can find these at craft stores or online. They come in different sizes; I like the medium ones (about 6mm) for these cookies. If you can’t find candy eyes, use mini chocolate chips turned upside down.
- Vegetable oil or coconut oil (1 teaspoon) — This is my secret trick. Adding a tiny bit of oil to the melted chocolate makes it smoother for piping and gives the legs a nice shine.
Ingredient Notes & Substitutions
For a dairy-free version, use vegan butter sticks (not tub margarine) and dairy-free chocolate chips. I’ve tried this with Earth Balance and it worked beautifully. If you want a gluten-free option, swap the all-purpose flour with a 1:1 gluten-free baking flour. King Arthur’s Measure for Measure blend is my go-to. Just know the cookies may spread a tiny bit more, so chill the dough for 15 minutes before baking.
As for the candy eyes, I’ve seen them at Walmart in the baking aisle, but Michael’s and Hobby Lobby have the best selection. Buy extra—you’ll lose a few on the floor, and kids will want to snack on them (don’t ask me how I know).
Equipment Needed
You don’t need a fancy kitchen to make these spooky spider cookies. Here’s what you’ll need, along with a few alternatives I’ve tested.
- Electric hand mixer or stand mixer — You can cream the butter and sugar by hand with a wooden spoon, but your arm will thank you for using a mixer. I use my KitchenAid for this, but any hand mixer works.
- Large mixing bowls (at least 2) — One for the dry ingredients, one for the wet. I prefer glass or stainless steel because they don’t retain smells.
- Baking sheets (2) — Light-colored aluminum sheets work best. Dark sheets can cause the bottoms to brown too fast. If you only have one, let it cool completely between batches.
- Parchment paper or silicone baking mat — Parchment paper is cheaper, but silicone mats are reusable and give you perfectly even browning. I use Silpat mats.
- Piping bag or small zip-top bag — For the chocolate legs. If you don’t have piping bags, a sandwich bag with a tiny corner snipped off works perfectly. I’ve done it both ways.
- Cooling rack — Essential for letting the cookies cool completely before adding the legs. A wire rack allows air to circulate underneath, preventing soggy bottoms.
- Small microwave-safe bowl — For melting the chocolate. Glass measuring cups work great because they have a spout for pouring.
If you’re on a budget, skip the piping bags and use the zip-top bag method. I’ve been doing that for years, and honestly, it’s less cleanup. Just be careful not to cut too big of a hole—start small and test it on a piece of parchment first.
Preparation Method
Let me walk you through this step by step. I’ve made these spooky spider cookies more times than I can count, so I’ll share all the little tricks I’ve picked up along the way.
- Preheat your oven to 350°F (175°C). Line two baking sheets with parchment paper or silicone mats. Don’t skip this—the cookies will stick without it, and you’ll cry over broken spider legs. I speak from experience.
- Cream the butter and sugar. In a large bowl, beat the softened butter and granulated sugar together until light and fluffy, about 2-3 minutes. You want it to look pale and almost doubled in volume. Scrape down the sides of the bowl halfway through. If you’re using a hand mixer, medium speed is perfect.
- Add the egg and vanilla. Crack the egg into the butter mixture, add the vanilla, and beat until just combined. Don’t overmix here—you’re not trying to incorporate air, just blend everything together. The mixture might look slightly curdled; that’s fine.
- Mix the dry ingredients. In a separate bowl, whisk together the flour, cocoa powder, baking powder, and salt. Whisking aerates the flour and breaks up any cocoa clumps. I use a fork for this because I’m too lazy to wash another whisk.
- Combine wet and dry. Gradually add the dry ingredients to the wet mixture, mixing on low speed or folding with a spatula. Stop as soon as you don’t see any more flour streaks. Overmixing develops gluten, which makes cookies tough. We want tender, chewy cookies here.
- Scoop the dough. Use a 1.5-tablespoon cookie scoop (about the size of a walnut) to portion the dough. Roll each portion into a smooth ball and place them on the prepared baking sheets, spacing them about 2 inches apart. You should get about 24 cookies. If the dough feels too sticky to roll, chill it for 10 minutes.
- Bake the cookies. Bake for 8-10 minutes. The cookies will look puffy and slightly cracked on top. They might seem underdone in the center—that’s what you want. They continue baking on the hot sheet once you pull them out. For softer cookies, bake for 8 minutes. For slightly crisper edges, go for 10.
- Cool the cookies. Let the cookies rest on the baking sheet for exactly 3 minutes. This is crucial—they’re too fragile to move right away. After 3 minutes, transfer them to a wire rack to cool completely. Don’t skip the wire rack; if they cool on the sheet, the bottoms can get soggy.
- Melt the chocolate. While the cookies cool, place the chocolate chips and oil in a microwave-safe bowl. Microwave in 20-second intervals, stirring after each, until smooth. It usually takes about 60-90 seconds total. Don’t overheat, or the chocolate will seize and turn into a grainy mess. If that happens, you can try stirring in a teaspoon of warm water, but honestly, it’s better to just start over.
- Pipe the legs. Transfer the melted chocolate to a piping bag or zip-top bag. Snip a tiny corner off the tip. Working with one cookie at a time, pipe four thin lines of chocolate on each side of the cookie to form the spider legs. I like to make them slightly curved for a more realistic look. Press two candy eyes gently into the chocolate on the top of the cookie.
- Let the legs set. Place the decorated cookies back on the wire rack and let the chocolate legs harden completely, about 20 minutes at room temperature. If you’re impatient (like me), pop them in the fridge for 10 minutes. Just know that condensation can form if you take them out too quickly.
And there you have it—spooky spider cookies with chocolate legs that actually stay attached. The first time I made these, I accidentally piped the legs too thick and they looked like tree trunks. Live and learn. Thin, delicate legs look much more spider-like.
Cooking Tips & Techniques
After making these spooky spider cookies about a dozen times, I’ve collected a few tricks that make the process smoother and the results more impressive. Let me share what I’ve learned—including the mistakes.
Perfect chocolate legs every time: The key is the consistency of your melted chocolate. If it’s too thick, the legs will look lumpy. If it’s too thin, they’ll spread into puddles. Adding that teaspoon of oil makes a world of difference. Also, work quickly once the chocolate is melted—it starts to thicken as it cools. If it gets too stiff, microwave it for 5 seconds to loosen it up.
Don’t overbake: This is the most common mistake I see with these cookies. They should look slightly underdone when you pull them out of the oven. The centers will be soft and the edges just set. If you wait until they look fully baked, they’ll be dry and crumbly. Trust the 8-minute mark for soft, chewy cookies.
Chill if needed: If your kitchen is warm or your dough feels sticky, pop it in the fridge for 15 minutes before scooping. This prevents the cookies from spreading too much and losing their shape. I learned this the hard way when I made a batch on a humid summer day and ended up with flat, amorphous blobs instead of round spider bodies.
Parallel processing: While the cookies are baking and cooling, melt your chocolate and prepare your piping bag. This cuts the total time significantly. I also like to set up my candy eyes in little pairs on a plate so I can grab them quickly without fumbling.
Consistency is queen: Use the same cookie scoop for every portion. This ensures even baking and consistent cookie sizes. Nobody wants one giant spider and a bunch of tiny ones. Well, actually, that sounds kind of cute, but you get the point.
Variations & Adaptations
One of the best things about these spooky spider cookies is how easy they are to customize. Here are some variations I’ve tried and loved.
Peanut Butter Spider Cookies: Replace ¼ cup of the butter with creamy peanut butter. The peanut butter flavor pairs beautifully with the chocolate, and it gives the cookies a slightly different texture. I made these for a friend who’s obsessed with Reese’s, and she said they were the best Halloween treat she’d ever had.
White Chocolate Spiders: Use white chocolate chips instead of semi-sweet for the legs. The contrast between the dark cookie and white legs is striking. You can also use white chocolate for the eyes if you don’t have candy eyes—just pipe a tiny dot and let it set.
Gluten-Free Version: As I mentioned earlier, swap the all-purpose flour with a 1:1 gluten-free baking flour. I’ve tested this with Bob’s Red Mill and King Arthur, and both worked well. The cookies might be slightly more delicate, so handle them gently when piping the legs.
Spooky Color Twist: Add a few drops of orange or green food coloring to the cookie dough for an extra festive look. I did this once with orange gel coloring, and the kids at the party went crazy. Just be careful not to overmix—the color should be evenly distributed but not worked in too much.
Different Leg Materials: If you don’t want to pipe chocolate legs, you can use pretzel sticks broken in half. Press four pieces into each side of the cookie while it’s still warm. The pretzels add a salty crunch that balances the sweetness. Just know they’re more likely to fall off than chocolate legs.
Serving & Storage Suggestions
These spooky spider cookies are best served at room temperature, ideally within a few hours of making them. The chocolate legs are at their snappiest when freshly set, and the cookies are softest on the first day. Arrange them on a platter with some fake spiderwebs or plastic spiders for maximum Halloween effect. I like to serve them alongside a glass of cold milk or a warm mug of apple cider.
For storage, place the cookies in a single layer in an airtight container. Separate layers with parchment paper to prevent the legs from breaking off. They’ll stay fresh for up to 4 days at room temperature. Don’t refrigerate them—the cookies will dry out, and the chocolate can develop a white bloom (that’s the fat rising to the surface, totally harmless but not pretty).
You can freeze the undecorated cookies for up to 3 months. Bake and cool them completely, then place them in a freezer-safe bag with parchment between layers. When you’re ready to serve, thaw them at room temperature for about 20 minutes, then pipe on the chocolate legs and eyes. This is actually my preferred method for Halloween parties—I bake the cookies a week in advance and decorate them the morning of the event. The flavors actually develop a bit during freezing, making the cookies even more delicious.
If you’re reheating leftover cookies (though I doubt you’ll have any), pop them in a 300°F oven for 3-4 minutes. This revives the soft texture and makes the chocolate slightly melty again. Just let them cool for a minute before serving.
Nutritional Information & Benefits
Let’s be real—these are cookies, not health food. But I believe in balance, and knowing what’s in your treats helps you enjoy them mindfully. Here’s the estimated nutritional breakdown per cookie (based on 24 cookies).
| Nutrient | Amount per Cookie |
|---|---|
| Calories | 145 |
| Total Fat | 8g |
| Saturated Fat | 5g |
| Carbohydrates | 18g |
| Sugar | 11g |
| Protein | 2g |
| Fiber | 1g |
On the bright side, cocoa powder is rich in antioxidants called flavonoids, which can support heart health and reduce inflammation. The butter provides vitamin A, and the egg adds a small amount of protein. If you use dark chocolate chips (60% cacao or higher), you’ll get even more antioxidants and less sugar.
These cookies are not gluten-free unless you make the substitution mentioned earlier, and they contain dairy and eggs. For nut-free preparation, skip the peanut butter variation and check your chocolate chips for cross-contamination warnings if allergies are a concern.
My personal philosophy? Halloween comes once a year. Enjoy a couple of these spooky spider cookies, savor every bite, and don’t stress about the numbers. Life is too short for guilt-ridden treats.
Conclusion
These spooky spider cookies with chocolate legs have become my signature Halloween contribution, and I honestly can’t imagine October without them. They’re the perfect blend of fun and delicious—the kind of recipe that makes people smile before they even take a bite. And then they take a bite and smile even bigger.
I hope you give these a try, whether you’re baking for a Halloween party, a classroom treat, or just because you want to make something that feels a little magical. Don’t be afraid to make them your own—swap the chocolate for white chocolate, add some sprinkles, or experiment with different cookie bases. The beauty of this recipe is how forgiving it is.
If you make these spooky spider cookies, I’d love to hear about it. Drop a comment below and let me know how they turned out, or share a photo on Pinterest and tag me. Did your kids help? Did you try a fun variation? Did the chocolate legs stay attached (fingers crossed)? Your stories make my day, and they help other readers feel confident trying the recipe too.
Until next time, happy baking—and happy Halloween. May your cookies be spooky, your chocolate legs be snappy, and your candy eyes stay put. You’ve got this.
Frequently Asked Questions
Can I make the dough ahead of time?
Absolutely. You can prepare the cookie dough up to 2 days in advance and keep it wrapped in plastic wrap in the refrigerator. Let it sit at room temperature for about 10 minutes before scooping—it’ll be easier to handle. You can also freeze the dough balls for up to 3 months and bake them straight from frozen, just add 1-2 minutes to the baking time.
My chocolate legs keep breaking. What am I doing wrong?
This usually happens if the chocolate is too thick when you pipe it, or if the legs are too thin. Make sure you add that teaspoon of oil to the melted chocolate—it makes the legs more flexible and less prone to snapping. Also, let the chocolate set completely before moving the cookies. If you’re in a hurry, the fridge is your friend.
Can I use milk chocolate instead of semi-sweet?
You can, but I don’t recommend it. Milk chocolate has more sugar and less cocoa butter, which makes it softer and harder to pipe into clean legs. The cookies themselves are already sweet, so the semi-sweet chocolate provides a nice balance. If you only have milk chocolate, add an extra teaspoon of oil to help it set firmer.
How do I keep the candy eyes from falling off?
Press the eyes into the chocolate while it’s still wet and warm. If the chocolate has started to set, the eyes won’t stick. Work on one cookie at a time—pipe the legs, add the eyes immediately, then move to the next cookie. If an eye does fall off after the chocolate hardens, you can use a tiny dab of melted chocolate as glue.
Can I double this recipe?
Yes, and I do it all the time. The recipe doubles perfectly. Just make sure you have enough baking sheets and space to cool all the cookies. You might need to work in batches if your oven is small. Also, don’t crowd the cookies on the baking sheet—they need room to spread, and crowded cookies can end up misshapen.
PrintSpooky Spider Cookies with Easy Chocolate Legs

These spooky spider cookies with chocolate legs are the perfect Halloween treat—soft, chewy chocolate cookies topped with crisp chocolate legs and candy eyes. Quick and easy to make, they’re sure to be a crowd-pleaser.
- Prep Time: 15 minutes
- Cook Time: 10 minutes
- Total Time: 35 minutes
- Yield: 24 cookies 1x
- Category: Dessert
- Cuisine: American
Ingredients
- 1 cup (226g) unsalted butter, softened
- ¾ cup (150g) granulated sugar
- 1 large egg, room temperature
- 1 teaspoon vanilla extract
- 1½ cups (188g) all-purpose flour
- ½ cup (50g) unsweetened cocoa powder (Dutch-processed recommended)
- ½ teaspoon baking powder
- ¼ teaspoon salt
- 1 cup (175g) semi-sweet chocolate chips
- 1 teaspoon vegetable oil or coconut oil
- Candy eyes (about 24 pairs)
Instructions
- Preheat your oven to 350°F (175°C). Line two baking sheets with parchment paper or silicone mats.
- In a large bowl, beat the softened butter and granulated sugar together until light and fluffy, about 2-3 minutes.
- Add the egg and vanilla extract, and beat until just combined.
- In a separate bowl, whisk together the flour, cocoa powder, baking powder, and salt.
- Gradually add the dry ingredients to the wet mixture, mixing on low speed or folding with a spatula until no flour streaks remain.
- Using a 1.5-tablespoon cookie scoop, portion the dough into balls and place them on the prepared baking sheets, spacing them about 2 inches apart.
- Bake for 8-10 minutes. The cookies should look puffy and slightly cracked on top, with soft centers.
- Let the cookies rest on the baking sheet for exactly 3 minutes, then transfer to a wire rack to cool completely.
- While the cookies cool, place the chocolate chips and oil in a microwave-safe bowl. Microwave in 20-second intervals, stirring after each, until smooth.
- Transfer the melted chocolate to a piping bag or zip-top bag. Snip a tiny corner off the tip.
- Working with one cookie at a time, pipe four thin lines of chocolate on each side of the cookie to form spider legs. Press two candy eyes gently into the chocolate on the top of the cookie.
- Let the chocolate legs harden completely, about 20 minutes at room temperature or 10 minutes in the refrigerator.
Notes
For dairy-free, use vegan butter sticks and dairy-free chocolate chips. For gluten-free, use a 1:1 gluten-free baking flour. Chill the dough for 15 minutes if it feels sticky. Work quickly with melted chocolate as it thickens as it cools.
Nutrition
- Serving Size: 1 cookie
- Calories: 145
- Sugar: 11
- Sodium: 50
- Fat: 8
- Saturated Fat: 5
- Carbohydrates: 18
- Fiber: 1
- Protein: 2
Keywords: spider cookies, Halloween cookies, chocolate cookies, spooky treats, easy Halloween recipe


