Love this? Save it for later!
Share the inspiration with your friends
The power went out halfway through my annual Halloween party prep last year. There I stood, covered in flour, staring at a dark oven with a half-baked batch of something ambitious that was never going to happen. My friend Jen, who’d shown up early to help, looked at the sad situation and said, “Why don’t you just throw everything into a dish and call it a dip?” I started to explain why that wouldn’t work — then stopped. She was holding a can of black beans, a packet of taco seasoning, and the most ridiculous grin. Honestly, I was too tired to argue. So I grabbed a baking dish, dumped in what I had, and told her this was going to be a disaster.
Twenty minutes later, that dip was gone. Like, completely gone. People were scraping the dish with chips, asking for the recipe, and I had to admit the truth — I had no idea what I’d done. The only thing I remembered was laughing at how the sour cream swirls looked like little ghosts floating on top. That’s when it hit me — what if I made it look like a mummy? I mean, Halloween is all about the visuals, right? You know that feeling when you accidentally stumble onto something brilliant? That was this dip.
So this Spooky Black Bean Mummy Taco Dip was born from a power outage, a friend who doesn’t take no for an answer, and a lot of last-minute scrambling. It’s the recipe that saved my party, and now it’s the one I actually look forward to making every October. The best part? You don’t need an oven, a stove, or any special skills. Just a dish, some beans, and a willingness to let a mummy sit on your snack table.
Why You’ll Love This Recipe
Let me tell you why this Spooky Black Bean Mummy Taco Dip has become my go-to for every Halloween gathering. It checks all the boxes — and then some.
- No Cooking Required : This is a no-bake, no-stove situation. You mix, layer, and chill. That’s it. Perfect for when the oven is full of other things or when you just don’t want to deal with heat.
- Simple Ingredients : Black beans, cream cheese, sour cream, taco seasoning, and cheese. You probably have most of this in your pantry right now. No fancy grocery trips needed.
- Perfect for Halloween Parties : It looks like a spooky mummy, but tastes like your favorite taco dip. Kids love the design, adults love the flavor. It’s a total crowd-pleaser.
- Make-Ahead Friendly : You can assemble this the night before and just add the mummy face right before serving. One less thing to stress about on party day.
- Unbelievably Delicious : The creamy layers, the seasoned beans, the melted cheese — it’s comfort food that happens to look like a Halloween decoration.
What makes this different from every other taco dip out there? It’s the presentation, honestly. I’ve seen a million layered dips, but wrapping sour cream “bandages” around a cheese face? That’s the kind of silly, fun detail that makes people stop and smile. And the flavor — I tested this with three different cream cheese brands before landing on the one that gave the smoothest, creamiest base. It’s not just another dip. It’s the one people text me about in November asking if I can make it for Thanksgiving. (I do. No shame.)
This recipe is the kind that makes you close your eyes after the first bite. It’s spooky, it’s silly, and it’s seriously good. Perfect for impressing guests without any stress.
What Ingredients You Will Need
This recipe uses simple, everyday ingredients to deliver bold flavor and a fun presentation. Most of these are pantry staples, and the ones that aren’t are easy to find at any grocery store.
- Black beans, 1 can (15 oz), drained and rinsed — These are the base of the spooky filling. I recommend Goya or Bush’s Best for consistent texture. Rinsing removes excess sodium and gives you a cleaner flavor.
- Cream cheese, 8 oz (226 g), softened — This creates the creamy bottom layer. Use full-fat for the richest texture. Let it sit out for 30 minutes before mixing so it blends smoothly.
- Sour cream, 1 cup (240 ml) — This goes into the cream cheese layer and also gets used for the mummy bandages. I prefer Daisy for its thick consistency.
- Taco seasoning, 1 packet (1 oz or about 2 tablespoons) — You can use store-bought or make your own. I use McCormick when I’m in a hurry, but homemade gives you more control over salt.
- Shredded Mexican blend cheese, 1 ½ cups (170 g) — This gets mixed into the bean layer and sprinkled on top. Pre-shredded works fine, but shredding your own melts better.
- Roma tomatoes, 2 medium, diced — Adds freshness and acidity. Remove the seeds if you want to avoid a watery dip.
- Green onions, 4-5 stalks, sliced — For color and a mild onion kick. You can substitute with chives if you want a milder flavor.
- Black olives, ¼ cup (about 8-10 olives), sliced — These become the mummy’s eyes. Use canned sliced olives for convenience.
- Tortilla chips, for serving — Choose sturdy chips that won’t break when scooping. I like Tostitos Scoops because they hold up to the thick dip.
- Optional garnishes : Fresh cilantro, sliced jalapeños, or a drizzle of hot sauce for extra heat.
For the mummy face, you’ll need a few extra olives to create the eyes and maybe a small piece of red bell pepper for a tongue if you want to get creative. The bandages are made from sour cream piped in thin strips across the top. It’s easier than it sounds, I promise.
Equipment Needed
You don’t need much for this recipe, which is part of its charm. Here’s what you’ll need:
- 9-inch round baking dish or pie plate — This gives the mummy its round shape. A square dish works too, but the mummy looks better in a circle.
- Mixing bowls — One large bowl for the cream cheese mixture and one medium bowl for the bean mixture.
- Electric hand mixer or stand mixer — For getting the cream cheese layer perfectly smooth. You can do it by hand with a spatula, but it takes more elbow grease.
- Rubber spatula — For spreading layers evenly. I use a OXO Good Grips spatula that I’ve had for years.
- Piping bag or zip-top bag — For piping the sour cream bandages. A zip-top bag with the corner snipped off works perfectly.
- Sharp knife and cutting board — For dicing tomatoes and slicing olives.
- Measuring cups and spoons — For accurate ingredient portions.
If you don’t have a piping bag, don’t worry. I’ve used a small spoon to drizzle sour cream in lines before, and it worked fine. The mummy looked a little messy, but honestly, that added to the spooky vibe.
Preparation Method
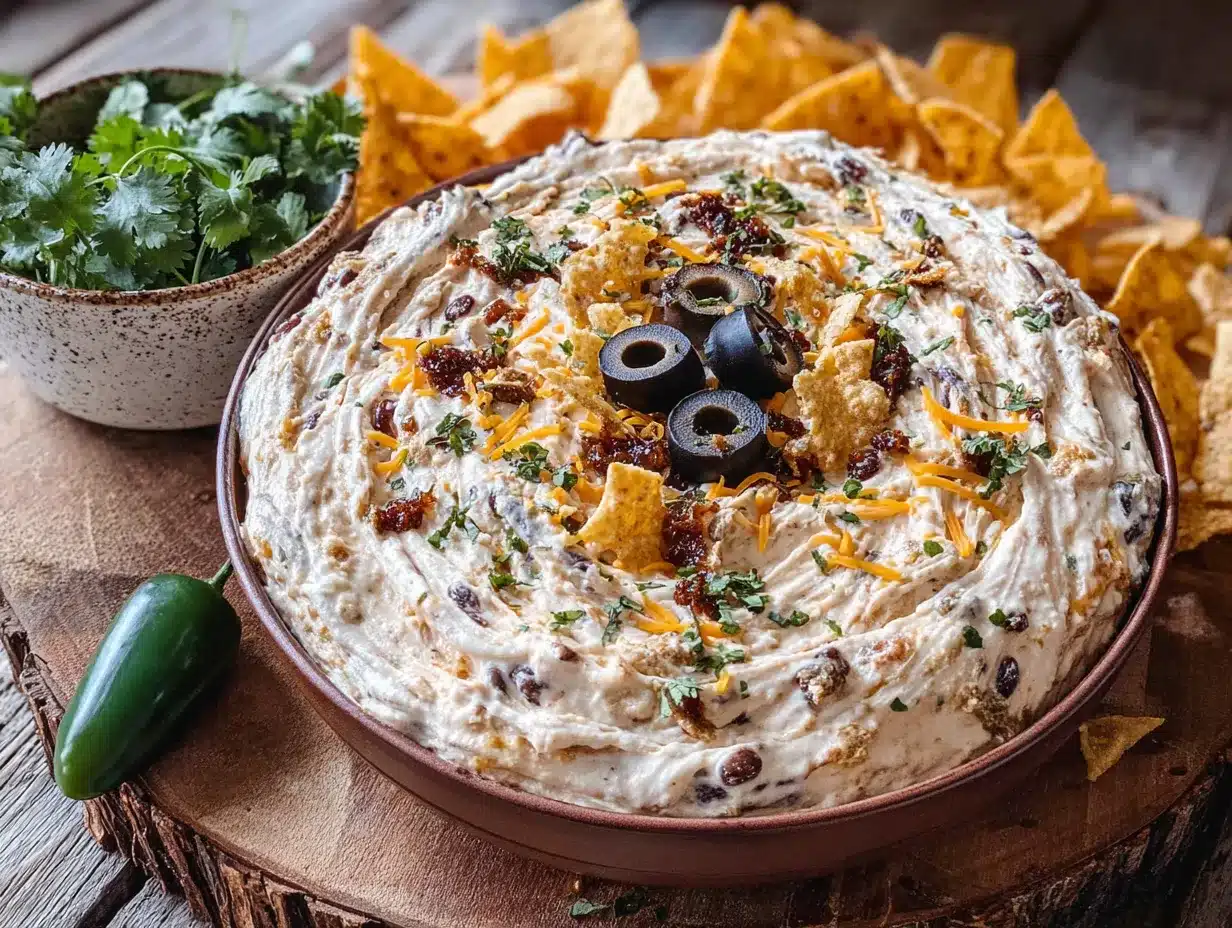
Follow these steps, and you’ll have a spooky mummy dip ready in under 30 minutes. The chill time is extra, but worth it.
-
Soften the cream cheese — Take the cream cheese out of the fridge about 30 minutes before you start. If you’re in a hurry, microwave it in 10-second bursts until soft but not melted. I’ve forgotten this step before, and the mixture came out lumpy. Learn from my mistake.
-
Make the cream cheese layer — In a large bowl, beat the softened cream cheese with ½ cup of the sour cream and 1 tablespoon of the taco seasoning. Mix on medium speed until smooth and fluffy, about 2 minutes. Scrape down the sides halfway through. The mixture should be thick but spreadable.
-
Spread the cream cheese layer — Using a rubber spatula, spread the cream cheese mixture evenly into the bottom of your 9-inch dish. Make sure it’s level. This is the base that everything else sits on.
-
Prepare the black bean mixture — In a medium bowl, combine the drained black beans, the remaining ½ cup of sour cream, the remaining 1 tablespoon of taco seasoning, 1 cup of the shredded cheese, and the diced tomatoes. Stir until everything is well coated. The mixture should look thick and chunky.
-
Layer the bean mixture — Spoon the black bean mixture over the cream cheese layer. Spread it gently, being careful not to mix the layers. Leave a small border around the edge if you want the cream cheese to show — it adds to the mummy look.
-
Add the top cheese layer — Sprinkle the remaining ½ cup of shredded cheese over the bean layer. This will melt slightly when the dip sits out, creating a nice gooey top.
-
Chill the dip — Cover the dish with plastic wrap and refrigerate for at least 1 hour. This helps the layers set and makes the mummy face easier to pipe. You can make it up to 24 hours ahead at this point.
-
Create the mummy face — Just before serving, take the dip out of the fridge. Place two black olive slices near the top of the dip to create the mummy’s eyes. They should be about 2 inches apart. You can add a small dot of sour cream in the center of each olive for a creepy pupil effect.
-
Pipe the bandages — Spoon the remaining sour cream into a piping bag or a zip-top bag with a small corner snipped off. Pipe thin, slightly diagonal lines across the dip, leaving the eyes exposed. Don’t worry about perfection — mummies are supposed to look a little ragged. I usually do about 6-8 lines going in one direction, then a few going the other way for that wrapped look.
-
Garnish and serve — Sprinkle the sliced green onions and any remaining diced tomatoes around the edges of the dip. Arrange the tortilla chips around the mummy or in a separate bowl. Serve immediately.
The dip should look like a mummy wrapped in sour cream bandages, peeking out at your guests. It’s silly, it’s spooky, and it’s going to be the first thing to disappear from the table.
Cooking Tips & Techniques
I’ve made this Spooky Black Bean Mummy Taco Dip about a dozen times now, and I’ve learned a few things the hard way. Here are my best tips:
Don’t skip the softening step. Cold cream cheese will leave you with lumps that never fully smooth out. I once tried to speed things up with a cold block, and the mixture looked like cottage cheese. Not the vibe you want.
Drain the tomatoes well. Roma tomatoes hold a lot of water. If you add them without removing the seeds and excess juice, your dip will get watery after sitting out for a while. I chop them, then let them sit on a paper towel for a minute before adding to the bean mixture.
Pipe the bandages right before serving. If you pipe the sour cream too early, it can start to separate or slide off. I’ve made that mistake — the mummy looked like it was melting in the sun. Not a good look for a spooky dip.
Use a light hand with the bandages. You want to see the cheese and beans underneath. Too much sour cream and it just looks like a white blob. Think of it as wrapping a mummy — you want gaps.
Let the dip sit out for 10 minutes before serving. If it’s been in the fridge, it can be a bit firm. Letting it sit at room temperature makes it easier to scoop and brings out the flavors.
Double the recipe for a crowd. This dip goes fast. I’ve seen a single batch disappear in 15 minutes at a party of 10 people. If you’re feeding more than that, make two.
Variations & Adaptations
One of the best things about this dip is how easy it is to customize. Here are some variations I’ve tried and loved:
Spicy Mummy Dip — Add 1-2 diced jalapeños to the bean mixture, or mix in ½ teaspoon of cayenne pepper with the taco seasoning. I did this for a party where everyone claimed to love spicy food, and it was a hit. Just warn your guests — nobody expects a mummy to bite back.
Vegetarian and Vegan Version — This recipe is already vegetarian. For a vegan version, use dairy-free cream cheese and sour cream. I’ve tested this with Kite Hill cream cheese and Forager Project sour cream, and it worked beautifully. The texture was slightly thinner, but the flavor was still great.
Gluten-Free Adaptation — Most taco seasonings are gluten-free, but check the label to be sure. Serve with certified gluten-free tortilla chips or veggie sticks. I’ve used cucumber rounds and bell pepper strips for a low-carb option too.
Different Protein — Swap the black beans for refried beans, seasoned ground beef, or shredded chicken. If you use meat, make sure it’s fully cooked and cooled before layering. I made a version with chorizo once, and it was incredible — just be aware it adds more grease.
Mummy Makeover — Change the design! Instead of a mummy, you can make a spider by piping sour cream legs around a central olive body. Or make a ghost by shaping the dip into a ghost outline and using olive slices for eyes. The base recipe stays the same — just have fun with the decorations.
Serving & Storage Suggestions
This Spooky Black Bean Mummy Taco Dip is best served chilled or at room temperature. I usually take it out of the fridge about 10 minutes before guests arrive so it’s not too cold. The texture is creamiest when it’s had a chance to soften slightly.
For presentation, I like to place the dip in the center of a large platter and surround it with tortilla chips arranged like a starburst. It makes the mummy the star of the show. You can also add small bowls of extra toppings on the side — diced avocado, extra olives, pickled jalapeños — so guests can customize their scoops.
Storage — Leftover dip can be stored in an airtight container in the refrigerator for up to 3 days. The sour cream bandages might look a little messy after storage, but the flavor is still great. I don’t recommend freezing this dip — the dairy separates and gets grainy.
Reheating — If you prefer warm dip, you can microwave individual portions for 20-30 seconds, or reheat the whole dish in a 350°F oven for 10 minutes. Just note that the mummy face won’t survive the reheating. I usually scrape off the bandages, warm the dip, and add fresh sour cream on top.
Make-Ahead Note — This dip actually tastes better after sitting overnight. The flavors meld together, and the layers become more cohesive. I always make it the day before a party, then add the mummy face just before serving. It’s one less thing to worry about on the day of.
Nutritional Information & Benefits
Here’s the estimated nutritional breakdown for one serving (based on 8 servings, not including chips):
| Nutrient | Amount per Serving |
|---|---|
| Calories | 285 |
| Total Fat | 18g |
| Saturated Fat | 10g |
| Cholesterol | 55mg |
| Sodium | 620mg |
| Total Carbohydrates | 18g |
| Dietary Fiber | 5g |
| Sugars | 4g |
| Protein | 12g |
Black beans are a fantastic source of plant-based protein and fiber, which helps keep you full and supports digestive health. Cream cheese and sour cream add calcium, but also saturated fat — so this is definitely a treat, not an everyday meal. If you’re watching sodium, use low-sodium taco seasoning and rinse your beans well.
This dip is naturally vegetarian and can be made gluten-free with a few swaps. It’s not low-carb, but if you serve it with veggie sticks instead of chips, you can cut down on the carbs significantly.
Personally, I love that this dip feels indulgent but has a solid nutritional backbone thanks to the beans. It’s the kind of party food that doesn’t leave you feeling terrible afterward — just satisfied.
Conclusion
This Spooky Black Bean Mummy Taco Dip is proof that the best recipes come from the most unexpected moments. A power outage, a stubborn friend, and a can of beans turned into a Halloween tradition that I actually look forward to every year. It’s easy, it’s fun, and it tastes incredible.
I hope you make this for your next Halloween party — or honestly, any fall gathering where you want to bring a smile to people’s faces. Don’t be afraid to customize it. Add more spice, change the design, or double the batch. The recipe is just a starting point. The real magic is in making it your own.
If you try this recipe, I’d love to hear about it. Leave a comment below, share a photo of your mummy dip, or tell me about your own kitchen disaster that turned into something amazing. Happy Halloween, and happy dipping!
Frequently Asked Questions
Can I make this dip ahead of time?
Yes! You can assemble the dip up to 24 hours in advance. Just wait to pipe the sour cream bandages until right before serving so they stay fresh and pretty.
How do I keep the sour cream bandages from sliding off?
Make sure your dip is well-chilled before piping. The cold surface helps the sour cream stick. Also, pipe in thin lines — thick lines are heavy and more likely to slide.
Can I use refried beans instead of black beans?
Absolutely. Refried beans will give you a smoother, thicker texture. Just make sure they’re at room temperature so they spread easily without tearing the cream cheese layer.
What if I don’t have a piping bag?
No problem. Use a zip-top bag with a tiny corner snipped off, or simply use a small spoon to drizzle the sour cream in lines. It won’t be as precise, but it will still look like a mummy — maybe a slightly messy one.
Is this dip gluten-free?
Most of the ingredients are naturally gluten-free, but check your taco seasoning label to be sure. Some brands add flour as a filler. Serve with gluten-free chips or veggie sticks for a fully gluten-free snack.
Pin This Recipe!
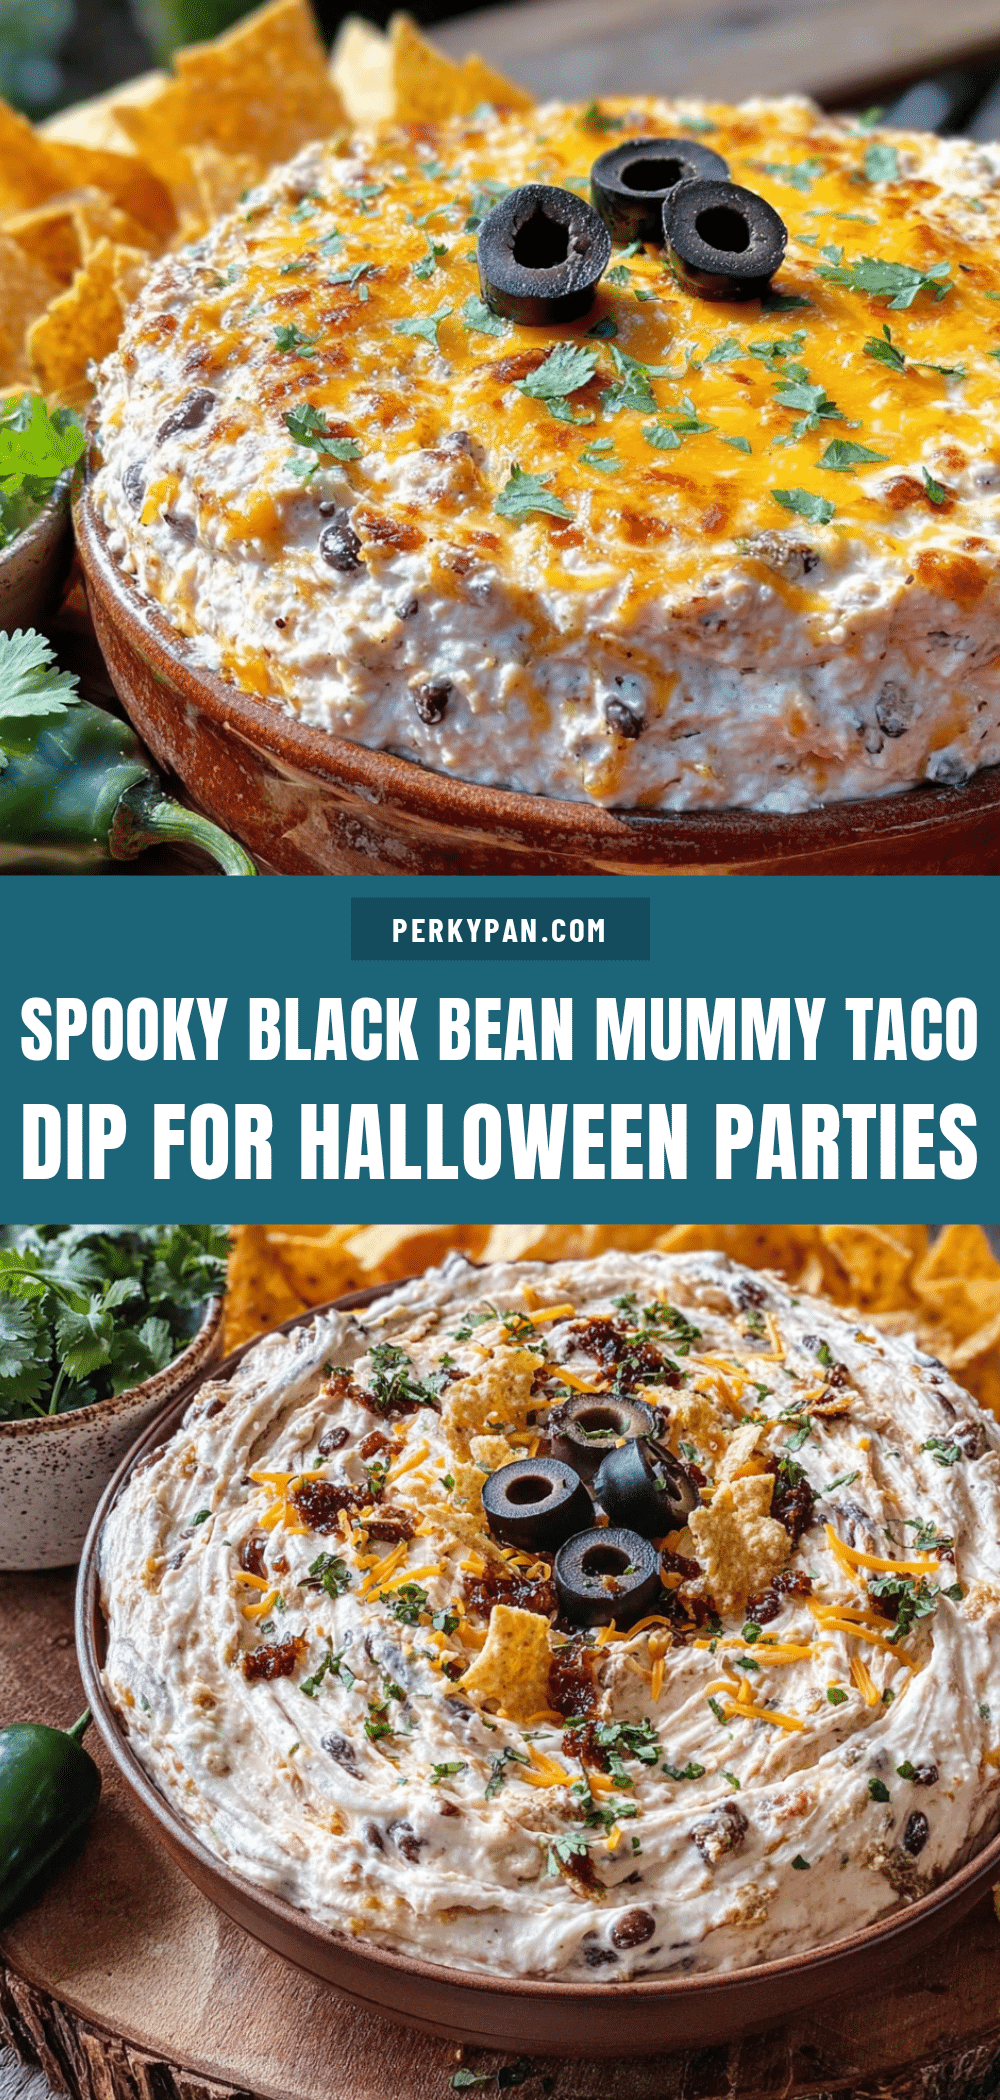
Spooky Black Bean Mummy Taco Dip Easy Halloween Party Recipe

A no-bake, spooky mummy-shaped taco dip made with black beans, cream cheese, sour cream, and taco seasoning. Perfect for Halloween parties, it’s easy to make ahead and always a crowd-pleaser.
- Prep Time: 20 minutes
- Cook Time: 0 minutes
- Total Time: 1 hour 20 minutes (includes 1 hour chilling)
- Yield: 8 servings 1x
- Category: Appetizer
- Cuisine: Mexican-American
Ingredients
- 1 can (15 oz) black beans, drained and rinsed
- 8 oz (226 g) cream cheese, softened
- 1 cup (240 ml) sour cream, divided
- 1 packet (1 oz or about 2 tablespoons) taco seasoning, divided
- 1 ½ cups (170 g) shredded Mexican blend cheese, divided
- 2 Roma tomatoes, diced
- 4–5 green onions, sliced
- ¼ cup (about 8–10 olives) black olives, sliced
- Tortilla chips, for serving
- Optional garnishes: fresh cilantro, sliced jalapeños, hot sauce
Instructions
- Soften the cream cheese: Take the cream cheese out of the fridge about 30 minutes before you start. If in a hurry, microwave in 10-second bursts until soft but not melted.
- Make the cream cheese layer: In a large bowl, beat the softened cream cheese with ½ cup of the sour cream and 1 tablespoon of the taco seasoning. Mix on medium speed until smooth and fluffy, about 2 minutes.
- Spread the cream cheese layer: Using a rubber spatula, spread the cream cheese mixture evenly into the bottom of a 9-inch round baking dish or pie plate.
- Prepare the black bean mixture: In a medium bowl, combine the drained black beans, the remaining ½ cup of sour cream, the remaining 1 tablespoon of taco seasoning, 1 cup of the shredded cheese, and the diced tomatoes. Stir until well coated.
- Layer the bean mixture: Spoon the black bean mixture over the cream cheese layer, spreading gently without mixing the layers. Leave a small border around the edge if desired.
- Add the top cheese layer: Sprinkle the remaining ½ cup of shredded cheese over the bean layer.
- Chill the dip: Cover the dish with plastic wrap and refrigerate for at least 1 hour, or up to 24 hours ahead.
- Create the mummy face: Just before serving, take the dip out of the fridge. Place two black olive slices near the top for eyes, about 2 inches apart. Optionally add a small dot of sour cream in the center of each olive.
- Pipe the bandages: Spoon the remaining sour cream into a piping bag or zip-top bag with a small corner snipped off. Pipe thin, slightly diagonal lines across the dip, leaving the eyes exposed. Do about 6-8 lines in one direction, then a few going the other way.
- Garnish and serve: Sprinkle sliced green onions and any remaining diced tomatoes around the edges. Arrange tortilla chips around the mummy or in a separate bowl. Serve immediately.
Notes
For best results, soften cream cheese to room temperature. Drain tomatoes well to avoid watery dip. Pipe sour cream bandages just before serving. Let dip sit out for 10 minutes before serving for easier scooping. Double recipe for a crowd.
Nutrition
- Serving Size: 1 serving (about 1/8
- Calories: 285
- Sugar: 4
- Sodium: 620
- Fat: 18
- Saturated Fat: 10
- Carbohydrates: 18
- Fiber: 5
- Protein: 12
Keywords: Halloween dip, mummy dip, taco dip, black bean dip, no-bake, party appetizer, spooky recipe


