Love this? Save it for later!
Share the inspiration with your friends
My neighbor, Mrs. Gable, watched me fumbling with a piping bag on my front porch last December. I was trying to get the perfect swirl on a batch of sugar cookies, and honestly, it was a mess. The icing was too runny, the cookies were sticking, and I was about five minutes away from tossing the whole tray into the trash. She didn’t say anything at first. She just leaned over the low fence between our yards, took one look at the chaos on my table, and said, “You’re working way too hard, honey. Let me show you something easier.”
She disappeared into her house and came back with a small plate of the most beautiful cookies I had ever seen. They were a deep, dark red, dusted with a snowy layer of powdered sugar, with little cracks that showed the rich color underneath. They looked like little jewels. “Red Velvet Crinkle Cookies,” she said, handing me the plate. “No piping bag required.” I took a bite, and let me tell you, I almost forgot about my failed frosting project completely. They were soft, fudgy, and had that perfect little tang that red velvet is famous for. I asked her for the recipe right then and there.
She laughed and told me it was her “lazy day” recipe. The one she made when she wanted something that looked impressive but didn’t require a whole afternoon of work. I’ve tweaked it a little over the years, making it even faster for those nights when a cookie craving hits hard and you need it fixed in 30 minutes flat. Maybe you’ve been there—standing in your kitchen at 8 PM, desperately wanting something sweet but not willing to spend an hour on it. This is that recipe. It’s the one that saves the day, every single time.
Why You’ll Love This Recipe
Let’s be real for a second. Most cookie recipes are a whole production. You have to chill the dough for an hour, then roll, then bake, then wait for them to cool. Who has time for that on a Tuesday night? These Quick Red Velvet Crinkle Cookies are the exact opposite of that. They are designed for the real world, where time is short and your sweet tooth is impatient.
- Ready in 30 Minutes: From the moment you decide you want cookies to the moment you’re biting into one, it’s only half an hour. No chilling, no waiting, no fuss. This is the kind of speed that makes you feel like a kitchen superhero.
- Simple Pantry Ingredients: You likely have most of these items in your kitchen right now. No need for a special trip to the store for obscure ingredients. We are using a boxed cake mix as a shortcut, and I am not ashamed of it. It’s a game-changer.
- Perfect for Last-Minute Cravings: Whether it’s a sudden potluck invite, a playdate that needs a treat, or just a rough day that demands chocolate, these cookies have your back. They are the ultimate weeknight hero.
- Always a Crowd-Pleaser: The color alone gets people talking. They look fancy and festive, but they are secretly one of the easiest things you can make. Kids love them, adults love them, and they disappear from the plate faster than you’d believe.
- Unbelievably Fudgy: The texture is what really sets these apart. They are not cakey or dry. They are soft, chewy, and almost brownie-like in the center. The powdered sugar coating adds a delicate sweetness that balances the rich cocoa perfectly.
What makes this recipe different from all the other red velvet cookies out there? It’s the simplicity, honestly. I’ve tested versions with homemade dye, with beets, with all sorts of complicated techniques. Nothing beats this quick, reliable method. It’s the one I come back to again and again because it just works. It’s comfort food, reimagined for a busy schedule. It’s the kind of cookie that makes you close your eyes after the first bite, even if you’re standing over the kitchen counter in your pajamas.
What Ingredients You Will Need
This recipe uses simple, clever ingredients to deliver that classic red velvet flavor and that signature crinkly look without any of the stress. Everything here is designed to be easy to find and even easier to use.
- 1 box (15.25 oz) Red Velvet Cake Mix: This is our secret weapon. It gives us the color, the flavor, and the structure all in one. I prefer the Duncan Hines or Betty Crocker brand for the best texture and color. Do not use a “pudding in the mix” variety, as it can make the cookies too soft.
- 2 large eggs: These bind everything together and add richness. Make sure they are at room temperature for the best results. If you’re in a hurry, just place them in a bowl of warm water for 5 minutes.
- 1/3 cup vegetable oil: This keeps the cookies incredibly moist and soft. You can use canola or melted coconut oil in a pinch, but vegetable oil gives the most neutral flavor. Don’t use butter here; it makes the cookies spread too much.
- 1 teaspoon vanilla extract: It enhances the chocolate flavor and adds a lovely warmth. Pure vanilla is best, but imitation works just fine.
- 1/2 cup powdered sugar (for rolling): This is what creates that beautiful crinkle effect and adds a sweet, snowy coating. You will need more than you think, so have a full cup ready just in case.
Ingredient Tips from My Kitchen:
- For a richer flavor, add 1/4 cup of mini chocolate chips to the dough. It takes them over the top.
- If you want a deeper red color, add a drop or two of red gel food coloring. The cake mix is usually pretty vibrant, but a little extra never hurts for special occasions.
- Make sure your powdered sugar is fresh and free of lumps. If it’s clumpy, sift it before rolling the cookies. It makes a big difference in the final look.
- You can substitute the vegetable oil with applesauce for a slightly lower-fat version, but the cookies will be a bit more cake-like and less fudgy.
Equipment Needed
You don’t need a fancy bakery setup for these cookies. In fact, you probably already own everything you need. That’s the beauty of this recipe.
- Large Mixing Bowl: Any medium-to-large bowl will do. I use my favorite ceramic one, but glass or metal works great.
- Whisk or Wooden Spoon: For mixing the dough. A sturdy spatula also works perfectly. No electric mixer required, which means less cleanup.
- Measuring Spoons: For the vanilla extract. Eyeballing it is fine, but using a spoon keeps things consistent.
- Small Bowl: For holding the powdered sugar while you roll the dough balls.
- Baking Sheet: A standard 13×18 inch sheet pan is perfect. Line it with parchment paper or a silicone baking mat for easy cleanup.
- Cookie Scoop (1.5 tablespoon size): This is my favorite tool for this job. It makes perfectly uniform dough balls, which means they all bake evenly. A regular spoon works if you don’t have one.
- Cooling Rack: Essential for letting the cookies cool properly so they don’t get soggy on the bottom.
Budget-Friendly Tip: If you don’t have a cookie scoop, just use two regular spoons to portion the dough. It’s a little less precise, but the cookies will still taste amazing. And if you don’t have a cooling rack, just let the cookies cool on the baking sheet for 5 minutes, then carefully transfer them to a plate.
Preparation Method
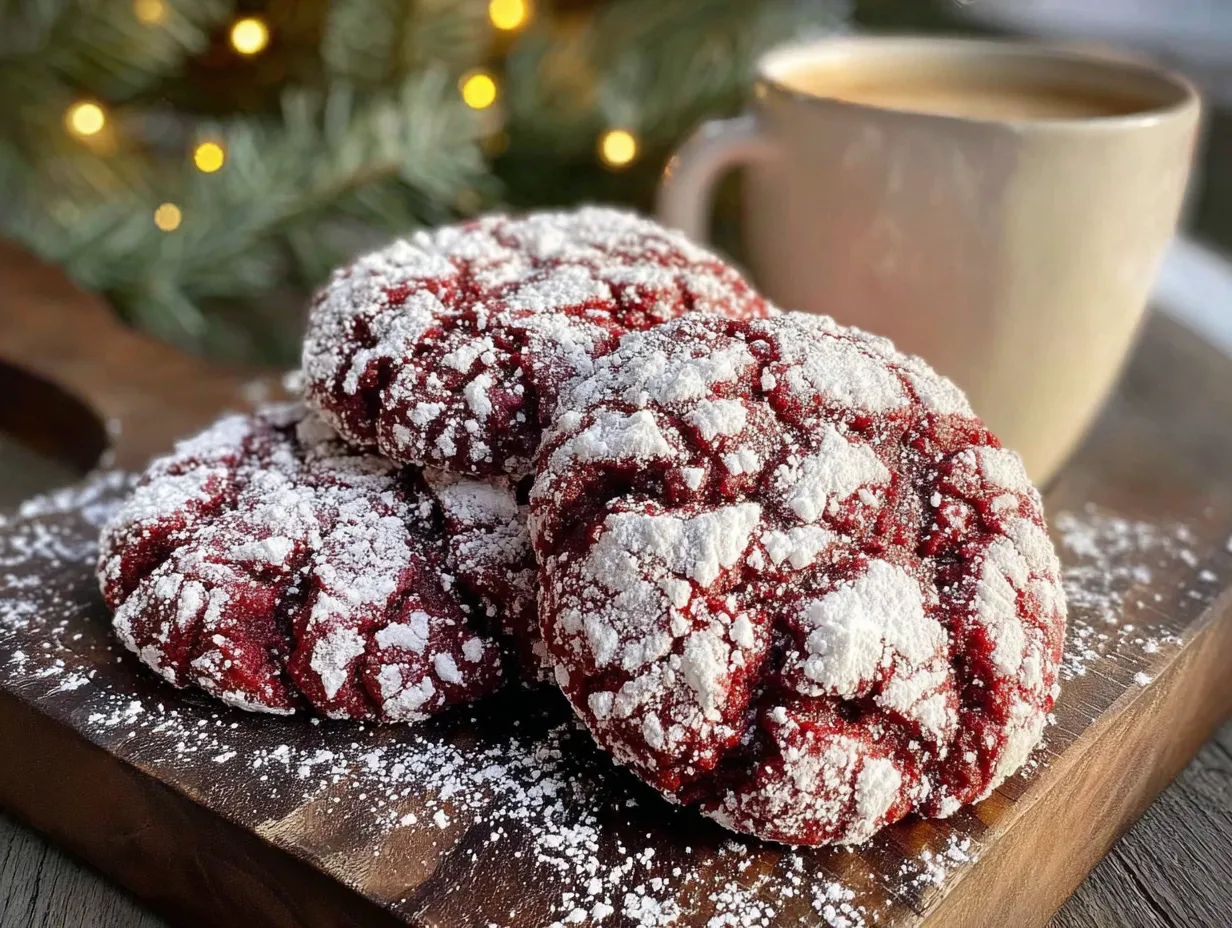
Alright, let’s get to the good part. This is where the magic happens. Follow these steps, and you’ll have a plate of beautiful cookies in under 30 minutes. I promise, it’s almost too easy.
- Preheat Your Oven to 350°F (175°C). This is important. Get your oven hot and ready before you mix the dough. Line your baking sheet with parchment paper or a silicone mat. Do not skip this step—it prevents sticking and makes cleanup a breeze.
- Mix the Wet Ingredients. In your large mixing bowl, whisk together the 2 large eggs, 1/3 cup of vegetable oil, and 1 teaspoon of vanilla extract. Whisk until they are well combined and slightly frothy. This should take about 30 seconds.
- Add the Cake Mix. Pour the entire box of red velvet cake mix into the bowl with the wet ingredients. Use a sturdy spatula or wooden spoon to stir everything together. At first, it will look dry and crumbly. Don’t panic. Keep stirring. Eventually, it will come together into a soft, thick, and slightly sticky dough. It should be uniform in color, with no streaks of dry mix remaining.
- Prepare the Coating. Pour the 1/2 cup of powdered sugar into your small bowl. You want a nice, deep layer for rolling. If you only put a thin layer, the dough won’t pick up enough sugar.
- Scoop and Roll. Using your cookie scoop (or a spoon), scoop out a heaping tablespoon of dough. Roll it between your palms to form a smooth ball. The dough will be a little sticky, so lightly oil your hands if needed. Drop the dough ball into the bowl of powdered sugar and roll it around until it is completely and generously coated. Don’t be shy here. The more sugar, the better the crinkle.
- Place on Baking Sheet. Place the sugared dough balls onto your prepared baking sheet, spacing them about 2 inches apart. They will spread a little, but not too much. I usually fit 12 cookies per sheet.
- Bake. Pop the baking sheet into the preheated oven and bake for 10 to 12 minutes. The cookies are done when they are set around the edges but still look slightly soft and puffy in the center. The tops will have started to crack, revealing the red color underneath. Do not overbake! They will continue to set as they cool.
- Cool. Let the cookies rest on the baking sheet for 5 minutes. This is crucial. They are very fragile right out of the oven. After 5 minutes, carefully transfer them to a wire cooling rack to cool completely. If you try to move them too soon, they will fall apart.
A Note from My First Time: The first time I made these, I was so excited that I pulled them out of the oven and immediately tried to pick one up. It crumbled in my hand. Lesson learned. Be patient. That 5-minute rest on the sheet is non-negotiable. It lets the structure set so you can enjoy them in one piece.
Cooking Tips & Techniques
I’ve made these cookies more times than I can count, and I’ve learned a few things along the way. Here are my best tips to make sure yours turn out perfectly every single time.
- Don’t Overmix the Dough: Once you add the cake mix, stir just until everything is combined. Overmixing can develop the gluten and make the cookies tough instead of tender and fudgy. A few streaks are fine.
- Chill If You Must, But You Don’t Have To: This recipe is designed to be baked immediately. However, if your kitchen is very hot or the dough feels too sticky to handle, pop the bowl in the fridge for 15 minutes. It will make the dough easier to roll, but it’s not necessary.
- The Sugar Coating is Key: Roll the dough balls generously in the powdered sugar. Right before they go into the oven, you can even roll them one more time for an extra-thick, snowy coating. That extra sugar is what creates the dramatic, beautiful cracks.
- Watch the Oven, Not the Clock: All ovens are different. Start checking your cookies at the 9-minute mark. You want them to look puffy and set on the edges, but still soft in the center. If you wait until they look fully “done,” they will be overbaked and dry.
- Use Parchment Paper: I cannot stress this enough. Parchment paper or a silicone mat prevents the cookies from spreading too much and makes cleanup effortless. Greasing the pan can cause them to spread into flat, ugly discs.
- My Biggest Failure: I once tried to double the batch and used a giant bowl. I ended up with a lumpy, uneven dough because I couldn’t mix it properly. Stick to a single batch in a reasonably sized bowl for the best results. Trust me on this one.
Variations & Adaptations
One of the best things about this recipe is how flexible it is. You can change it up to suit any mood, season, or dietary need. Here are some of my favorite ways to make it my own.
- Chocolate Lover’s Dream: Fold in 1/2 cup of white chocolate chips or dark chocolate chunks before rolling. The white chocolate against the red velvet is a classic combination. I did this for a Valentine’s Day party, and they vanished in minutes.
- Cream Cheese Twist: For an even richer cookie, add 2 ounces of softened cream cheese to the wet ingredients. Mix it in until smooth before adding the cake mix. This gives the cookies that classic red velvet tang and makes them incredibly soft.
- Gluten-Free Version: Simply use a gluten-free red velvet cake mix. Most major brands make one now. The texture will be slightly different, but the cookies will still be delicious and chewy.
- Minty Red Velvet: Add 1/2 teaspoon of peppermint extract along with the vanilla. Roll the cookies as directed, and you have a festive, holiday-ready treat. I love making these for Christmas cookie exchanges.
- Spiced Up: Add 1/2 teaspoon of cinnamon and a pinch of cayenne pepper to the dough. The warmth of the spices pairs beautifully with the chocolate, and the cayenne adds a tiny, unexpected kick at the end.
Serving & Storage Suggestions
These cookies are wonderful at room temperature, but they have a few other tricks up their sleeve. Here’s how to serve and store them to keep them at their best.
Serving: These cookies are perfect on their own, but they are also amazing with a cold glass of milk or a warm cup of coffee. For a dessert platter, arrange them alongside other cookies or brownies. The red color makes them a natural star for any holiday spread. You can also serve them slightly warm for an extra-gooey center. Just pop them in the microwave for 10 seconds.
Storage: Store your cooled cookies in an airtight container at room temperature. They will stay soft and fresh for up to 5 days. To keep them from getting stale, place a slice of bread in the container. The bread will absorb the excess moisture and keep the cookies soft. Replace the bread slice every couple of days.
Freezing: These cookies freeze beautifully. You can freeze the baked cookies in a freezer-safe bag for up to 3 months. Thaw them at room temperature when you’re ready to enjoy them. Even better, you can freeze the unbaked dough balls. Roll them in the powdered sugar, place them on a baking sheet, and freeze until solid. Then transfer them to a freezer bag. When you want fresh cookies, just bake them straight from the freezer, adding 2-3 minutes to the baking time.
Nutritional Information & Benefits
Let’s be honest, these are a treat. But knowing a little about what’s in them can help you enjoy them even more. The nutritional values below are estimates and will vary based on the specific brands you use.
Per cookie (based on 24 cookies):
- Calories: ~140
- Fat: 6g
- Carbohydrates: 21g
- Protein: 2g
- Sugar: 14g
Health Highlights: While these are not a health food, the cocoa in the cake mix does contain antioxidants called flavanols, which are good for heart health. The eggs provide a small amount of protein and essential vitamins like B12. If you are watching your sugar intake, you can use a sugar-free cake mix and a sugar substitute like Swerve for the powdered sugar coating.
Dietary Considerations: This recipe contains gluten, eggs, and dairy (depending on the cake mix). For a dairy-free version, use a dairy-free cake mix and check that your powdered sugar is vegan-friendly. For a nut-free version, ensure all your ingredients are processed in a nut-free facility.
Conclusion
So there you have it. My neighbor’s “lazy day” recipe, turned into a 30-minute weeknight wonder. These Quick Red Velvet Crinkle Cookies are proof that you don’t need hours in the kitchen to make something that looks and tastes incredible. They are forgiving, they are fast, and they are absolutely delicious.
I love this recipe because it reminds me that cooking doesn’t have to be complicated to be good. Sometimes the best things come from a box mix and a little bit of powdered sugar. It’s a reminder that we can all be a little kinder to ourselves in the kitchen, especially on busy nights. I hope you make these cookies and they bring a little joy to your day, just like they did for mine.
Now, I want to hear from you! Have you tried these cookies? Did you add any fun twists? Drop a comment below and let me know how they turned out. And if you loved them, please share this post with a friend who needs a quick cookie fix. Happy baking!
Frequently Asked Questions
Can I use a different flavor of cake mix?
Absolutely! While red velvet is the star here, you can use a chocolate fudge, vanilla, or even a strawberry cake mix for a completely different cookie. Just adjust the color and flavor accordingly.
Why are my cookies flat and not crinkly?
This usually happens for two reasons. First, your oven might not be hot enough. Make sure it’s fully preheated to 350°F. Second, you might not have used enough powdered sugar. Roll the dough balls generously to get that perfect crackled top.
Can I make the dough ahead of time?
Yes! You can make the dough, roll it into balls, and store them in the fridge for up to 24 hours before baking. Just roll them in the powdered sugar right before you bake them.
How do I get a deeper red color?
If you want a more vibrant red, add 1/2 to 1 teaspoon of red gel food coloring to the wet ingredients before adding the cake mix. Liquid food coloring works too, but gel gives a more intense color without adding extra liquid.
Can I use butter instead of oil?
I don’t recommend it. Butter has a lower melting point than oil, which causes the cookies to spread too much and become thin and crispy. Oil keeps them soft, thick, and fudgy, which is exactly what we want.
Pin This Recipe!

Quick Red Velvet Crinkle Cookies: Easy 30-Minute Recipe

These Quick Red Velvet Crinkle Cookies are soft, fudgy, and ready in just 30 minutes. Made with a simple boxed cake mix shortcut, they feature a deep red color and a snowy powdered sugar coating, perfect for last-minute cravings or holiday treats.
- Prep Time: 15 minutes
- Cook Time: 12 minutes
- Total Time: 27 minutes
- Yield: 24 servings 1x
- Category: Dessert
- Cuisine: American
Ingredients
- 1 box (15.25 oz) Red Velvet Cake Mix
- 2 large eggs, at room temperature
- 1/3 cup vegetable oil
- 1 teaspoon vanilla extract
- 1/2 cup powdered sugar (for rolling)
Instructions
- Preheat your oven to 350°F (175°C). Line a baking sheet with parchment paper or a silicone mat.
- In a large mixing bowl, whisk together the eggs, vegetable oil, and vanilla extract until well combined and slightly frothy, about 30 seconds.
- Add the entire box of red velvet cake mix to the bowl. Stir with a sturdy spatula or wooden spoon until a soft, thick, and slightly sticky dough forms. Do not overmix.
- Pour the powdered sugar into a small bowl.
- Using a cookie scoop or spoon, scoop out heaping tablespoons of dough. Roll into smooth balls. If sticky, lightly oil your hands.
- Drop each dough ball into the powdered sugar and roll until generously coated.
- Place the sugared dough balls on the prepared baking sheet, spacing them about 2 inches apart.
- Bake for 10 to 12 minutes, until the edges are set and the tops have cracked, but the centers still look soft and puffy. Do not overbake.
- Let the cookies rest on the baking sheet for 5 minutes, then carefully transfer to a wire cooling rack to cool completely.
Notes
For a richer flavor, add 1/4 cup mini chocolate chips. For deeper red color, add a drop or two of red gel food coloring. Ensure powdered sugar is fresh and lump-free; sift if needed. Substitute vegetable oil with applesauce for lower fat, but cookies will be more cake-like. Do not use butter as it causes spreading. Let cookies rest on baking sheet for 5 minutes before moving to prevent crumbling.
Nutrition
- Serving Size: 1 cookie
- Calories: 140
- Sugar: 14
- Sodium: 180
- Fat: 6
- Saturated Fat: 1
- Carbohydrates: 21
- Protein: 2
Keywords: red velvet crinkle cookies, quick cookies, 30-minute cookies, easy dessert, holiday cookies, boxed cake mix cookies


