Love this? Save it for later!
Share the inspiration with your friends
I was standing in line at the post office last December, clutching a package of holiday cards I’d meant to mail a week earlier, when the woman ahead of me started talking to no one in particular about cookies. She was maybe seventy, wearing a coat with a missing button, and she turned around and said, “You know what’s better than a chocolate cookie? A chocolate cookie that looks like it got caught in a snowstorm.” That was it. No introduction. No “excuse me.” Just a stranger named Ruth telling me about her Peppermint Mocha Crinkle Cookies.
I should have been annoyed—I was already running late. But she had my full attention. She described how the powdered sugar cracks as the cookie bakes, creating those little canyons of dark chocolate and white. And then she mentioned the coffee. “Just a pinch of instant espresso,” she said, “wakes the chocolate right up.” I scribbled her instructions on the back of a deposit slip. Honestly, I figured I’d try it once and move on.
But here’s the thing—I’ve made them every December since. These Quick Peppermint Mocha Crinkle Cookies are now my go-to for cookie swaps, neighbor gifts, and those nights when I need something sweet fast. The recipe came from the most unlikely source—a post office line with a woman who looked like she’d rather be anywhere else. And that’s what makes it stick. It’s not complicated. It’s not fussy. It’s just a really good cookie that comes together in under thirty minutes. Maybe you’ve been there—desperate for a holiday cookie that doesn’t require chilling or rolling or any of that nonsense. This one’s for you.
Why You’ll Love This Recipe
Let me tell you why these cookies have earned a permanent spot in my holiday rotation. I’ve tested a lot of crinkle cookie recipes over the years, and this one wins for a few very specific reasons.
- Quick & Easy: From mixing bowl to cooling rack in about 25 minutes. No chilling the dough. No waiting. That’s a weeknight miracle right there.
- Simple Ingredients: You probably have most of these in your pantry right now. No need to hunt down obscure baking supplies at the last minute.
- Perfect for Cookie Swaps: They look impressive with that cracked, snowy top, but they’re secretly one of the easiest cookies you’ll ever make. Everyone thinks you worked way harder than you did.
- Crowd-Pleaser: The combo of chocolate, peppermint, and coffee hits that sweet spot that both kids and adults love. I’ve watched people eat three in a row without blinking.
- Unbelievably Delicious: The edges are slightly crisp, the centers are soft and fudgy, and that peppermint finish keeps you coming back for “just one more.”
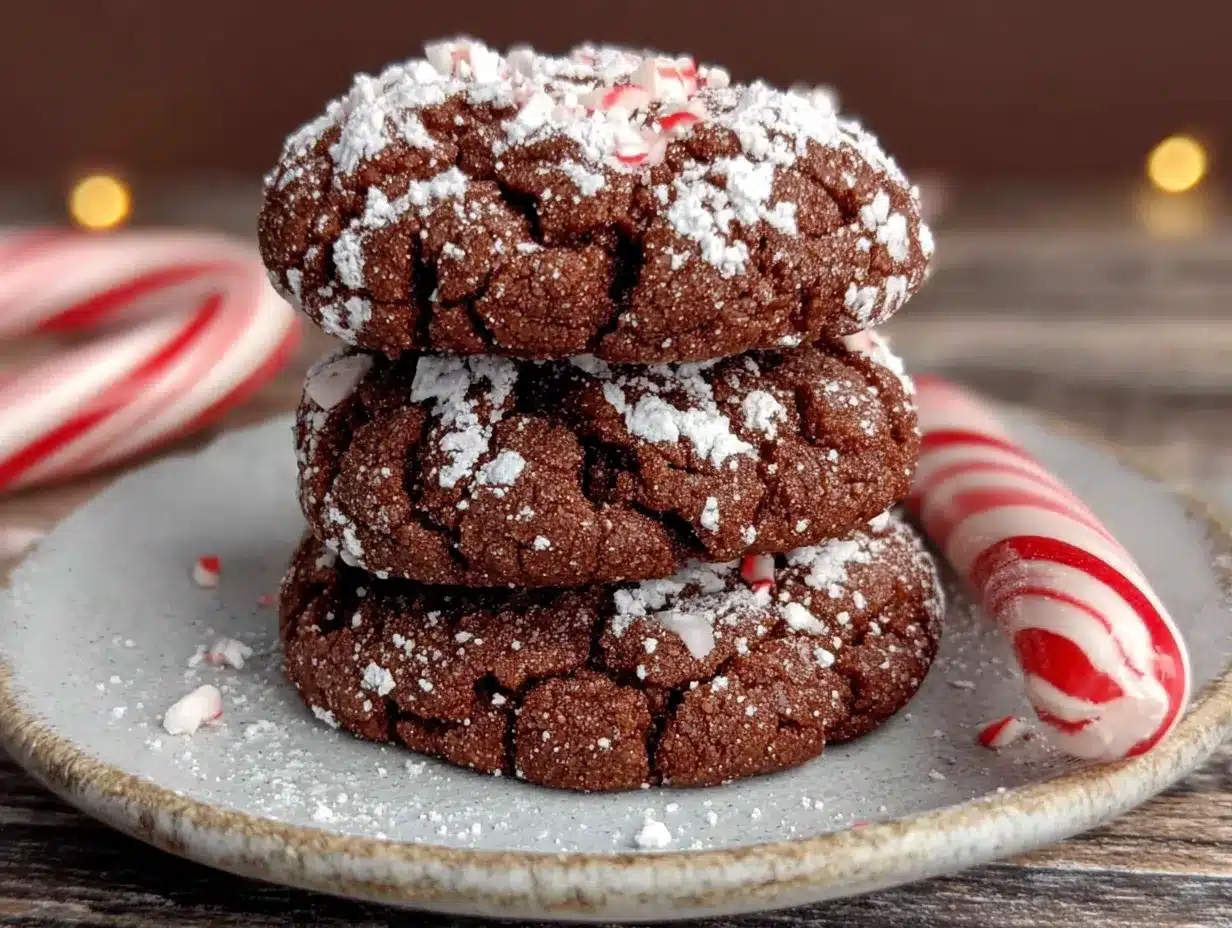
What makes these different from every other crinkle cookie out there? It’s the mocha factor. Most recipes just do chocolate and peppermint, which is fine, but the coffee adds this depth that makes the chocolate taste richer. It’s not a coffee flavor you’ll notice directly—it’s more like the chocolate suddenly got a promotion. Plus, I’ve tweaked the technique so the cracks form perfectly every time. No guesswork, no flat cookies. Just beautiful, bakery-style results from your own kitchen.
This is the kind of cookie that makes you close your eyes after the first bite. It’s comfort food with a little holiday magic, and it comes together fast enough to save you on a hectic Tuesday night.
What Ingredients You Will Need
This recipe uses straightforward ingredients to deliver big flavor without any fuss. Most of these are pantry staples, which is exactly what you want when you’re short on time.
- All-purpose flour: 1 ½ cups (190g). The base of the cookie. No need for anything fancy here.
- Unsweetened cocoa powder: ½ cup (50g). I prefer Hershey’s Special Dark for a deeper chocolate flavor, but regular works fine too.
- Granulated sugar: 1 cup (200g). Adds sweetness and helps create that crinkly top.
- Vegetable oil: ⅓ cup (80ml). Keeps the cookies soft and tender without needing butter. This is what makes them so quick—no waiting for butter to soften.
- Large eggs: 2, at room temperature. They help bind everything together. If you forgot to take them out early, place them in a bowl of warm water for 5 minutes.
- Vanilla extract: 1 teaspoon. Pure vanilla adds warmth. Avoid imitation if you can—it makes a difference.
- Instant espresso powder: 1 tablespoon. This is the secret weapon. It doesn’t make the cookies taste like coffee; it just makes the chocolate taste more like chocolate. Trust me on this.
- Baking powder: 2 teaspoons. Helps the cookies puff up and crack properly.
- Salt: ½ teaspoon. Balances the sweetness and enhances the chocolate.
- Peppermint extract: 1 teaspoon. Use pure peppermint extract, not mint extract. Mint is more like toothpaste; peppermint is the holiday flavor you want.
- Powdered sugar: ½ cup (60g), for rolling. This creates that signature snowy look. You’ll need extra for coating.
- Crushed peppermint candies: ¼ cup (optional, for garnish). Adds a little crunch and extra peppermint punch. I like to crush them myself so the pieces aren’t too fine.
Substitution Guidance: If you don’t have instant espresso, you can use 2 tablespoons of strong brewed coffee, but reduce the oil by 1 tablespoon to compensate. For a gluten-free version, swap the all-purpose flour with a 1:1 gluten-free baking blend. The texture will be slightly different but still delicious. And if peppermint isn’t your thing, try orange extract instead for a chocolate orange twist.
Equipment Needed
You don’t need a fancy kitchen to make these cookies. Here’s what you’ll need:
- Large mixing bowl: For combining the wet and dry ingredients. Any bowl works, but a wide one makes mixing easier.
- Whisk: To sift together the dry ingredients and break up any cocoa clumps.
- Rubber spatula or wooden spoon: For folding the dough together. A spatula is gentler and helps avoid overmixing.
- Measuring cups and spoons: Accurate measurements matter in baking. Use the spoon-and-level method for flour.
- Baking sheet: A standard half-sheet pan works perfectly. Line it with parchment paper for easy cleanup.
- Parchment paper: Non-stick and makes cleanup a breeze. You can use a silicone baking mat instead if you prefer.
- Small bowl: For the powdered sugar. A shallow bowl works best for rolling.
- Cooling rack: Lets the cookies cool evenly and prevents soggy bottoms.
- Cookie scoop (optional): A 1.5-tablespoon scoop ensures uniform cookies. If you don’t have one, use two spoons to portion the dough.
- Rolling pin or zip-top bag: For crushing the peppermint candies. A rolling pin over a bag works great and contains the mess.
I’ve made these cookies using a cheap baking sheet from the grocery store and they turned out just fine. Don’t stress about having the perfect equipment. A sheet pan, a bowl, and a spoon are all you really need.
Preparation Method
Alright, let’s get baking. This whole process takes about 25 minutes from start to finish, so preheat your oven to 350°F (175°C) right now. Line your baking sheet with parchment paper and set it aside.
- Mix the dry ingredients: In a large bowl, whisk together the flour, cocoa powder, baking powder, salt, and instant espresso powder. Make sure there are no lumps—cocoa powder loves to clump. I usually sift it through a fine-mesh strainer if I’m feeling fancy, but whisking vigorously works too.
- Combine the wet ingredients: In a separate bowl, beat the sugar and vegetable oil together until well combined. It’ll look like wet sand. Then add the eggs one at a time, mixing well after each addition. Stir in the vanilla extract and peppermint extract. The mixture should be smooth and slightly glossy.
- Bring it together: Pour the wet ingredients into the dry ingredients and fold gently with a rubber spatula until just combined. Do not overmix—stop as soon as you no longer see streaks of flour. Overmixing will make the cookies tough. The dough will be soft and slightly sticky, which is exactly what you want.
- Chill? No need: This dough doesn’t need to be chilled. That’s the beauty of it. You can scoop and bake immediately. If the dough feels too sticky to handle, let it rest for 5 minutes—the flour will absorb some moisture and it’ll firm up.
- Shape and coat: Place the powdered sugar in a small shallow bowl. Using a cookie scoop or your hands, portion the dough into 1.5-tablespoon balls (about 20g each). Roll each ball between your palms until smooth, then drop it into the powdered sugar. Roll it around to coat generously. Don’t be shy—the sugar is what creates those beautiful cracks. Place the coated balls on the prepared baking sheet, spacing them about 2 inches apart. They will spread, so give them room.
- Bake: Bake for 10-12 minutes. The cookies should look puffed and cracked, with the edges set but the centers still slightly soft. They will continue to set as they cool. If you overbake them, they’ll lose that fudgy center. I start checking at 10 minutes—when the kitchen smells like a coffee shop and the tops look like a cracked desert floor, they’re done.
- Cool: Let the cookies cool on the baking sheet for 5 minutes. This is important—they’re fragile right out of the oven. After 5 minutes, transfer them to a wire rack to cool completely. If you’re adding crushed peppermint, sprinkle it on right after you take them out of the oven while the tops are still slightly tacky.
Sensory cues to watch for: The dough should be soft but not runny. When you roll it in powdered sugar, it should look like a snowball. During baking, you’ll see the white sugar crack open to reveal dark chocolate underneath—that’s the magic moment. The cookies should smell like chocolate, coffee, and peppermint all at once.
Troubleshooting: If your cookies didn’t crack, you probably didn’t coat them heavily enough in powdered sugar, or the dough was too dry. Add a teaspoon of milk next time. If they spread too much, your dough was too warm or your baking powder was old. Check the expiration date.
Cooking Tips & Techniques
I’ve made these cookies at least twenty times, and I’ve learned a few things the hard way. Let me save you the trouble.
Don’t skip the espresso powder. I know it seems like an extra step, but it’s not optional. Coffee and chocolate are best friends. The espresso doesn’t make the cookies taste like coffee—it deepens the chocolate flavor and adds complexity. I once forgot to add it, and the cookies tasted flat. Never again.
The powdered sugar coating is everything. This is where most people mess up. You need a thick, even coating. Roll each dough ball until it’s completely white, then roll it again. The sugar creates the crust that cracks as the cookie expands in the oven. If you skimp, you’ll get pale cookies with minimal cracks. Go heavy-handed here.
Room temperature eggs matter. Cold eggs will seize the oil and make the dough difficult to mix. If you’re in a hurry, place the eggs in a bowl of warm water for 5 minutes. It works every time.
Watch the bake time closely. These cookies go from perfect to overdone in about 60 seconds. I set a timer for 10 minutes and check them. The edges should be set, but the centers should still look slightly underdone. They’ll finish setting on the hot baking sheet. Trust the carryover cooking.
Multitasking tip: While the first batch bakes, roll the remaining dough balls and coat them in sugar. That way, as soon as the first sheet comes out, the second is ready to go in. This keeps the process moving and saves time.
My biggest failure: The first time I made these, I used mint extract instead of peppermint extract. Big mistake. The cookies tasted like toothpaste. Learn from my error—peppermint extract is sweet and festive; mint extract is for mojitos and gum. Read the label carefully.
Variations & Adaptations
One of the best things about this recipe is how flexible it is. Here are some variations I’ve tried and loved:
Double Chocolate Peppermint: Fold in ½ cup of dark chocolate chips or chunks before baking. The extra chocolate makes them even richer, and the chunks create little melty pockets. I did this for a cookie swap last year and they disappeared first.
Gluten-Free Version: Substitute the all-purpose flour with a 1:1 gluten-free baking blend that contains xanthan gum. I’ve used King Arthur Measure for Measure with great results. The texture is slightly less tender, but the flavor is still spot on. Just make sure to let the dough rest for 10 minutes before baking to allow the gluten-free flour to hydrate.
White Chocolate Drizzle: After the cookies cool, drizzle them with melted white chocolate and a sprinkle of crushed candy canes. It adds a beautiful presentation and an extra layer of sweetness. This is my go-to when I’m giving them as gifts.
Spicy Mocha Version: Add ½ teaspoon of cinnamon and a pinch of cayenne pepper to the dry ingredients. The warmth of the spices pairs beautifully with the chocolate and coffee. It’s unexpected but really good—like Mexican hot chocolate in cookie form.
Vegan Adaptation: Replace the eggs with two flax eggs (2 tablespoons ground flaxseed mixed with 6 tablespoons water, let sit for 5 minutes). Use a vegan-friendly sugar and ensure your chocolate is dairy-free. The texture will be a bit more cake-like, but the flavor holds up well.
Serving & Storage Suggestions
These cookies are best served slightly warm, when the centers are still soft and the chocolate is at its most intense. Let them cool for about 10 minutes after baking, then grab one while it’s still warm. Pair it with a cold glass of milk or a hot peppermint mocha—yes, go full theme.
For presentation, arrange them on a festive plate or in a tin lined with parchment paper. The contrast between the snowy white tops and the dark chocolate cracks is striking. If you added the crushed peppermint garnish, they look even more holiday-ready.
Storage: Store the cookies in an airtight container at room temperature for up to 5 days. Place a slice of bread in the container to keep them soft—the cookies will absorb the moisture and stay tender. Replace the bread every other day if they last that long.
Freezing: These cookies freeze beautifully. You can freeze the baked cookies in a single layer on a baking sheet, then transfer them to a freezer-safe bag for up to 3 months. Thaw at room temperature for about 30 minutes before serving. Alternatively, freeze the unbaked dough balls coated in powdered sugar. Place them on a baking sheet and freeze until solid, then transfer to a bag. Bake straight from frozen, adding 2-3 minutes to the bake time. This is my favorite make-ahead trick for holiday baking.
Flavor development: Honestly, these cookies taste even better the next day. The flavors meld together and the peppermint becomes more pronounced. If you can resist eating them all on day one, you’ll be rewarded on day two.
Nutritional Information & Benefits
Let’s be real—these are cookies, not health food. But here’s the estimated nutritional breakdown per cookie (based on 24 cookies):
- Calories: 135
- Fat: 6g
- Carbohydrates: 20g
- Protein: 2g
- Sugar: 14g
- Fiber: 1g
Health highlights: The cocoa powder is rich in antioxidants called flavonoids, which can support heart health. The peppermint extract may aid digestion—so consider these a post-dinner treat that helps settle your stomach. The instant espresso provides a small amount of caffeine, enough to give you a tiny energy boost without keeping you up at night.
Dietary considerations: These cookies contain gluten, eggs, and dairy (if using butter). For a dairy-free version, use a dairy-free baking stick or coconut oil. For a gluten-free version, see the variation above. They are nut-free as written, making them safe for school bake sales and parties.
My take: I believe in balance. These cookies are a treat, and there’s nothing wrong with that. Enjoy them mindfully, share them with people you love, and don’t feel guilty about having a second one. Life is short—eat the cookie.
Conclusion
These Quick Peppermint Mocha Crinkle Cookies are the kind of recipe that saves the day when you need something fast, festive, and genuinely delicious. They come together in under half an hour, use ingredients you probably already have, and look like you spent way more effort than you actually did. That’s my favorite kind of recipe.
I love that this recipe came from a stranger in a post office line. It reminds me that good ideas can come from anywhere—you just have to be willing to listen. Ruth was right: a chocolate cookie that looks like it got caught in a snowstorm is exactly what the holidays need.
I’d love to hear how these turn out for you. Did you add the crushed peppermint? Did you try the white chocolate drizzle? Drop a comment below and let me know. And if you have a recipe that came from an unexpected source, share that too. Some of the best recipes have the best stories.
Now go preheat your oven. Your new favorite holiday cookie is waiting.
Frequently Asked Questions
Can I make these cookies ahead of time?
Absolutely. You can bake them up to 3 days in advance and store them in an airtight container. They actually taste better on day two. You can also freeze the unbaked dough balls for up to 3 months and bake them straight from frozen.
Why didn’t my cookies crack?
There are two common reasons. First, you didn’t coat the dough balls heavily enough in powdered sugar. You need a thick, even layer. Second, your dough might have been too dry. Make sure you’re measuring your flour correctly—spoon it into the cup and level it off, don’t scoop directly from the bag.
Can I use butter instead of oil?
You can, but the texture will be different. Oil keeps these cookies soft and tender without needing to cream butter and sugar. If you use butter, you’ll need to cream it with the sugar for 2-3 minutes, which adds an extra step. The cookies will also be slightly denser and less fudgy.
Is the peppermint extract optional?
You can leave it out if you want plain mocha crinkle cookies. But the peppermint is what makes these festive and gives them that holiday feel. If you’re not a fan of peppermint, try orange extract or almond extract instead for a different flavor profile.
How do I crush peppermint candies without making a mess?
Place the candies in a sturdy zip-top bag and seal it. Use a rolling pin or the bottom of a heavy pan to gently crush them. You can also pulse them in a food processor, but be careful not to turn them into powder—you want small pieces, not dust.
Pin This Recipe!

Quick Peppermint Mocha Crinkle Cookies

These Quick Peppermint Mocha Crinkle Cookies are a fast, festive treat that comes together in under 30 minutes. With a fudgy chocolate center, a snowy powdered sugar coating, and a hint of peppermint and espresso, they’re perfect for cookie swaps, holiday gifts, or a quick weeknight dessert.
- Prep Time: 15 minutes
- Cook Time: 12 minutes
- Total Time: 27 minutes
- Yield: 24 servings 1x
- Category: Dessert
- Cuisine: American
Ingredients
- 1 ½ cups (190g) all-purpose flour
- ½ cup (50g) unsweetened cocoa powder (preferably Hershey’s Special Dark)
- 1 cup (200g) granulated sugar
- ⅓ cup (80ml) vegetable oil
- 2 large eggs, at room temperature
- 1 teaspoon vanilla extract
- 1 tablespoon instant espresso powder
- 2 teaspoons baking powder
- ½ teaspoon salt
- 1 teaspoon peppermint extract
- ½ cup (60g) powdered sugar (for rolling, plus extra as needed)
- ¼ cup crushed peppermint candies (optional, for garnish)
Instructions
- Preheat oven to 350°F (175°C). Line a baking sheet with parchment paper.
- In a large bowl, whisk together flour, cocoa powder, baking powder, salt, and instant espresso powder until no lumps remain.
- In a separate bowl, beat together granulated sugar and vegetable oil until well combined. Add eggs one at a time, mixing well after each. Stir in vanilla extract and peppermint extract until smooth and glossy.
- Pour the wet ingredients into the dry ingredients and fold gently with a rubber spatula until just combined. Do not overmix. The dough will be soft and slightly sticky.
- Place powdered sugar in a small shallow bowl. Using a cookie scoop or your hands, portion dough into 1.5-tablespoon balls (about 20g each). Roll each ball between your palms until smooth, then coat generously in powdered sugar, rolling until completely white.
- Place coated dough balls on the prepared baking sheet, spacing them about 2 inches apart.
- Bake for 10-12 minutes, until cookies are puffed and cracked, with edges set but centers still soft. If using crushed peppermint, sprinkle on top immediately after removing from oven.
- Let cookies cool on the baking sheet for 5 minutes, then transfer to a wire rack to cool completely.
Notes
For best results, coat dough balls heavily in powdered sugar to ensure a cracked top. Use pure peppermint extract, not mint extract. If dough is too sticky, let it rest for 5 minutes. Cookies taste even better the next day. Store in an airtight container at room temperature for up to 5 days, or freeze for up to 3 months.
Nutrition
- Serving Size: 1 cookie
- Calories: 135
- Sugar: 14
- Sodium: 95
- Fat: 6
- Saturated Fat: 1
- Carbohydrates: 20
- Fiber: 1
- Protein: 2
Keywords: peppermint mocha crinkle cookies, easy holiday cookies, no-chill cookies, chocolate peppermint cookies, quick cookie recipe