Love this? Save it for later!
Share the inspiration with your friends
I was standing in the baking aisle of a random grocery store last October when the smell of orange extract hit me — and suddenly I was seven years old in my Tía Carmen’s tiny kitchen in Phoenix, watching her shape little bone-shaped pieces of dough by hand. She’d been gone five years by then, and I hadn’t made pan de muerto once since. Not because I didn’t want to, but because her version took all day — the sponge, the double rise, the careful braiding. I didn’t have that kind of time anymore, honestly. I had a job and a toddler and a husband who worked late. But I stood there holding that little bottle of orange extract like it might unlock something, and I thought: maybe I could cheat a little. Maybe she’d forgive me.
So I bought the extract, went home, and started testing. The first batch was a disaster — dry, dense, nothing like the soft, fragrant bread I remembered. I mean, I almost cried over it, which is ridiculous because it’s just bread, right? But it wasn’t just bread. It was the smell of her kitchen on November 1st. It was the way she’d let me eat the leftover glaze straight from the bowl. It was the only time all year she let me stay up past midnight to help her arrange the ofrenda. So I kept testing. I swapped butter for shortening, cut the rise time in half, added a little more orange blossom water than any recipe would call for. And finally — finally — I got it. Soft, tender, fragrant, and on the table in under two hours. You know that feeling when something tastes exactly like a memory you were scared you’d lost? That’s this bread.
This quick pan de muerto with orange blossom glaze isn’t traditional, I’ll tell you that straight up. But it is delicious, and it is doable on a Tuesday night when you’re tired and craving something that connects you to something bigger than your to-do list. Maybe you’ve been there too — wanting to honor a tradition but not having the hours it used to take. This one’s for you. And for Tía Carmen, wherever she is.
Why You’ll Love This Recipe
Let me tell you why this quick pan de muerto has become my most-requested fall recipe — and I’ve tested it on some tough crowds, including my neighbor Rosa who grew up in Mexico City and is very picky about her Día de Muertos bread.
- Quick & Easy: Traditional pan de muerto takes 4 to 6 hours with all those rises. This version goes from mixing bowl to your table in under 2 hours. That’s weeknight magic, my friends.
- Simple Ingredients: No trips to a specialty market. You probably have flour, butter, eggs, and sugar in your kitchen right now. The only special item is orange blossom water, and you can find that at most grocery stores or online for under $8.
- Perfect for Día de Muertos: Whether you’re building an ofrenda or just want to honor the tradition, this bread fits right in. It’s also amazing for fall brunches, Thanksgiving morning, or any time you want something that smells like celebration.
- Crowd-Pleaser: I’ve served this to kids who usually don’t like “weird bread” and adults who grew up eating the real deal. Everyone goes back for seconds. The orange blossom glaze is honestly addictive.
- Unbelievably Delicious: The texture is soft and pillowy, not dry like some quick breads can be. The orange blossom glaze soaks in just enough to make every bite fragrant and sweet without being overwhelming.
What makes this different from other quick pan de muerto recipes? It’s the technique. I use a warm milk activation method that jumpstarts the yeast without needing a separate sponge. Plus, I add the orange blossom water in two stages — some in the dough, some in the glaze — so the flavor builds and lingers. It’s not just another version. It’s the version I wish I’d had when I was standing in that grocery store aisle, missing my tía and wanting her bread.
This recipe is comfort food with soul. It’s faster, yes, but it doesn’t skimp on the feeling. That first bite — warm, soft, fragrant — makes you close your eyes. And isn’t that what we’re all chasing?
What Ingredients You Will Need
This recipe uses simple, mostly pantry ingredients to deliver that signature soft texture and floral orange flavor. Here’s what you’ll need and why each one matters.
For the Dough
- All-purpose flour, 3 cups (360g) — I’ve tested this with bread flour too, but all-purpose gives a softer, more tender crumb. King Arthur Flour is my go-to for consistent results.
- Active dry yeast, 2 ¼ teaspoons (one packet) — Instant yeast works too, just skip the activation step and mix it straight into the flour. Look for Red Star or Fleischmann’s for reliability.
- Warm milk, ½ cup (120ml) — Whole milk gives the richest texture, but 2% works fine. Heat it to about 110°F — warm but not hot, like a comfortable bath.
- Granulated sugar, ⅓ cup (65g) — This feeds the yeast and sweetens the bread. Don’t reduce it; the sugar is structural here, not just for taste.
- Unsalted butter, 4 tablespoons (56g), softened — Salted butter works if you reduce the added salt slightly. Let it come to room temperature for easier mixing.
- Large eggs, 2, room temperature — Cold eggs will slow down your dough. If you forgot to take them out, place them in warm water for 5 minutes.
- Orange zest, 1 tablespoon (from about 1 large orange) — Fresh zest only, please. The dried stuff won’t give you that bright, essential oil flavor.
- Orange blossom water, 1 tablespoon — This is the star. I use Nielsen-Massey or Sadaf brand. Don’t skip it — there’s no substitute that captures the same floral note.
- Salt, ½ teaspoon — Fine sea salt dissolves better than kosher in this small amount.
For the Orange Blossom Glaze
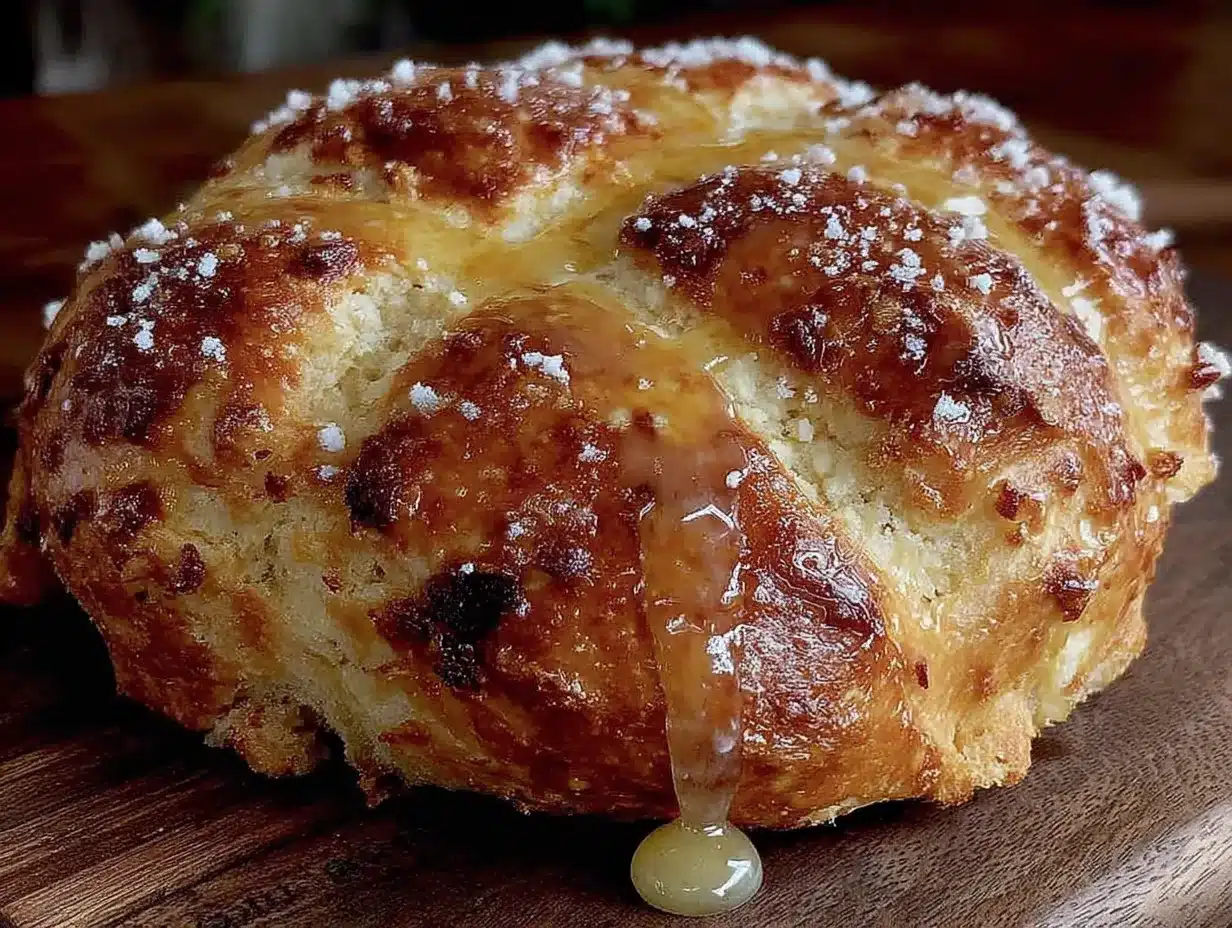
- Powdered sugar, 1 cup (120g) — Sift it if it’s lumpy. Nobody wants crunchy glaze.
- Orange blossom water, 2 tablespoons — This is where the second layer of flavor comes in. Yes, you’ll use the whole bottle making this recipe. Worth it.
- Fresh orange juice, 1 tablespoon (from that same orange you zested) — Adds brightness and thins the glaze to the right consistency.
- Pinch of salt — Balances the sweetness. Trust me on this.
For Decoration (Optional but Traditional)
- Extra granulated sugar, about ¼ cup — For sprinkling on top after glazing. Traditional pan de muerto has that sparkly, crunchy coating.
- Orange zest, for garnish — A little color and extra fragrance on top.
Substitution Notes: Need this dairy-free? Use melted coconut oil instead of butter and oat milk instead of dairy milk. The texture will be slightly different — a little more cake-like — but still delicious. For a gluten-free version, I recommend Cup4Cup gluten-free flour blend, but expect a denser crumb. And if you absolutely cannot find orange blossom water, you can use 1 teaspoon orange extract mixed with 2 tablespoons water for the glaze, but honestly, it won’t be the same. The floral quality is what makes pan de muerto special.
Equipment Needed
You don’t need a fancy kitchen for this recipe, and that’s by design. Here’s what you’ll actually use:
- Large mixing bowl — Any big bowl works. I use a ceramic one because it retains warmth better than metal, but glass or plastic is fine.
- Stand mixer with dough hook (optional but helpful) — You can absolutely knead by hand. I did for years. But if you have a KitchenAid, let it do the work for 8 minutes on medium-low speed.
- Measuring cups and spoons — For accuracy, especially with the yeast and orange blossom water. I’ve ruined batches by eyeballing.
- Kitchen scale — Not required, but highly recommended for consistent results. Flour volume can vary wildly by how you scoop.
- Baking sheet — A standard half-sheet pan works. Line it with parchment paper for easy cleanup.
- Small saucepan — For warming the milk. Or use a microwave-safe bowl in 15-second bursts.
- Whisk — For mixing the glaze and for combining dry ingredients.
- Pastry brush (optional) — For applying the glaze evenly. A spoon works too, but a brush gives that nice, even coating.
- Clean kitchen towel — For covering the dough while it rises. I use an old flour sack towel, but any lightweight cloth works.
If you don’t have a stand mixer, no worries. Kneading by hand takes about 10 to 12 minutes — you’re looking for a smooth, elastic dough that springs back when you poke it. It’s actually kind of meditative. Put on a podcast and enjoy the process.
Preparation Method
Let’s make some bread. I’ve broken this down so even a beginner can follow along without stress. Total active time is about 30 minutes; the rest is rising and baking.
Step 1: Activate the Yeast (5 minutes)
Warm your ½ cup of milk to about 110°F — warm to the touch but not hot. If it’s too hot, it’ll kill the yeast. Too cold, and the yeast won’t wake up. Pour the warm milk into your mixing bowl, add 1 tablespoon of the sugar and all the yeast. Stir gently and let it sit for 5 minutes. You should see foam and bubbles on top — that means your yeast is alive and happy. If nothing happens after 10 minutes, your yeast is dead. Start over with fresh yeast.
Step 2: Mix the Dough (5 minutes)
To the foamy yeast mixture, add the remaining sugar, softened butter, eggs, orange zest, orange blossom water, and salt. Stir until everything looks like a lumpy, fragrant mess — that’s normal. Add the flour, one cup at a time, stirring with a wooden spoon or your dough hook. The dough will be shaggy and sticky at first. Don’t panic, don’t add more flour yet.
Step 3: Knead (8 to 10 minutes)
If using a stand mixer, knead on medium-low speed for 8 minutes. The dough should pull away from the sides of the bowl and feel smooth and slightly tacky — like a post-it note that’s lost some of its stick. If kneading by hand, turn the dough onto a lightly floured surface and push, fold, and turn for 10 to 12 minutes. You’ll know it’s ready when you can stretch a small piece thin enough to see light through without it tearing (that’s the windowpane test).
Step 4: First Rise (30 to 40 minutes)
Place the dough in a lightly greased bowl, cover with a clean kitchen towel, and set it in a warm spot. I put mine in the microwave (turned off) with a cup of hot water next to it. Let it rise until doubled in size — about 30 to 40 minutes. If your kitchen is cold, it might take closer to 50 minutes. Be patient.
Step 5: Shape the Bread (10 minutes)
Punch down the dough gently to release the air. Turn it onto a lightly floured surface. Divide it into two pieces — one larger piece (about two-thirds of the dough) for the base, and one smaller piece (one-third) for the decorations.
Shape the large piece into a round ball and place it on your parchment-lined baking sheet. Now for the traditional bone shapes: divide the smaller piece into 4 to 6 equal parts. Roll each into a rope about 4 inches long. These are your “bones.” Arrange them on top of the round loaf in a crisscross pattern, like a skull’s crossbones. You can also make a small round ball for the top center — it represents a skull. Don’t stress about perfection. Tía Carmen’s loaves were always a little lopsided, and they tasted amazing.
Step 6: Second Rise (20 minutes)
Cover the shaped loaf with your towel and let it rise again for 20 minutes. It won’t double this time, but it should puff up noticeably. Meanwhile, preheat your oven to 350°F (175°C).
Step 7: Bake (20 to 25 minutes)
Bake the bread on the middle rack for 20 to 25 minutes, until the top is golden brown and the loaf sounds hollow when you tap the bottom. If the top is browning too fast (after about 15 minutes), tent loosely with foil. Let it cool on the baking sheet for 10 minutes, then transfer to a wire rack.
Step 8: Make the Glaze (5 minutes)
While the bread is still warm (but not hot), whisk together the powdered sugar, orange blossom water, orange juice, and salt. It should be thick but pourable — like thin pancake batter. If it’s too thick, add a few drops more orange juice. Too thin, add a little more powdered sugar.
Step 9: Glaze and Serve (5 minutes)
Brush or spoon the glaze over the warm bread. It’ll soak in and create that signature soft, fragrant crust. Sprinkle with extra granulated sugar and orange zest if you’re feeling fancy. Serve warm or at room temperature. The glaze gets a little crunchy as it sets, which is my favorite part.
Cooking Tips & Techniques
I’ve made this recipe probably twenty times now, and I’ve learned some things the hard way. Let me save you the trouble.
Don’t skip the warm milk step. I know it’s tempting to just dump everything together and hope for the best, but that 5-minute yeast activation is what makes this quick bread actually work. Without it, you’ll end up with a dense, sad disc that tastes more like a biscuit than pan de muerto. I learned this the hard way on a Tuesday night when I was too impatient to wait. Never again.
Watch your liquid ratios. Humidity affects flour absorption. If your dough feels dry and crumbly, add a tablespoon of warm milk. If it’s sticking to everything like glue, add a tablespoon of flour. The dough should be soft and slightly tacky but not wet. Trust the feel more than the exact measurements — flour varies by brand and season.
Use room temperature eggs. Cold eggs straight from the fridge will seize up your butter and make the dough stiff and hard to knead. If you forgot to set them out, place them in a bowl of warm water for 5 minutes before cracking. Same goes for the butter — softened, not melted. Melted butter changes the texture completely.
The glaze timing matters. Apply the glaze while the bread is still warm but not hot. If it’s too hot, the glaze will run right off and pool on your baking sheet. Too cold, and it won’t soak in at all. Aim for that 10-minute mark after it comes out of the oven. That sweet spot gives you a soft, slightly sticky top that’s absolutely perfect.
Make ahead tip for busy people: You can prepare the dough through step 5 (shaping), then cover and refrigerate overnight. The next day, let it sit at room temperature for 30 minutes, then proceed with the second rise and baking. This actually develops more flavor, like a slow-fermented bread. I do this all the time for Día de Muertos morning.
Variations & Adaptations
One of the best things about this recipe is how flexible it is. Here are some ways I’ve adapted it over the years:
Traditional Spiced Version
Add 1 teaspoon of anise seed and ½ teaspoon of cinnamon to the flour mixture. This is how my neighbor Rosa’s family makes it, and the anise gives it this warm, licorice-like undertone that pairs beautifully with the orange blossom. Toast the anise seeds lightly in a dry pan first to release their oils.
Chocolate Orange Twist
Fold ½ cup of mini chocolate chips into the dough after kneading. Use dark chocolate chips (60% cacao or higher) so they don’t overwhelm the orange blossom. The combo tastes like those fancy chocolate oranges you see around the holidays, but better because it’s warm bread.
Vegan Version
Substitute the butter with vegan butter or coconut oil, use flax eggs (1 tablespoon ground flaxseed + 3 tablespoons water per egg), and replace the milk with oat milk. The texture will be slightly denser and more cake-like, but the flavor is still spot-on. I tested this for a friend who’s vegan, and she said it was the best pan de muerto she’d had since going plant-based.
Gluten-Free Adaptation
Use a 1:1 gluten-free baking flour blend (I like Bob’s Red Mill or Cup4Cup). Add 1 teaspoon of xanthan gum if your blend doesn’t already include it. The dough will be stickier and harder to shape — wet your hands with water to make it easier. Bake for the same time, but check at 20 minutes. The texture won’t be as airy, but the flavor is still wonderful.
Extra Floral Version
Add 1 tablespoon of dried lavender buds (culinary grade) to the flour mixture and use rose water instead of orange blossom water for the glaze. This makes a beautiful, fragrant loaf that’s perfect for spring celebrations. I made this for a friend’s baby shower and people couldn’t stop talking about it.
Serving & Storage Suggestions
Pan de muerto is best served warm, within a few hours of baking. The glaze is soft and the bread is pillowy — it’s basically heaven in bread form. Here’s how to make the most of it:
Serving Temperature: Serve at room temperature or slightly warm. If it’s been a few hours, pop it in a 300°F oven for 5 minutes to refresh the texture. Microwaving works in a pinch, but it’ll make the bread a little chewy.
What to Serve With It: A cup of Mexican hot chocolate is the classic pairing — the cinnamon and chocolate complement the orange blossom beautifully. Coffee with a splash of milk works too. For a full Día de Muertos spread, serve it alongside atole (a warm corn-based drink) or café de olla (spiced coffee).
Storage: Store leftover bread in an airtight container at room temperature for up to 3 days. Do not refrigerate — it’ll dry out the bread and make it stale faster. If you live in a humid climate, keep it in a paper bag instead of plastic to prevent the glaze from getting sticky.
Freezing Instructions: This bread freezes beautifully. Wrap the unglazed, cooled loaf tightly in plastic wrap, then foil, and freeze for up to 3 months. When you’re ready to serve, thaw at room temperature, then warm in a 300°F oven for 10 minutes. Make the glaze fresh and apply it while the bread is warm. Nobody will know it wasn’t made that day.
How Flavors Develop: Honestly, this bread is best the day it’s made — that fresh-from-the-oven magic is hard to beat. But day-old pan de muerto makes incredible French toast or bread pudding. Slice it thick, soak it in a custard of eggs, milk, and a splash of orange blossom water, and fry it up. Breakfast of champions.
Nutritional Information & Benefits
Let’s be real — pan de muerto is a treat, not a health food. But here’s what you should know about what’s in each serving:
Estimated Per Serving (1/8 of the loaf): Calories: 285 | Fat: 8g | Carbohydrates: 48g | Protein: 6g | Fiber: 1g | Sugar: 22g
Health Highlights: The orange zest and orange blossom water provide a small amount of antioxidants and vitamin C. The eggs add protein and choline, which supports brain health. And honestly? There’s something to be said for the mental health benefits of making and sharing traditional foods. Connecting to culture and memory through cooking is a form of self-care that doesn’t show up on any nutrition label.
Dietary Considerations: This recipe contains gluten, dairy, and eggs. For allergen-friendly versions, see the variations section above. This bread is not low-carb or keto-friendly — it’s meant to be enjoyed as part of a celebration, not as everyday fuel.
My personal take? Food like this is about more than calories. It’s about showing up for the traditions that matter, even when you’re busy. One slice of pan de muerto with your morning coffee on November 2nd is a way of saying, “I remember you. I honor you. I’m still here, making your bread.” That’s worth every single carb.
Conclusion
This quick pan de muerto with orange blossom glaze is my love letter to Tía Carmen, and to anyone who’s ever wanted to keep a tradition alive but didn’t think they had the time. It’s not the version she made — hers took all day and tasted like pure patience. But it’s the version I can make on a Tuesday night after work, with a toddler pulling at my pants and a sink full of dishes. And you know what? It still tastes like love.
I hope you make this bread for your own people — whether that’s your family, your friends, or just yourself on a quiet evening. Customize it however you want. Add the anise, skip the glaze, shape it into a simple round loaf. The point isn’t perfection. The point is that you made it. That you took the time to connect with something bigger than your to-do list.
If you try this recipe, I’d love to hear about it. Drop a comment below and tell me who you’re remembering when you take that first bite. Share a photo if you’re feeling brave. And if you have your own twist on pan de muerto, I’m all ears — traditions evolve, and that’s beautiful.
Go make some bread. Your people are waiting.
Frequently Asked Questions
Can I make this pan de muerto without a stand mixer?
Absolutely. I made this recipe by hand for years before I got my stand mixer. Kneading by hand takes about 10 to 12 minutes — just push, fold, and turn until the dough is smooth and elastic. It’s actually a great arm workout and very meditative.
Where can I find orange blossom water?
Most well-stocked grocery stores carry it in the international or baking aisle. Look for brands like Sadaf, Cortas, or Nielsen-Massey. You can also find it at Middle Eastern markets or order it online. A bottle costs around $6 to $8 and lasts for months.
Can I use orange extract instead of orange blossom water?
You can, but it won’t taste the same. Orange blossom water has a delicate floral flavor that’s completely different from orange extract. If you’re in a pinch, use 1 teaspoon orange extract mixed with 2 tablespoons water for the glaze. The bread will still be good, just not authentically pan de muerto.
Why didn’t my dough rise?
Most likely your yeast was dead or your milk was too hot. Always check the expiration date on your yeast, and make sure your milk is warm (about 110°F) but not hot. If you’re unsure, test the milk on your wrist — it should feel like a comfortable bath, not a hot tub.
Can I freeze the dough instead of the baked bread?
Yes! After shaping the loaf (step 5), wrap it tightly in plastic wrap and freeze for up to 1 month. When you’re ready to bake, thaw it in the refrigerator overnight, then let it come to room temperature for 30 minutes before the second rise. Bake as directed. This is my favorite make-ahead trick for busy weeks.
Pin This Recipe!
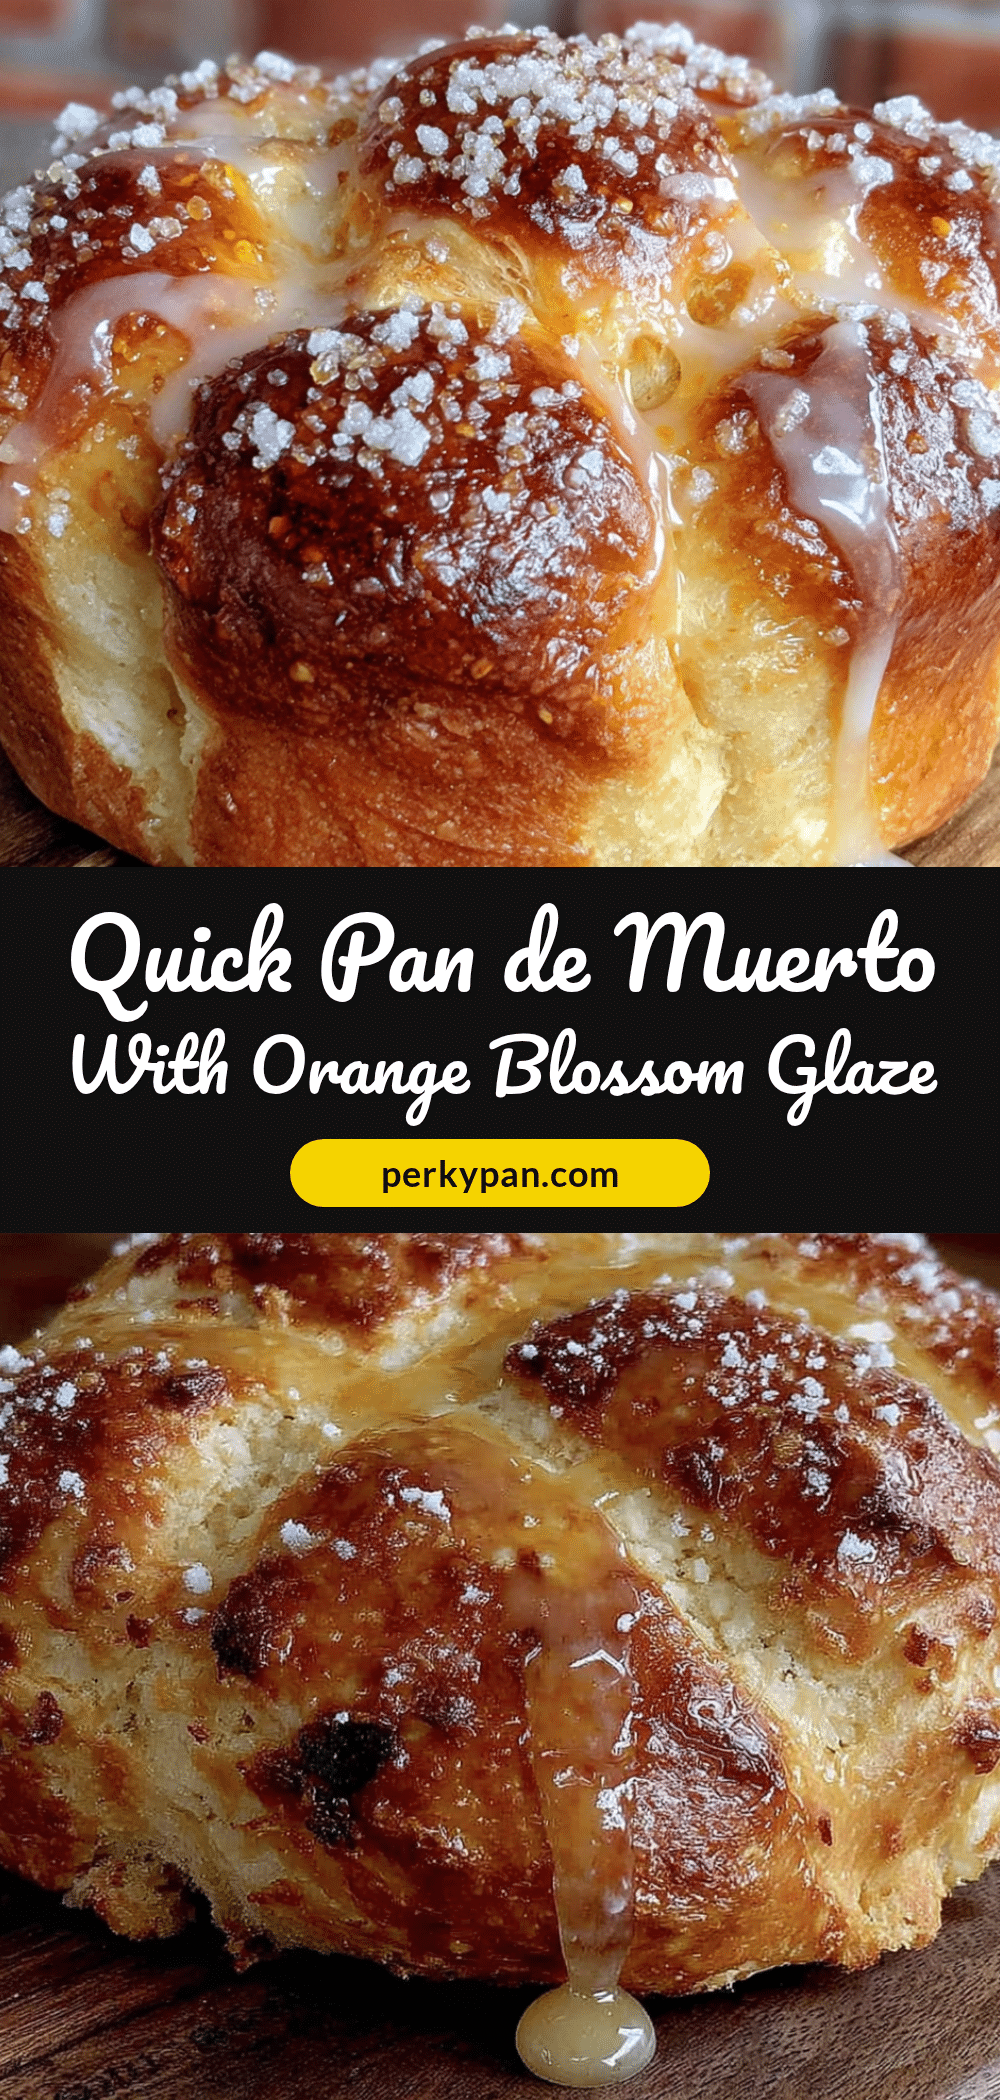
Quick Pan de Muerto with Orange Blossom Glaze
A quick and easy version of the traditional Mexican Day of the Dead bread, made with orange blossom water and a sweet glaze. This recipe honors the tradition but cuts the time down to under two hours, making it perfect for busy weeknights.
- Prep Time: 30 minutes
- Cook Time: 25 minutes
- Total Time: 1 hour 55 minutes
- Yield: 8 servings 1x
- Category: Bread
- Cuisine: Mexican
Ingredients
- 3 cups (360g) all-purpose flour
- 2 ¼ teaspoons (one packet) active dry yeast
- ½ cup (120ml) warm milk (about 110°F)
- ⅓ cup (65g) granulated sugar
- 4 tablespoons (56g) unsalted butter, softened
- 2 large eggs, room temperature
- 1 tablespoon orange zest (from about 1 large orange)
- 1 tablespoon orange blossom water
- ½ teaspoon fine sea salt
- 1 cup (120g) powdered sugar
- 2 tablespoons orange blossom water (for glaze)
- 1 tablespoon fresh orange juice
- Pinch of salt (for glaze)
- ¼ cup extra granulated sugar (for decoration, optional)
- Orange zest for garnish (optional)
Instructions
- Activate the yeast: Warm ½ cup milk to about 110°F. Pour into a mixing bowl, add 1 tablespoon of the sugar and all the yeast. Stir gently and let sit for 5 minutes until foamy.
- Mix the dough: To the foamy yeast, add remaining sugar, softened butter, eggs, orange zest, 1 tablespoon orange blossom water, and salt. Stir until combined. Add flour one cup at a time, stirring until a shaggy dough forms.
- Knead: Knead with a stand mixer on medium-low for 8 minutes, or by hand on a lightly floured surface for 10-12 minutes, until smooth and elastic (passes windowpane test).
- First rise: Place dough in a lightly greased bowl, cover with a towel, and let rise in a warm spot for 30-40 minutes until doubled.
- Shape the bread: Punch down dough. Divide into two pieces: two-thirds for the base, one-third for decorations. Shape the large piece into a round ball on a parchment-lined baking sheet. Divide the small piece into 4-6 parts, roll into ropes, and arrange in a crisscross pattern on top. Optionally add a small ball in the center.
- Second rise: Cover shaped loaf and let rise for 20 minutes. Preheat oven to 350°F (175°C).
- Bake: Bake on middle rack for 20-25 minutes until golden brown and hollow-sounding when tapped. Tent with foil if browning too fast. Cool on baking sheet for 10 minutes, then transfer to a wire rack.
- Make the glaze: While bread is warm, whisk together powdered sugar, 2 tablespoons orange blossom water, orange juice, and a pinch of salt until smooth and pourable.
- Glaze and serve: Brush or spoon glaze over warm bread. Sprinkle with extra granulated sugar and orange zest if desired. Serve warm or at room temperature.
Notes
For best results, use room temperature eggs and butter. The glaze should be applied while the bread is warm but not hot. To make ahead, shape the dough and refrigerate overnight; let sit at room temperature for 30 minutes before second rise. For dairy-free, use melted coconut oil and oat milk. For gluten-free, use a 1:1 gluten-free flour blend with xanthan gum.
Nutrition
- Serving Size: 1/8 of loaf
- Calories: 285
- Sugar: 22
- Sodium: 180
- Fat: 8
- Saturated Fat: 4
- Carbohydrates: 48
- Fiber: 1
- Protein: 6
Keywords: pan de muerto, day of the dead bread, orange blossom, quick bread, mexican bread, dia de muertos


