Love this? Save it for later!
Share the inspiration with your friends
The summer I turned thirty, I was wandering through a bustling flea market in a small New England town, hunting for quirky vintage kitchen tools. Honestly, I wasn’t expecting any culinary inspiration that day, but there I was, fiddling with a rusty cookie cutter set when the quietest person in the crowd, a taxi driver named Joe, started chatting about his secret to the perfect patriotic treat: star-spangled sugar cookies with royal icing. Now, Joe wasn’t your typical baker — he was all about fast runs and late-night shifts, yet he went on about the balance of crisp edges and soft centers that make these cookies unforgettable. I mean, who would think a taxi driver could be a sugar-cookie savant? I scribbled down his recipe on the back of a napkin (right before he had to dash off to his next fare), and let me tell you, that cracked little note has been my go-to for every 4th of July since. Maybe you’ve been there too—caught off guard by an unexpected source sharing something truly special. This recipe stuck with me because it’s not just festive; it’s the kind of cookie that makes you pause, close your eyes, and savor that perfect sweet crunch. So if you want to make your next patriotic celebration shine, let me walk you through Joe’s star-spangled sugar cookies with royal icing—trust me, they’re worth every sprinkle.
Why You’ll Love This Recipe
After testing countless sugar cookie recipes over the years, this one truly stands out for so many reasons. It’s been kitchen-tested by busy parents, party hosts, and even the occasional taxi driver, so you can count on it to deliver every time.
- Quick & Easy: Comes together in under 45 minutes, making it perfect for those last-minute 4th of July cookie cravings or busy weekend baking sessions.
- Simple Ingredients: You probably already have everything in your pantry—no fancy or obscure items needed.
- Perfect for Patriotic Celebrations: These star-shaped cookies decorated with royal icing bring a festive flair to any Independence Day spread or summer party.
- Crowd-Pleaser: Kids adore the colorful icing, and adults appreciate the buttery, melt-in-your-mouth texture.
- Unbelievably Delicious: The recipe strikes a delightful balance between crisp edges and soft centers, with royal icing that sets beautifully without being too sweet.
What makes this recipe different? Well, the secret lies in the royal icing technique Joe shared—thick enough to hold sharp details but soft enough to pipe smoothly. Plus, the dough’s chill time ensures perfect shapes and texture every single time. It’s comfort food reimagined for summer festivities, and honestly, it makes me want to bake these all year round, not just on the 4th!
What Ingredients You Will Need
This recipe uses simple, wholesome ingredients to deliver bold flavor and satisfying texture without the fuss. Most are pantry staples, and a few tips below will help you pick the best for your cookies and icing.
- For the Sugar Cookies:
- 2 ¾ cups (345g) all-purpose flour, sifted (I like Gold Medal for consistent results)
- 1 teaspoon baking powder
- ½ teaspoon salt
- 1 cup (227g) unsalted butter, softened (room temperature for easy mixing)
- 1 ½ cups (300g) granulated sugar
- 1 large egg, room temperature
- 1 teaspoon pure vanilla extract (real vanilla makes a noticeable difference!)
- 1 tablespoon whole milk
- For the Royal Icing:
- 3 cups (360g) powdered sugar, sifted
- 2 large egg whites (or 4 tablespoons pasteurized egg whites for safety)
- 1 teaspoon fresh lemon juice (helps with drying and flavor)
- Red and blue gel food coloring (Wilton gels are my go-to for vibrant colors without thinning the icing)
Ingredient tips: For a gluten-free version, swap the all-purpose flour with a gluten-free blend that includes xanthan gum. If you prefer a dairy-free cookie, use a plant-based butter substitute and a non-dairy milk like almond milk. When it comes to egg whites for the royal icing, pasteurized whites are the safest bet for no-bake decorations.
Equipment Needed
- Electric mixer (stand or handheld) – essential for creaming butter and whipping royal icing; I’ve found a handheld mixer works just fine for small batches.
- Mixing bowls – at least two, one for dough and one for icing.
- Measuring cups and spoons – accuracy matters especially with flour and powdered sugar.
- Rolling pin – a basic wooden or silicone one is perfect; I recommend lightly flouring it to prevent sticking.
- Star-shaped cookie cutters (various sizes) – metal cutters give cleaner edges than plastic.
- Baking sheets lined with parchment paper or silicone mats – prevents sticking and helps with even baking.
- Piping bags and small round piping tips – for detailed royal icing decoration; if you don’t have piping bags, resealable plastic bags with a small corner snipped work well too.
- Cooling racks – to let cookies cool evenly without sogginess.
For a budget-friendly option, you can often find cookie cutters and piping bags at discount stores or online. I’ve also used a small offset spatula for spreading icing when I’m not in the mood to pipe intricate designs. Keeping your equipment clean and dry, especially bowls and beaters for royal icing, is key to achieving the right consistency.
Preparation Method

- Mix dry ingredients: In a medium bowl, whisk together 2 ¾ cups (345g) sifted all-purpose flour, 1 teaspoon baking powder, and ½ teaspoon salt. Set aside. (5 minutes)
- Cream butter and sugar: In a large bowl, beat 1 cup (227g) softened unsalted butter with 1 ½ cups (300g) granulated sugar using an electric mixer at medium speed until light and fluffy, about 3-4 minutes. This step is crucial for tender cookies.
- Add wet ingredients: Beat in 1 large egg, 1 teaspoon vanilla extract, and 1 tablespoon whole milk until combined. Scrape down the sides as needed.
- Combine wet and dry: Gradually add the flour mixture to the butter mixture, mixing on low speed until just combined. Avoid overmixing to keep cookies tender. (2-3 minutes)
- Chill the dough: Divide dough into two disks, wrap in plastic wrap, and refrigerate for at least 1 hour (or up to overnight). This step prevents spreading and helps with clean cookie shapes.
- Preheat oven: Set oven to 350°F (175°C) and line baking sheets with parchment paper or silicone mats.
- Roll and cut cookies: Lightly flour your work surface and rolling pin. Roll one dough disk to about ¼-inch (6mm) thickness. Use star-shaped cookie cutters to cut out shapes, placing them 1 inch (2.5cm) apart on the baking sheets. (15 minutes)
- Bake: Bake cookies for 8-10 minutes, or until edges begin to turn a very light golden color. Watch carefully to avoid browning, which changes the flavor.
- Cool: Transfer cookies to cooling racks immediately after baking to cool completely before icing. (At least 20 minutes)
- Prepare royal icing: In a clean bowl, beat 3 cups (360g) sifted powdered sugar with 2 large egg whites and 1 teaspoon lemon juice on medium speed until stiff peaks form, about 7-10 minutes. Divide icing into separate bowls, tint with red and blue gel colors as desired.
- Decorate: Fill piping bags with colored icing and pipe stars, stripes, or dots on the cookies. Let dry at room temperature for several hours or overnight until icing hardens.
Pro tip: If your royal icing seems too thick, add a few drops of water at a time to reach piping consistency. Too thin? Add more powdered sugar. And, if you get interrupted mid-bake (yes, that happened to me once when the phone rang), just keep the dough chilled until you can pick back up.
Cooking Tips & Techniques
Making the perfect sugar cookie with royal icing can feel tricky, but a few tips learned through trial and error make all the difference.
- Chill your dough: Don’t skip this step. Chilling firms up the butter, which helps cookies hold their shape and develop that tender crumb.
- Don’t overbake: Cookies continue to cook slightly on the hot baking sheet, so pull them out just as the edges turn barely golden. This keeps them soft inside.
- Royal icing consistency: For outlining, thicker icing works best to hold shape. For flooding (filling in areas), thin the icing with a little water until it flows easily but isn’t runny enough to drip off the cookie.
- Work in small batches: If you’re decorating many cookies, keep icing covered with a damp cloth to prevent drying out between batches.
- Practice piping: If you’re new to piping, practice on parchment paper before decorating cookies. It helps build confidence and control.
- Use gel colors: Unlike liquid food coloring, gels don’t thin your icing, so colors stay vibrant and the consistency stays perfect.
One of my kitchen mishaps was accidentally adding too much water to the icing, making it runny and hard to control. Lesson learned: add water slowly and test as you go! Also, multitasking by baking cookies while prepping icing saves time but keep an eye on timers to avoid overbaking.
Variations & Adaptations
If you want to mix things up or accommodate dietary needs, here are some tasty twists on these star-spangled sugar cookies with royal icing.
- Gluten-Free Version: Swap all-purpose flour for a 1-to-1 gluten-free baking flour blend. Add a pinch of xanthan gum if not included to help with structure.
- Vegan Adaptation: Use vegan butter and substitute the egg with a flax egg (1 tablespoon ground flaxseed mixed with 3 tablespoons water, chilled). For royal icing, use aquafaba (chickpea water) instead of egg whites.
- Flavor Variations: Add lemon zest or almond extract to the dough for a citrusy or nutty twist. You can also flavor the royal icing subtly with peppermint or vanilla extracts.
- Different Shapes: While stars are perfect for patriotic occasions, try hearts, circles, or even letters to personalize your cookies for birthdays or anniversaries.
- Alternative Decorating: If royal icing feels intimidating, try decorating with colored sugar sprinkles or edible markers once the cookies have cooled.
Personally, I once swapped in fresh blueberries into the dough for a subtle fruity surprise that paired beautifully with the classic vanilla icing. It was a hit at a summer picnic! Adjusting the recipe for special diets or flavor preferences is easy and keeps this recipe feeling fresh and new.
Serving & Storage Suggestions
These cookies are best served at room temperature to enjoy the perfect balance between the crisp edges and soft centers. Arrange them on a festive platter alongside red, white, and blue beverages like sparkling lemonade or iced tea for a cool summer vibe.
If you’re preparing ahead, store your star-spangled sugar cookies in an airtight container at room temperature for up to 3 days. For longer storage, they freeze well—just place them in a single layer on a baking sheet until firm, then transfer to a freezer-safe container or bag for up to 3 months.
To reheat, let frozen cookies thaw at room temperature. Avoid microwaving as it can soften the royal icing. Over time, the flavors meld and the cookies become even more delightful, so if you can resist, make them a day ahead!
Nutritional Information & Benefits
Each star-spangled sugar cookie with royal icing contains approximately:
| Calories | 180 |
|---|---|
| Fat | 8g |
| Carbohydrates | 25g |
| Protein | 2g |
| Sugar | 16g |
While sugar cookies are definitely a treat, there are some small nutritional perks here: the butter provides a source of healthy fats and fat-soluble vitamins, and the egg whites in the royal icing add a bit of protein. For those mindful of allergens, this recipe contains gluten, dairy, and eggs, but can be adapted for most special diets.
From my perspective, baking these cookies is as much about the joy and tradition as it is about nutrition. Moderation and sharing these with loved ones make it a wholesome experience beyond the calories.
Conclusion
These Perfect Star-Spangled Sugar Cookies with Royal Icing are more than just a dessert—they’re a festive tradition that’s easy to make and brings a smile to any celebration. Whether you’re an experienced baker or just starting out, this recipe’s straightforward steps and delicious results make it accessible and fun. I encourage you to play with the colors, shapes, and flavors to make these cookies truly yours.
Honestly, I love how this recipe connects me to unexpected moments—like chatting with Joe that summer day—and the way it turns simple ingredients into something magical. If you try it, I’d love to hear how your cookies turn out or what personal twists you add. Don’t forget to share your star-spangled creations with family and friends—because good cookies are meant to be enjoyed together!
Frequently Asked Questions
Can I make the cookie dough ahead of time?
Yes! The dough can be refrigerated for up to 3 days or frozen for up to 1 month. Just thaw and roll before cutting.
Is it safe to use raw egg whites in royal icing?
To be safe, use pasteurized egg whites or meringue powder. Avoid raw eggs if serving to children or immunocompromised individuals.
How do I fix royal icing that is too runny or too thick?
Add powdered sugar to thicken or a few drops of water to thin. Adjust gradually until you reach the desired consistency.
Can I use cookie cutters other than stars?
Absolutely! Circles, hearts, or any shape works well with this dough and royal icing.
How long does royal icing take to dry?
At room temperature, royal icing typically dries in 4-6 hours but is best left overnight for fully hardened decorations.
For a different take on patriotic treats, you might also enjoy my recipe for red, white, and blueberry pie or the homemade American flag cake—both crowd favorites during summer celebrations.
Pin This Recipe!
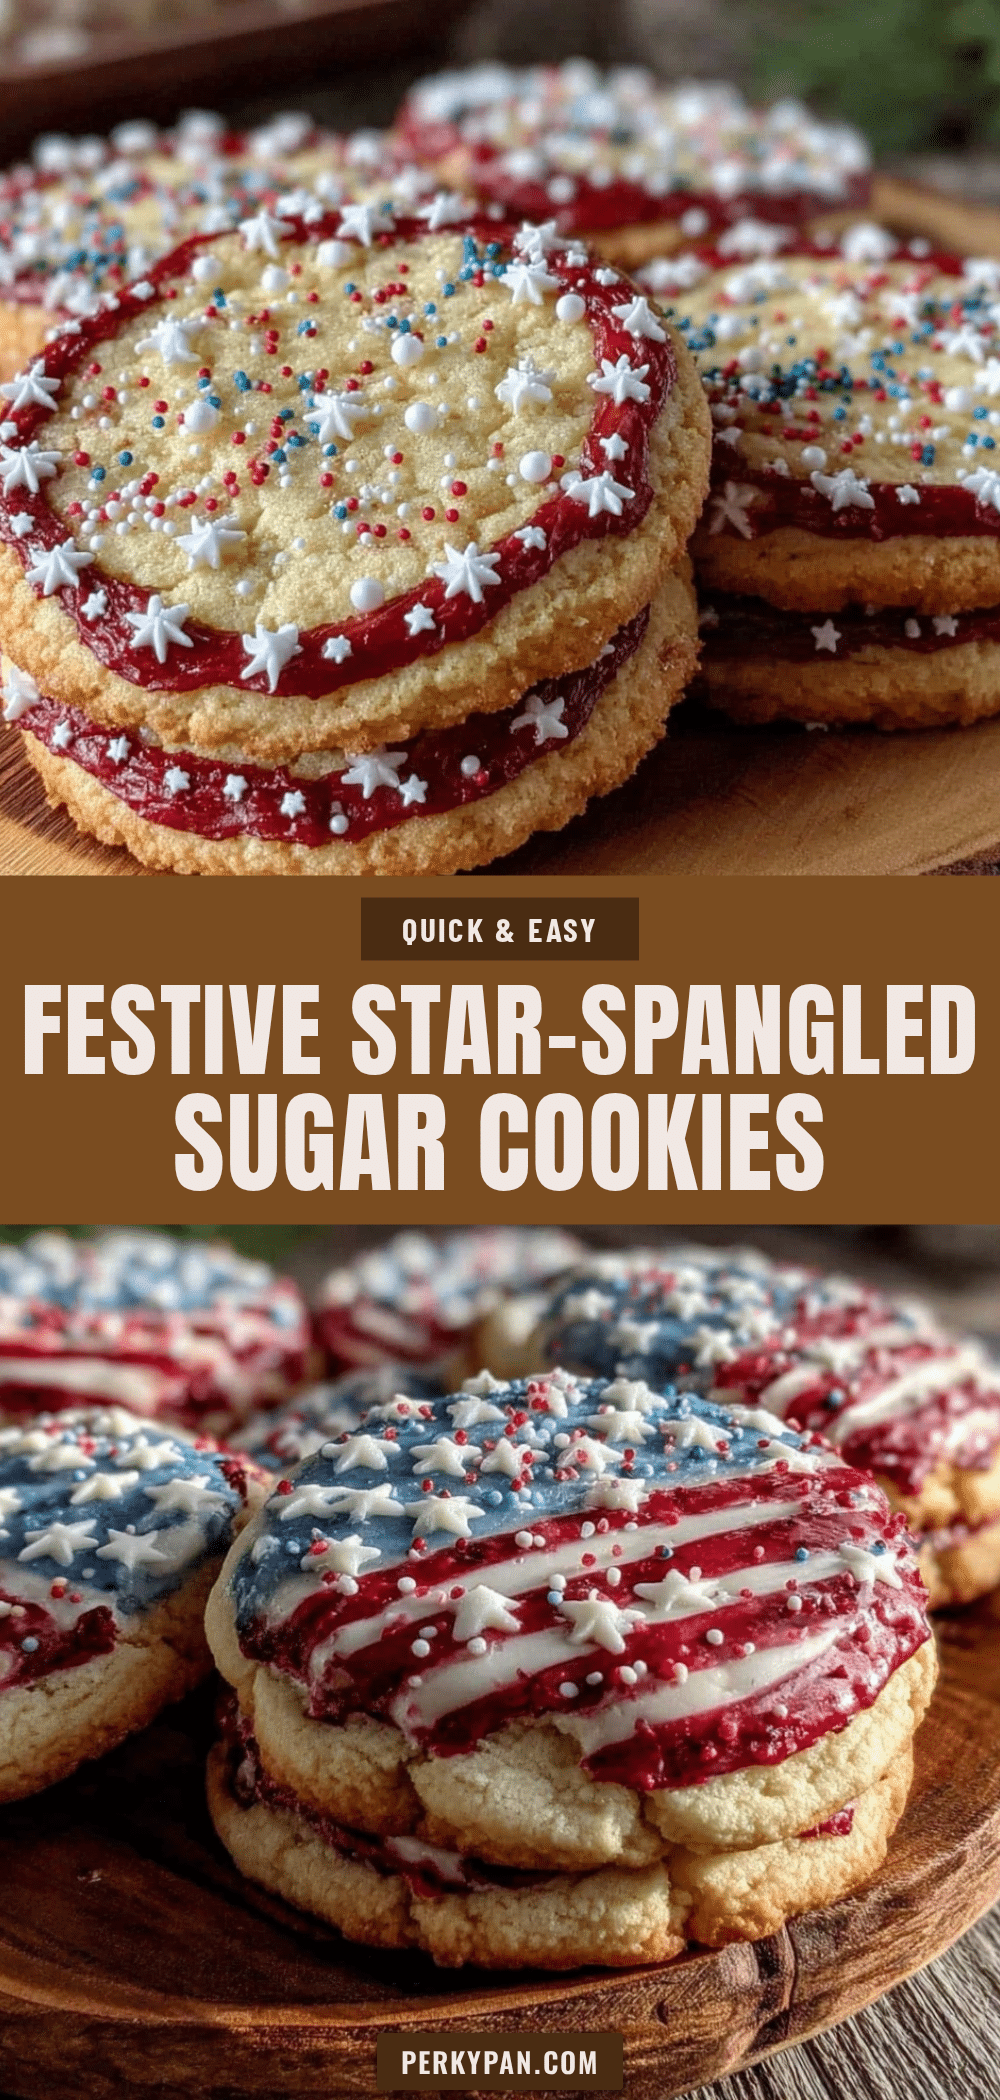
Perfect Star-Spangled Sugar Cookies with Royal Icing

These star-shaped sugar cookies with royal icing are a quick and easy patriotic treat perfect for 4th of July celebrations, featuring a delightful balance of crisp edges and soft centers.
- Prep Time: 20 minutes
- Cook Time: 10 minutes
- Total Time: 1 hour 30 minutes
- Yield: 24 cookies 1x
- Category: Dessert
- Cuisine: American
Ingredients
- 2 ¾ cups (345g) all-purpose flour, sifted
- 1 teaspoon baking powder
- ½ teaspoon salt
- 1 cup (227g) unsalted butter, softened (room temperature)
- 1 ½ cups (300g) granulated sugar
- 1 large egg, room temperature
- 1 teaspoon pure vanilla extract
- 1 tablespoon whole milk
- 3 cups (360g) powdered sugar, sifted
- 2 large egg whites (or 4 tablespoons pasteurized egg whites)
- 1 teaspoon fresh lemon juice
- Red and blue gel food coloring
Instructions
- In a medium bowl, whisk together 2 ¾ cups sifted all-purpose flour, 1 teaspoon baking powder, and ½ teaspoon salt. Set aside.
- In a large bowl, beat 1 cup softened unsalted butter with 1 ½ cups granulated sugar using an electric mixer at medium speed until light and fluffy, about 3-4 minutes.
- Beat in 1 large egg, 1 teaspoon vanilla extract, and 1 tablespoon whole milk until combined. Scrape down the sides as needed.
- Gradually add the flour mixture to the butter mixture, mixing on low speed until just combined. Avoid overmixing.
- Divide dough into two disks, wrap in plastic wrap, and refrigerate for at least 1 hour or up to overnight.
- Preheat oven to 350°F (175°C) and line baking sheets with parchment paper or silicone mats.
- Lightly flour your work surface and rolling pin. Roll one dough disk to about ¼-inch thickness. Use star-shaped cookie cutters to cut out shapes, placing them 1 inch apart on the baking sheets.
- Bake cookies for 8-10 minutes, or until edges begin to turn a very light golden color. Watch carefully to avoid browning.
- Transfer cookies to cooling racks immediately after baking to cool completely before icing.
- In a clean bowl, beat 3 cups sifted powdered sugar with 2 large egg whites and 1 teaspoon lemon juice on medium speed until stiff peaks form, about 7-10 minutes.
- Divide icing into separate bowls, tint with red and blue gel colors as desired.
- Fill piping bags with colored icing and pipe stars, stripes, or dots on the cookies. Let dry at room temperature for several hours or overnight until icing hardens.
Notes
Chill dough for at least 1 hour to prevent spreading and ensure clean shapes. Avoid overbaking to keep cookies soft inside. Adjust royal icing consistency by adding water or powdered sugar as needed. Use pasteurized egg whites for safety in royal icing. Store cookies in an airtight container at room temperature for up to 3 days or freeze for up to 3 months.
Nutrition
- Serving Size: 1 cookie
- Calories: 180
- Sugar: 16
- Fat: 8
- Carbohydrates: 25
- Protein: 2
Keywords: sugar cookies, royal icing, 4th of July, patriotic cookies, star-shaped cookies, easy sugar cookies, holiday baking


