Love this? Save it for later!
Share the inspiration with your friends
The other day, I was waiting in line at the grocery store when the sharp, sweet scent of strawberries from a nearby display hit me — and suddenly I was eight years old, standing on a creaky wooden stool in my Aunt Marla’s kitchen. The sunlight pooled in soft patches on the worn linoleum floor, and the hum of the old ceiling fan mingled with the faint crackling of the radio. Aunt Marla was humming a tune, carefully spreading thick swirls of cream cheese frosting over a towering red, white, and blue layer cake. I remember the way the frosting stuck to the back of my fingers when I sneaked a taste between tasks, that perfect balance of tang and sweetness that felt like summer wrapped up in a bite.
Honestly, I never got to ask her for the exact recipe — life took her far away and the recipe card got lost somewhere in the shuffle of moves and boxes. But for years, that cake haunted my kitchen dreams, that elusive combination of fluffy layers and luscious cream cheese frosting in patriotic colors. Maybe you’ve been there — chasing a flavor or a feeling that seems just out of reach.
After many trials and a few messy experiments (including one time when I forgot the baking powder and ended up with something more like a brick), I finally cracked what I call my Perfect Red White Blue Layer Cake with Cream Cheese Frosting. It’s not just a cake; it’s a little time machine back to sunlit kitchens and the thrill of summer celebrations. Let me tell you, it’s the kind of dessert that makes you close your eyes and savor the moment — just like Aunt Marla’s did.
Why You’ll Love This Recipe
After putting this recipe through its paces countless times, I can say with confidence it’s a winner for so many reasons. Whether you’re baking for the Fourth of July, a summer birthday, or just because, this cake delivers every time.
- Quick & Easy: Comes together in under 90 minutes, including baking and frosting — perfect when you’re short on time but big on celebration.
- Simple Ingredients: No fancy or hard-to-find items here — just pantry staples and everyday fresh ingredients you probably already have.
- Perfect for Summer Gatherings: Bright, patriotic, and fun, it’s a showstopper for barbecues, picnics, or neighborhood potlucks.
- Crowd-Pleaser: Kids and adults alike love the vibrant colors and the rich, tangy cream cheese frosting that isn’t too sweet.
- Unbelievably Delicious: The moist, fluffy layers combined with the silky, dreamy cream cheese frosting make each bite pure comfort.
What makes this cake stand out? Well, the secret lies in the frosting technique — whipping the cream cheese and butter just right to achieve that ultra-smooth, spreadable texture that holds up beautifully between layers and on top. Plus, I’ve played around with the food coloring to get those true, vivid red and blue hues without any bitterness, making the cake as pretty as it is tasty.
This isn’t just another layered cake recipe; it’s the one that brings a little spark to any table and reminds you why homemade desserts are worth the fuss. There’s something about the combination of the colors and that tangy frosting that just feels right for sunny days and festive nights.
What Ingredients You Will Need
This recipe uses straightforward, wholesome ingredients to create a festive and flavorful cake without any fuss. Most are pantry staples, and substitutions are easy if you have dietary needs or preferences.
- For the Cake Batter:
- All-purpose flour, 3 cups (360 g) — I recommend King Arthur for consistent results
- Baking powder, 1 tablespoon
- Baking soda, 1 teaspoon
- Salt, 1/2 teaspoon
- Unsalted butter, 1 cup (227 g), softened — use high-quality European butter if possible for richness
- Granulated sugar, 2 cups (400 g)
- Large eggs, 4, room temperature
- Buttermilk, 1 cup (240 ml), room temperature — adds moisture and tang
- Vanilla extract, 2 teaspoons
- Red food coloring, 1 tablespoon (gel or liquid) — gel tends to give more vibrant color without altering texture
- Blue food coloring, 1 tablespoon (separate portion of batter for the blue layer)
- White portion has no coloring added
- For the Cream Cheese Frosting:
- Cream cheese, 16 oz (450 g), softened — Philadelphia brand works great for smoothness
- Unsalted butter, 1/2 cup (113 g), softened
- Powdered sugar, 4 cups (480 g), sifted
- Vanilla extract, 1 teaspoon
- Salt, a pinch, to balance sweetness
Substitution tips: You can swap all-purpose flour for a gluten-free blend like Bob’s Red Mill 1-to-1 if needed. For dairy-free options, try vegan butter and a dairy-free cream cheese alternative, though the frosting texture will differ slightly.
Equipment Needed
- Three 8-inch (20 cm) round cake pans — nonstick or lined with parchment paper for easy release
- Electric mixer (stand or hand) — essential for whipping the frosting smooth and the batter airy
- Mixing bowls — at least two (one for batter, one for frosting)
- Measuring cups and spoons — for precise ingredient portions
- Rubber spatula — perfect for folding and scraping bowls clean
- Cooling racks — to cool the cakes evenly without sogginess
- Offset spatula or butter knife — helpful for spreading frosting evenly
If you don’t have three pans, you can bake the layers one or two at a time, but expect longer baking time overall. I’ve used a hand mixer for years with great results, though a stand mixer does save a lot of elbow grease.
Preparation Method
- Preheat your oven to 350°F (175°C). Grease and flour three 8-inch pans or line them with parchment circles. This step avoids any sticking and ensures your layers come out cleanly. (Time: 10 minutes)
- Mix dry ingredients: In a medium bowl, whisk together 3 cups (360 g) flour, 1 tablespoon baking powder, 1 teaspoon baking soda, and 1/2 teaspoon salt. This sets the base for fluffy, tender cake layers.
- Cream butter and sugar: In a large bowl, use your electric mixer to beat 1 cup (227 g) softened unsalted butter with 2 cups (400 g) granulated sugar until light and fluffy — about 3-5 minutes. You want this step thorough; it traps air to help your cake rise nicely.
- Add eggs: Beat in 4 large eggs, one at a time, mixing well after each addition. Scrape down the sides of the bowl if needed. This avoids curdling and keeps the batter smooth.
- Incorporate vanilla and buttermilk: Stir in 2 teaspoons vanilla extract. Then, alternate adding the dry ingredients and 1 cup (240 ml) buttermilk, beginning and ending with dry ingredients. Mix just until combined to avoid dense cake. (Tip: Overmixing can make your cake tough.)
- Divide and color the batter: Evenly split the batter into three bowls. Leave one plain for the white layer. Stir 1 tablespoon red food coloring into one bowl and 1 tablespoon blue into the other. Use gel coloring for the most vibrant hues without thinning the batter.
- Pour batter into pans: Spread each colored batter into its prepared pan, smoothing tops with a spatula. Tap pans gently on the counter to release air bubbles.
- Bake: Place pans in the oven and bake for 25-30 minutes, or until a toothpick inserted in the center comes out clean. Rotate pans halfway through for even baking. (Watch carefully after 20 minutes to avoid overbaking.)
- Cool: Remove cakes from oven and let sit in pans for 10 minutes. Then, turn out onto cooling racks to cool completely before frosting. Cooling fully is key to prevent frosting from melting.
- Prepare frosting: Beat together 16 oz (450 g) softened cream cheese and 1/2 cup (113 g) softened butter until creamy and smooth. Gradually add 4 cups (480 g) sifted powdered sugar, mixing on low speed to avoid clouds of sugar dust. Stir in 1 teaspoon vanilla and a pinch of salt. (Tip: If frosting seems too soft, chill for 15 minutes.)
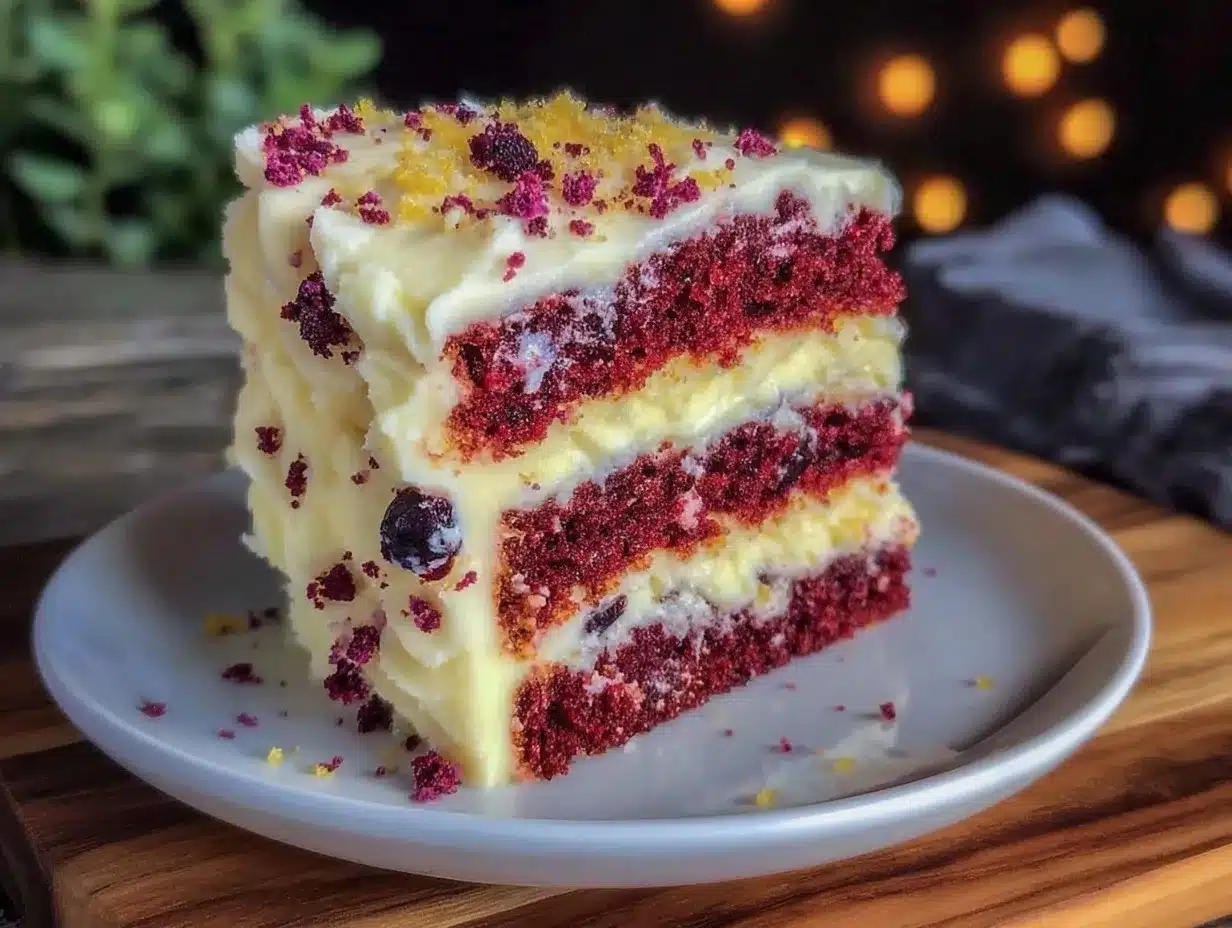
- Assemble the cake: Place the red layer on your serving plate. Spread a generous layer of frosting over the top. Add the white layer, repeat frosting, then top with the blue layer. Coat the entire cake with a thin crumb coat and chill 20 minutes to set.
- Final frosting: Apply a smooth, even layer of cream cheese frosting around the cake. Use an offset spatula for neat edges. Chill again before serving to help the frosting firm up.
Cooking Tips & Techniques
One thing I learned the hard way is that the temperature of your ingredients matters — room temperature eggs, butter, and buttermilk make a world of difference in how the batter comes together. Cold butter can leave lumps, and cold eggs can cause the batter to curdle.
Another pro tip: when coloring the batter, gel food coloring is your friend. Liquid dyes can thin the batter and dull the colors. Gel keeps the layers vibrant and the texture just right.
Frosting texture is another beast. Don’t rush beating the cream cheese and butter — a few extra minutes of whipping creates that silky, spreadable frosting that holds up to piping or smooth finishes. If it’s too runny, pop it in the fridge for a bit.
When assembling, a crumb coat is a lifesaver if you want a clean finish. It traps loose crumbs and makes the final frosting layer look flawless. Trust me, extra steps here pay off with a neat, professional look.
Lastly, multitasking during baking saves time — prep your frosting while the cakes cool. Just watch out for distractions; I once left the mixer running unattended and ended up with powdered sugar everywhere. Lesson learned!
Variations & Adaptations
Want to switch things up? Here are some ideas I’ve tried or recommend:
- Dietary swaps: Use almond flour or gluten-free blend for a gluten-free cake. Coconut yogurt or dairy-free cream cheese can replace dairy in the frosting for a vegan twist (though texture will be slightly different).
- Seasonal fruits: Add fresh berries between layers or as a topping for extra freshness. In summer, sliced strawberries and blueberries add a burst of natural color and flavor.
- Flavor tweaks: Try adding a teaspoon of lemon zest to the batter for a bright citrus note or a dash of cinnamon for warmth.
- Baking method: If you don’t have round pans, bake the batter in a 9×13-inch pan and layer it with frosting in slices or squares for a fun variation.
Personally, I once made a mini version of this cake in cupcake form for a picnic — same flavors, just easier to share and carry around. It was a hit!
Serving & Storage Suggestions
This cake tastes best chilled but served at room temperature — take it out of the fridge about 20 minutes before slicing. The frosting softens and the flavors come alive.
Pair it with fresh whipped cream or a scoop of vanilla ice cream for an extra indulgent touch. It also goes surprisingly well with a crisp lemonade or iced tea on a hot day.
To store, cover the cake tightly with plastic wrap or keep it in an airtight container in the refrigerator for up to 4 days. The flavors actually deepen after a day or two. For longer storage, you can freeze unfrosted cake layers wrapped well for up to 2 months and frost after thawing.
Reheat slices gently at room temperature or briefly in the microwave (about 10 seconds) to soften the frosting before serving.
Nutritional Information & Benefits
Each slice of this red white blue layer cake with cream cheese frosting contains approximately 450-500 calories, with a balance of carbohydrates, fats, and protein from the butter and cream cheese. The recipe offers a good dose of calcium and vitamin A thanks to the dairy ingredients.
While this is a festive treat, using real butter and cream cheese adds wholesome fats, and the buttermilk contributes probiotics and tang. The cake is free from artificial preservatives, and you can adjust sugar amounts slightly if you want to lower sweetness.
If you choose gluten-free flours or dairy-free substitutes, this recipe can accommodate common dietary restrictions while still delivering that classic taste and texture.
Conclusion
So, there you have it — the Perfect Red White Blue Layer Cake with Cream Cheese Frosting, a recipe that’s as much about capturing a feeling as it is about baking. Whether it’s your first time making a layered cake or you’re a seasoned baker looking for a festive showstopper, this one won’t let you down.
Feel free to tweak the colors, flavors, or frosting to make it truly yours. I love how this cake brings people together, sparks smiles, and brings a little sunshine to the table — just like those summer afternoons in Aunt Marla’s kitchen.
Give it a try, and please share your results or any fun twists you add! I’m always excited to hear how folks make this recipe their own.
Frequently Asked Questions
Can I use frozen berries between the layers instead of fresh?
Yes! Just make sure to thaw and drain them well to avoid excess moisture that could make the layers soggy.
How long can I store this cake in the fridge?
It keeps well for up to 4 days when covered tightly. For best texture and flavor, enjoy within that time frame.
Can I make this cake ahead of time?
Absolutely! You can bake the layers a day or two ahead and refrigerate or freeze them. Just bring to room temperature before frosting.
What if I don’t have buttermilk?
You can make a quick substitute by adding 1 tablespoon of lemon juice or vinegar to 1 cup of milk and letting it sit for 5-10 minutes.
Is this recipe suitable for a dairy-free diet?
With substitutions like dairy-free cream cheese and butter alternatives, yes — though the texture and flavor will vary slightly from the original.
For those who enjoy experimenting with flavor and color, this recipe can be a fun canvas for creativity while staying true to a classic celebration cake.
Pin This Recipe!
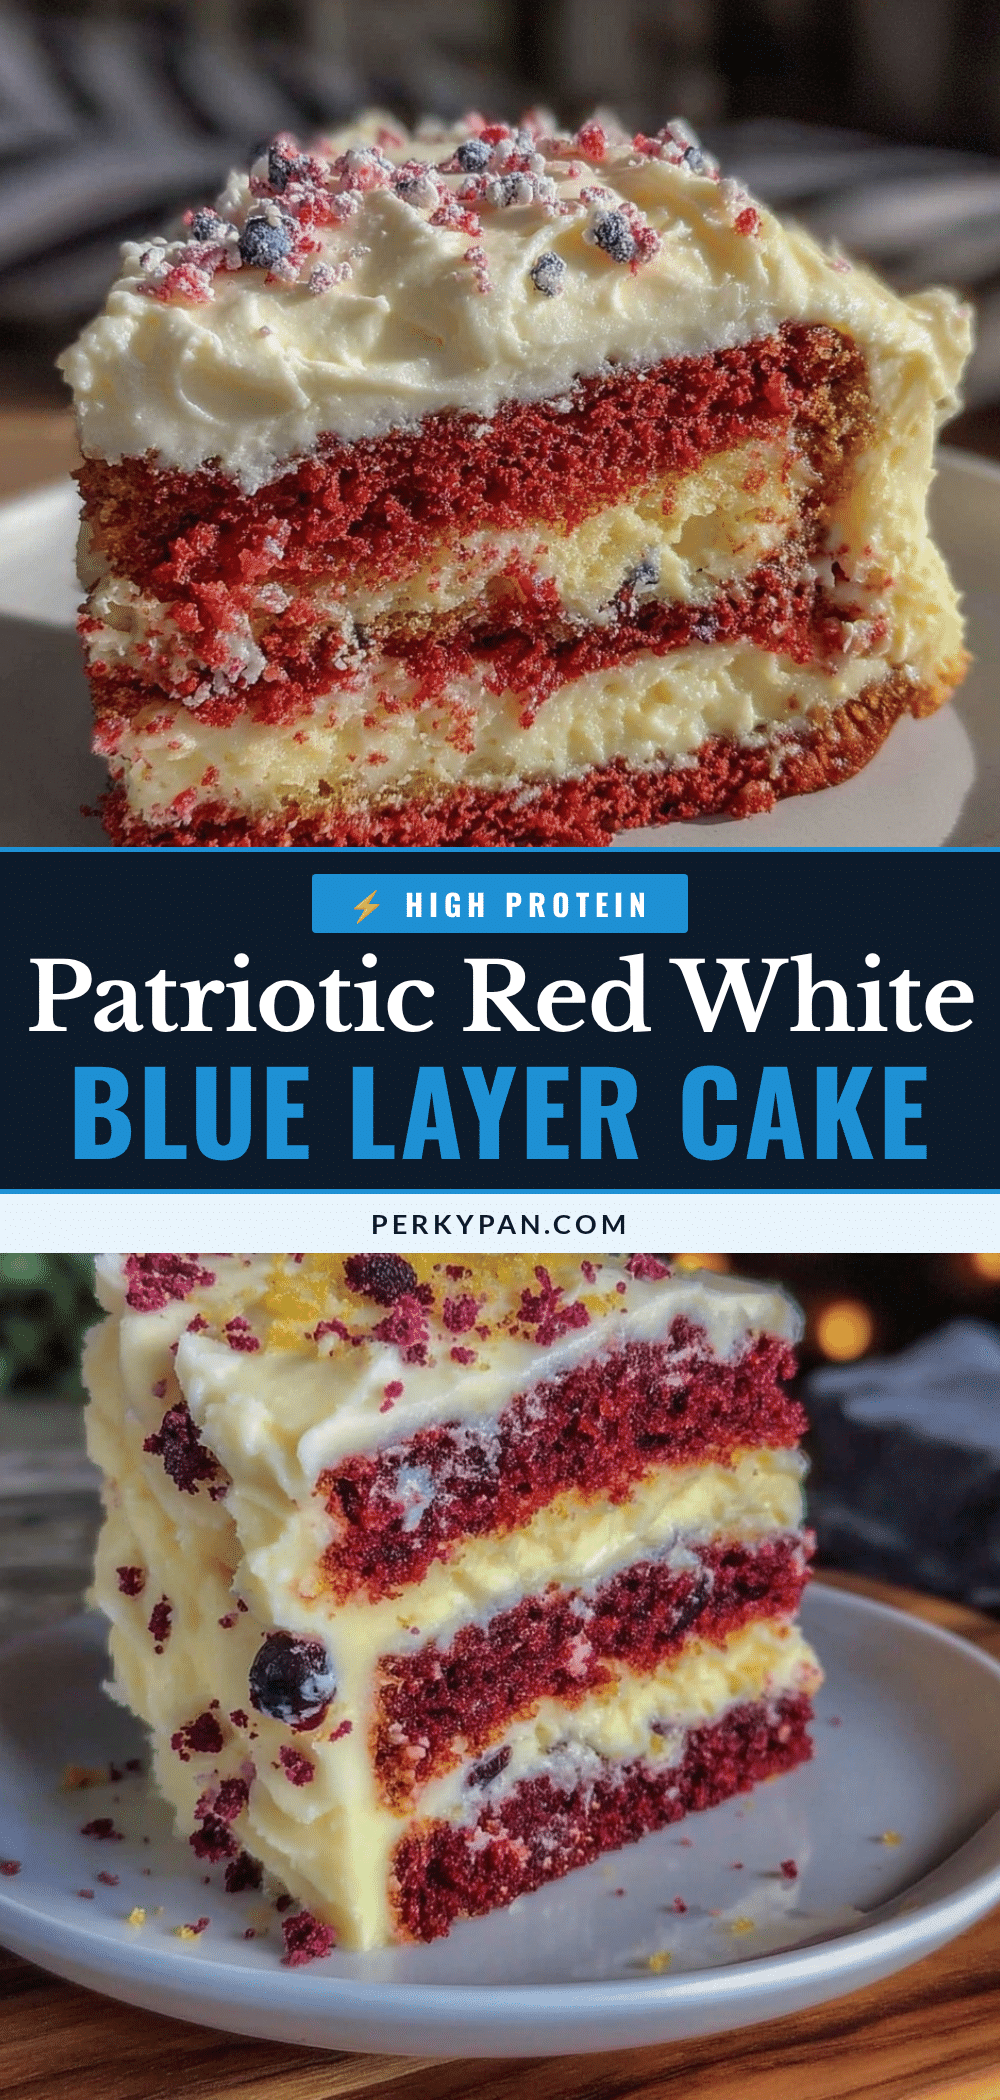
Perfect Red White Blue Layer Cake with Cream Cheese Frosting
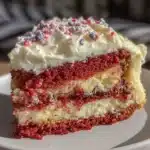
A festive and moist layered cake featuring vibrant red, white, and blue layers, topped with a silky, tangy cream cheese frosting. Perfect for summer celebrations and patriotic occasions.
- Prep Time: 30 minutes
- Cook Time: 30 minutes
- Total Time: 1 hour
- Yield: 12 servings 1x
- Category: Dessert
- Cuisine: American
Ingredients
- 3 cups (360 g) all-purpose flour
- 1 tablespoon baking powder
- 1 teaspoon baking soda
- 1/2 teaspoon salt
- 1 cup (227 g) unsalted butter, softened
- 2 cups (400 g) granulated sugar
- 4 large eggs, room temperature
- 1 cup (240 ml) buttermilk, room temperature
- 2 teaspoons vanilla extract
- 1 tablespoon red food coloring (gel or liquid)
- 1 tablespoon blue food coloring (gel or liquid)
- 16 oz (450 g) cream cheese, softened
- 1/2 cup (113 g) unsalted butter, softened
- 4 cups (480 g) powdered sugar, sifted
- 1 teaspoon vanilla extract
- Pinch of salt
Instructions
- Preheat your oven to 350°F (175°C). Grease and flour three 8-inch pans or line them with parchment circles.
- In a medium bowl, whisk together flour, baking powder, baking soda, and salt.
- In a large bowl, beat softened butter and granulated sugar with an electric mixer until light and fluffy, about 3-5 minutes.
- Beat in eggs one at a time, mixing well after each addition and scraping down the bowl as needed.
- Stir in vanilla extract. Alternate adding dry ingredients and buttermilk, beginning and ending with dry ingredients. Mix just until combined.
- Divide batter evenly into three bowls. Leave one plain for the white layer. Stir red food coloring into one bowl and blue food coloring into the other.
- Pour each colored batter into prepared pans and smooth the tops. Tap pans gently to release air bubbles.
- Bake for 25-30 minutes or until a toothpick inserted in the center comes out clean. Rotate pans halfway through baking.
- Let cakes cool in pans for 10 minutes, then turn out onto cooling racks to cool completely.
- For frosting, beat cream cheese and softened butter until smooth and creamy. Gradually add powdered sugar on low speed. Stir in vanilla extract and a pinch of salt. Chill if too soft.
- Assemble cake by placing the red layer on a serving plate, spreading frosting over the top. Add the white layer and repeat frosting, then top with the blue layer.
- Apply a thin crumb coat of frosting over the entire cake and chill for 20 minutes.
- Finish by applying a smooth, even layer of cream cheese frosting around the cake. Chill before serving.
Notes
Use room temperature eggs, butter, and buttermilk for best batter consistency. Gel food coloring provides vibrant colors without thinning the batter. Chill frosting if too soft before spreading. A crumb coat helps achieve a neat finish. Cakes can be baked one or two at a time if fewer pans are available, but baking time will increase.
Nutrition
- Serving Size: 1 slice (1/12 of cak
- Calories: 475
- Sugar: 42
- Sodium: 320
- Fat: 25
- Saturated Fat: 15
- Carbohydrates: 58
- Fiber: 1
- Protein: 6
Keywords: red white blue cake, layered cake, cream cheese frosting, patriotic cake, summer dessert, easy cake recipe