Love this? Save it for later!
Share the inspiration with your friends
The neighborhood pie contest was in twelve hours and I’d completely forgotten. My friend Sarah texted me the reminder at 10 PM the night before, and I just stared at my phone, heart sinking. Everyone else would be bringing their grandmother’s legendary recipes—the ones that had won blue ribbons for decades. I had a can of pumpkin puree, a bag of flour, and absolutely no game plan. I mean, who forgets a pie contest? This girl, apparently.
I rummaged through my pantry like a woman possessed, pulling out spices, butter, and sugar. The clock was ticking, and my kitchen looked like a hurricane hit it. Honestly, I almost gave up and bought a frozen pie from the store. But something in me snapped—I wasn’t going down without a fight. I grabbed a bowl, cracked an egg, and started mixing. The whole thing felt like a cooking show challenge, complete with flour on my forehead and a cat weaving through my legs.
By midnight, the pie was cooling on the counter, looking surprisingly respectable. I stuck it in the fridge and crossed my fingers. The next day, I walked into that community center feeling like an imposter. Sarah’s apple pie looked like it belonged in a bakery window. Mrs. Henderson’s pecan pie was practically glowing with caramel perfection. And there was my humble pumpkin pie, slightly lopsided but smelling like autumn heaven.
Long story short? It won first place. I kid you not. The judges said it was the most balanced pumpkin pie they’d ever tasted—not too sweet, perfectly spiced, with a crust that was flaky but sturdy. I just stood there, holding my little blue ribbon, covered in the same flour I’d worn the night before. That’s when I knew this perfect homemade pumpkin pie from scratch was something special. It’s the recipe I’ve made every Thanksgiving since, and let me tell you, it never gets old. Maybe you’ve been there—scrambling at the last minute, only to stumble onto something magical. That’s this pie.
Why You’ll Love This Recipe
Let me be real with you—I’ve tested this recipe about a dozen times to get it just right. I’m not a professional chef, but I’ve learned a thing or two from my kitchen disasters. This perfect homemade pumpkin pie from scratch isn’t just another recipe you’ll forget about. It’s the one that’ll make your guests close their eyes after the first bite. Here’s why it stands out:
- Completely From Scratch: No canned pie filling shortcuts here. You control the sweetness, the spice level, and the texture. It’s honestly easier than you think.
- Foolproof Pie Crust: I’ve had my share of soggy bottoms and crumbly disasters. This crust uses a simple trick that guarantees flaky, buttery perfection every single time.
- Perfectly Balanced Spices: Not too much cinnamon, not too little nutmeg. It’s like the Goldilocks of pumpkin pie—just right. I spent three batches dialing in the ratios.
- Make-Ahead Friendly: Hosting a dinner party? You can make this pie a day ahead without losing any quality. The flavors actually get better overnight. Trust me on this one.
- Crowd-Pleasing Winner: I’ve brought this to potlucks, Friendsgivings, and holiday dinners. It disappears fast, and people always ask for the recipe. It’s my secret weapon for impressing a crowd.
What makes this different from the dozens of pumpkin pie recipes out there? It’s the texture. Most pumpkin pies turn out either too dense or too runny. This one hits that sweet spot—silky, creamy, and firm enough to hold a clean slice. The secret is a combination of heavy cream and evaporated milk, plus a slow, gentle bake that prevents cracking. It’s comfort food reimagined—familiar but somehow better than you remember.
What Ingredients You Will Need
This recipe uses simple, wholesome ingredients that come together to create something truly special. Most of these are pantry staples, which makes it perfect for those last-minute hosting emergencies. Here’s what you’ll need:
For the Pie Crust
- 1 ¼ cups all-purpose flour (spooned and leveled—don’t scoop directly from the bag)
- ½ teaspoon salt (I use fine sea salt for even distribution)
- ½ cup cold unsalted butter, cut into small cubes (Kerrygold is my go-to for flavor)
- 3 to 4 tablespoons ice water (you might need an extra tablespoon depending on humidity)
For the Pumpkin Filling
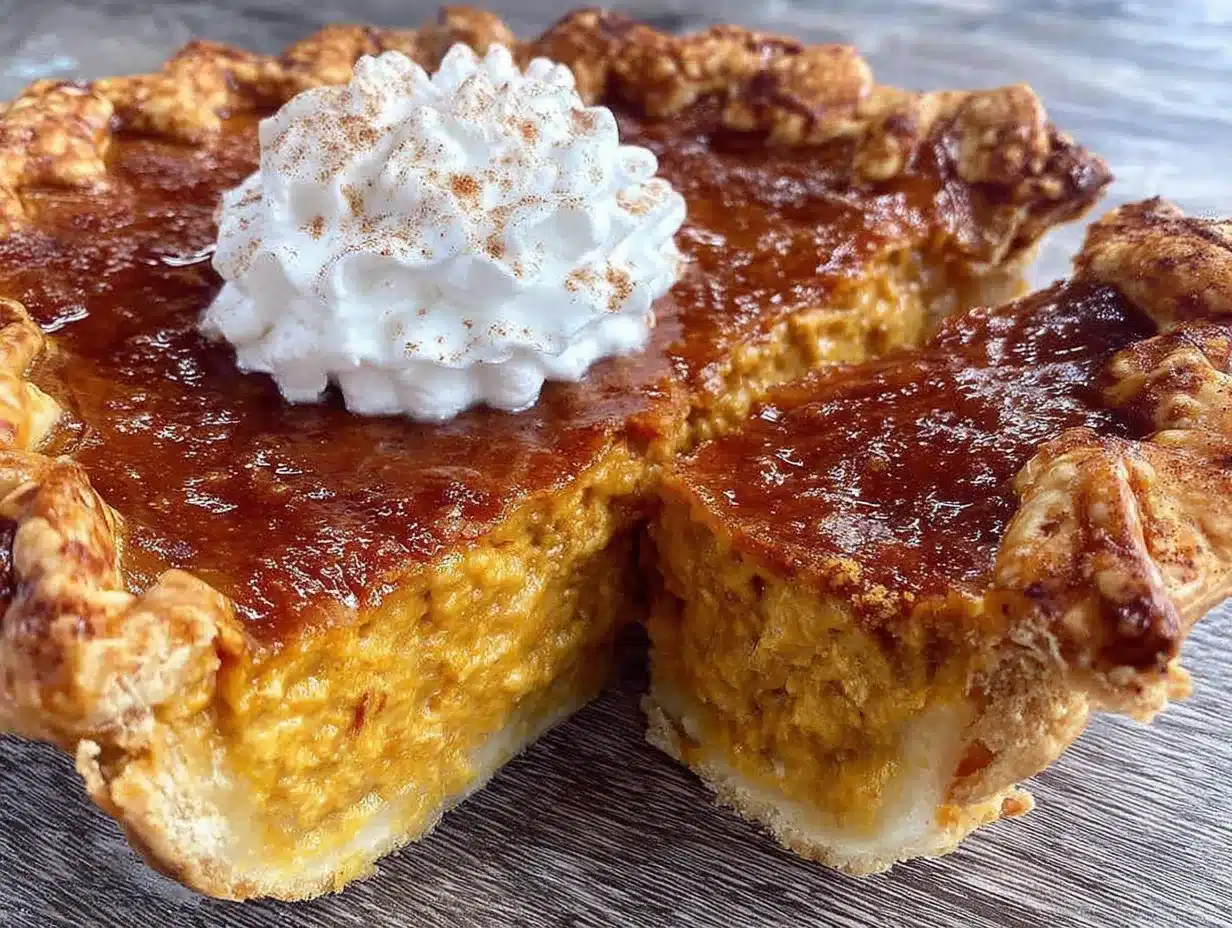
- 1 can (15 oz) pumpkin puree (not pumpkin pie filling—make sure it’s 100% pure pumpkin. Libby’s is reliable)
- ¾ cup granulated sugar
- ¼ cup packed brown sugar (light or dark works, dark gives more depth)
- 2 large eggs, room temperature
- 1 large egg yolk, room temperature (this adds extra richness)
- 1 teaspoon vanilla extract
- 1 cup heavy cream
- ½ cup evaporated milk (don’t substitute with regular milk—the texture won’t be the same)
- 2 teaspoons ground cinnamon
- 1 teaspoon ground ginger
- ½ teaspoon ground nutmeg (freshly grated if you have it)
- ¼ teaspoon ground cloves
- ½ teaspoon salt
Let’s talk about the pumpkin puree for a second. I’ve tried roasting my own pumpkins, and honestly? It’s a pain. The canned stuff is more consistent and saves you hours. Just make sure you’re buying pure pumpkin, not the pre-sweetened pie filling. That stuff has its place, but it’s not what we’re doing here. For the spices, I recommend buying fresh ones every six months or so. Old spices lose their punch, and your pie will taste flat. If you want to mix your own pumpkin pie spice blend, use 3 teaspoons cinnamon, 1 teaspoon ginger, 1 teaspoon nutmeg, and ½ teaspoon cloves—then use 3 teaspoons of that blend in the recipe.
One more thing about the dairy: room temperature eggs are non-negotiable here. Cold eggs will seize up your filling and make it lumpy. Just leave them on the counter for 30 minutes before you start. The heavy cream and evaporated milk combo gives the pie that velvety texture that’s hard to achieve with milk alone. If you’re dairy-free, you can try full-fat coconut milk, but the texture will be slightly different.
Equipment Needed
You don’t need a fancy kitchen to pull off this perfect homemade pumpkin pie from scratch. Here’s what you’ll need:
- 9-inch pie dish (glass or ceramic works best—metal can cook the crust too quickly)
- Rolling pin (a wine bottle works in a pinch, I’ve been there)
- Large mixing bowls (one for crust, one for filling)
- Whisk
- Pastry cutter or two forks (for cutting butter into flour)
- Plastic wrap
- Parchment paper
- Pie weights or dried beans (for blind baking the crust)
- Measuring cups and spoons
- Rubber spatula
- Cooling rack
If you don’t have a pastry cutter, don’t sweat it. Two forks work just fine, or you can use your fingertips—just work quickly so the butter doesn’t warm up. I’ve used a food processor for the crust before, and it works great, but be careful not to overmix. For the pie weights, I actually use dried chickpeas that I keep in a jar specifically for baking. They’re reusable and cheaper than buying actual pie weights. Just let them cool completely before storing.
Preparation Method
Alright, let’s get into the nitty-gritty. This looks like a lot of steps, but I promise it flows naturally. Take your time, especially with the crust—it’s the foundation of everything.
- Make the pie crust (30 minutes active, 1 hour chilling): In a large bowl, whisk together the flour and salt. Add the cold butter cubes and toss them in the flour to coat. Using a pastry cutter or two forks, cut the butter into the flour until you have pea-sized crumbs with some larger pieces. Don’t overwork it—those butter chunks are what create flaky layers. Drizzle 3 tablespoons of ice water over the mixture and stir with a fork until the dough just comes together. If it feels dry, add the extra tablespoon. Turn the dough onto a piece of plastic wrap, shape it into a disk, and wrap tightly. Refrigerate for at least 1 hour. (Pro tip: you can make this crust up to 3 days ahead.)
- Blind bake the crust (20 minutes): Preheat your oven to 375°F (190°C). On a lightly floured surface, roll the chilled dough into a 12-inch circle, about ⅛-inch thick. Carefully transfer it to your 9-inch pie dish, gently pressing it into the corners. Trim the excess dough, leaving about a ½-inch overhang. Fold the edges under and crimp them with your fingers or a fork. Prick the bottom of the crust all over with a fork—this prevents air bubbles. Line the crust with parchment paper and fill with pie weights or dried beans. Bake for 15 minutes. Remove the weights and parchment, then bake for another 5 minutes until the bottom looks dry and lightly golden. Set aside to cool slightly.
- Prepare the filling (10 minutes): While the crust is baking, make the filling. In a large bowl, whisk together the pumpkin puree, both sugars, eggs, egg yolk, and vanilla extract until smooth. In a separate small bowl, whisk the heavy cream and evaporated milk together. Gradually pour the milk mixture into the pumpkin mixture, whisking constantly. Add the cinnamon, ginger, nutmeg, cloves, and salt. Whisk until everything is fully combined and silky. The filling should be a beautiful orange color and smell amazing already.
- Bake the pie (50-60 minutes): Reduce the oven temperature to 350°F (175°C). Place the blind-baked crust on a baking sheet (this catches any spills and makes it easier to handle). Pour the filling into the warm crust—it should fill it almost to the brim. Carefully transfer to the oven and bake for 50 to 60 minutes. The pie is done when the edges are set but the center still jiggles slightly when you gently shake the pan. It will continue to set as it cools. If the crust edges start browning too quickly, tent them with foil or a pie shield around the 30-minute mark.
- Cool completely (2-3 hours): Remove the pie from the oven and place it on a cooling rack. Let it cool at room temperature for at least 2 hours. Do not refrigerate it while it’s still warm—this can cause cracking. Once fully cooled, you can refrigerate it until ready to serve. The pie needs at least 4 hours of chilling time to slice cleanly, so plan accordingly.
One thing I learned the hard way: don’t overbake the pie. The first time I made this, I left it in until the center was completely firm. It turned out dry and cracked. That slight jiggle in the center is your friend. It’s the same principle as cheesecake—the residual heat finishes the cooking process as it cools.
Cooking Tips & Techniques
After making this perfect homemade pumpkin pie from scratch more times than I can count, I’ve picked up a few tricks that make a real difference. Let me share them so you don’t make the same mistakes I did.
Keep everything cold for the crust: I cannot stress this enough. Cold butter, cold water, cold hands. If your kitchen is warm, pop the flour and bowl in the fridge for 10 minutes before starting. Warm butter melts into the flour, and you end up with a tough, greasy crust instead of a flaky one. I once made a crust in July without air conditioning—total disaster. Learn from my pain.
Don’t overmix the filling: Whisk until everything is just combined. Overmixing incorporates too much air, which can cause the filling to puff up and crack during baking. You want a smooth, uniform mixture without bubbles. If you see small bubbles forming on the surface, tap the bowl on the counter a few times to release them.
Use a baking sheet: Always place your pie dish on a baking sheet before putting it in the oven. This catches any drips (because the filling is very liquid before it bakes) and makes it easier to transfer the hot pie. I use a rimmed baking sheet lined with parchment for easy cleanup.
Check for doneness with the jiggle test: Forget the toothpick test—it doesn’t work for custard pies. Gently shake the pie pan. The center should wobble like Jell-O, while the edges should be firm. If the whole pie is liquid, it needs more time. If the center is completely still, you’ve gone too far.
Cool gradually: Don’t move the pie from the hot oven to the cold counter too quickly. Let it sit on the baking sheet for 5 minutes before transferring to a cooling rack. This gradual temperature change reduces the risk of cracking. Also, keep it away from drafts—a sudden cold breeze can cause the surface to crack.
Variations & Adaptations
One of the best things about this perfect homemade pumpkin pie from scratch is how versatile it is. Here are some variations I’ve tried and loved:
- Spiced Maple Pumpkin Pie: Replace the granulated sugar with ¾ cup maple syrup and reduce the heavy cream to ¾ cup. The maple flavor pairs beautifully with the pumpkin and spices. Just note that the pie might take an extra 5-10 minutes to set because maple syrup adds more liquid.
- Gingerbread Crust: Add 1 teaspoon molasses, ½ teaspoon ground ginger, and ¼ teaspoon black pepper to the crust dough. Roll it out as usual. This gives the pie a warm, holiday-spiced kick that’s perfect for Christmas gatherings. I made this for a cookie swap once, and people lost their minds.
- Dairy-Free Version: Substitute the heavy cream with full-fat coconut cream and the evaporated milk with oat milk. The texture will be slightly less rich but still delicious. Use a vegan butter stick for the crust. I tested this for a friend with dairy allergies, and it held up surprisingly well.
- Mini Pumpkin Pies: Use a muffin tin instead of a pie dish. Roll out the crust and cut circles to fit each cup. Fill with the pumpkin mixture and bake for 20-25 minutes. These are perfect for parties where people want individual servings. Just reduce the blind baking time to 10 minutes total.
- Chocolate Swirl Pumpkin Pie: Melt 4 ounces of dark chocolate and drizzle it into the filling before baking. Use a knife to gently swirl it in. The chocolate adds a layer of richness that’s unexpected but totally works. This one’s for the chocolate lovers in your life.
Serving & Storage Suggestions
This pie is a showstopper at any gathering, and how you serve it makes all the difference. Here’s what I’ve learned from hosting countless dinner parties and potlucks.
Serving: Serve the pie chilled or at room temperature—both work well. If you’re serving at a party, I recommend taking it out of the fridge about 30 minutes before slicing. This takes the chill off and allows the flavors to open up. Top each slice with a generous dollop of lightly sweetened whipped cream (add a splash of vanilla and a pinch of cinnamon to the cream for extra flair). For a fancy touch, sprinkle some candied pecans or a dusting of cinnamon on top.
What to serve alongside: This pie pairs beautifully with a scoop of vanilla bean ice cream or a drizzle of salted caramel sauce. If you’re hosting a full Thanksgiving spread, serve it after the main course with coffee or spiced apple cider. For a potluck, bring extra whipped cream in a separate bowl—people always want more.
Storage: Cover the pie loosely with plastic wrap or foil and store it in the refrigerator for up to 4 days. The flavors actually improve after a day or two as the spices meld together. Do not leave it at room temperature for more than 2 hours, especially if it has dairy in it.
Freezing: You can freeze the fully baked and cooled pie for up to 3 months. Wrap it tightly in plastic wrap, then a layer of foil. To serve, thaw it overnight in the refrigerator. Do not freeze an unbaked pie—the filling will separate and become grainy.
Reheating: If you prefer warm pie, place individual slices in a 300°F (150°C) oven for 10-15 minutes. The microwave works in a pinch, but it can make the crust soggy. Honestly, I prefer it cold straight from the fridge—the texture is firmer and the spices are more pronounced.
Nutritional Information & Benefits
Let’s be honest—pumpkin pie isn’t health food, but it does have some redeeming qualities. Here’s the breakdown per slice (based on 8 servings):
- Calories: Approximately 380-420 per slice
- Fat: 22g (mostly from butter and cream)
- Carbohydrates: 45g
- Protein: 6g
- Fiber: 3g
- Sugar: 28g
Pumpkin itself is packed with vitamin A (over 200% of your daily needs in one serving), plus vitamin C, potassium, and fiber. The spices—cinnamon, ginger, nutmeg, cloves—are anti-inflammatory and packed with antioxidants. So while this is definitely a treat, you’re getting some nutritional benefits too. I always tell my friends that a slice of pumpkin pie is basically a vegetable serving in disguise. They don’t buy it, but I keep saying it.
For those watching their intake, you can reduce the sugar to ½ cup total and use a low-fat evaporated milk. The texture will be slightly less creamy, but it’s still a solid pie. This recipe contains gluten, dairy, and eggs, so it’s not suitable for those with allergies unless you use the substitutions mentioned above.
Conclusion
This perfect homemade pumpkin pie from scratch has become my signature dish, and I’m not even a pie person. There’s something about the way it comes together—the flaky crust, the silky filling, the warm spices—that feels like a hug on a plate. It’s the recipe I turn to when I want to impress without stress, when I need a last-minute dessert, or when I just want to fill my kitchen with the smell of autumn.
I hope you give this recipe a try, whether it’s for a holiday gathering, a potluck, or just because you deserve a good slice of pie. Don’t be afraid to make it your own—add a little extra cinnamon, swap the crust, or top it with something unexpected. That’s the beauty of cooking from scratch. You’re in control.
If you make this pie, I’d love to hear about it! Drop a comment below and let me know how it turned out. Did you try one of the variations? Did your family fight over the last slice? Share your photos and tag me—I live for that stuff. And if you’re looking for more hosting-friendly desserts, check out my classic apple crisp recipe or these easy pumpkin cheesecake bars. Happy baking, friends!
Frequently Asked Questions
Can I use a store-bought crust for this recipe?
Absolutely, and I won’t judge you. A good quality refrigerated pie crust works fine in a pinch. Just blind bake it according to the package directions before adding the filling. The homemade crust is better, but sometimes you’re short on time, and that’s okay.
Why did my pumpkin pie crack on top?
Cracking usually happens from overbaking or sudden temperature changes. Make sure you remove the pie when the center still jiggles slightly. Also, let it cool gradually—don’t put it near a draft or in the fridge while it’s still warm. If it does crack, just cover it with whipped cream. Nobody will ever know.
Can I make this pie gluten-free?
Yes! Use a gluten-free all-purpose flour blend (like Bob’s Red Mill 1-to-1) for the crust. The texture will be slightly more crumbly, but it still works beautifully. Just make sure your blend contains xanthan gum for structure. The filling is naturally gluten-free.
How do I know when the pie is done without a thermometer?
The jiggle test is your best friend. Gently shake the pie pan—the center should wobble like Jell-O while the edges are set. If you have an instant-read thermometer, the internal temperature should be around 175°F (80°C) when done. But honestly, the jiggle test has never failed me.
Can I use fresh pumpkin instead of canned?
You can, but I don’t recommend it for this recipe. Fresh pumpkin has much higher water content, which can make the filling watery and bland. If you really want to use fresh, roast the pumpkin, puree it, then strain it through cheesecloth overnight to remove excess moisture. It’s a lot of work for minimal payoff, but you do you.
Pin This Recipe!
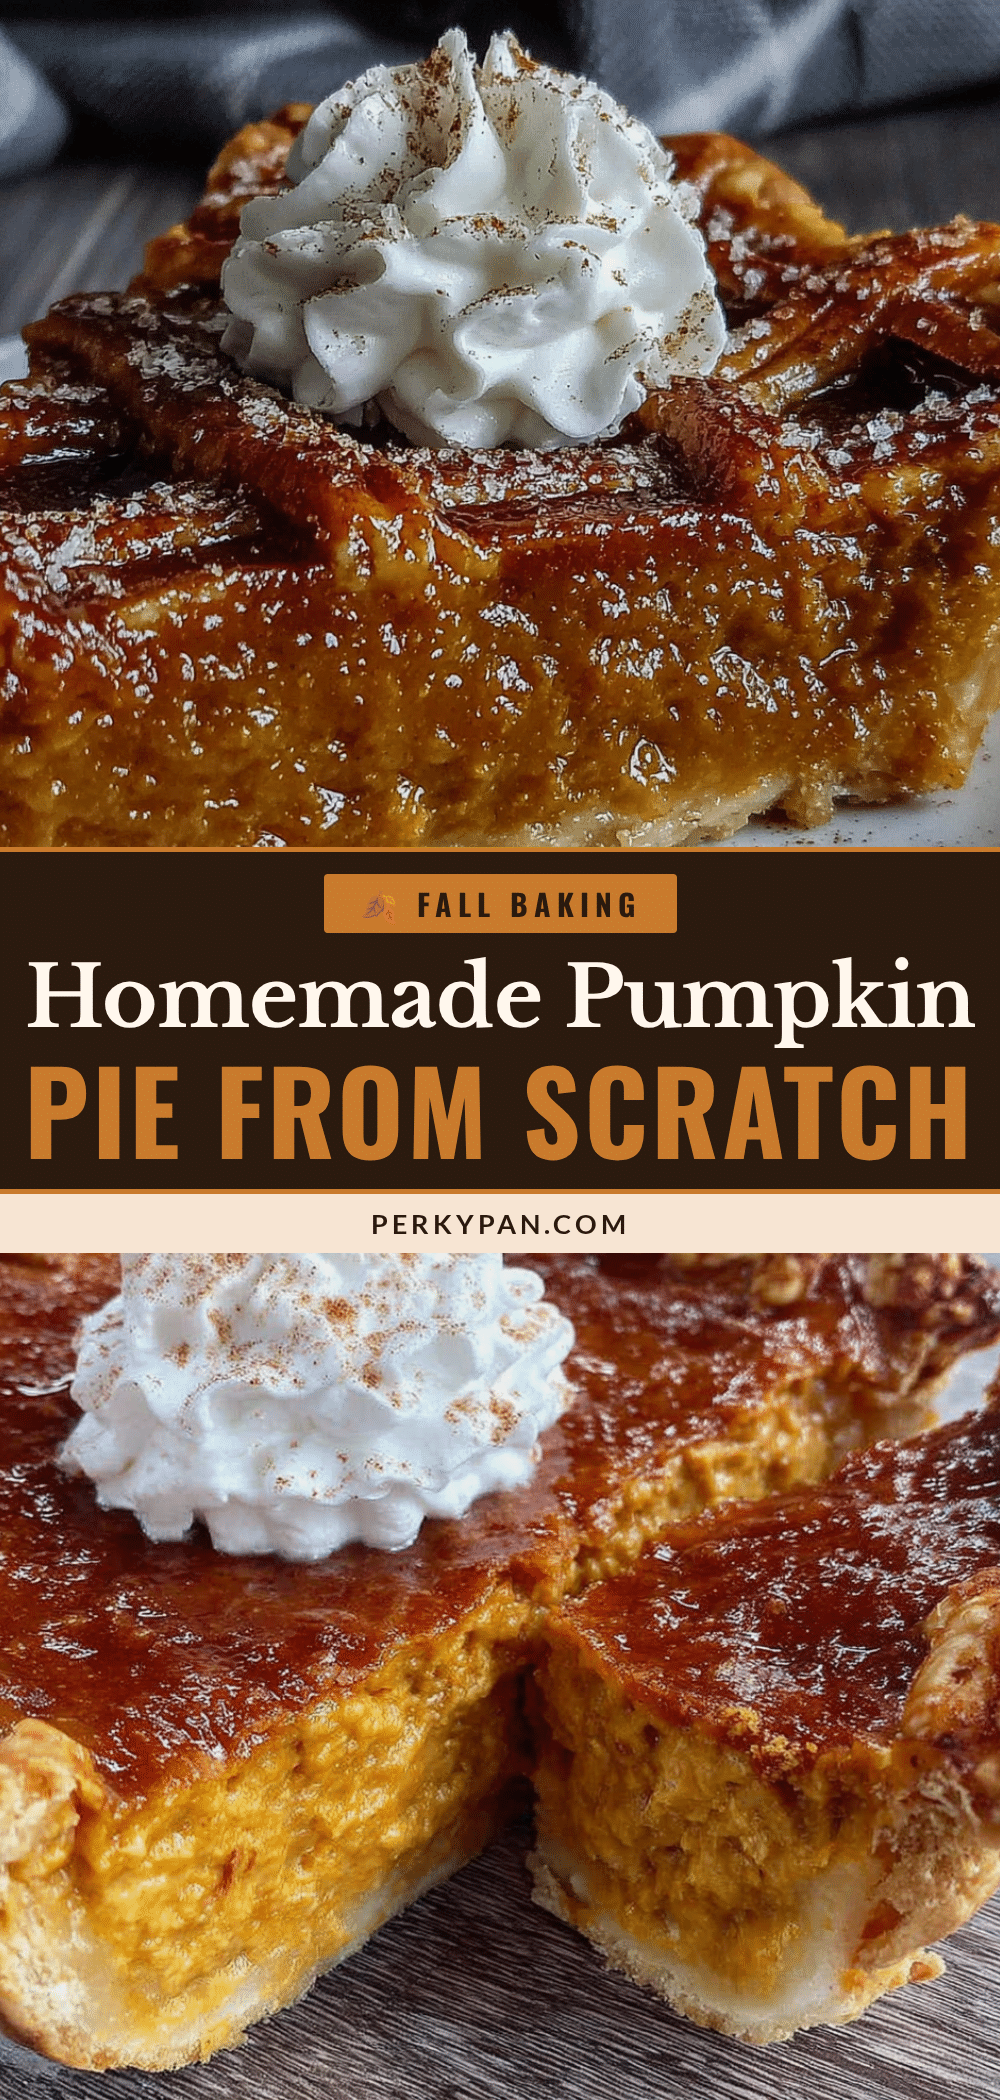
Perfect Homemade Pumpkin Pie from Scratch – Easy & Delicious

This perfect homemade pumpkin pie from scratch features a flaky, buttery crust and a silky, perfectly spiced filling. It’s a crowd-pleasing winner that’s make-ahead friendly and guaranteed to impress.
- Prep Time: 30 minutes
- Cook Time: 1 hour 20 minutes
- Total Time: 4 hours 50 minutes (includes chilling and cooling)
- Yield: 8 servings 1x
- Category: Dessert
- Cuisine: American
Ingredients
- 1 ¼ cups all-purpose flour (spooned and leveled)
- ½ teaspoon fine sea salt
- ½ cup cold unsalted butter, cut into small cubes
- 3 to 4 tablespoons ice water
- 1 can (15 oz) pumpkin puree (100% pure pumpkin)
- ¾ cup granulated sugar
- ¼ cup packed brown sugar (light or dark)
- 2 large eggs, room temperature
- 1 large egg yolk, room temperature
- 1 teaspoon vanilla extract
- 1 cup heavy cream
- ½ cup evaporated milk
- 2 teaspoons ground cinnamon
- 1 teaspoon ground ginger
- ½ teaspoon ground nutmeg (freshly grated if possible)
- ¼ teaspoon ground cloves
- ½ teaspoon salt
Instructions
- Make the pie crust: In a large bowl, whisk together the flour and salt. Add the cold butter cubes and toss to coat. Using a pastry cutter or two forks, cut the butter into the flour until you have pea-sized crumbs with some larger pieces. Drizzle 3 tablespoons of ice water over the mixture and stir with a fork until the dough just comes together. If dry, add the extra tablespoon. Turn the dough onto plastic wrap, shape into a disk, wrap tightly, and refrigerate for at least 1 hour (up to 3 days …
- Blind bake the crust: Preheat oven to 375°F (190°C). On a lightly floured surface, roll the chilled dough into a 12-inch circle, about ⅛-inch thick. Transfer to a 9-inch pie dish, pressing into the corners. Trim excess dough, leaving a ½-inch overhang. Fold edges under and crimp. Prick the bottom all over with a fork. Line with parchment paper and fill with pie weights or dried beans. Bake for 15 minutes. Remove weights and parchment, then bake for another 5 minutes until the bottom looks dry an…
- Prepare the filling: In a large bowl, whisk together the pumpkin puree, both sugars, eggs, egg yolk, and vanilla extract until smooth. In a separate small bowl, whisk the heavy cream and evaporated milk together. Gradually pour the milk mixture into the pumpkin mixture, whisking constantly. Add the cinnamon, ginger, nutmeg, cloves, and salt. Whisk until fully combined and silky.
- Bake the pie: Reduce oven temperature to 350°F (175°C). Place the blind-baked crust on a baking sheet. Pour the filling into the warm crust, filling almost to the brim. Bake for 50 to 60 minutes. The pie is done when the edges are set but the center still jiggles slightly when gently shaken. If the crust edges brown too quickly, tent with foil around the 30-minute mark.
- Cool completely: Remove the pie from the oven and place on a cooling rack. Cool at room temperature for at least 2 hours. Do not refrigerate while warm. Once fully cooled, refrigerate until ready to serve. The pie needs at least 4 hours of chilling time to slice cleanly.
Notes
Keep everything cold for the crust. Don’t overmix the filling. Use a baking sheet to catch drips. Check for doneness with the jiggle test. Cool gradually to prevent cracking. The pie can be made a day ahead; flavors improve overnight.
Nutrition
- Serving Size: 1 slice
- Calories: 400
- Sugar: 28
- Sodium: 350
- Fat: 22
- Saturated Fat: 13
- Carbohydrates: 45
- Fiber: 3
- Protein: 6
Keywords: pumpkin pie, homemade pumpkin pie, from scratch, Thanksgiving dessert, fall dessert, pumpkin dessert, pie recipe