Love this? Save it for later!
Share the inspiration with your friends
My sister-in-law, Clara, asked me why I couldn’t just skip the cream of tartar in my snickerdoodle recipe. She was helping me prep for a big fall dinner party, and I had just realized I was out of it. I started to explain why that wouldn’t work—that the tangy flavor and that signature soft chew depend on it. Then I stopped. I was out of options, and the store was a thirty-minute round trip. I figured, what’s the worst that could happen? A flat cookie? Honestly, I was pretty sure I was about to ruin a batch of dough.
So, I did it. I swapped in a little extra brown sugar for depth and a splash of apple cider vinegar to mimic that missing tang. I also had a can of pumpkin puree sitting on the counter from a pie I never got around to making. On a whim, I folded in a half-cup. Clara looked at me like I had lost my mind. “You’re just throwing things in now?” she laughed. I told her this was a “controlled experiment,” but really, I was just trying to salvage the situation before our guests arrived. The dough felt… weird. Too soft, almost sticky. I was certain I had created a disaster.
But then I baked them. The kitchen filled with this warm, spiced aroma that was entirely different from a standard cookie. When I pulled the tray out, they had crackled tops and a puffed, pillowy center. I let one cool for exactly two minutes—maybe you’ve been there, impatient and convinced you’ve failed—and took a bite. The texture was unreal. Soft, almost cakelike, with a crisp, cinnamon-sugar edge. That accidental pumpkin addition didn’t ruin them; it made them the star of the party. I learned that day that sometimes the best recipes come from being wrong. And now, these Perfect Brown Sugar Pumpkin Snickerdoodle Cookies are the only version I make for a crowd.
Why You’ll Love This Recipe
Let me tell you why these cookies have become my go-to for every fall gathering. I’ve tested this recipe about seven times (poor Clara, she was my taste-tester for all of them), and it’s finally perfect. These aren’t just good cookies—they are the kind that disappear before the main course even hits the table.
- Quick & Easy: You can have these whipped up and in the oven in under 15 minutes. No chilling required, which is a lifesaver when you’re juggling a turkey and side dishes.
- Simple Ingredients: You likely have most of these in your pantry right now. Pumpkin puree is the only “special” item, and it’s everywhere in the fall.
- Perfect for Hosting: These are my secret weapon for dinner parties and potlucks. They look impressive with their crackled tops, but they are incredibly forgiving to make.
- Crowd-Pleaser: I’ve served these to kids, grandparents, and foodie friends. Everyone asks for the recipe. I mean it—I’ve had three people text me for it just last week.
- Unbelievably Delicious: The brown sugar and pumpkin create a deep, molasses-like sweetness that pairs perfectly with the cinnamon coating. It’s next-level comfort food.
What makes this recipe different from the rest? It’s the texture. Most pumpkin cookies are dense or gummy. By using brown sugar instead of white, and skipping the cream of tartar, you get a cookie that is soft, tender, and almost cake-like without being dry. The pumpkin keeps it moist for days. This isn’t just another fall cookie recipe—it’s your best version.
What Ingredients You Will Need
This recipe uses simple, wholesome ingredients to deliver that bold pumpkin flavor and soft, chewy texture without any fuss. Most of these are pantry staples, which makes this perfect for a last-minute hostess gift or a sudden craving.
For the Cookies
- 1 cup (2 sticks) unsalted butter, softened — (adds richness) I prefer using Land O’Lakes for consistent results.
- 1 ½ cups packed light brown sugar — (for deep flavor and moisture) Dark brown sugar works too, but the flavor will be more molasses-forward.
- ½ cup granulated sugar — (for structure and sweetness)
- 1 cup pumpkin puree — (not pumpkin pie filling!) Look for 100% pure pumpkin. Libby’s is my go-to brand.
- 2 large eggs, room temperature — (helps create a smooth dough)
- 2 teaspoons vanilla extract — (enhances the warm spices)
- 3 ½ cups all-purpose flour — (spooned and leveled for accuracy)
- 2 teaspoons cream of tartar — (optional, but adds that classic tangy flavor)
- 1 teaspoon baking soda — (for lift)
- ½ teaspoon salt — (balances the sweetness)
- 2 teaspoons ground cinnamon — (the star spice)
- 1 teaspoon ground ginger — (adds warmth)
- ½ teaspoon ground nutmeg — (for that fall feeling)
- ¼ teaspoon ground cloves — (optional, but I love the depth)
For the Cinnamon-Sugar Coating
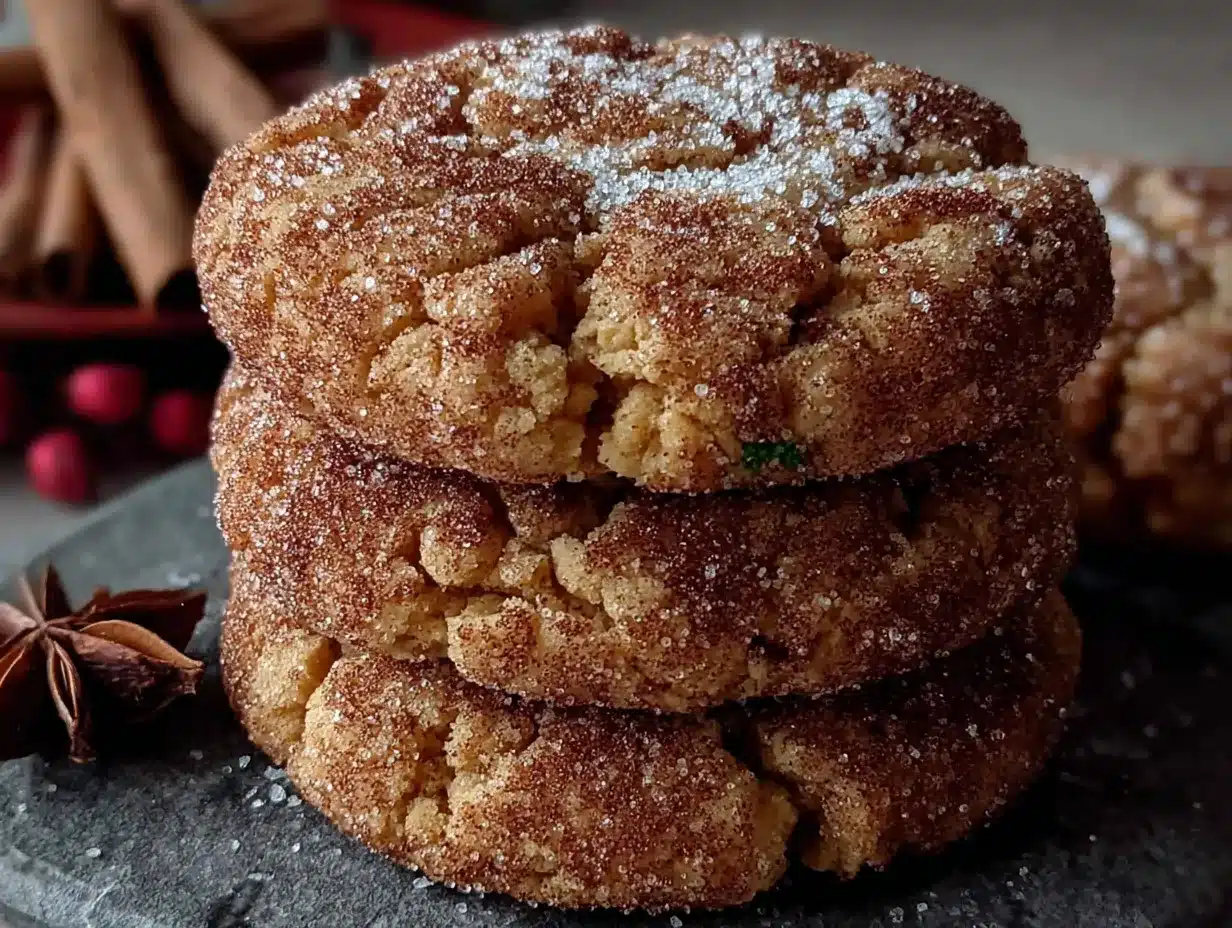
- ¼ cup granulated sugar
- 2 tablespoons ground cinnamon
Ingredient Selection Tip: For the best texture, make sure your butter is truly softened—leave it out on the counter for about an hour. Cold butter will make the dough lumpy. Also, if your pumpkin puree looks watery, blot it with a paper towel to remove excess moisture. This prevents the cookies from spreading too much.
Substitution Guidance: If you are gluten-free, use a 1:1 gluten-free baking flour blend. I’ve had great results with Bob’s Red Mill. For a dairy-free option, swap the butter with a high-quality vegan butter stick (not the spreadable kind).
Equipment Needed
You don’t need a fancy kitchen to pull these off. Here is exactly what you’ll need:
- Large mixing bowls (one for wet, one for dry)
- Electric hand mixer or stand mixer — A hand mixer works perfectly. I actually prefer it for these cookies because you have more control over not over-mixing.
- Measuring cups and spoons
- Rubber spatula
- Baking sheets (two, if you have them, to speed things up)
- Parchment paper or silicone baking mats — I’ve used both, and silicone mats give the most even browning on the bottom.
- Cooling rack
- Small bowl for the cinnamon-sugar mixture
- Cookie scoop (a 1.5-tablespoon scoop is ideal for uniform cookies)
Budget-Friendly Tip: If you don’t have a cookie scoop, just use two spoons to drop the dough. The cookies will still taste amazing, they just might look a little more rustic. I’ve done it plenty of times when my scoop was in the dishwasher.
Preparation Method
Follow these steps carefully, and you will have perfect cookies every time. I’ve included all the little details I wish someone had told me when I first made these.
- Preheat and Prep: Preheat your oven to 350°F (175°C). Line two baking sheets with parchment paper or silicone mats. Set them aside.
- Cream the Butter and Sugars: In a large bowl, beat the softened butter, brown sugar, and granulated sugar together with an electric mixer on medium speed. Beat for about 2-3 minutes until the mixture is light, fluffy, and pale in color. Scrape down the sides of the bowl with a spatula halfway through. Tip: Don’t rush this step. Proper creaming incorporates air, which helps the cookies rise.
- Add Wet Ingredients: Add the pumpkin puree, eggs, and vanilla extract to the butter mixture. Beat on low speed until just combined. The mixture might look a little curdled or separated—that’s totally normal with pumpkin. Don’t panic. Just mix until it comes together.
- Whisk Dry Ingredients: In a separate medium bowl, whisk together the flour, cream of tartar (if using), baking soda, salt, cinnamon, ginger, nutmeg, and cloves. Whisking ensures the spices and leavening agents are evenly distributed, so you don’t get a pocket of baking soda in one cookie.
- Combine Wet and Dry: Gradually add the dry ingredients to the wet ingredients, mixing on low speed. Add about one-third of the flour mixture at a time. Mix until just combined—stop as soon as you no longer see streaks of flour. Over-mixing will make the cookies tough. The dough will be soft and slightly sticky. That’s perfect.
- Make the Coating: In a small bowl, stir together the ¼ cup granulated sugar and 2 tablespoons cinnamon. Set aside.
- Shape the Cookies: Using a 1.5-tablespoon cookie scoop or two spoons, scoop a ball of dough. Drop it into the cinnamon-sugar mixture. Roll it around gently to coat all sides. Place the coated dough balls onto the prepared baking sheets, spacing them about 2 inches apart. They will spread a bit.
- Bake: Bake for 10-12 minutes, rotating the pans halfway through (swap top and bottom racks). The cookies should look puffed and set around the edges, but the centers will still look soft and slightly underdone. Sensory cue: They should smell like a fall candle—warm, spicy, and sweet.
- Cool: Let the cookies cool on the baking sheet for 5 minutes. This is crucial. They are very fragile when hot. After 5 minutes, transfer them to a wire rack to cool completely. The centers will continue to set as they cool.
Preparation Note: If the dough feels too sticky to roll, chill it in the refrigerator for 15 minutes. This makes it easier to handle. I had to do this once when my kitchen was particularly warm, and it worked like a charm.
Cooking Tips & Techniques
I’ve made every mistake in the book with these cookies, so you don’t have to. Here are the lessons I learned the hard way.
Don’t Skip the Pumpkin Blotting: The first time I made these, I was in a hurry and just dumped the pumpkin in straight from the can. The cookies spread into flat, sad discs. Pumpkin puree has a lot of water. Blotting it with a paper towel removes that extra moisture, giving you a thicker, puffier cookie. Just press the puree gently in a paper towel-lined bowl to absorb the liquid.
Measure Flour Correctly: This is the number one mistake home bakers make. Scooping your measuring cup directly into the flour bag packs it down, leading to dry, crumbly cookies. Instead, spoon the flour into the cup and level it off with a knife. It takes an extra five seconds, and it makes a huge difference.
Room Temperature Eggs Matter: Cold eggs can seize the butter, making the dough lumpy. If you forget to take your eggs out of the fridge, place them in a bowl of warm water for 5 minutes. They’ll be ready to go. I do this all the time when I’m baking on a whim.
Underbake Slightly: I know it’s tempting to leave them in the oven until they look “done,” but pull them out when the edges are set and the centers are still soft. They will continue to bake on the hot pan. Overbaked pumpkin cookies turn dry and cakey in a bad way. Trust the 10-minute mark and check them.
Chill the Dough if Needed: If your kitchen is warm or you’re baking multiple batches, the dough can get soft and sticky. Just pop the bowl in the fridge for 15 minutes between batches. It makes rolling much easier and prevents the cookies from spreading too much.
Variations & Adaptations
One of the best things about this recipe is how flexible it is. I’ve played around with it quite a bit, and these are my favorite variations.
Gluten-Free Version: I tested this for a friend with celiac disease. Substitute the all-purpose flour with a 1:1 gluten-free baking blend that contains xanthan gum. The texture is slightly more tender, but the flavor is spot on. I used King Arthur Measure for Measure, and nobody at the party could tell the difference.
Vegan Adaptation: Replace the butter with vegan butter sticks (like Miyoko’s) and use a flax egg (1 tablespoon ground flaxseed mixed with 3 tablespoons water, let sit for 5 minutes). The cookies will be a bit flatter, but still delicious. I’d recommend chilling the dough for 30 minutes to help them hold their shape.
Spice It Up: For a bolder flavor, add ¼ teaspoon of cardamom or allspice to the dry ingredients. I tried this last Thanksgiving, and it gave the cookies a lovely, almost chai-like warmth. My brother-in-law said they were the best cookies I’d ever made.
Chocolate Drizzle: Melt ½ cup of semi-sweet chocolate chips with 1 teaspoon of coconut oil and drizzle it over the cooled cookies. It adds a touch of elegance for a dinner party. I did this for a friend’s baby shower, and they looked like they came from a bakery.
Pumpkin Chip Cookies: Fold in 1 cup of white chocolate chips or butterscotch chips with the dry ingredients. The sweetness of the chips pairs beautifully with the warm spices. This is my go-to variation for potlucks because it feels extra indulgent.
Serving & Storage Suggestions
These cookies are best served slightly warm, when the centers are still soft and the cinnamon-sugar coating is perfectly crisp. If you’re hosting, I recommend baking them just before your guests arrive. The smell will draw everyone into the kitchen.
Presentation Tips for Hosting: Arrange the cookies on a wooden board or a rustic cake stand. Sprinkle a little extra cinnamon on the plate for visual appeal. They pair beautifully with a hot cup of spiced apple cider or a pumpkin spice latte. For a dessert spread, serve them alongside a warm apple crisp or a slice of pecan pie.
Storage Instructions: Store the cookies in an airtight container at room temperature for up to 5 days. I like to place a slice of bread in the container—it absorbs excess moisture and keeps the cookies soft. Honestly, they taste even better on day two, as the flavors have time to meld together.
Freezer Instructions: These cookies freeze beautifully. You can freeze the baked cookies in a zip-top bag for up to 3 months. Just thaw them at room temperature for about 30 minutes before serving. Alternatively, you can freeze the unbaked dough balls. Roll them in the cinnamon-sugar mixture, place them on a baking sheet, and freeze until solid. Then transfer them to a freezer bag. Bake directly from frozen, adding 2-3 minutes to the baking time.
Reheating Tips: To revive that just-baked texture, pop a cookie in the microwave for 10 seconds. Or, place them on a baking sheet in a 300°F oven for 5 minutes. The coating will crisp up again perfectly.
Nutritional Information & Benefits
While these are definitely a treat, there are a few nutritional bright spots. Please note that these values are estimates and will vary based on specific ingredients and portion sizes.
| Nutrient | Per Cookie (approx.) |
|---|---|
| Calories | 185 |
| Fat | 8g |
| Saturated Fat | 5g |
| Carbohydrates | 27g |
| Sugar | 16g |
| Protein | 2g |
| Fiber | 1g |
| Vitamin A | 15% DV |
Health Benefits: Pumpkin is rich in Vitamin A, which supports eye health and immune function. The cinnamon in the coating has anti-inflammatory properties. The brown sugar provides a quick source of energy, making these a great post-dinner treat or a mid-afternoon pick-me-up.
Dietary Considerations: This recipe contains gluten, dairy, and eggs. For allergen-friendly options, see the variations section above. They are vegetarian-friendly as written.
I love that I can serve these to my family knowing they’re getting a little bit of vegetable in their dessert. It’s not health food, but it’s a treat that makes you feel a little less guilty!
Conclusion
These Perfect Brown Sugar Pumpkin Snickerdoodle Cookies are more than just a fall dessert—they are a conversation starter. They are the cookie that makes people ask, “Wait, what’s in these?” The combination of that tender, pumpkin-infused crumb with the crackly cinnamon-sugar coating is honestly unforgettable.
I hope you give this recipe a try, whether it’s for a big Thanksgiving dinner or just a quiet Tuesday night. Don’t be afraid to customize it—throw in some chocolate chips, add a pinch of cardamom, or double the batch because they will disappear fast. I love that this recipe came from a moment of panic and a sister-in-law’s simple question. It reminds me that sometimes the best things happen when we let go of perfection.
Please come back and let me know how they turned out! Drop a comment below, share a photo on Pinterest, or tag me in your cookie creations. I can’t wait to see your version of these little autumn gems. Happy baking, friends!
Frequently Asked Questions
Can I use pumpkin pie filling instead of pumpkin puree?
No, please don’t. Pumpkin pie filling is pre-sweetened and spiced, which will throw off the sugar and spice balance in this recipe. Stick with 100% pure pumpkin puree for the best results.
Why did my cookies turn out flat?
Flat cookies usually mean the butter was too soft or the dough was too warm. Make sure your butter is just softened, not melted. Also, blotting the pumpkin puree to remove excess moisture is crucial. If your dough feels sticky, chill it for 15-20 minutes before baking.
Can I make the dough ahead of time?
Absolutely! You can prepare the dough, roll it into balls, and coat them in the cinnamon-sugar. Place them on a baking sheet and refrigerate for up to 24 hours. Bake them straight from the fridge, adding 1-2 minutes to the baking time.
How do I store these cookies to keep them soft?
Store them in an airtight container at room temperature. Adding a slice of sandwich bread to the container helps absorb excess moisture and keeps the cookies soft for days. I’ve kept them fresh for up to 5 days this way.
Can I double this recipe for a large party?
Yes, this recipe doubles beautifully. Just make sure you have enough baking sheets and space in your oven. You may need to bake in batches. The dough holds up well, so don’t worry about it sitting out while the first batch bakes.
Pin This Recipe!
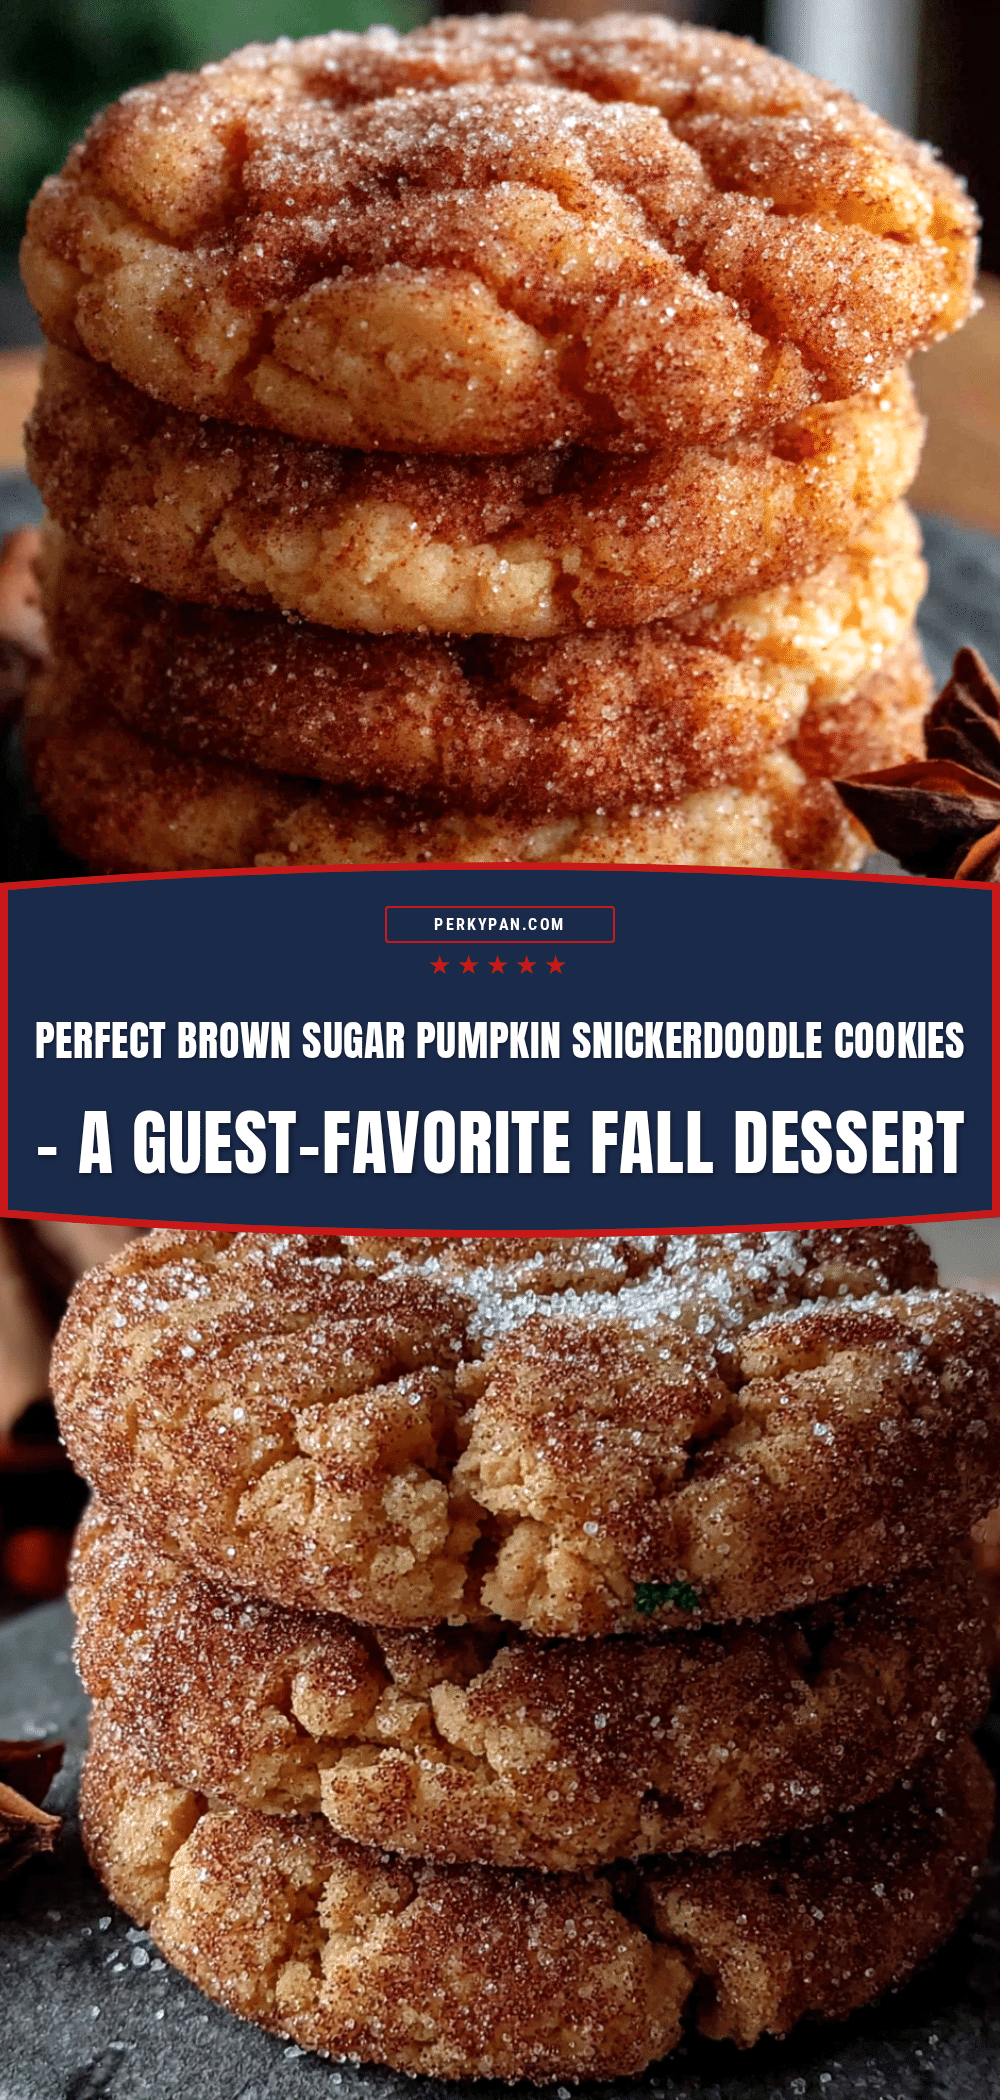
Perfect Brown Sugar Pumpkin Snickerdoodle Cookies
These soft, cake-like snickerdoodle cookies are infused with pumpkin and brown sugar, then rolled in a cinnamon-sugar coating. They are a crowd-pleasing fall dessert that comes together quickly without chilling.
- Prep Time: 15 minutes
- Cook Time: 12 minutes
- Total Time: 27 minutes
- Yield: 36 servings 1x
- Category: Dessert
- Cuisine: American
Ingredients
- 1 cup (2 sticks) unsalted butter, softened
- 1 ½ cups packed light brown sugar
- ½ cup granulated sugar
- 1 cup pumpkin puree (not pumpkin pie filling)
- 2 large eggs, room temperature
- 2 teaspoons vanilla extract
- 3 ½ cups all-purpose flour, spooned and leveled
- 2 teaspoons cream of tartar (optional)
- 1 teaspoon baking soda
- ½ teaspoon salt
- 2 teaspoons ground cinnamon
- 1 teaspoon ground ginger
- ½ teaspoon ground nutmeg
- ¼ teaspoon ground cloves (optional)
- ¼ cup granulated sugar (for coating)
- 2 tablespoons ground cinnamon (for coating)
Instructions
- Preheat oven to 350°F (175°C). Line two baking sheets with parchment paper or silicone mats.
- In a large bowl, beat softened butter, brown sugar, and granulated sugar with an electric mixer on medium speed for 2-3 minutes until light and fluffy. Scrape down sides halfway through.
- Add pumpkin puree, eggs, and vanilla extract. Beat on low speed until just combined (mixture may look slightly curdled).
- In a separate medium bowl, whisk together flour, cream of tartar (if using), baking soda, salt, cinnamon, ginger, nutmeg, and cloves.
- Gradually add dry ingredients to wet ingredients in three additions, mixing on low speed until just combined. Do not overmix. Dough will be soft and slightly sticky.
- In a small bowl, stir together ¼ cup granulated sugar and 2 tablespoons cinnamon for coating.
- Using a 1.5-tablespoon cookie scoop or two spoons, scoop dough balls. Roll each ball in the cinnamon-sugar mixture to coat. Place 2 inches apart on prepared baking sheets.
- Bake for 10-12 minutes, rotating pans halfway through. Cookies should look puffed and set around edges with soft centers.
- Let cookies cool on baking sheet for 5 minutes, then transfer to a wire rack to cool completely.
Notes
Blot pumpkin puree with a paper towel to remove excess moisture for thicker cookies. Measure flour by spooning and leveling. Underbake slightly for soft centers. If dough is too sticky, chill for 15 minutes. Store in an airtight container with a slice of bread to keep soft for up to 5 days. Freeze baked cookies for up to 3 months or unbaked dough balls for later use.
Nutrition
- Serving Size: 1 cookie
- Calories: 185
- Sugar: 16
- Sodium: 120
- Fat: 8
- Saturated Fat: 5
- Carbohydrates: 27
- Fiber: 1
- Protein: 2
Keywords: pumpkin snickerdoodle, brown sugar cookies, fall cookies, pumpkin cookies, snickerdoodle recipe, soft pumpkin cookies


