Love this? Save it for later!
Share the inspiration with your friends
I was standing in line at the hardware store—not exactly where you expect to find dessert inspiration—when the woman ahead of me, clutching a bag of lightbulbs and a new garden hose, turned around and started talking about meringues. She was probably seventy, with the kind of no-nonsense haircut that says she doesn’t have time for fluff. But there she was, describing how her grandmother used to make these cookies that practically floated off the plate. “You put them in the oven,” she said, “then you just forget about them. That’s the whole trick.” I almost laughed. A recipe that starts with forgetting? That felt like something I could actually handle. She scribbled the directions on the back of her receipt, and I stood there holding it like it was a treasure map. Honestly, I’d been looking for a dessert that felt special but didn’t require a stand mixer, a culinary degree, or a trip to three different grocery stores. These light and airy forgotten meringue cookies checked every box. They’re the kind of thing you make when you want to feel like a fancy baker but you’re also, you know, a regular person with a regular kitchen and a regular amount of patience. Maybe you’ve been there too—staring at a recipe with fifteen steps and thinking, “I just want something that works.” Well, this one works. It’s been my go-to for years now, and I still think about that woman in the hardware store every single time I pull a batch out of the oven.
Why You’ll Love This Recipe
Let me tell you why these cookies have earned a permanent spot in my recipe rotation. I’ve tested this method more times than I can count, tweaking temperatures and timing until it was absolutely foolproof. Here’s what makes them special:
- Just 3 Ingredients: Egg whites, sugar, and a splash of vanilla. That’s it. No butter, no flour, no complicated shopping list.
- Virtually Effortless: The oven does all the work. You mix, you pipe, you walk away. The “forgetting” part is actually the secret to their success.
- Naturally Gluten-Free & Low-Fat: Perfect for when you want something sweet without the heaviness of traditional cookies.
- Incredibly Light & Airy: They literally melt in your mouth. The texture is unlike anything you’ve ever had from a cookie.
- Endlessly Customizable: Add cocoa, fold in chocolate chips, or tint them with food coloring for holidays.
What sets this recipe apart from other meringue cookies is the specific technique of leaving them in the turned-off oven overnight. It’s not just a gimmick—it creates a perfectly dry, crisp interior with a delicate exterior that never cracks or weeps. I’ve tried the quick-bake methods, and honestly, they just don’t compare. This version gives you that professional-quality result every single time. It’s the kind of cookie that makes people close their eyes after the first bite, and you get to pretend you spent hours in the kitchen. Between us, you spent about fifteen minutes of actual work.
What Ingredients You Will Need
This recipe uses simple, pantry-friendly ingredients to create something that feels surprisingly elegant. You probably already have everything you need, which is exactly how I like to cook.
- 3 large egg whites, room temperature (this is important—cold eggs won’t whip up as voluminously)
- 3/4 cup (150g) granulated white sugar (not powdered sugar—the granulated texture helps stabilize the meringue)
- 1 teaspoon vanilla extract (pure vanilla extract makes a noticeable difference, but imitation works in a pinch)
A few notes from my kitchen to yours. First, make sure your bowl and whisk attachment are completely clean and free of any grease. Even a tiny bit of oil can prevent the egg whites from whipping properly. I wipe mine down with a little lemon juice or white vinegar before starting—old baker’s trick. Second, room temperature eggs are non-negotiable here. Cold egg whites take forever to whip and never reach the same volume. If you forgot to take your eggs out ahead of time, place them in a bowl of warm water for about 5 minutes. Third, I prefer using fine granulated sugar because it dissolves more quickly into the egg whites. If you only have coarser sugar, give it a quick spin in the food processor before using.
For the best texture, I recommend using fresh eggs rather than carton egg whites. Fresh egg whites whip up fluffier and hold their structure better. Also, avoid getting any yolk in your whites—even a speck can ruin the whole batch. Separate your eggs one at a time into a small bowl before adding them to the main mixing bowl, just to be safe.
You can absolutely play with flavors here. Swap the vanilla for almond extract, peppermint extract, or even lemon zest. For chocolate meringues, sift in 1 tablespoon of unsweetened cocoa powder with the sugar. The possibilities are endless, and the base recipe stays the same.
Equipment Needed
You don’t need a fancy kitchen to pull this off, but a few specific tools make the process much smoother.
- Electric stand mixer or hand mixer: You can whip egg whites by hand with a whisk, but your arm will definitely feel it. A mixer saves time and ensures consistent results.
- Large mixing bowl: Preferably glass, stainless steel, or ceramic. Avoid plastic bowls—they can retain grease even after washing.
- Baking sheet: A standard half-sheet pan works perfectly.
- Parchment paper or silicone baking mat: Essential for preventing sticking. Do not skip this.
- Piping bag with star tip: For pretty swirls, but you can also use a zip-top bag with the corner snipped off, or simply drop spoonfuls onto the baking sheet.
- Cooling rack: For letting the cookies rest after they come out of the oven.
I’ve made these cookies with a $20 hand mixer and they turned out beautifully. Don’t feel pressured to invest in expensive equipment. The only thing I wouldn’t recommend skimping on is the parchment paper—trust me, cleaning stuck meringue off a baking sheet is not fun.
Preparation Method
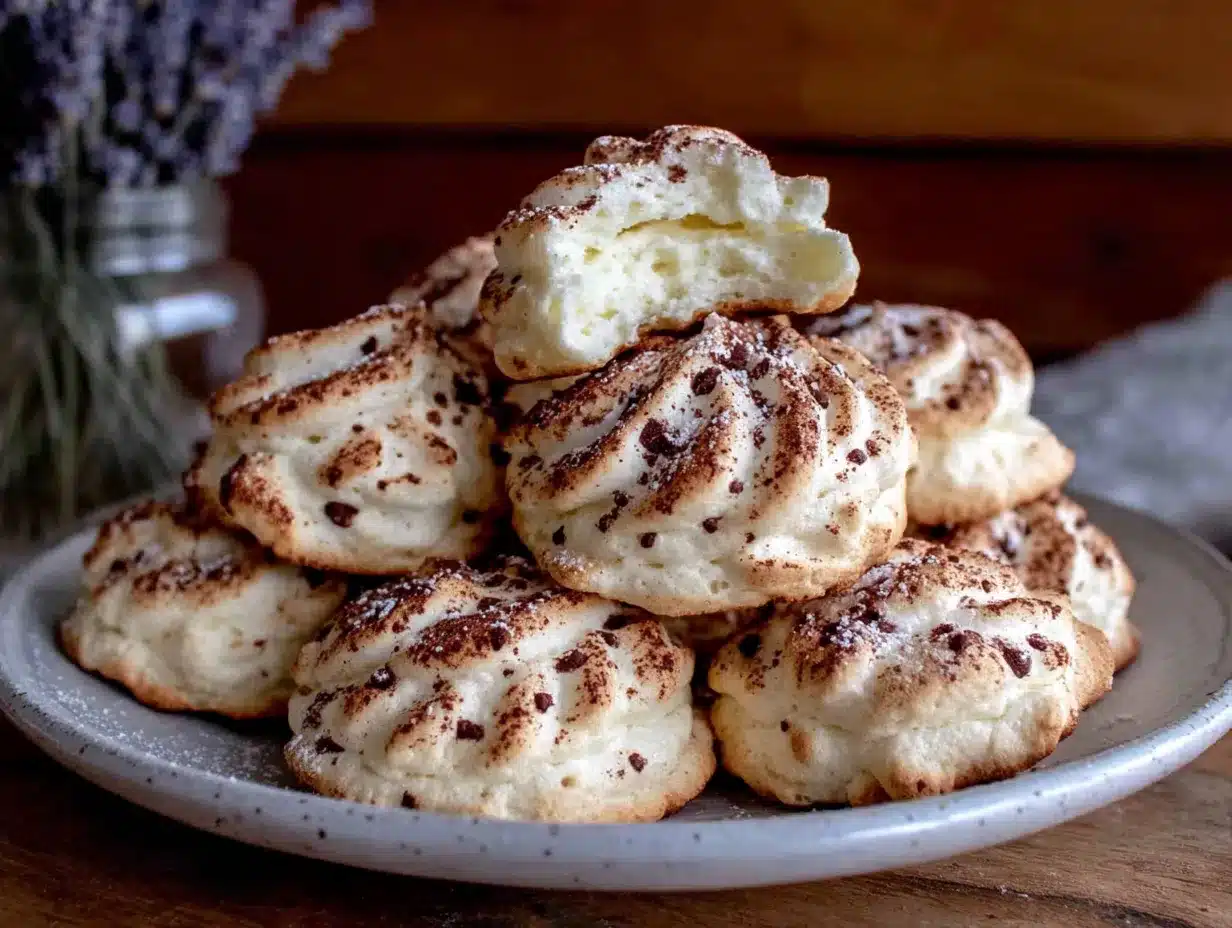
Follow these steps carefully, and you’ll have perfect meringue cookies every time. I’ve included all the little details that make the difference between good and great.
- Preheat your oven to 350°F (175°C). Line a baking sheet with parchment paper or a silicone mat. Set aside.
- Prepare your egg whites. Separate 3 large eggs, making sure no yolk gets into the whites. Let the whites sit at room temperature for about 10 minutes. This helps them whip up to maximum volume.
- Start whipping. Place the egg whites in your clean, dry mixing bowl. Begin beating on medium speed until they become frothy and bubbly—about 1 minute. You’ll see lots of small bubbles forming.
- Gradually add the sugar. With the mixer running, add the granulated sugar one tablespoon at a time. This slow addition helps the sugar dissolve properly. Keep beating on medium-high speed for about 3-4 minutes.
- Add the vanilla. Pour in the vanilla extract and continue beating. The mixture will start to look glossy and smooth.
- Check for stiff peaks. This is the most important step. Stop the mixer and lift the whisk attachment. The meringue should form peaks that stand straight up without drooping. If the peaks flop over, keep beating for another 30 seconds and check again. Also, rub a tiny bit of meringue between your fingers—if it feels gritty, the sugar hasn’t fully dissolved, so keep beating until it’s smooth.
- Pipe or scoop the meringue. Transfer the meringue to a piping bag fitted with a star tip. Pipe small swirls onto the prepared baking sheet, spacing them about 1 inch apart. Alternatively, drop rounded tablespoonfuls onto the sheet for a more rustic look.
- Place in the oven and TURN IT OFF. This is the “forgotten” part. Put the baking sheet in the oven, then immediately turn the oven off. Do not open the door.
- Leave them overnight. Let the meringues sit in the closed oven for at least 8 hours or overnight. They will dry out slowly, becoming crisp and light.
- Remove and cool. In the morning, take the meringues out of the oven. Let them cool completely on the baking sheet for about 10 minutes before transferring to a wire rack.
A few troubleshooting notes. If your meringue looks weepy or starts releasing liquid, your bowl might have had grease on it, or you might have added the sugar too quickly. If the cookies come out chewy instead of crisp, they needed more time in the oven. Next time, leave them for the full 8 hours minimum. And if they crack or collapse, the oven might have been too hot when you put them in, or you opened the door too early. Patience is truly the secret ingredient here.
Cooking Tips & Techniques
Over the years, I’ve learned a few things the hard way so you don’t have to. Here are my best tips for meringue success.
Humidity is your enemy. Meringue cookies are basically sugar and egg whites, which means they absorb moisture from the air. Don’t make these on a rainy or humid day—they’ll end up sticky and soft. Pick a dry day for best results.
Don’t over-beat. I know I said to beat until stiff peaks form, but there’s a fine line. If you over-beat, the meringue will start to look grainy and separate. Stop the moment the peaks are stiff and glossy. Trust your eyes and your fingers.
Use cream of tartar if you have it. It’s not listed in the ingredients because it’s optional, but adding 1/4 teaspoon of cream of tartar helps stabilize the egg whites and makes them less likely to deflate. I use it every time now after a few sad, flat batches in my early days.
Room temperature eggs really matter. I cannot stress this enough. Cold egg whites don’t whip as high, and they take forever to reach stiff peaks. Set your eggs out on the counter about 30 minutes before you start.
Pipe with confidence. When you’re piping the meringue, hold the bag straight up and apply steady pressure. Release the pressure before lifting the bag away to avoid creating little peaks that might burn. If you’re using a star tip, you’ll get those beautiful ridged swirls that look so professional.
Let them cool completely. Even after 8 hours in the oven, the cookies are fragile when warm. Let them sit on the baking sheet for a full 10 minutes before moving them. I once rushed this step and ended up with a tray of broken meringue pieces. Still delicious, but not as pretty.
Variations & Adaptations
This recipe is incredibly forgiving when it comes to customization. Here are some of my favorite variations.
Chocolate Meringues: Sift 1 tablespoon of unsweetened cocoa powder into the sugar before adding it to the egg whites. The result is a light, airy chocolate cookie that tastes like a cloud of hot cocoa. I like to fold in 1/4 cup of mini chocolate chips at the end for little pockets of melted chocolate.
Peppermint Holiday Meringues: Substitute the vanilla extract with 1/2 teaspoon of peppermint extract. Fold in 2 tablespoons of crushed candy canes just before piping. The red and white specks look so festive, and the flavor is perfect for winter gatherings.
Lemon or Orange Meringues: Add 1 teaspoon of lemon zest or orange zest along with the vanilla. You can also swap the vanilla for lemon extract. These are bright and refreshing—perfect for spring and summer.
Vegan Option: Use aquafaba (the liquid from a can of chickpeas) instead of egg whites. Replace 3 egg whites with 1/2 cup of aquafaba. Whip it the same way, adding sugar gradually. It works surprisingly well, though the texture is slightly different—still light and airy, but a bit more delicate.
Swirl Meringues: Divide the meringue into two bowls. Tint one half with food coloring, then gently swirl them together in the piping bag. You’ll get beautiful two-tone cookies that look like they came from a fancy bakery.
I personally love the chocolate version for when I’m craving something richer. The cocoa adds just enough depth to make them feel indulgent without losing that signature lightness.
Serving & Storage Suggestions
These cookies are best served at room temperature, straight from the oven (or, you know, the next morning after they’ve been forgotten). They have a delicate, melt-in-your-mouth texture that’s perfect on their own, but they also pair beautifully with other treats.
Serving Ideas: Serve them alongside fresh berries and a dollop of whipped cream for an elegant dessert. Crumble them over ice cream for a crunchy topping. Or simply arrange them on a pretty plate with a cup of coffee or tea—they’re light enough to enjoy after a heavy meal.
Storage: Store meringue cookies in an airtight container at room temperature for up to 2 weeks. Do not refrigerate them—the moisture in the fridge will make them sticky. If you live in a humid climate, add a silica gel packet or a piece of bread to the container to absorb excess moisture.
Freezing: You can freeze meringue cookies for up to 3 months. Place them in a single layer in a freezer-safe container with parchment paper between layers. Thaw at room temperature for about 15 minutes before serving. They won’t be quite as crisp as fresh, but they’re still delicious.
Flavor Development: Unlike many baked goods, meringues don’t improve with age. They’re best within the first few days. After about a week, they start to lose their crispness and become slightly chewy. That said, I’ve never had a batch last that long—they disappear too quickly.
Nutritional Information & Benefits
Per serving (1 cookie, based on 24 cookies per batch):
- Calories: 25
- Fat: 0g
- Carbohydrates: 6g
- Sugar: 6g
- Protein: 1g
- Sodium: 10mg
These cookies are naturally low in calories and fat-free, making them a guilt-free treat for anyone watching their intake. The main ingredient, egg whites, provides high-quality protein without the fat and cholesterol found in yolks. They’re also gluten-free, dairy-free, and nut-free, which makes them a safe option for many dietary restrictions.
From a wellness perspective, I love that these cookies satisfy a sweet craving without the heaviness of traditional desserts. They’re perfect for when you want something that feels like a treat but doesn’t leave you feeling sluggish. Just keep in mind that they are still sugar-based, so enjoy them in moderation as part of a balanced diet.
Conclusion
These light and airy forgotten meringue cookies have become a staple in my kitchen for good reason. They’re simple, elegant, and surprisingly forgiving for such a delicate-looking dessert. The fact that they only require three ingredients and almost no active effort makes them perfect for busy days when you still want to create something special. I love that I can mix up a batch in the evening, forget about them overnight, and wake up to a tray of beautiful cookies that look like I spent hours perfecting them. Honestly, that’s my favorite kind of recipe—one that makes me look more accomplished than I actually am. I hope you give these a try and make them your own. Whether you stick with the classic vanilla version or experiment with chocolate, peppermint, or citrus flavors, I think you’ll fall in love with how something so simple can feel so extraordinary. If you make them, I’d love to hear how they turned out. Drop a comment below, share your favorite variation, or tag me in your photos. Happy baking, friend.
Frequently Asked Questions
Why are they called “forgotten” meringue cookies?
The name comes from the unique baking method where you literally forget the cookies in the oven overnight. After piping the meringue, you place them in a preheated oven, turn the heat off, and leave them there for at least 8 hours. The residual heat gently dries them out without browning, creating that perfect light and airy texture.
Can I make these on a humid day?
I wouldn’t recommend it. Meringue cookies are extremely sensitive to humidity because sugar absorbs moisture from the air. On humid days, your cookies may end up sticky, soft, or chewy instead of crisp. Wait for a dry day for best results, or use a dehumidifier in your kitchen if you absolutely need to make them.
How do I know when the meringue is whipped enough?
You’re looking for stiff, glossy peaks. Lift the whisk attachment out of the bowl—the meringue should stand up straight without drooping. Also, rub a small amount between your fingers. If it feels smooth and not gritty, the sugar has dissolved and you’re ready to pipe. If it feels grainy, keep beating for another minute.
Why did my meringue cookies crack or collapse?
Several things could cause this. The oven might have been too hot when you put them in, or you may have opened the door during the drying process. It could also mean your egg whites weren’t whipped enough, or your bowl had traces of grease. Make sure your equipment is spotless and your oven is fully preheated before turning it off.
Can I use liquid egg whites from a carton?
You can, but fresh egg whites work much better. Carton egg whites often have stabilizers added that can prevent them from whipping to full volume. If you use carton egg whites, look for ones labeled “100% liquid egg whites” without added ingredients, and expect slightly less volume than fresh.
Pin This Recipe!

Light & Airy Forgotten Meringue Cookies: Easy 3-Ingredient Recipe

These light and airy forgotten meringue cookies require only 3 ingredients and almost no active effort. The unique method of leaving them in the turned-off oven overnight creates perfectly dry, crisp cookies that melt in your mouth.
- Prep Time: 15 minutes
- Cook Time: 8 hours (overnight in turned-off oven)
- Total Time: 8 hours 15 minutes
- Yield: 24 cookies 1x
- Category: Dessert
- Cuisine: American
Ingredients
- 3 large egg whites, room temperature
- 3/4 cup (150g) granulated white sugar
- 1 teaspoon vanilla extract
Instructions
- Preheat your oven to 350°F (175°C). Line a baking sheet with parchment paper or a silicone mat. Set aside.
- Separate 3 large eggs, making sure no yolk gets into the whites. Let the whites sit at room temperature for about 10 minutes.
- Place the egg whites in your clean, dry mixing bowl. Begin beating on medium speed until they become frothy and bubbly—about 1 minute.
- With the mixer running, add the granulated sugar one tablespoon at a time. Keep beating on medium-high speed for about 3-4 minutes.
- Pour in the vanilla extract and continue beating until the mixture looks glossy and smooth.
- Check for stiff peaks. The meringue should form peaks that stand straight up without drooping. Rub a tiny bit between your fingers—if it feels gritty, keep beating until smooth.
- Transfer the meringue to a piping bag fitted with a star tip. Pipe small swirls onto the prepared baking sheet, spacing them about 1 inch apart. Alternatively, drop rounded tablespoonfuls onto the sheet.
- Place the baking sheet in the oven, then immediately turn the oven off. Do not open the door.
- Let the meringues sit in the closed oven for at least 8 hours or overnight.
- In the morning, take the meringues out of the oven. Let them cool completely on the baking sheet for about 10 minutes before transferring to a wire rack.
Notes
Make sure your bowl and whisk attachment are completely clean and free of any grease. Wipe them down with lemon juice or white vinegar before starting. Room temperature eggs are essential. For best texture, use fresh eggs rather than carton egg whites. Avoid making on humid days. Optional: add 1/4 teaspoon cream of tartar to stabilize the egg whites. Store in an airtight container at room temperature for up to 2 weeks. Do not refrigerate.
Nutrition
- Serving Size: 1 cookie
- Calories: 25
- Sugar: 6
- Sodium: 10
- Carbohydrates: 6
- Protein: 1
Keywords: meringue cookies, forgotten cookies, 3-ingredient recipe, gluten-free dessert, low-fat cookies, egg white cookies, light and airy cookies


