Love this? Save it for later!
Share the inspiration with your friends
Jen wasn’t trying to impress anyone. I’d stopped by her place on a random Tuesday to pick up a book I’d lent her months ago, and the smell hit me before I even got through the screen door. It wasn’t fancy—it was rich and warm, like chocolate and something earthy I couldn’t quite place. She was in the kitchen, flour on her jeans, a toddler on her hip, and this gorgeous dark Bundt cake cooling on the counter. “Oh, that?” she said when I asked, barely looking up. “Just something I threw together so the kids would eat their vegetables.” I mean, honestly. She said it like it was nothing. But I stood there staring at that cake like she’d pulled a rabbit out of a hat. That’s the thing about the best recipes, you know? They come from people who don’t think they’re doing anything special. Jen was just trying to get some pumpkin into her picky eaters, and she accidentally created the most irresistible chocolate cake I’d ever seen. I made her write down the recipe before I left, and let me tell you, I’ve been making it ever since. It’s the kind of cake that makes you feel like a genius in the kitchen, even though it’s ridiculously simple. And the salted caramel drizzle? That was my addition—Jen just dusted hers with powdered sugar, but I couldn’t resist taking it over the top. Maybe you’ve been there, standing in someone else’s kitchen, watching them make something extraordinary look so ordinary. That’s this cake. It’s humble, it’s brilliant, and it’s about to become your new favorite thing.
Why You’ll Love This Recipe
Let’s be real for a second. Getting kids to eat anything with pumpkin in it is usually a losing battle. But this cake? It’s a chocolate cake first, pumpkin second. The pumpkin just makes it incredibly moist and adds a little something-something that keeps everyone coming back for another slice. I’ve tested this recipe more times than I can count, tweaking the flour ratio and the cocoa powder until it was absolutely perfect. Here’s why it works:
- Kid-Approved & Parent-Praised: My own kids have no idea there’s a whole cup of pumpkin puree in this cake. They just know it’s the best chocolate cake they’ve ever had. And I know it’s packed with vitamin A and fiber. Win-win.
- Simple Pantry Ingredients: You probably have everything you need already. Pumpkin puree, cocoa powder, flour, sugar, eggs, oil—nothing fancy. No trips to a specialty store required.
- One Bowl, No Fuss: This isn’t one of those recipes that requires separate bowls for wet and dry ingredients. You mix everything in one bowl, pour it into your Bundt pan, and let the oven do the work. Perfect for busy weeknights or lazy weekends.
- Budget-Friendly: A can of pumpkin puree costs about two dollars and stretches across this entire cake. No expensive ingredients, no fancy extracts. Just honest, affordable baking that feeds a crowd.
- Leftovers That Stay Moist: This cake actually gets better on day two. The pumpkin keeps it incredibly moist, so you can make it ahead of time for a party or just enjoy it all week long. It’s the kind of cake that disappears from the kitchen counter slice by slice.
What makes this recipe different from every other chocolate cake out there is the texture. The pumpkin creates a crumb that’s dense and tender at the same time—almost like a brownie and a cake had a baby. And when you add that salted caramel drizzle? Honestly, it’s next-level comfort food. This is the cake you make when you want to impress people without actually trying very hard.
What Ingredients You Will Need
This recipe uses simple, wholesome ingredients to deliver bold chocolate flavor and an incredibly tender crumb. Most of these are pantry staples, which is exactly what you want when a cake craving hits on a Wednesday afternoon.
For the Cake
- 1 ¾ cups all-purpose flour (spooned and leveled—don’t scoop straight from the bag or you’ll end up with too much)
- ¾ cup unsweetened cocoa powder (I prefer Ghirardelli or Hershey’s Special Dark for a richer flavor)
- 2 teaspoons baking powder
- 1 teaspoon baking soda
- 1 teaspoon ground cinnamon (this is subtle but makes the chocolate taste warmer and more complex)
- ½ teaspoon salt
- 1 cup granulated sugar
- ½ cup packed light brown sugar (adds moisture and a hint of molasses that pairs beautifully with pumpkin)
- 1 cup pumpkin puree (not pumpkin pie filling—make sure it’s 100% pure pumpkin)
- ½ cup vegetable oil (or melted coconut oil for a slightly different flavor)
- 2 large eggs, at room temperature
- 1 teaspoon vanilla extract
- ½ cup milk (whole milk works best, but 2% or even oat milk will do in a pinch)
- ½ cup hot water (this helps bloom the cocoa powder and creates a smoother batter)
For the Salted Caramel Drizzle
- ½ cup granulated sugar
- 3 tablespoons salted butter, cut into pieces
- ¼ cup heavy cream (warm it slightly to prevent the caramel from seizing)
- ½ teaspoon flaky sea salt (like Maldon—it makes a difference)
A quick note on the pumpkin puree: I always buy Libby’s because it’s consistently thick and not watery. If you’re using a store brand, just make sure to drain off any excess liquid before measuring. Nobody wants a soggy cake. And for the cocoa powder, don’t skimp here. The quality of your cocoa really determines how deep and rich your chocolate flavor will be. I’ve tried this with Dutch-process cocoa and it works beautifully, but natural unsweetened is perfectly fine too.
Equipment Needed
You don’t need a fancy kitchen to pull this off. Here’s what you’ll need:
- A 10-inch Bundt pan (the classic size that holds about 12 cups). If you don’t have one, you can use two 9-inch loaf pans instead—just adjust the baking time to about 40-45 minutes.
- Large mixing bowl and a whisk or spatula. No electric mixer required for this one.
- Measuring cups and spoons. I recommend using dry measuring cups for the flour and sugar, and a liquid measuring cup for the milk and oil.
- Small saucepan for the caramel. A heavy-bottomed one works best to prevent burning.
- Cooling rack. You’ll need this to let the cake cool completely before adding the glaze.
- Cooking spray or butter for greasing the pan. Don’t skip this step—Bundt pans are notorious for sticking.
I’ve made this cake with both a nonstick and an old-school aluminum Bundt pan, and honestly, the nonstick one makes life much easier. If you’re using a regular pan, make sure to grease it really well, getting into all those nooks and crannies. A pastry brush helps, or you can use a paper towel. Just don’t forget the center tube—that’s where cakes always seem to stick!
Preparation Method
Alright, let’s get baking. This comes together faster than you’d think, so preheat your oven first.
- Preheat your oven to 350°F (175°C). Position the rack in the center of the oven. While it’s heating up, generously grease your Bundt pan with cooking spray or softened butter. I like to use a baking spray that has flour in it—it’s like insurance against sticking.
- Mix the dry ingredients. In your large mixing bowl, whisk together the flour, cocoa powder, baking powder, baking soda, cinnamon, and salt. Make sure there are no lumps in the cocoa powder—if there are, sift it in. This whole step takes about 30 seconds.
- Add the sugars. Stir in both the granulated sugar and the brown sugar. Break up any clumps of brown sugar with your fingers if needed. Give everything a good whisk so the sugars are evenly distributed.
- Make a well in the center. Push the dry ingredients to the sides of the bowl to create a little crater. This is where the wet ingredients will go.
- Add the wet ingredients. Pour in the pumpkin puree, vegetable oil, eggs, and vanilla extract. Stir everything together gently with a spatula or wooden spoon. Don’t overmix—just stir until the dry ingredients are mostly incorporated. There will still be some streaks of flour, and that’s okay.
- Add the milk and hot water. Pour in the milk and the hot water. The batter will look very thin at this point—almost like a milkshake. That’s exactly what you want. The hot water helps the cocoa powder bloom, which intensifies the chocolate flavor. Stir just until the batter is smooth and glossy. It should take about 10 seconds.
- Pour the batter into the prepared pan. Scrape every last bit out of the bowl. Give the pan a gentle tap on the counter to release any air bubbles. The batter should fill the pan about two-thirds full.
- Bake for 40-45 minutes. Start checking at 40 minutes. Insert a toothpick or a thin skewer into the center of the cake—it should come out clean or with just a few moist crumbs attached. If it’s still wet, give it another 3-5 minutes. The top of the cake should feel springy when you press it gently.
- Cool in the pan. Place the pan on a cooling rack and let it cool for exactly 15 minutes. Don’t skip this step—if you try to flip it too soon, the cake will fall apart. Too late, and it might stick.
- Flip the cake out. Place your cooling rack upside down on top of the pan. Hold both together firmly and flip them over. Lift the pan off carefully. If any part of the cake sticks, don’t panic—just patch it back together with your fingers. It’ll be covered in caramel anyway.
- Cool completely. Let the cake cool completely on the rack before adding the caramel drizzle. This usually takes about an hour. If you add the caramel while the cake is still warm, it’ll just soak in and disappear.
Cooking Tips & Techniques
I’ve made this cake at least a dozen times now, and I’ve learned a few things the hard way. Here’s what I wish someone had told me.
Don’t overmix the batter. I know it’s tempting to keep stirring until everything is perfectly smooth, but overmixing develops the gluten and makes the cake tough. You want a tender crumb, not a rubbery one. Stir just until you don’t see any more streaks of flour, then stop. Trust me on this one.
Grease your Bundt pan like you mean it. The first time I made this cake, I was a little too casual with the cooking spray, and half the cake stayed in the pan. It was heartbreaking. Now I use a pastry brush to coat every single crevice with softened butter, then I dust it with cocoa powder instead of flour. The cocoa powder blends into the cake and doesn’t leave white spots. Game changer.
Room temperature eggs matter. If your eggs are cold, they’ll seize up the coconut oil or butter and create a lumpy batter. Just set them on the counter for 30 minutes before you start baking. If you forget, place them in a bowl of warm water for 5 minutes. Problem solved.
Watch the caramel like a hawk. Caramel can go from perfect to burnt in about 30 seconds. When you’re making the drizzle, swirl the pan gently instead of stirring with a spoon. Stirring can cause the sugar to crystallize and turn grainy. You want a smooth, golden amber color—like a new penny. As soon as it hits that color, take it off the heat and add the butter immediately.
Variations & Adaptations
This recipe is incredibly forgiving, so feel free to play around with it. Here are some of my favorite variations.
Dairy-Free Version: Swap the milk for oat milk or almond milk, and use a plant-based butter in the caramel. I’ve made this with oat milk and coconut oil, and honestly, nobody could tell the difference. Just make sure your dairy-free butter is salted for the caramel.
Gluten-Free Adaptation: Use a 1:1 gluten-free flour blend that contains xanthan gum. I’ve tested this with Bob’s Red Mill 1-to-1 Baking Flour, and it worked beautifully. The texture is slightly more delicate, so let the cake cool a little longer before flipping it out.
Spice It Up: If you want a more pronounced pumpkin spice flavor, add ½ teaspoon of ground ginger, ¼ teaspoon of nutmeg, and a pinch of cloves to the dry ingredients. It makes the cake taste like fall in a slice.
Chocolate Chip Version: Fold in ½ cup of mini chocolate chips right before pouring the batter into the pan. They sink a little during baking, which creates a lovely chocolatey ribbon through the middle of the cake. My kids go absolutely crazy for this version.
No Caramel? If you’re short on time or ingredients, just dust the cooled cake with powdered sugar. It’s still absolutely delicious. You can also drizzle it with a simple chocolate ganache made from melted chocolate chips and a splash of cream.
Serving & Storage Suggestions
This cake is best served at room temperature, which means you can make it ahead of time and just let it sit on the counter until you’re ready. The salted caramel drizzle should be added right before serving, though, because it tends to soak in after a few hours.
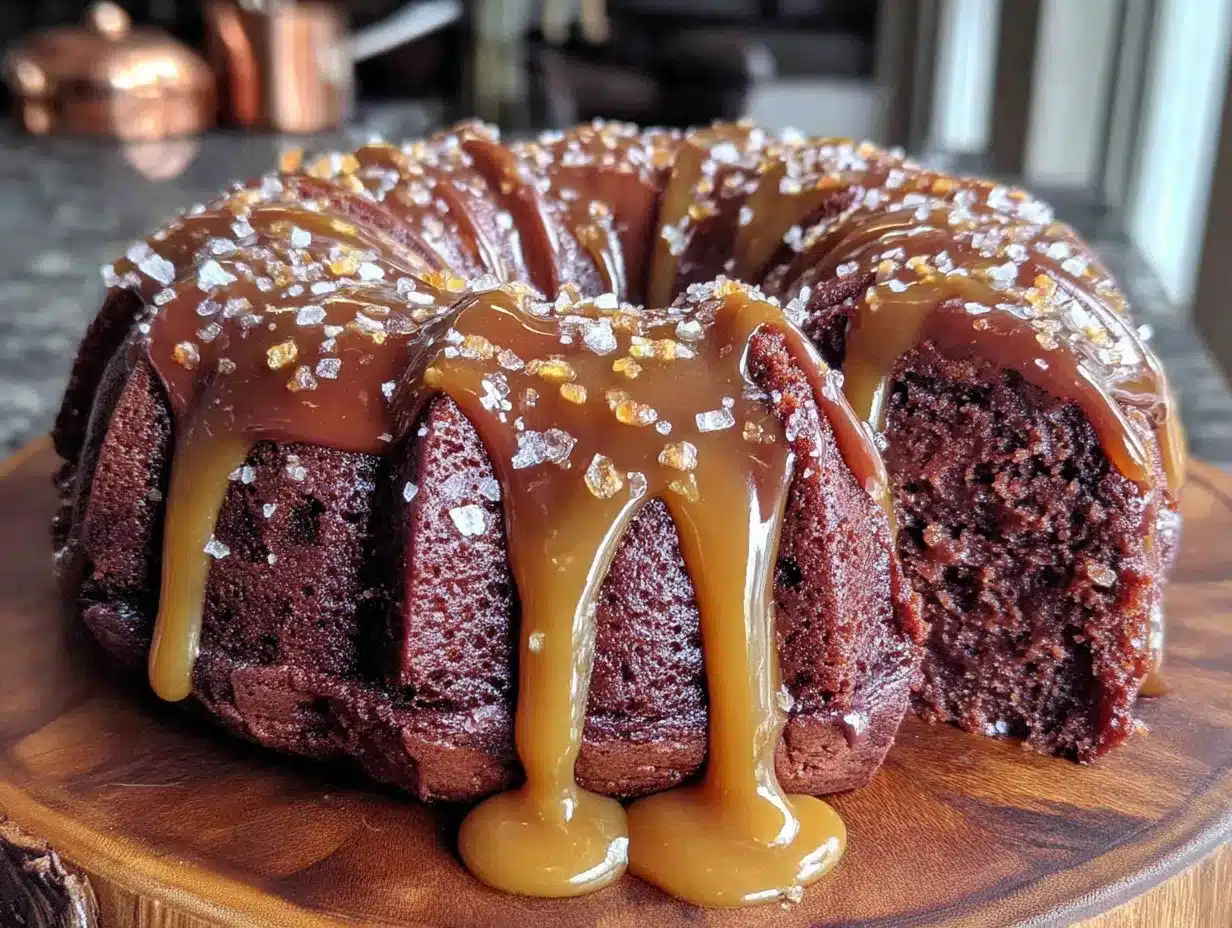
For serving: Place the cake on a beautiful plate or cake stand. Drizzle the caramel over the top in a zigzag pattern, letting it drip down the sides. Sprinkle with a little extra flaky sea salt right before serving—it adds a lovely crunch and a pop of saltiness that balances the sweetness. A dollop of whipped cream or a scoop of vanilla ice cream on the side takes it over the top.
For storing: This cake stays moist for days. Keep it in an airtight container at room temperature for up to 4 days. If you’ve already added the caramel, store it in the fridge so the caramel doesn’t get too sticky. Let it come back to room temperature before serving.
For freezing: The cake freezes beautifully. Wrap it tightly in plastic wrap, then in a layer of aluminum foil, and freeze for up to 3 months. Thaw it overnight in the fridge, then bring it to room temperature before adding the caramel. I often make two cakes at once and freeze one for later. It’s a lifesaver during the holiday season.
The flavors actually deepen after a day or two. The pumpkin and chocolate meld together, and the spices become more pronounced. So don’t worry if you’re making this for a party a day ahead—it might actually be better that way.
Nutritional Information & Benefits
Let’s be honest—this is a cake, not a health food. But it does have some redeeming qualities. Here’s a rough estimate per slice (based on 12 servings):
- Calories: Approximately 320
- Fat: 14g
- Carbohydrates: 48g
- Fiber: 3g
- Sugar: 32g
- Protein: 5g
- Vitamin A: 80% of the daily value (thank you, pumpkin!)
The pumpkin puree is the real star here nutritionally. It’s packed with vitamin A, which is great for eye health and immune function. It also adds fiber, which helps balance out all that sugar. Plus, the cocoa powder is rich in antioxidants called flavonoids, which are good for heart health. So while I wouldn’t recommend eating this for breakfast every day, it’s certainly not the worst thing you could indulge in.
If you’re watching your sugar intake, you can reduce the granulated sugar to ¾ cup without affecting the texture too much. The caramel drizzle is where most of the sugar lives, so you could skip it or just use a light dusting of powdered sugar instead.
Conclusion
This Kid-Approved Chocolate Pumpkin Bundt Cake with Salted Caramel is the kind of recipe that becomes a family tradition. It’s the cake you make for birthday parties, for Thanksgiving dessert, for no reason at all on a rainy Sunday afternoon. It’s forgiving enough for beginner bakers and impressive enough to serve to company. And honestly? It just makes people happy.
I love this recipe because it reminds me of that Tuesday at Jen’s house—how something so simple could stop me in my tracks. It’s proof that you don’t need fancy techniques or rare ingredients to create something extraordinary. You just need a little pumpkin, a lot of chocolate, and someone to share it with.
So go ahead and make this cake. Customize it however you like—add more spice, skip the caramel, throw in some chocolate chips. Make it your own. And when you take that first bite, close your eyes for a second. That’s the good stuff.
I’d love to hear how it turns out for you. Leave a comment below and let me know if your kids gave it the thumbs up. Share a photo if you’re feeling fancy. And if you’ve got your own twist on this recipe, I’m all ears. Happy baking!
Frequently Asked Questions
Can I use pumpkin pie filling instead of pumpkin puree?
No, please don’t. Pumpkin pie filling has added sugar and spices, and it’s much thicker than pure pumpkin puree. It will throw off the texture and sweetness of the cake. Stick with 100% pure pumpkin puree for the best results.
Why did my cake stick to the Bundt pan?
This usually happens when the pan isn’t greased thoroughly enough. Make sure you get into every crevice, especially the center tube. I recommend using a pastry brush to apply softened butter, then dusting with cocoa powder. Let the cake cool for exactly 15 minutes before flipping—too short and it’ll fall apart, too long and it’ll stick.
Can I make this cake without a Bundt pan?
Absolutely. You can use two 9-inch loaf pans and bake for 40-45 minutes, or a 9×13-inch baking pan for about 30-35 minutes. Just keep an eye on it and start checking for doneness a few minutes early. The cake is done when a toothpick inserted in the center comes out clean.
How do I store leftover salted caramel?
If you have extra caramel, pour it into a glass jar and let it cool completely. Store it in the fridge for up to 2 weeks. To reheat, place the jar in a bowl of warm water or microwave it in 10-second bursts, stirring between each. Drizzle it over ice cream, apple slices, or just eat it with a spoon—no judgment here.
Can I make this cake dairy-free?
Yes! Use oat milk or almond milk instead of regular milk, and swap the butter in the caramel for a good-quality vegan butter. The cake itself turns out beautifully with these substitutions. Just make sure your dairy-free butter is salted for the caramel sauce.
Pin This Recipe!
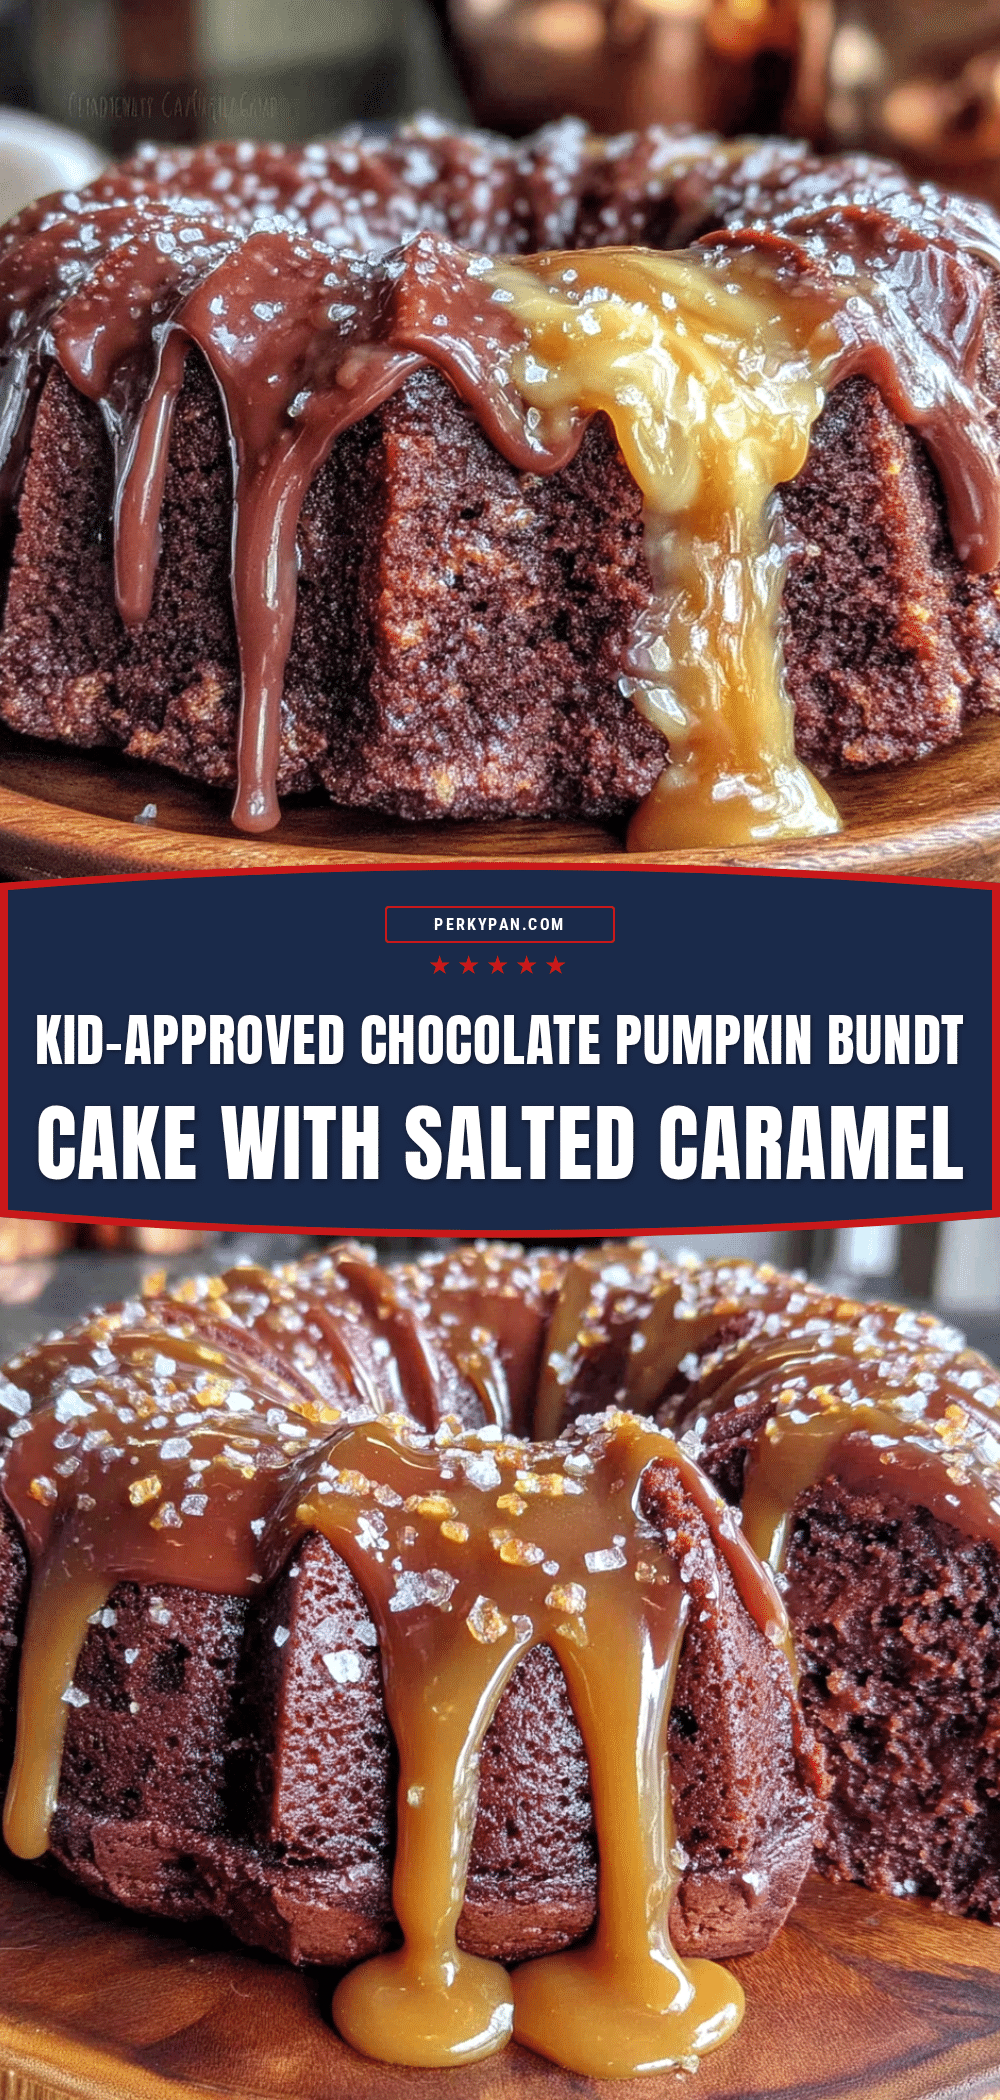
Kid-Approved Chocolate Pumpkin Bundt Cake with Salted Caramel
A moist and decadent chocolate Bundt cake made with pumpkin puree, topped with a homemade salted caramel drizzle. This kid-friendly recipe is simple, budget-friendly, and perfect for any occasion.
- Prep Time: 15 minutes
- Cook Time: 45 minutes
- Total Time: 1 hour 15 minutes
- Yield: 12 servings 1x
- Category: Dessert
- Cuisine: American
Ingredients
- 1 ¾ cups all-purpose flour (spooned and leveled)
- ¾ cup unsweetened cocoa powder
- 2 teaspoons baking powder
- 1 teaspoon baking soda
- 1 teaspoon ground cinnamon
- ½ teaspoon salt
- 1 cup granulated sugar
- ½ cup packed light brown sugar
- 1 cup pumpkin puree (100% pure pumpkin)
- ½ cup vegetable oil (or melted coconut oil)
- 2 large eggs, at room temperature
- 1 teaspoon vanilla extract
- ½ cup milk (whole milk preferred)
- ½ cup hot water
- ½ cup granulated sugar (for caramel)
- 3 tablespoons salted butter, cut into pieces
- ¼ cup heavy cream (warmed)
- ½ teaspoon flaky sea salt
Instructions
- Preheat oven to 350°F (175°C). Generously grease a 10-inch Bundt pan with cooking spray or softened butter.
- In a large mixing bowl, whisk together flour, cocoa powder, baking powder, baking soda, cinnamon, and salt.
- Stir in granulated sugar and brown sugar, breaking up any clumps.
- Make a well in the center of the dry ingredients.
- Add pumpkin puree, vegetable oil, eggs, and vanilla extract. Stir gently until mostly combined.
- Pour in milk and hot water. Stir until batter is smooth and glossy (about 10 seconds). Do not overmix.
- Pour batter into prepared Bundt pan. Tap pan gently on counter to release air bubbles.
- Bake for 40-45 minutes, or until a toothpick inserted in center comes out clean or with a few moist crumbs.
- Cool in pan on a wire rack for exactly 15 minutes.
- Place cooling rack upside down on pan, flip over, and lift pan off carefully. Cool completely (about 1 hour).
- For caramel: In a small saucepan, heat ½ cup granulated sugar over medium heat, swirling occasionally, until melted and amber-colored.
- Remove from heat, add butter and heavy cream, and stir until smooth. Stir in flaky sea salt.
- Drizzle caramel over cooled cake. Sprinkle with extra sea salt if desired.
Notes
For best results, use room temperature eggs and grease the Bundt pan thoroughly. The cake can be made ahead and stored at room temperature for up to 4 days. For a dairy-free version, use oat milk and vegan butter. The caramel should be added just before serving.
Nutrition
- Serving Size: 1 slice
- Calories: 320
- Sugar: 32
- Sodium: 280
- Fat: 14
- Saturated Fat: 5
- Carbohydrates: 48
- Fiber: 3
- Protein: 5
Keywords: chocolate pumpkin cake, Bundt cake, salted caramel, kid-friendly, fall dessert, easy cake recipe


