Love this? Save it for later!
Share the inspiration with your friends
I wasn’t supposed to be cooking. The kids were asleep, the house was quiet, and I had promised myself I’d go to bed at a reasonable hour. But then, the craving hit. It wasn’t just hunger; it was a specific, desperate need for something salty, cheesy, and shaped like a little ghost or a mummy. Honestly, let’s face it, Halloween prep usually feels like a chore. You buy the decorations, you make the costumes, and by October 31st, you’re too tired to cook anything other than toast.
I didn’t have the fancy mold for the perfect mummy face, but I had mini sweet peppers, a block of sharp cheddar, and a package of refrigerated crescent roll dough that was starting to get a little soft in the package. The idea arrived fully formed in my tired brain: stuff the peppers, wrap them in dough, bake them until golden, and pretend they were spooky treats for my kids. It was a weird-but-genius substitution for traditional Halloween snacks that usually involve way too much sugar.
The odd hours matter here. Something about the late night loosens the usual rules of “healthy eating” and “meal planning.” I remember dropping a pepper on the floor. I picked it up, wiped it off with a paper towel, and kept going. No one was watching. It was just me, the hum of the refrigerator, and the smell of baking dough starting to fill the kitchen. I mean, I usually have a system for this stuff, but at midnight, I just winged it.
Maybe you’ve been there, standing in front of an open fridge at an ungodly hour, wondering what to make when the clock says it’s time to sleep. This recipe stayed with me because it turned a stressful holiday prep task into a fun, low-effort activity. I keep making it not just for the holidays, but because it’s the kind of comfort food that feels like a hug, even if it’s wrapped in pastry. Honestly, it’s the best way to sneak some veggies into dinner without anyone noticing.
Why You’ll Love This Recipe
Let me tell you, these Fun Mummy Stuffed Peppers are not just another Halloween gimmick. I’ve tested dozens of stuffed pepper recipes over the years, from the traditional ground beef version to some wild vegan experiments, and this one stands out for its perfect balance of crunch, creaminess, and ease. It’s the kind of recipe that makes you close your eyes after the first bite because the texture is just so satisfying. It’s comfort food reimagined—simpler, faster, but with that same soul-soothing satisfaction.
Here is why this recipe has become a staple in my kitchen:
- Quick & Easy: These come together in under 30 minutes. Perfect for busy weeknights or last-minute Halloween parties where you need to look like you tried but also want to enjoy a drink.
- Simple Ingredients: No fancy grocery trips needed. You likely already have crescent dough, cheese, and peppers in your kitchen right now.
- Perfect for Kids: Great for school parties, trick-or-treat hosting, or just getting your picky eaters to eat a vegetable without complaining.
- Crowd-Pleaser: Always gets rave reviews from kids and adults alike. The salty dough wrapper appeals to everyone, and the mild pepper inside keeps it from being too intense.
- Unbelievably Delicious: The texture and flavor combo is next-level. The crisp pastry contrasts with the soft, melted cheese inside, creating a mini meal in one bite.
What makes this different from the rest? It’s the technique. Instead of using heavy rice or meat fillings that can make the peppers soggy, we use a simple cheese blend that melts beautifully. Plus, wrapping the dough around the pepper creates a “mummy” look that is adorable and functional. It’s not just another version—it’s your best version for a spooky snack that doesn’t require hours of prep.
What Ingredients You Will Need
This recipe uses simple, wholesome ingredients to deliver bold flavor and satisfying texture without the fuss. The beauty of these mummy peppers lies in how few components you need. You don’t need to raid the spice aisle or buy exotic items. Everything you need is likely already in your pantry or refrigerator. I like to keep this list short so that the focus remains on the fun assembly process.
- Mini Sweet Peppers: You want the small, bite-sized ones. They are less spicy than bell peppers and have a nice snap. Look for firm, bright red or orange peppers for the best color contrast. If you can’t find mini peppers, you can use small cherry peppers, but they might be a bit spicy.
- Crescent Roll Dough: I recommend using a standard tube of refrigerated crescent roll dough. It’s easy to separate into triangles and stretches well for wrapping. Some people prefer gluten-free dough, but the texture is slightly different. If you need a dairy-free option, check your local store for plant-based dough alternatives.
- Sharp Cheddar Cheese: Use a block and shred it yourself. Pre-shredded cheese has anti-caking agents that prevent it from melting smoothly. Sharp cheddar adds a nice tang that cuts through the richness of the dough. If you prefer milder flavors, use a white American cheese.
- Mozzarella Cheese: This is the melty one. It provides that stretchy, gooey interior that makes stuffed peppers so good. A mix of cheddar and mozzarella gives you both flavor and texture.
- Cream Cheese: Softened cream cheese helps bind the filling together and adds a creamy mouthfeel. It also helps the cheese stay inside the pepper while baking. Use full-fat cream cheese for the best results; low-fat versions can become grainy.
- Everything Bagel Seasoning: This is the secret weapon. Sprinkling this on top before baking adds a savory crunch and makes them look even more like mummy wrappings. It’s a great way to add flavor without adding calories.
- Egg Wash (Optional): For a golden, shiny finish, you can brush the dough with a beaten egg. This is optional if you want a softer, paler look, but I highly recommend it for that bakery-style appearance.
For sourcing, I always buy my peppers from a local farmers’ market when possible, as they tend to be fresher and hold their shape better during baking. If you are making these for a specific occasion, you can swap the cheddar for pepper jack for a spicy kick, or use vegan cheese if you have guests with dietary restrictions.
Equipment Needed
You don’t need a lot of fancy gear to make these mummy peppers. The main tool you’ll need is a standard baking sheet. I prefer a heavy-gauge metal baking sheet because it conducts heat evenly and prevents the dough from burning on the bottom. If you use a dark non-stick pan, you might need to lower the oven temperature by 25 degrees to avoid over-browning.
A small spoon or a melon baller is useful for scooping out the seeds and membranes from the inside of the peppers. This step is crucial because the seeds can make the peppers watery and slightly bitter. I use a teaspoon, but if you have a small paring knife, you can also carefully cut the tops off and scoop with the knife tip. Just be careful not to puncture the bottom of the pepper.
You’ll also need a small mixing bowl for combining the cheeses. A ramekin or a small glass measuring cup works well for holding the egg wash. If you don’t have an egg brush, you can use a silicone pastry brush or even a clean makeup sponge if you’re feeling very experimental (though I don’t recommend that last one!).
For maintenance, make sure your baking sheet is clean and dry before you start. Any leftover grease from previous meals can cause the dough to stick or burn. If you use parchment paper, it makes cleanup a breeze, though it’s not strictly necessary if your pan is well-seasoned. Budget-friendly option: if you don’t have a baking sheet, you can use a cast-iron skillet, but the mummies might stick. Parchment paper is your friend here.
Preparation Method
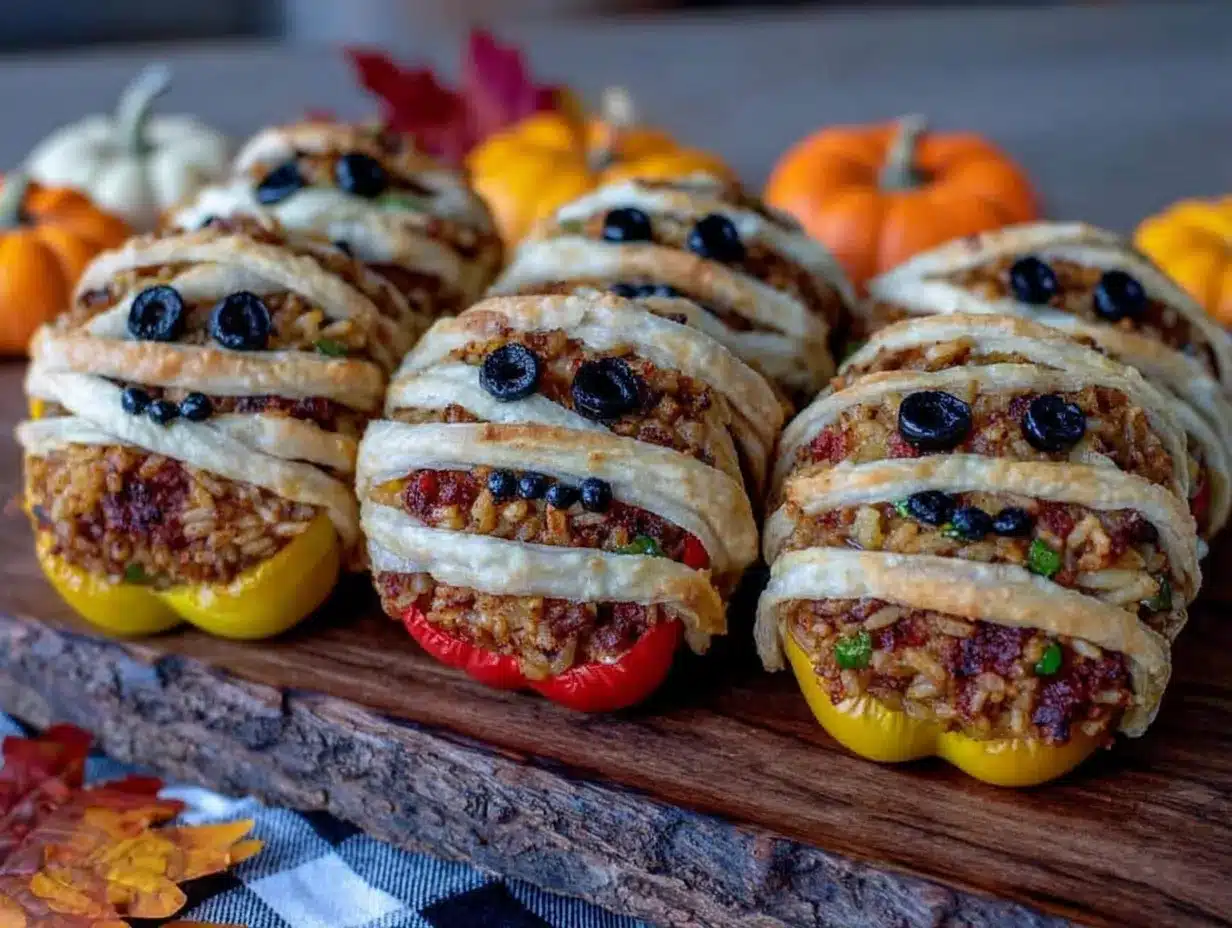
Let’s get into the nitty-gritty. Making these Fun Mummy Stuffed Peppers is easier than you think, but there are a few key steps to ensure they turn out perfectly. Follow these instructions closely for the best results.
- Preheat and Prep: Start by preheating your oven to 375°F (190°C). Line a large baking sheet with parchment paper or a silicone baking mat. This ensures easy removal and prevents sticking. Take your mini sweet peppers and wash them thoroughly. Pat them dry with a paper towel. Moisture is the enemy of crispy dough, so make sure they are as dry as possible. (Time: 5 minutes)
- Remove the Seeds: Using a small spoon or a paring knife, carefully remove the stem and the seeds from each pepper. You want to create a small cavity for the filling. Be gentle so you don’t tear the pepper. If the pepper is large, you can cut the top off and use it as a lid, but for mini peppers, scooping from the top is usually sufficient. Scrape out the white membranes as much as possible to reduce bitterness. (Time: 5 minutes)
- Make the Filling: In a small mixing bowl, combine the softened cream cheese, shredded cheddar cheese, and shredded mozzarella cheese. Mix until well combined. If the mixture is too stiff, add a tablespoon of milk or cream to loosen it up. Taste the mixture and add a pinch of salt and black pepper if needed. (Time: 3 minutes)
- Stuff the Peppers: Using a small spoon or a piping bag, fill each pepper with the cheese mixture. Do not overstuff them, as the cheese will expand slightly as it melts. Leave about 1/4 inch of space at the top. If you have leftover filling, you can roll it into small balls and bake them alongside the peppers for extra cheesy bites. (Time: 5 minutes)
- Prepare the Dough: Unroll the crescent dough and separate it into triangles according to the package instructions. If the dough is too warm and sticky, let it sit in the fridge for 10 minutes to firm up. This makes it easier to handle. (Time: 2 minutes)
- Wrap the Mummies: Take a triangle of dough and place the pointed end at the bottom of the stuffed pepper. Wrap the dough around the pepper in a spiral motion, leaving small gaps to create the “mummy” effect. You can leave the top of the pepper exposed or cover it completely. Tuck the excess dough underneath the pepper to secure it. Repeat for all peppers. (Time: 10 minutes)
- Add Details: If you want eyes, you can use small pieces of black olive or pretzel sticks to create a spooky face. Press them gently into the dough. Brush the dough with egg wash for a golden finish. Sprinkle with everything bagel seasoning for extra flavor. (Time: 5 minutes)
- Bake: Place the baking sheet in the preheated oven. Bake for 15-20 minutes, or until the dough is golden brown and puffed up. The cheese inside should be melted and bubbly. Keep an eye on them after 15 minutes, as oven temperatures can vary. (Time: 20 minutes)
- Cool and Serve: Remove from the oven and let them cool for 5 minutes on the baking sheet. The cheese will be extremely hot, so let them sit until they are safe to touch. Serve warm with your favorite dipping sauce. (Time: 5 minutes)
How do I prevent the dough from falling apart?
If the dough is too warm, it will be sticky and hard to wrap. Let it chill in the fridge for 10 minutes before handling. Also, make sure to tuck the ends under the pepper to secure them.
Can I use bell peppers instead of mini peppers?
Yes, but you will need to adjust the cooking time. Larger peppers will take longer to bake, and you may need to use more dough to wrap them properly. Mini peppers are preferred for their bite-sized convenience.
Cooking Tips & Techniques
I’ve made my share of burnt mummy peppers in my time. Here are some professional tips to help you avoid common pitfalls. First, temperature control is key. If your oven runs hot, use an oven thermometer to check the actual temperature. Many home ovens are off by 25-50 degrees, which can mean the difference between golden brown and charcoal.
Another common mistake is overstuffing the peppers. If you pack the cheese in too tightly, it will burst out of the dough during baking, making a mess and leaving the pepper underfilled. Aim for a loose, fluffy filling. Also, make sure your peppers are dry before stuffing. Any water left inside will steam the dough, preventing it from becoming crispy.
For consistency, try to use peppers of similar size. This ensures they all bake at the same rate. If you have some large and some small, place the smaller ones on the outer edges of the baking sheet where the heat is more intense. Multitasking strategy: while the peppers are baking, prepare your dipping sauces. This way, everything is ready at the same time.
Personal lesson learned: I once tried to freeze the assembled mummies before baking. The dough became soggy and fell apart. It’s best to assemble and bake them fresh. If you need to prep ahead, you can stuff the peppers and refrigerate them for up to 24 hours, but wrap them in dough right before baking.
Variations & Adaptations
One of the best things about this recipe is how adaptable it is. You can tweak it to suit different dietary needs or flavor preferences.
- Spicy Version: Swap the cheddar for pepper jack cheese and add some diced jalapeños to the filling. This adds a nice kick that balances the sweetness of the peppers.
- Vegan Option: Use vegan cream cheese and vegan cheddar/mozzarella shreds. There are many brands that melt well, such as Daiya or Violife. Use a vegan crescent dough if available, or make your own dough from scratch.
- Gluten-Free: Use gluten-free crescent dough or a gluten-free pizza dough. The texture will be slightly different, but the flavor will still be great. Make sure to check the label on your cheese to ensure it’s gluten-free.
- Herbed Twist: Add dried oregano, basil, or thyme to the cheese filling for an Italian flair. This pairs well with marinara sauce for dipping.
- Personal Variation: I sometimes add a small piece of cooked bacon inside the pepper for extra savory flavor. It’s a bit indulgent, but it’s delicious.
Serving & Storage Suggestions
These mummy peppers are best served warm, straight out of the oven. They look fantastic on a platter, especially if you arrange them in a circle to resemble a spooky spiderweb. Serve with marinara sauce, ranch dressing, or a spicy mustard for dipping.
If you have leftovers (which is rare), store them in an airtight container in the refrigerator for up to 3 days. Reheat them in the oven at 350°F (175°C) for 10 minutes to crisp up the dough. Avoid microwaving, as it will make the dough soggy. You can also freeze the baked mummies for up to 2 months. Reheat in the oven for the best texture.
The flavors actually develop over time as the cheese settles into the pepper. Some people prefer them the next day, as the flavors have had time to meld. However, the dough is always best when fresh.
Nutritional Information & Benefits
While these are definitely a treat, they do offer some nutritional benefits. Mini sweet peppers are high in Vitamin C and antioxidants. The cheese provides protein and calcium. Each serving (2 mummies) contains approximately 150-180 calories, depending on the size of the pepper and the amount of cheese used. They are a good option for a light snack or appetizer. If you are watching your sodium intake, choose low-sodium cheese and dough. They are not gluten-free unless you use specific ingredients, so be mindful of allergens.
Conclusion
These Fun Mummy Stuffed Peppers are a delightful twist on a classic snack. They are easy to make, delicious to eat, and perfect for any spooky occasion. I love them because they bring a sense of fun to the kitchen, even on the most mundane nights. I encourage you to try this recipe and customize it to your liking. Add your favorite fillings, change the cheese, or make it spicy. I’d love to hear how you adapt it!
Share your creations on social media and tag me. Don’t forget to leave a comment below with your thoughts. Happy Halloween, and happy cooking!
Frequently Asked Questions
Can I make these ahead of time?
Yes, you can stuff the peppers and refrigerate them for up to 24 hours. Wrap them in dough right before baking to ensure the dough stays crispy.
What dipping sauces go well with these?
Marinara sauce, ranch dressing, spicy mustard, and garlic aioli all pair beautifully with the cheesy filling and savory dough.
Can I use frozen mini peppers?
It’s not recommended. Frozen peppers will release too much water and become soggy. Fresh peppers are best for this recipe.
How do I store leftovers?
Store leftovers in an airtight container in the refrigerator for up to 3 days. Reheat in the oven to maintain crispiness.
Are these kid-friendly?
Absolutely! The mild flavor and fun shape make them a hit with children. They are also a great way to sneak vegetables into their diet.
Pin This Recipe!
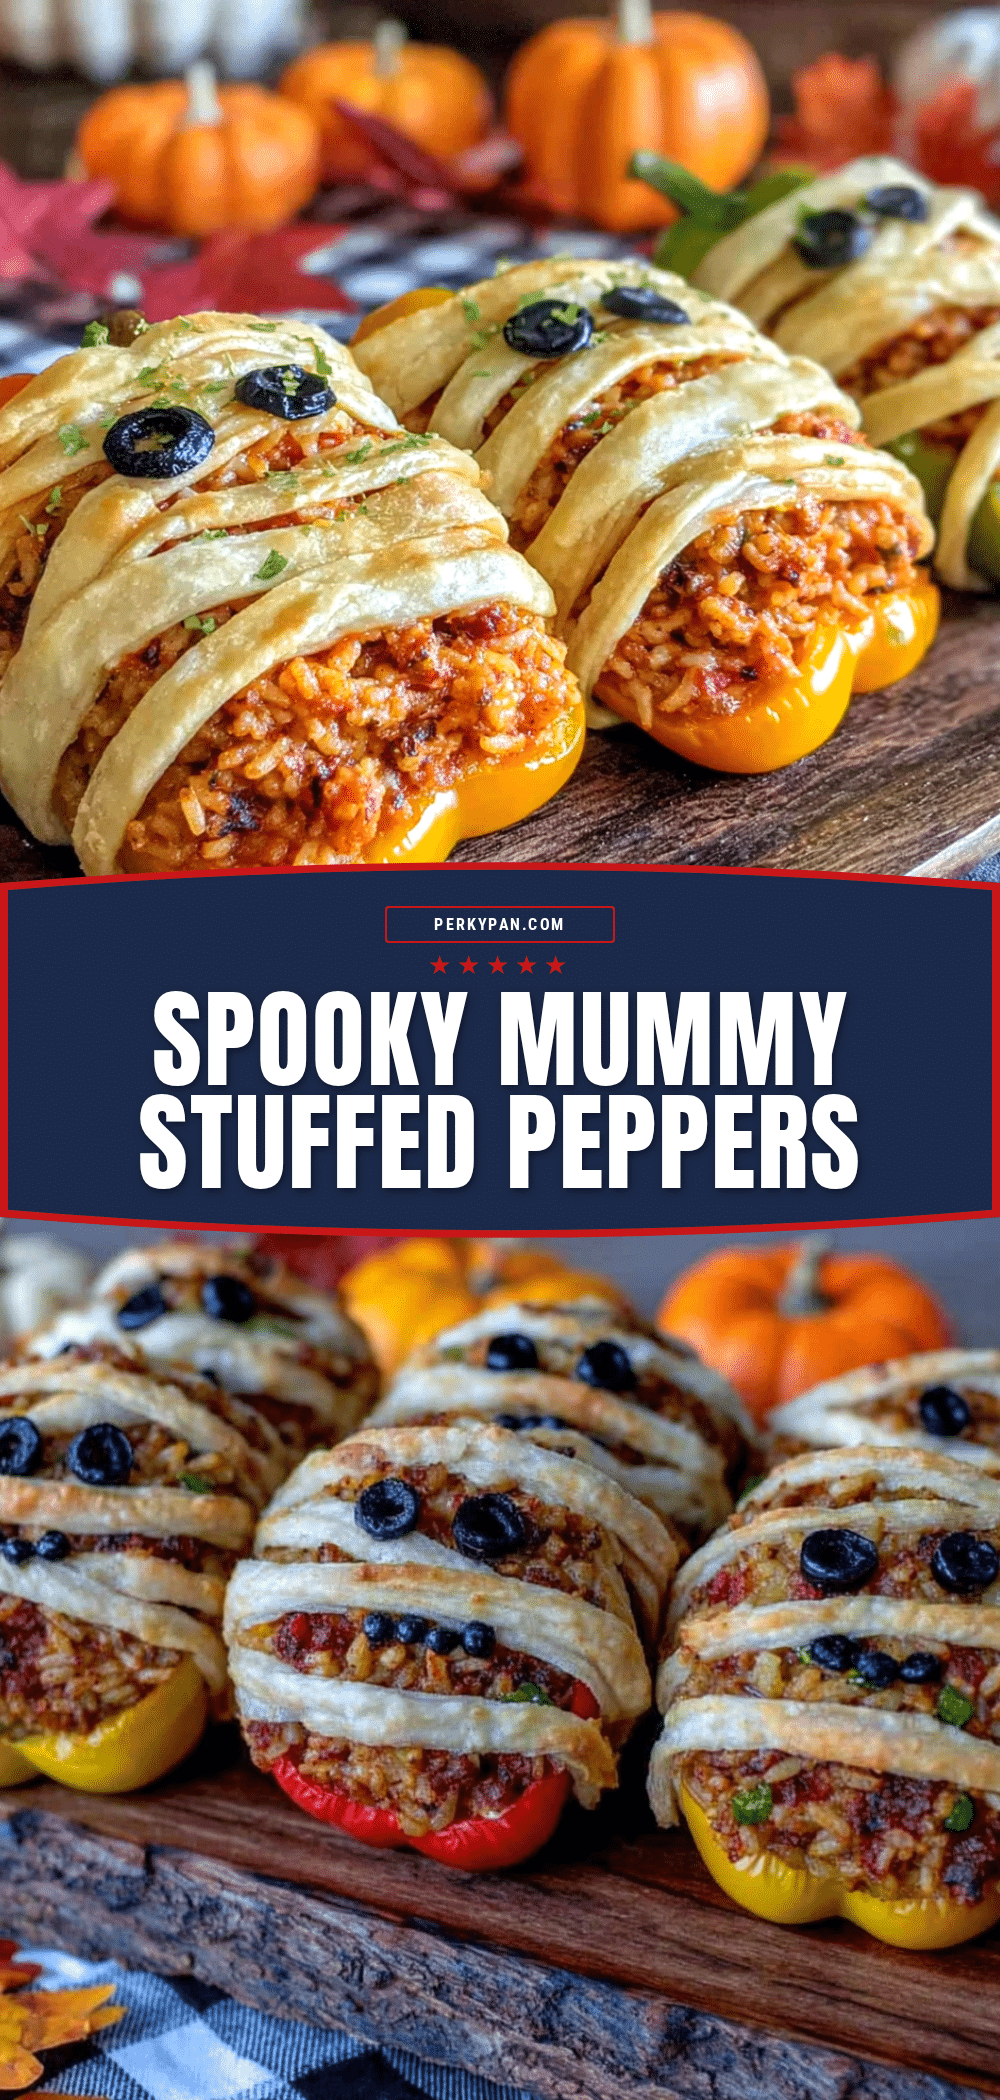
Fun Mummy Stuffed Peppers: Easy Halloween Recipe

A fun and easy Halloween appetizer featuring mini sweet peppers stuffed with a creamy cheese blend and wrapped in crescent roll dough to resemble mummies. These savory treats are quick to make, kid-friendly, and perfect for spooky parties.
- Prep Time: 30 minutes
- Cook Time: 20 minutes
- Total Time: 50 minutes
- Yield: 12 servings 1x
- Category: Appetizer
- Cuisine: American
Ingredients
- Mini Sweet Peppers
- 1 tube refrigerated crescent roll dough
- Sharp Cheddar Cheese (shredded)
- Mozzarella Cheese (shredded)
- Cream Cheese (softened)
- Everything Bagel Seasoning
- Egg (for egg wash, optional)
- Salt and Black Pepper (to taste)
- Milk or Cream (optional, to loosen filling)
Instructions
- Preheat oven to 375°F (190°C). Line a large baking sheet with parchment paper.
- Wash and thoroughly dry the mini sweet peppers. Pat them dry with a paper towel to ensure crispy dough.
- Using a small spoon or paring knife, remove the stem and seeds from each pepper, creating a cavity for the filling. Scrape out white membranes to reduce bitterness.
- In a small mixing bowl, combine softened cream cheese, shredded cheddar, and shredded mozzarella. Mix until well combined. Add a pinch of salt and pepper if needed.
- Fill each pepper with the cheese mixture using a small spoon or piping bag. Do not overstuff; leave about 1/4 inch of space at the top.
- Unroll crescent dough and separate into triangles. If sticky, chill in the fridge for 10 minutes.
- Wrap each stuffed pepper with a dough triangle in a spiral motion, leaving small gaps for the ‘mummy’ effect. Tuck excess dough underneath to secure.
- Optional: Add olive eyes or pretzel stick details. Brush with egg wash and sprinkle with everything bagel seasoning.
- Bake for 15-20 minutes until the dough is golden brown and puffed, and the cheese is melted.
- Cool for 5 minutes before serving warm.
Notes
Ensure peppers are completely dry before stuffing to prevent soggy dough. If the dough is too warm and sticky, chill it for 10 minutes. Do not freeze assembled mummies before baking as the dough may become soggy; instead, stuff peppers and refrigerate for up to 24 hours, wrapping in dough right before baking. For a spicy version, swap cheddar for pepper jack and add jalapeños.
Nutrition
- Serving Size: 2 mummies per servin
- Calories: 165
- Sugar: 2
- Sodium: 280
- Fat: 12
- Saturated Fat: 6
- Carbohydrates: 12
- Fiber: 1
- Protein: 5
Keywords: Halloween recipe, stuffed peppers, mummy peppers, crescent roll recipes, easy appetizer, kid-friendly snacks, cheesy peppers, party food


