Love this? Save it for later!
Share the inspiration with your friends
There used to be a tiny wine bar tucked behind a vintage shop in Portland—three tables, mismatched chairs, and a chalkboard menu that changed daily. They made these paper cones filled with crispy prosciutto, marinated olives, and shaved pecorino that you’d eat standing up, balancing your glass of Nebbiolo. When they closed last fall—turned into a kombucha taproom, of all things—I actually mourned. For weeks, I kept thinking about those cones. The way the salt and fat and acid all hit your mouth at once. The casual, happy mess of eating with your hands while catching up with friends.
After six tries—two of which ended in me just eating the components separately over the sink—I finally cracked it. But instead of sticking with the Italian original, I took it somewhere else entirely. Because honestly, what I really wanted was something that captured that same energy but felt like us. Something that said: friends, chaos, Thanksgiving leftovers, paper cones, and zero stress.
That’s how the Friendsgiving Turkey Charcuterie Cone Board was born. It’s the love child of a traditional charcuterie spread and your post-turkey-day fridge raid, served in crispy, dippable, hold-it-in-your-hand cones. I mean, let’s face it—by the time Friendsgiving rolls around, nobody wants to wrestle with a full place setting. You want to stand around, laugh too loud, and eat with your fingers. This board makes that ridiculously easy.
Maybe you’ve been there—hosting a Friendsgiving and realizing halfway through that you’ve got turkey coming out of your ears but no fun way to serve it. Or maybe you just want a dish that feels festive without requiring you to iron a napkin. Either way, this recipe was built for you. It’s the reason I keep making it, and the reason I think you will too.
Why You’ll Love This Recipe
I’ve tested this Friendsgiving Turkey Charcuterie Cone Board on six different groups of friends—including one notoriously picky bunch who usually just picks at crudité platters. Every single time, the cones were the first thing to disappear. Here’s why this recipe works so well:
- Quick & Easy: Comes together in under 20 minutes, perfect for chaotic Friendsgiving prep or last-minute cravings.
- Simple Ingredients: No fancy grocery trips needed; you likely already have turkey, cheese, and crackers in your kitchen.
- Perfect for Friendsgiving: Great for casual gatherings, potlucks, cozy dinners, or holiday mornings when you’re still in pajamas.
- Crowd-Pleaser: Always gets rave reviews from kids and adults alike—there’s something about eating out of a cone that makes everyone happy.
- Unbelievably Delicious: The texture and flavor combo is next-level comfort food—crispy, creamy, salty, sweet, all in one bite.
What makes this recipe different from the rest? It’s not just another turkey sandwich or sad leftover plate. The cone format changes everything—it’s portable, interactive, and visually stunning. Plus, I’ve perfected the balance of flavors so every cone has a little bit of everything. This isn’t just another version—it’s your best version.
This recipe isn’t just good—it is the kind that makes you close your eyes after the first bite. It’s comfort food reimagined—healthier, faster, but with the same soul-soothing satisfaction. Perfect for impressing guests without stress, or turning a simple meal into something memorable.
What Ingredients You Will Need
This Friendsgiving Turkey Charcuterie Cone Board uses simple, wholesome ingredients to deliver bold flavor and satisfying texture without the fuss. Most of these are pantry staples or common Thanksgiving leftovers, making this recipe incredibly accessible.
For the Cones
- 6-8 large flour tortillas (burrito size works best; I recommend Mission brand for consistent texture)
- 2 tablespoons olive oil (adds richness and helps crisp the cones)
- 1 teaspoon garlic powder
- 1 teaspoon smoked paprika
- ½ teaspoon salt
For the Turkey Filling

- 2 cups cooked turkey, shredded or diced (leftover Thanksgiving turkey is ideal; rotisserie chicken works too)
- ¼ cup cranberry sauce (homemade or canned—both work great)
- 2 tablespoons mayonnaise
- 1 tablespoon Dijon mustard
- 1 teaspoon fresh thyme leaves (or ½ teaspoon dried)
- Salt and pepper to taste
For the Charcuterie Board
- 4 ounces sharp cheddar cheese, sliced (I recommend Cabot or Tillamook for best flavor)
- 4 ounces salami or prosciutto, thinly sliced
- 1 cup mixed olives (green and kalamata)
- ½ cup dried apricots or figs
- ¼ cup honey (for drizzling)
- Fresh herbs for garnish (rosemary, thyme, or sage)
Substitution Guidance
Use corn tortillas for a gluten-free option—just note they’re smaller and more delicate. Swap Greek yogurt for mayonnaise if you want a lighter filling. For a vegetarian version, replace turkey with roasted chickpeas or halloumi. In summer, swap in fresh berries instead of dried apricots. Look for firm, small-curd cheeses for best texture on the board.
Equipment Needed
You don’t need much to pull off this Friendsgiving Turkey Charcuterie Cone Board. Here’s what I use:
- Large baking sheet (18×13 inch works best for multiple cones)
- Parchment paper or silicone baking mat
- Small bowl for mixing turkey filling
- Pastry brush (for oiling tortillas)
- Large serving board or platter (a wooden cutting board or large slate tile works beautifully)
- Small ramekins or bowls (for honey, olives, and cranberry sauce)
If you don’t have a pastry brush, use a paper towel dipped in oil. No baking sheet? You can crisp the cones in a dry skillet, though they won’t hold their shape as perfectly. I’ve made these on a cookie sheet from the thrift store—it worked fine. For the board, a large pizza pan or even a clean baking sheet lined with parchment works if you don’t have a wooden board. Budget-friendly tip: check dollar stores for small ramekins—they’re perfect for dips and sauces.
Preparation Method
- Preheat your oven to 375°F (190°C). Line a large baking sheet with parchment paper. This is the first step because you want the oven fully hot when the cones go in—crispiness depends on it.
- Prepare the tortilla cones. In a small bowl, mix the olive oil, garlic powder, smoked paprika, and salt. Brush this mixture lightly over both sides of each tortilla. Working one at a time, roll each tortilla into a cone shape—think of it like rolling a paper cone for popcorn. Secure the edge with a toothpick. Place seam-side down on the prepared baking sheet. Don’t worry if they look a little messy; rustic is the look we’re going for.
- Bake the cones for 8-10 minutes, until golden and crispy. Keep an eye on them—they go from perfect to burnt fast. Remove from oven and let cool completely on the baking sheet. The cones will continue to crisp as they cool. Remove toothpicks once cool.
- Make the turkey filling. While the cones bake, combine the shredded turkey, cranberry sauce, mayonnaise, Dijon mustard, fresh thyme, salt, and pepper in a medium bowl. Mix until everything is well coated. Taste and adjust seasoning—you want it savory with a hint of sweetness from the cranberry. Set aside. The filling can be made up to 24 hours ahead and refrigerated.
- Assemble the charcuterie board. Place your large serving board or platter on the counter. Arrange the cooled cones in a cluster in the center—lean them against each other so they stand upright. Spoon the turkey filling into each cone, filling about halfway. Don’t overfill, or the cones will get soggy.
- Arrange the remaining ingredients around the cones: fan out the sliced cheddar, fold the salami or prosciutto into loose ribbons, scatter the olives and dried apricots, and place small bowls of honey and extra cranberry sauce nearby. Tuck fresh herbs between everything for color.
- Drizzle honey over the cones and cheese just before serving. This adds a gorgeous sheen and a touch of sweetness that cuts through the saltiness. Serve immediately—the cones are best within an hour of assembly.
Pro tip: If the cones feel fragile after baking, place them back in the oven for 2-3 minutes. They should be rigid enough to hold the filling without collapsing. And here’s a little confession—I once forgot to secure one with a toothpick and it unrolled in the oven. It still tasted amazing, just looked like a sad taco. Learn from my mistakes!
Cooking Tips & Techniques
Here’s what I’ve learned from making this Friendsgiving Turkey Charcuterie Cone Board more times than I care to count:
- Don’t skip the oil brushing. The oil-and-spice mixture is what makes the cones crispy and flavorful. Dry tortillas just turn into sad, chewy tubes. Trust me, I tried it. It was not good.
- Let the cones cool completely before filling. If you add the turkey mixture while they’re still warm, the moisture will soften them. Patience pays off here—I usually make the cones first, then prep everything else while they cool.
- Use room temperature turkey for the filling. Cold turkey straight from the fridge won’t blend as well with the other ingredients. Let it sit out for 10-15 minutes before mixing.
- Toast the spices briefly in a dry pan before adding oil—it wakes up their flavor. I do this while the oven preheats. Just 30 seconds over medium heat until fragrant.
- Timing is everything. Bake the cones, prepare the filling, then assemble the board. This flows naturally and prevents any component from sitting too long. I’ve learned to prep all the charcuterie ingredients while the cones bake—it’s efficient multitasking.
- One common mistake is overfilling the cones. They look so cute that you want to stuff them full, but less is more. A generous spoonful of turkey, a few olives, and a drizzle of honey is perfect. Anything more, and you’ll be picking filling off the board.
Variations & Adaptations
This Friendsgiving Turkey Charcuterie Cone Board is endlessly customizable. Here are a few ways I’ve adapted it:
- Vegetarian Version: Replace turkey with roasted chickpeas (tossed in smoked paprika and garlic) or crispy halloumi cubes. The texture holds up beautifully in the cones.
- Low-Carb Option: Use large lettuce leaves or cheese crisps instead of tortillas. It’s a different experience but still delicious—and my keto friends loved it.
- Spicy Twist: Add sliced jalapeños to the turkey filling or drizzle with sriracha honey. I did this for a Friendsgiving with my spice-loving crew, and the cones disappeared in minutes.
- Breakfast Version: Fill the cones with scrambled eggs, bacon bits, and shredded cheese. Serve with maple syrup for dipping. Yes, this is a thing, and yes, it’s incredible.
- Dessert Cones: Skip the savory filling and fill with Nutella, fresh berries, and whipped cream. Perfect for a sweet ending to the meal.
- Seasonal Adaptations: In spring, add fresh peas and mint to the turkey filling. In summer, swap dried apricots for fresh peaches. Fall calls for roasted pumpkin seeds and apple slices.
My personal favorite variation? I once made these for a game night with buffalo chicken instead of turkey, blue cheese crumbles, and celery sticks on the board. It was a mess in the best possible way. Sometimes the best recipes come from raiding your fridge and saying, “Why not?”
Serving & Storage Suggestions
This Friendsgiving Turkey Charcuterie Cone Board is best served immediately, while the cones are still crispy and the turkey filling is cool and creamy. Arrange everything on a large board at room temperature—it’s meant to be a grazing experience, so guests can grab a cone and pick at the surrounding ingredients.
Storage: If you have leftovers (unlikely, but possible), store the cones and turkey filling separately. Cones keep in an airtight container at room temperature for up to 2 days. The turkey filling stays fresh in the fridge for 3-4 days. The charcuterie ingredients—cheese, salami, olives—can be stored according to their individual needs.
Reheating: To revive the cones, pop them in a 350°F (175°C) oven for 3-5 minutes. They’ll crisp right back up. Don’t microwave them—trust me, I tried, and they turned into rubbery messes. Reheat the turkey filling gently in a skillet over low heat, adding a splash of water or broth if it seems dry.
Make-Ahead Tip: You can bake the cones and prepare the turkey filling up to 24 hours in advance. Store separately and assemble just before serving. The flavors actually meld and improve overnight—the thyme and cranberry really settle into the turkey.
Flavor Development: The turkey filling tastes even better the next day, as the cranberry and mustard have time to marry. I’ve been known to make extra just for next-day turkey sandwiches. The cones, however, are best fresh—they lose their snap after a day.
Nutritional Information & Benefits
This Friendsgiving Turkey Charcuterie Cone Board is surprisingly balanced. Here’s an estimated breakdown per cone (assuming 8 servings):
- Calories: 320-380
- Protein: 22-26g (thanks to the turkey and cheese)
- Fat: 16-20g (from olive oil, cheese, and salami)
- Carbohydrates: 24-28g (mostly from tortillas and dried fruit)
- Fiber: 3-4g
- Sugar: 8-10g (naturally occurring plus honey)
Health Benefits: Turkey is lean protein that keeps you full and supports muscle health. Olives provide healthy monounsaturated fats and antioxidants. Dried apricots offer fiber and potassium. The fresh herbs add anti-inflammatory compounds. This isn’t a diet food, but it’s far from junk—it’s real food with real ingredients.
Dietary Considerations: This recipe contains gluten (tortillas) and dairy (cheese). For gluten-free, use corn tortillas or lettuce wraps. For dairy-free, omit the cheese or use a plant-based alternative. The recipe is naturally nut-free unless you add nuts to the board. Always check labels on processed meats and condiments for hidden allergens.
My personal take? This is the kind of food that makes you feel good—not just because it’s tasty, but because it’s made with intention. You’re nourishing your people with something that feels special but isn’t fussy. That’s a win in my book.
Conclusion
This Friendsgiving Turkey Charcuterie Cone Board is the recipe I keep coming back to, year after year. It captures everything I love about the holiday season—good food, good friends, and the joyful chaos of eating with your hands. It’s forgiving enough for beginners, impressive enough for company, and endlessly adaptable to whatever you have on hand.
I hope you make this your own. Swap in your favorite cheeses, play with the spices, try it with leftover ham or roast beef. The beauty of this recipe is that it’s a template, not a rulebook. Customize it to your taste, your crowd, your fridge contents.
When you make it—and I really hope you do—tag me or leave a comment below. I love seeing how people put their own spin on things. Tell me about your Friendsgiving traditions, your favorite cone fillings, or the time you forgot the toothpicks and ended up with tortilla tacos (it happens to the best of us). Let’s keep this conversation going, because honestly, that’s what this recipe is really about—connection, one crispy cone at a time.
Now go make some cones. Your friends will thank you.
Frequently Asked Questions
Can I make the cones ahead of time?
Yes, absolutely! Bake the cones up to 24 hours in advance and store them in an airtight container at room temperature. Just re-crisp them in a 350°F oven for 3-4 minutes before filling. I do this all the time for parties—it makes assembly a breeze.
What if I don’t have leftover turkey?
No problem at all! Use rotisserie chicken, deli turkey slices (just chop them up), or even canned chicken in a pinch. The flavor will be slightly different, but it’s still delicious. I’ve even used leftover roast beef—it worked beautifully.
Can I use something other than tortillas for the cones?
Definitely! Large lettuce leaves (romaine or iceberg) work for a low-carb option. You can also use cheese crisps—just bake small piles of shredded cheese until crispy and shape them while warm. For a gluten-free option, corn tortillas are great, though they’re smaller and more delicate.
How do I keep the cones from getting soggy?
Don’t fill them until just before serving. The oil-and-spice coating helps create a barrier, but moisture from the filling will eventually soften them. If you’re serving at a party, fill the cones right before guests arrive and expect them to be best within the first hour. For a buffet, let guests fill their own cones.
What other fillings work well in these cones?
So many options! Try buffalo chicken with blue cheese, caprese with fresh mozzarella and basil, or even taco filling with seasoned ground beef and salsa. For breakfast, scrambled eggs and bacon are amazing. For dessert, Nutella and strawberries are a crowd favorite. The cone format works with almost anything—get creative!
Pin This Recipe!
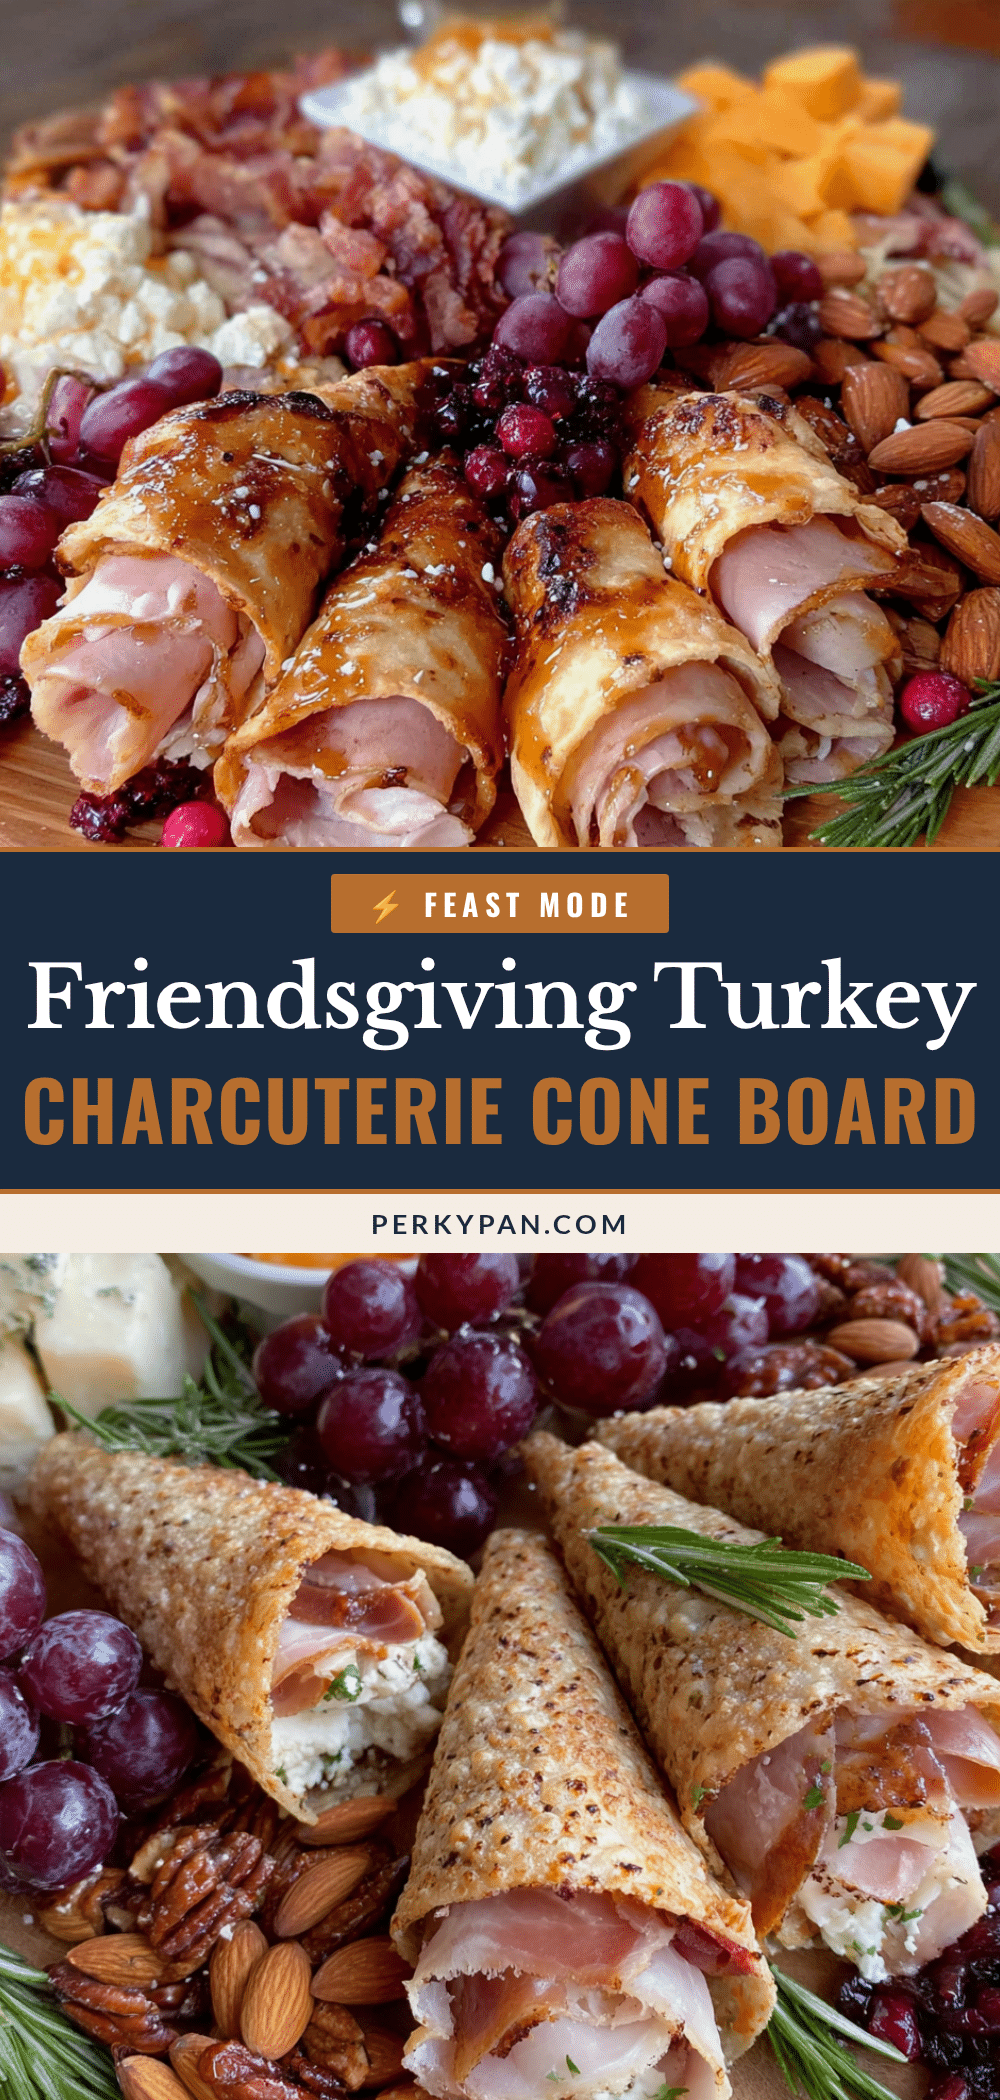
Friendsgiving Turkey Charcuterie Cone Board

A fun and interactive Friendsgiving appetizer featuring crispy tortilla cones filled with a savory turkey-cranberry mixture, surrounded by a charcuterie board of cheese, salami, olives, and dried fruit. Perfect for casual gatherings and leftover turkey.
- Prep Time: 15 minutes
- Cook Time: 10 minutes
- Total Time: 25 minutes
- Yield: 8 servings 1x
- Category: Appetizer
- Cuisine: American
Ingredients
- 6–8 large flour tortillas (burrito size)
- 2 tablespoons olive oil
- 1 teaspoon garlic powder
- 1 teaspoon smoked paprika
- ½ teaspoon salt
- 2 cups cooked turkey, shredded or diced
- ¼ cup cranberry sauce
- 2 tablespoons mayonnaise
- 1 tablespoon Dijon mustard
- 1 teaspoon fresh thyme leaves (or ½ teaspoon dried)
- Salt and pepper to taste
- 4 ounces sharp cheddar cheese, sliced
- 4 ounces salami or prosciutto, thinly sliced
- 1 cup mixed olives (green and kalamata)
- ½ cup dried apricots or figs
- ¼ cup honey
- Fresh herbs for garnish (rosemary, thyme, or sage)
Instructions
- Preheat your oven to 375°F (190°C). Line a large baking sheet with parchment paper.
- In a small bowl, mix the olive oil, garlic powder, smoked paprika, and salt. Brush this mixture lightly over both sides of each tortilla. Working one at a time, roll each tortilla into a cone shape and secure the edge with a toothpick. Place seam-side down on the prepared baking sheet.
- Bake the cones for 8-10 minutes, until golden and crispy. Remove from oven and let cool completely on the baking sheet. Remove toothpicks once cool.
- While the cones bake, combine the shredded turkey, cranberry sauce, mayonnaise, Dijon mustard, fresh thyme, salt, and pepper in a medium bowl. Mix until well coated. Taste and adjust seasoning.
- Place your large serving board or platter on the counter. Arrange the cooled cones in a cluster in the center. Spoon the turkey filling into each cone, filling about halfway.
- Arrange the remaining ingredients around the cones: fan out the sliced cheddar, fold the salami or prosciutto into loose ribbons, scatter the olives and dried apricots, and place small bowls of honey and extra cranberry sauce nearby. Tuck fresh herbs between everything for color.
- Drizzle honey over the cones and cheese just before serving. Serve immediately.
Notes
Don’t skip the oil brushing for crispy cones. Let cones cool completely before filling to avoid sogginess. Use room temperature turkey for better blending. Cones can be baked up to 24 hours ahead and re-crisped in a 350°F oven for 3-4 minutes. Turkey filling can be made up to 24 hours ahead and refrigerated.
Nutrition
- Serving Size: 1 cone
- Calories: 350
- Sugar: 9
- Sodium: 650
- Fat: 18
- Saturated Fat: 6
- Carbohydrates: 26
- Fiber: 3.5
- Protein: 24
Keywords: Friendsgiving, turkey, charcuterie, cone, appetizer, Thanksgiving leftovers, easy, party food


