Love this? Save it for later!
Share the inspiration with your friends
My mother-in-law swore she hated cake. For thirty-seven years, she’d turn down birthday slices, push away wedding dessert plates, and make that little face people make when they’re trying to be polite about something they genuinely don’t enjoy. “Too dry,” she’d say. “Too crumbly.” “All that frosting gives me a headache.” I believed her, honestly. Some people just aren’t cake people, and that’s fine.
Then I caught her last Tuesday, standing at my kitchen counter at four in the afternoon, eating a slice of this vanilla bean cream cake with her fingers. She wasn’t even using a plate. Just standing there, pulling off pieces, nodding to herself. I didn’t say anything for a solid minute. I just watched. Because let me tell you, when you witness a thirty-seven-year cake boycott end without warning, you don’t interrupt it. You just stand there and memorize the moment.
“This doesn’t count,” she said when she finally noticed me. “This isn’t cake. This is something else entirely.” And you know what? She’s right. This quick vanilla bean cream cake sits in this weird perfect middle ground between a pound cake and a custard. It’s not dry. It’s not fussy. It’s not anything you’d expect from something that goes from mixing bowl to table in under thirty minutes. Maybe you’ve been burned by quick cakes before—I know I have. But this one’s different. This one changes minds.
Why You’ll Love This Recipe
Let me be straight with you. I’ve tested this quick vanilla bean cream cake more times than I care to admit. I’ve made it with cheap vanilla extract, with the good vanilla bean paste, with expired baking powder (don’t do that, by the way), and even accidentally with salted butter when I ran out of unsalted. Every single time, it worked. That’s the kind of recipe reliability you need on a Tuesday night when you’re tired and the kids are hungry and you just want something that feels special without the effort.
- Quick & Easy: From start to finish, we’re talking 30 minutes. That’s not a typo. You can have this on the table before the preheat timer on your oven even finishes beeping.
- Simple Ingredients: You likely have everything in your kitchen right now. Heavy cream, eggs, sugar, flour, vanilla. That’s it. No trips to specialty stores, no hunting for obscure ingredients.
- Perfect for Weeknights: This isn’t a weekend project cake. This is the cake you make on a Wednesday when you need something warm and comforting after a long day.
- Crowd-Pleaser: I’ve served this to kids, adults, picky eaters, and people who “don’t like dessert.” Empty plates every time.
- Unbelievably Delicious: The texture is what gets everyone. It’s creamy on the inside, golden on the outside, and the vanilla flavor is so present and warm it feels like a hug.
What makes this different from every other vanilla cake recipe out there? It’s the cream. Most vanilla cakes use butter or oil as the fat. This one uses heavy cream, and that changes everything. The cream gives it this tender, almost custard-like crumb that stays moist for days. Plus, the vanilla bean specks throughout make it feel like you spent way more effort than you actually did. It’s my best version, and I’m not being modest about it.
This cake makes you close your eyes after the first bite. It really does. It’s comfort food reimagined—faster, simpler, but with the same soul-soothing satisfaction that makes you forget whatever stress you walked into the kitchen with.
What Ingredients You Will Need
This recipe uses simple, wholesome ingredients to deliver that rich, creamy texture and bold vanilla flavor without any fuss. Most of these are pantry staples, which is exactly what you want on a busy weeknight.
- 1 cup (200g) granulated sugar — Regular white sugar works best here. It dissolves easily and gives the cake that delicate sweetness without overpowering the vanilla. (Don’t use brown sugar; it’ll change the flavor and texture too much.)
- 1/2 cup (113g) unsalted butter, softened — Make sure it’s truly at room temperature. Cold butter won’t cream properly, and melted butter changes the structure. I use Land O’Lakes or Kerrygold depending on what’s on sale.
- 2 large eggs, room temperature — This matters more than you think. Cold eggs can seize the batter and make the cake dense. If you forgot to take them out early, place them in a bowl of warm water for 5 minutes.
- 1 1/2 cups (188g) all-purpose flour — Spoon and level your flour. Don’t scoop directly from the bag, or you’ll end up with too much and a dry cake. King Arthur Flour is my go-to for consistent results.
- 1 1/2 teaspoons baking powder — Make sure it’s fresh. Test it by dropping a little in hot water—if it fizzes, you’re good. If not, buy new baking powder.
- 1/4 teaspoon salt — Just regular table salt. It balances the sweetness and enhances the vanilla flavor.
- 1/2 cup (120ml) heavy cream — This is the star ingredient. Use full-fat heavy cream, not half-and-half or milk. The high fat content is what gives this cake its signature creamy texture. (You can use heavy whipping cream—they’re the same thing.)
- 1 tablespoon vanilla bean paste — This is where the magic happens. Vanilla bean paste gives you those beautiful black specks and intense flavor without the hassle of scraping a whole vanilla pod. I recommend Nielsen-Massey or Taylor & Colledge. If you can’t find paste, use 2 teaspoons of good vanilla extract, but you’ll miss out on the specks.
- Optional: Powdered sugar for dusting — Just a light dusting before serving makes it look pretty. Not necessary, but nice.
Substitution Note: If you’re out of heavy cream, you can use full-fat coconut cream for a dairy-free version. The texture will be slightly different—a bit denser—but still delicious. Just don’t use light coconut milk or regular milk; they won’t give you the same richness.
Equipment Needed
You don’t need fancy equipment for this quick vanilla bean cream cake. That’s the beauty of it. Here’s what you’ll need:
- 8-inch round cake pan — A metal pan works best for even baking. Glass or ceramic will work, but you might need to add a few minutes to the baking time.
- Parchment paper — Cut a circle for the bottom of the pan and grease the sides. Trust me, this cake is tender and you don’t want it sticking.
- Large mixing bowl — Any bowl works, but a wide one makes creaming the butter and sugar easier.
- Hand mixer or stand mixer — You can do this by hand with a whisk, but your arm will get tired. A hand mixer is perfect for this recipe.
- Rubber spatula — For scraping down the bowl and folding in the dry ingredients.
- Measuring cups and spoons — Accurate measurements matter here, especially for the flour and cream.
- Cooling rack — Lets the cake cool evenly so the bottom doesn’t get soggy.
I’ve made this cake with a $20 hand mixer from Target and a fancy KitchenAid stand mixer. Both work fine. Don’t let equipment hold you back.
Preparation Method
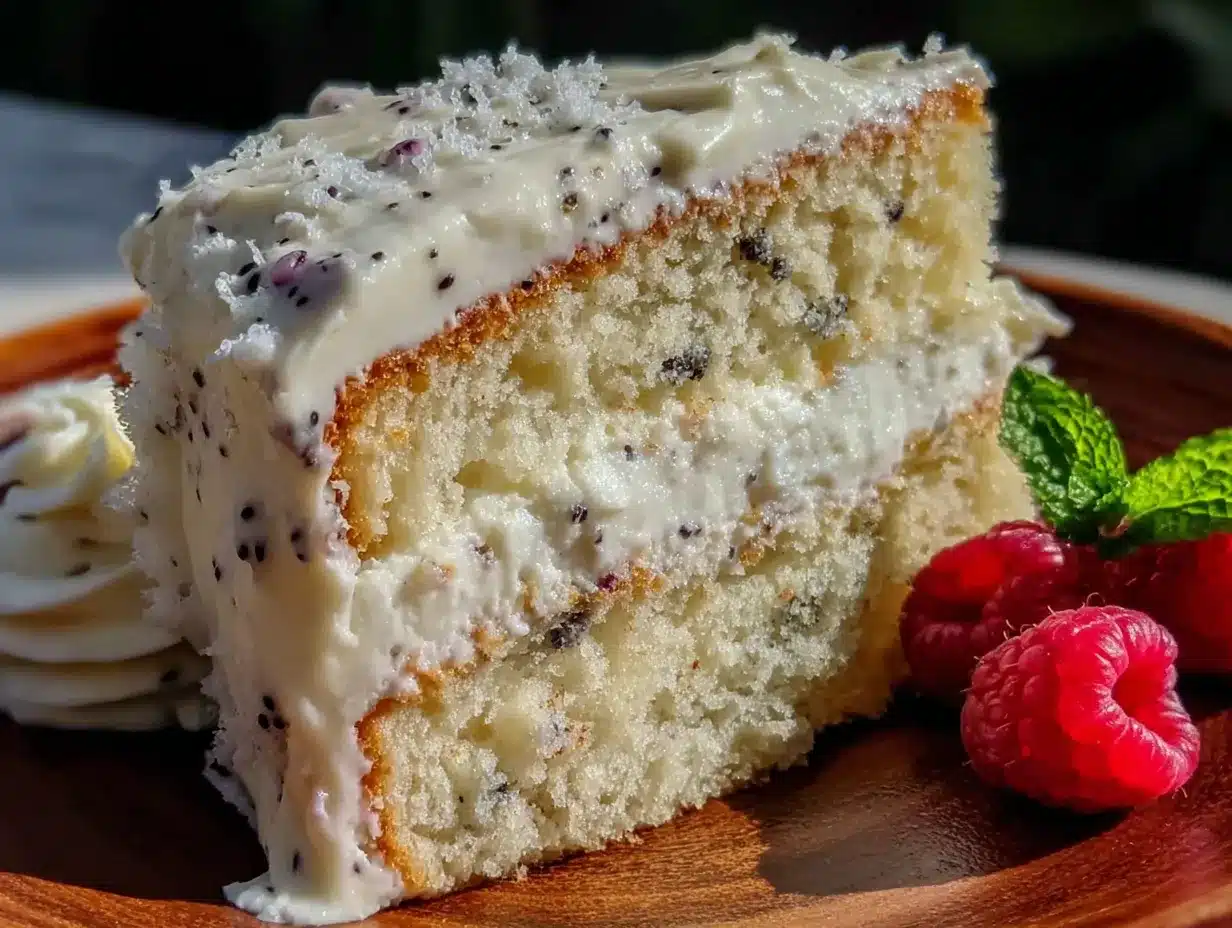
Preheat your oven to 350°F (175°C). Grease your 8-inch round cake pan and line the bottom with parchment paper. Set it aside while you make the batter.
- Cream the butter and sugar. In a large mixing bowl, beat the softened butter and granulated sugar together on medium speed for about 3 minutes. You want it light and fluffy—pale yellow in color. Scrape down the sides of the bowl with your spatula halfway through. This step adds air to the batter, which helps the cake rise. (Don’t rush it. I’ve tried shortcutting this step, and the cake comes out denser.)
- Add the eggs one at a time. Crack the first egg into the bowl and beat on medium until fully incorporated, about 30 seconds. Scrape the bowl. Add the second egg and beat again. The batter should look smooth and slightly glossy. If it looks curdled, your butter was too cold or your eggs were too cold. Don’t panic—it’ll come together once you add the flour.
- Mix the dry ingredients separately. In a small bowl, whisk together the flour, baking powder, and salt. This ensures the baking powder is evenly distributed. (I learned this lesson the hard way after biting into a pocket of baking powder in a muffin. Not fun.)
- Alternate adding dry ingredients and cream. With the mixer on low speed, add about one-third of the flour mixture to the butter mixture. Mix until just combined—maybe 10 seconds. Pour in half the heavy cream and mix until incorporated. Add another third of the flour, then the rest of the cream, then the remaining flour. Stop mixing as soon as the last streak of flour disappears. Overmixing at this stage develops gluten and makes the cake tough.
- Fold in the vanilla bean paste. Remove the bowl from the mixer. Add the vanilla bean paste and fold it in gently with your rubber spatula. You’ll see those beautiful black specks spreading through the batter. Take a moment to smell it. That’s the good stuff.
- Pour and spread the batter. Scrape the batter into your prepared cake pan. Use your spatula to spread it evenly to the edges. The batter will be thick, almost like a soft cookie dough. That’s normal. Give the pan a gentle tap on the counter to release any air bubbles.
- Bake for 22-25 minutes. Place the pan on the middle rack of your preheated oven. Bake until the top is golden brown and a toothpick inserted into the center comes out clean or with just a few moist crumbs. My oven runs hot, so I start checking at 20 minutes. Every oven is different, so trust your eyes and the toothpick test.
- Cool in the pan for 10 minutes. Set the pan on a cooling rack. Let it rest for exactly 10 minutes. This allows the cake to set so it doesn’t fall apart when you remove it. Then run a knife around the edge, invert the pan onto the rack, and peel off the parchment paper. Let it cool completely if you’re frosting it, or serve it warm if you can’t wait (I never can).
Cooking Tips & Techniques
I’ve made this quick vanilla bean cream cake probably twenty times now, and I’ve messed it up more times than I’d like to admit. Here’s what I’ve learned so you don’t have to learn the hard way.
Room temperature ingredients aren’t optional. I know, I know. You’re busy, and you forgot to take the butter out. But cold butter doesn’t cream properly, and cold eggs can make the batter curdle. If you’re in a rush, cut the butter into small cubes and let it sit for 10 minutes. Place the eggs in a bowl of warm (not hot) water for 5 minutes. It makes a real difference.
Don’t overmix once the flour goes in. This is the number one mistake people make with quick cakes. Once you add flour, gluten starts developing. Mix too much, and your cake goes from tender to tough. Mix until you don’t see any more white streaks, then stop. I promise, those last few lumps will work themselves out in the oven.
Check your baking powder freshness. I once made this cake for a dinner party and it came out flat as a pancake. Turns out my baking powder was expired. Baking powder loses its potency after about 6 months. If you can’t remember when you bought it, test it. Drop a teaspoon into hot water—if it bubbles vigorously, you’re good. If it just sits there, buy new baking powder.
Use vanilla bean paste, not extract. Look, I love vanilla extract. I use it every day. But for this specific cake, the paste makes a noticeable difference. The flavor is more rounded, more aromatic, and you get those beautiful specks that make the cake look homemade in the best way. If you only have extract, use 2 teaspoons and accept that the flavor will be slightly less complex.
Let it cool properly. I know it’s hard to wait. The smell fills your whole kitchen and you just want to dig in. But if you try to remove the cake from the pan too soon, it will break. Those 10 minutes of cooling in the pan are non-negotiable. Use them to make a cup of tea or clean up your mixing bowl.
Variations & Adaptations
This quick vanilla bean cream cake is a great base recipe that you can adapt in so many ways. Here are some of my favorites:
Lemon Cream Cake: Add the zest of one lemon to the sugar and rub it in with your fingers before creaming with the butter. The lemon oils will infuse the sugar and give you a bright, citrusy vanilla cake. I make this version in spring and it’s always a hit.
Chocolate Chip Vanilla Cream Cake: Fold in 1/2 cup of mini chocolate chips after adding the vanilla bean paste. The mini chips distribute better than regular-sized ones. Use dark chocolate chips for a nice contrast to the sweet vanilla batter.
Gluten-Free Version: Substitute the all-purpose flour with a 1:1 gluten-free baking flour blend that contains xanthan gum. I’ve used King Arthur’s Measure for Measure blend and Bob’s Red Mill 1-to-1 Baking Flour with good results. The texture will be slightly more delicate, so handle the cake gently when removing it from the pan.
Berry Swirl: Warm 1/2 cup of raspberry or strawberry jam until it’s runny, then drop spoonfuls on top of the batter before baking. Use a knife to swirl it gently. The jam sinks a bit during baking and creates these lovely pockets of fruit throughout the cake.
Spiced Vanilla Cake: Add 1 teaspoon of cinnamon and 1/4 teaspoon of nutmeg to the dry ingredients. This turns it into a cozy fall cake that pairs beautifully with a cup of coffee. I make this version from September through November, and it always feels like a warm hug.
Serving & Storage Suggestions
This cake is incredibly versatile when it comes to serving. Here’s how I like to do it:
Serving Temperature: Warm is my favorite. The cake is soft and almost pudding-like when it’s fresh from the oven. If you’re serving it later, pop individual slices in the microwave for 10-15 seconds to bring back that warmth. Room temperature is also lovely—the vanilla flavor becomes more pronounced as it cools.
Presentation: Dust the top with powdered sugar through a fine-mesh sieve. That’s really all it needs. If you’re feeling fancy, add a dollop of whipped cream and a few fresh berries on the side. The simplicity of the cake means it looks beautiful with minimal effort.
What to Serve With It: A cup of black coffee or a glass of cold milk. That’s it. This isn’t a cake that needs ice cream or sauce or anything complicated. It stands on its own. That said, a scoop of vanilla bean ice cream never hurt anyone.
Storage: Store the cake in an airtight container at room temperature for up to 3 days. The texture actually improves after day one—the cream continues to tenderize the crumb. Do not refrigerate it, as the cold will dry out the cake. If you live in a humid climate, you can store it in the fridge, but let slices come to room temperature before eating.
Freezing: This cake freezes beautifully. Wrap the completely cooled cake (or individual slices) tightly in plastic wrap, then in aluminum foil. Freeze for up to 3 months. Thaw overnight in the refrigerator or at room temperature for a few hours. The flavor and texture remain remarkably intact.
Flavor Development: Here’s a little secret—this cake tastes even better on day two. The vanilla flavor deepens and the texture becomes even more tender. If you can resist eating it all on day one, you’re in for a treat.
Nutritional Information & Benefits
Let’s be real—this is a treat. But that doesn’t mean it can’t have some redeeming qualities. Here’s the estimated nutritional breakdown per slice (based on 8 servings):
| Nutrient | Amount per Slice |
|---|---|
| Calories | 310 |
| Total Fat | 17g |
| Saturated Fat | 10g |
| Cholesterol | 85mg |
| Sodium | 180mg |
| Total Carbohydrates | 37g |
| Dietary Fiber | 0.5g |
| Sugars | 25g |
| Protein | 4g |
Health Highlights: The heavy cream provides calcium and vitamin A, while the eggs offer high-quality protein and choline, which supports brain health. The vanilla bean contains small amounts of antioxidants called vanilloids. Is this a health food? No. But it’s made with real ingredients, no preservatives, and nothing artificial. That counts for something.
Dietary Considerations: This recipe contains dairy, eggs, and gluten. For a dairy-free version, use coconut cream and a plant-based butter substitute. For a gluten-free version, use a 1:1 gluten-free flour blend as mentioned above. This recipe is naturally nut-free, making it safe for school lunches and gatherings where nut allergies are a concern.
Conclusion
This quick vanilla bean cream cake has become my go-to for so many reasons. It’s fast enough for a Tuesday night dessert, impressive enough for guests, and simple enough that I don’t have to think too hard after a long day. But honestly, the real reason I keep making it is that first bite. That moment when the vanilla hits your nose and the cream melts on your tongue and you remember that something so simple can be so good.
I want you to make this cake your own. Add lemon zest if that sounds good. Throw in some chocolate chips. Serve it warm with a glass of cold milk. The recipe is a starting point, not a rulebook. And if you’re skeptical—like my mother-in-law was—I get it. But I dare you to try one slice. Just one. See what happens.
When you make it, come back and tell me how it went. Did you add something? Change something? Did someone in your house swear they hated cake and then eat three slices? I want to hear about it. Drop a comment below or tag me in your photos. Let’s keep this conversation going.
Frequently Asked Questions
Can I use vanilla extract instead of vanilla bean paste?
Yes, you can substitute 2 teaspoons of pure vanilla extract for the vanilla bean paste. The flavor will still be good, but you’ll miss out on the beautiful vanilla bean specks and the slightly more complex flavor that the paste provides.
Why did my cake come out dense?
Dense cake usually comes from overmixing the batter after adding the flour, or from using cold ingredients. Make sure your butter, eggs, and cream are all at room temperature, and mix only until the flour disappears. Overmixing develops gluten, which makes the cake tough.
Can I double this recipe?
Absolutely. Double all the ingredients and bake in a 9×13-inch pan. You’ll need to increase the baking time to about 30-35 minutes. Start checking at 28 minutes with a toothpick test. The cake is done when the toothpick comes out clean or with just a few moist crumbs.
How do I know when the cake is done baking?
Insert a toothpick into the center of the cake. If it comes out clean or with just a few moist crumbs clinging to it, the cake is done. The top should also be golden brown and the edges should be pulling away slightly from the pan. Every oven runs differently, so start checking at 20 minutes.
Can I make this cake ahead of time?
Yes! This cake actually tastes better on day two. Bake it a day ahead, let it cool completely, wrap it tightly in plastic wrap, and store it at room temperature. The vanilla flavor deepens and the texture becomes even more tender. Just dust with powdered sugar before serving.
Pin This Recipe!
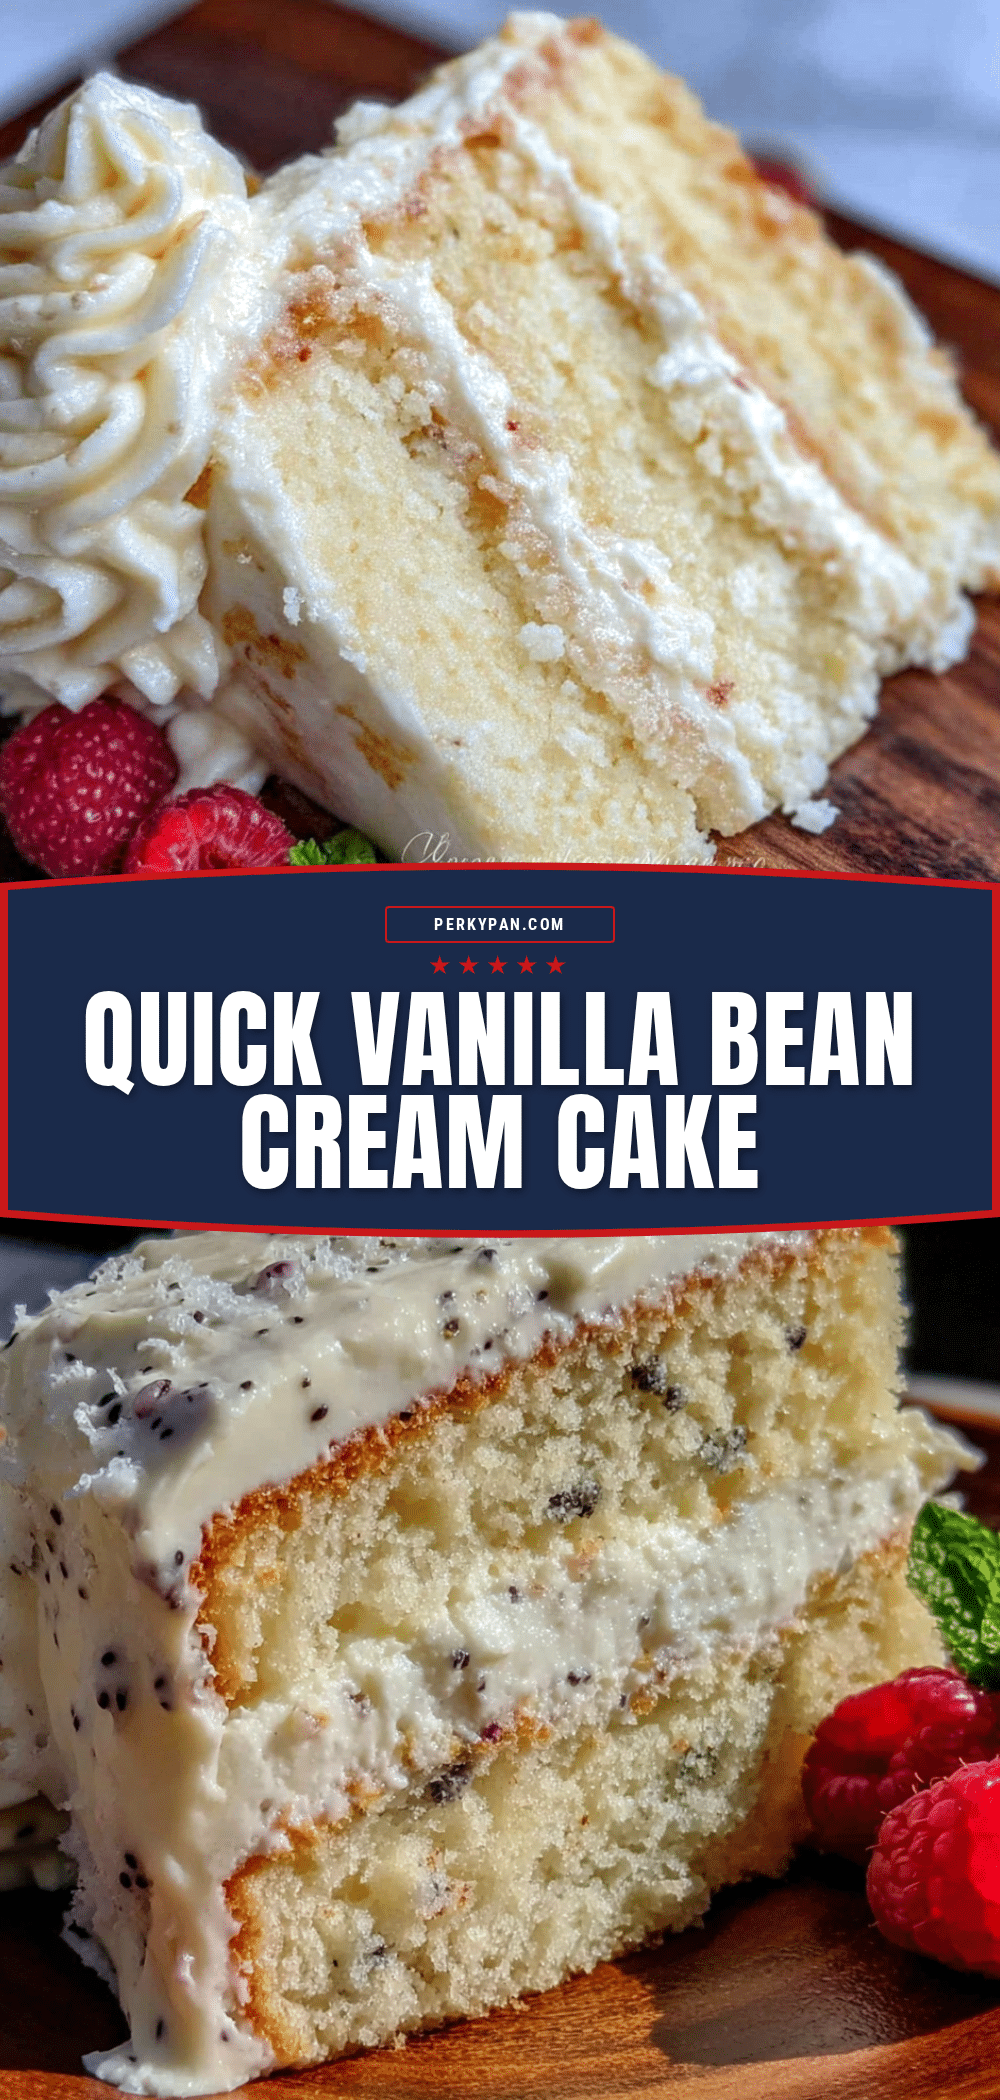
Easy Vanilla Bean Cream Cake: Best 30-Minute Recipe
This quick vanilla bean cream cake sits in a perfect middle ground between a pound cake and a custard. It’s not dry, not fussy, and goes from mixing bowl to table in under thirty minutes.
- Prep Time: 10 minutes
- Cook Time: 22-25 minutes
- Total Time: 30 minutes
- Yield: 8 servings 1x
- Category: Dessert
- Cuisine: American
Ingredients
- 1 cup (200g) granulated sugar
- 1/2 cup (113g) unsalted butter, softened
- 2 large eggs, room temperature
- 1 1/2 cups (188g) all-purpose flour
- 1 1/2 teaspoons baking powder
- 1/4 teaspoon salt
- 1/2 cup (120ml) heavy cream
- 1 tablespoon vanilla bean paste
- Optional: Powdered sugar for dusting
Instructions
- Preheat your oven to 350°F (175°C). Grease your 8-inch round cake pan and line the bottom with parchment paper. Set it aside while you make the batter.
- Cream the butter and sugar. In a large mixing bowl, beat the softened butter and granulated sugar together on medium speed for about 3 minutes until light and fluffy. Scrape down the sides of the bowl halfway through.
- Add the eggs one at a time. Crack the first egg into the bowl and beat on medium until fully incorporated, about 30 seconds. Scrape the bowl. Add the second egg and beat again until smooth and slightly glossy.
- Mix the dry ingredients separately. In a small bowl, whisk together the flour, baking powder, and salt.
- Alternate adding dry ingredients and cream. With the mixer on low speed, add about one-third of the flour mixture to the butter mixture. Mix until just combined. Pour in half the heavy cream and mix until incorporated. Add another third of the flour, then the rest of the cream, then the remaining flour. Stop mixing as soon as the last streak of flour disappears.
- Fold in the vanilla bean paste. Remove the bowl from the mixer. Add the vanilla bean paste and fold it in gently with a rubber spatula.
- Pour and spread the batter. Scrape the batter into your prepared cake pan. Use a spatula to spread it evenly to the edges. Give the pan a gentle tap on the counter to release any air bubbles.
- Bake for 22-25 minutes. Place the pan on the middle rack of your preheated oven. Bake until the top is golden brown and a toothpick inserted into the center comes out clean or with just a few moist crumbs.
- Cool in the pan for 10 minutes. Set the pan on a cooling rack. Let it rest for exactly 10 minutes. Then run a knife around the edge, invert the pan onto the rack, and peel off the parchment paper. Let it cool completely if frosting, or serve warm.
Notes
Room temperature ingredients are crucial. Don’t overmix once flour is added. Check baking powder freshness. Use vanilla bean paste for best flavor and specks. Let cake cool in pan for 10 minutes before removing. Cake tastes even better on day two.
Nutrition
- Serving Size: 1 slice
- Calories: 310
- Sugar: 25
- Sodium: 180
- Fat: 17
- Saturated Fat: 10
- Carbohydrates: 37
- Fiber: 0.5
- Protein: 4
Keywords: vanilla bean cream cake, quick cake, 30-minute cake, easy vanilla cake, cream cake, vanilla bean paste


