Love this? Save it for later!
Share the inspiration with your friends
It was 11:47 PM on a random Thursday in early December, and I had a very specific, almost desperate craving for something sweet, salty, and completely ridiculous. I didn’t have the energy for a full batch of cookies or the patience for a layered dessert. I had a bag of white chocolate chips, some pretzels, and a bag of candy eyes left over from Halloween. And then the idea arrived — a no-bake bark that looked like little piles of snowman poop. Honestly, it was one of those weird, late-night thoughts that usually gets forgotten by morning. But this one stuck.
I was supposed to be making a “proper” holiday treat for a potluck the next day. You know, something elegant like peppermint bark or a yule log. But the clock was ticking, and the idea of melting chocolate and throwing things together on a sheet pan felt like the only logical move. I grabbed the white chocolate, crushed up some Oreos for the “dirt,” and tossed in some mini marshmallows for texture. The candy eyes were the punchline — they made the whole thing look like a tiny, edible snowman left a little present on your plate.
Let me tell you, when I brought this easy snowman poop cookie bark to that party, it was the first thing to disappear. People laughed, then they grabbed a piece, then they came back for seconds. It was messy, it was silly, and it was absolutely perfect. I mean, sometimes the best recipes come from a place of tired impulsiveness — and this one has become a non-negotiable part of my holiday hosting lineup ever since.
Why You’ll Love This Recipe
This easy snowman poop cookie bark is not just a funny name — it’s a genuinely delicious, no-bake treat that saves you time and stress during the busiest season of the year. I’ve tested this recipe multiple times (for parties, family gatherings, and even a few “oops I forgot the dessert” moments), and it never fails to deliver. Here’s why you’ll love it:
- No-Bake & Ready in 20 Minutes: You don’t need to turn on the oven. Just melt, mix, and chill. Perfect for those days when you’re already juggling a dozen other dishes for your holiday spread.
- Simple Ingredients: You probably have most of these in your pantry right now. White chocolate chips, pretzels, Oreos, marshmallows, and candy eyes — that’s it. No fancy grocery store runs required.
- Perfect for Holiday Parties: This is the treat that gets people talking. It’s funny, it’s festive, and it’s a guaranteed conversation starter. Your guests will love the playful presentation, and you’ll love how easy it is to scale up for a crowd.
- Crowd-Pleaser for All Ages: Kids think it’s hilarious, and adults appreciate the sweet-and-salty crunch. I’ve seen grown men go back for fourths. It’s that good.
- Unbelievably Addictive: The combination of creamy white chocolate, crunchy pretzels, and soft marshmallows is next-level. Add the Oreo “dirt” for a bit of chocolatey richness, and you’ve got a bark that’s impossible to resist.
What makes this recipe different from the rest? It’s the perfect balance of humor and flavor. I’ve tried other “snowman poop” recipes that are just white chocolate with a few add-ins. This version has texture, crunch, and a visual punch that makes it stand out on any dessert table. It’s the kind of treat that makes people smile before they even take a bite — and then they close their eyes because it’s just that good.
What Ingredients You Will Need
This recipe uses simple, pantry-friendly ingredients to create a bark that’s both visually fun and incredibly tasty. Here’s what you’ll need, along with a few tips I’ve picked up from making this dozens of times.
- White Chocolate Chips (2 cups / 12 oz): The base of our bark. I recommend using a good-quality brand like Ghirardelli or Guittard for the smoothest melt and creamiest texture. Avoid white chocolate “melting wafers” if possible — they have added oils that can make the bark greasy. Real white chocolate chips give you that rich, buttery flavor that ties everything together.
- Mini Pretzel Twists (1 cup, crushed): These add the salty crunch that balances the sweetness. I like to crush them by hand in a zip-top bag — it gives you a mix of fine crumbs and bigger chunks, which makes the texture more interesting. You can use gluten-free pretzels if needed.
- Oreo Cookies (1 cup, crushed): The “dirt” that gives the bark its visual charm. I use regular Oreos (cream filling included) and crush them into a mix of fine crumbs and small pieces. The dark chocolate crumbs contrast beautifully with the white chocolate. You can use gluten-free chocolate sandwich cookies if needed.
- Mini Marshmallows (1 cup): These add soft, pillowy pockets of sweetness and mimic the look of snow. They also help the bark look more like “snowman poop” — trust me on this. I’ve tried using regular marshmallows cut into quarters, but mini marshmallows are much easier and distribute more evenly.
- Candy Eyes (1/4 cup, about 24-30 pieces): The secret ingredient that makes this bark instantly recognizable. You can find these at most craft stores or online. They come in different sizes — I prefer the small ones (about 6mm) so they look like tiny snowman faces peeking out from the bark.
- Coconut Oil (1 teaspoon): Optional, but highly recommended. A tiny bit of coconut oil helps the white chocolate melt more smoothly and gives the bark a slightly softer, easier-to-cut texture. If you don’t have coconut oil, you can skip it — the bark will just be a bit firmer.
Ingredient Selection Tips: When buying white chocolate chips, check the label. You want cocoa butter listed as an ingredient, not palm oil or other vegetable fats. The flavor difference is noticeable. For the Oreos, I’ve found that generic chocolate sandwich cookies work fine, but the name brand has a slightly better crumb texture. And for the candy eyes, buy a few extra packs — they’re fun to have on hand for other holiday treats, and you might accidentally eat a few while assembling (no judgment here).
Substitution Guidance: If you’re dairy-free, use dairy-free white chocolate chips and vegan marshmallows. For a nut-free version, skip the coconut oil and use a neutral vegetable oil instead. You can also swap the pretzels for crushed potato chips if you want a different kind of salty crunch — I’ve tried it, and it’s surprisingly good.
Equipment Needed
You don’t need a lot of fancy tools for this recipe, which is part of its charm. Here’s what you’ll need:
- Large Baking Sheet (13×18 inches): A rimmed baking sheet works best. Line it with parchment paper or a silicone baking mat for easy removal. I’ve used a regular cookie sheet in a pinch, but the rimmed sheet keeps everything contained.
- Medium Microwave-Safe Bowl: For melting the white chocolate. Glass or ceramic works best. Avoid plastic bowls — they can retain heat unevenly and cause the chocolate to seize.
- Zip-Top Plastic Bag: For crushing the pretzels and Oreos. A rolling pin or even a heavy-bottomed pan works great for this. I’ve also used a food processor, but I prefer the hand-crushed texture — it’s more rustic and gives you better control over the chunkiness.
- Spatula: For spreading the melted chocolate mixture onto the baking sheet. A rubber spatula is ideal for scraping every last bit of goodness out of the bowl.
- Refrigerator: For setting the bark. You’ll need at least 1-2 hours of chill time. If you’re in a rush, the freezer works in about 30 minutes.
- Sharp Knife: For cutting the bark into pieces. A chef’s knife works best. I’ve tried using a pizza cutter, but it tends to push the toppings around instead of cutting cleanly through.
Budget-Friendly Options: If you don’t have a silicone baking mat, parchment paper is your best friend. If you don’t have a microwave, you can melt the white chocolate in a double boiler on the stovetop — just be careful not to overheat it. And if you don’t have a rolling pin for crushing, a wine bottle works beautifully (just make sure it’s clean and dry).
Preparation Method
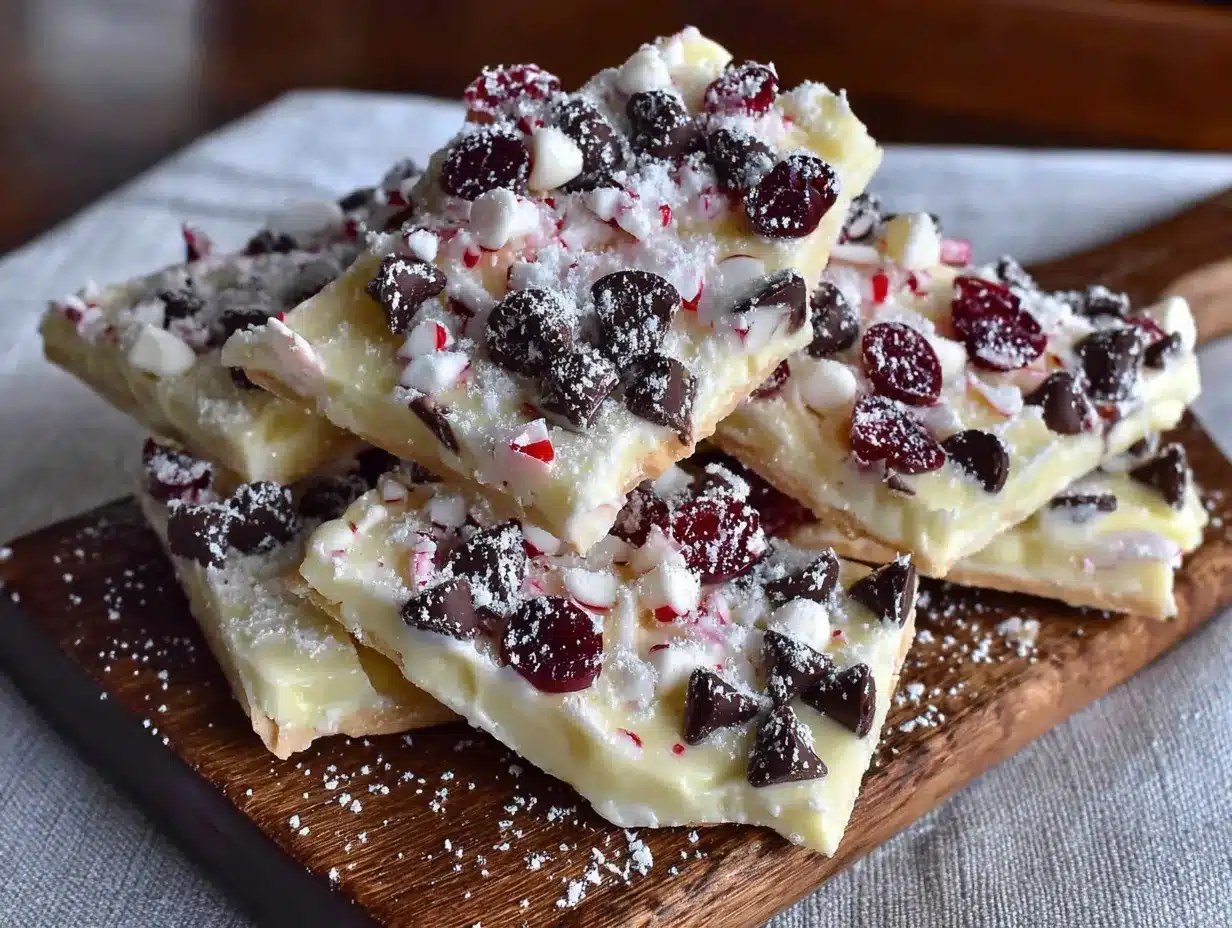
Follow these steps carefully, and you’ll have a gorgeous, hilarious batch of easy snowman poop cookie bark ready for your next party. I’ve included all the little details I’ve learned from making this dozens of times.
- Prep Your Baking Sheet (5 minutes): Line a large rimmed baking sheet with parchment paper or a silicone baking mat. Make sure the paper extends up the sides a bit — this will make it easier to lift the bark out later. Set the sheet aside.
- Crush the Pretzels and Oreos (5 minutes): Place the mini pretzel twists in a zip-top bag and seal it. Use a rolling pin or heavy pan to crush them into a mix of fine crumbs and small chunks. You want some larger pieces for texture, so don’t go overboard. Transfer to a small bowl. Repeat with the Oreo cookies in a separate bag, crushing them into a similar consistency. Set both bowls aside.
- Melt the White Chocolate (3-4 minutes): Place the white chocolate chips and coconut oil (if using) in a medium microwave-safe bowl. Microwave in 30-second intervals, stirring well after each interval. The chocolate will look smooth and slightly thick when it’s ready. Be careful not to overheat — white chocolate burns easily. If it seizes (turns grainy and stiff), you’ve gone too far and need to start over. Trust me, I’ve learned this the hard way. It should take about 2-3 intervals total.
- Mix in the Crunchy Add-Ins (2 minutes): Once the white chocolate is fully melted and smooth, add the crushed pretzels and mini marshmallows. Stir gently but thoroughly until everything is evenly coated. The mixture will look thick and chunky — that’s exactly what you want.
- Spread the Mixture (3 minutes): Pour the mixture onto the prepared baking sheet. Use a spatula to spread it into an even layer, about 1/4 to 1/2 inch thick. Don’t worry about making it perfect — the rustic, uneven edges are part of the charm. The bark should cover most of the sheet but doesn’t need to reach the edges.
- Add the Oreo “Dirt” and Candy Eyes (5 minutes): While the bark is still warm and slightly sticky, sprinkle the crushed Oreos evenly over the top. Gently press them into the surface with your fingers or the spatula. Then, randomly place the candy eyes around the bark — some clustered together, some scattered. Press them in gently so they stick. The eyes are what make this bark instantly recognizable, so have fun with it. I like to place a few pairs close together so it looks like tiny snowmen are peeking out.
- Chill Until Set (1-2 hours): Place the baking sheet in the refrigerator and let the bark set completely. This usually takes about 1-2 hours. If you’re in a hurry, the freezer works in about 30 minutes. The bark should feel firm and solid to the touch when it’s ready.
- Cut and Serve (5 minutes): Once the bark is fully set, lift it out of the baking sheet using the parchment paper. Place it on a cutting board and use a sharp knife to cut it into irregular pieces. I like to aim for about 2-inch pieces, but honestly, any size works. The uneven edges and visible toppings are what make it look so fun.
Sensory Cues: When the white chocolate is melting, it should look glossy and smell sweet and buttery. When you stir in the pretzels and marshmallows, you’ll hear a satisfying crunch as everything combines. The finished bark should look like a snowy, rocky landscape dotted with tiny eyes — it’s weird and wonderful.
Troubleshooting Tips: If your white chocolate seizes (turns grainy), you can try adding a teaspoon of vegetable oil and stirring vigorously to bring it back. If the bark is too sticky to cut, it needs more chill time. If the candy eyes fall off after cutting, you didn’t press them in firmly enough while the chocolate was still warm — you can dab a tiny bit of melted chocolate on the back and reattach them.
Cooking Tips & Techniques
I’ve made this easy snowman poop cookie bark more times than I can count, and I’ve learned a few tricks along the way. Here are my best tips for getting it right every time.
Master the Melt: White chocolate is finicky. It doesn’t like high heat. Always melt it slowly in short bursts, and stir between each interval. If you see any lumps forming, stop microwaving immediately and stir vigorously — the residual heat will usually smooth them out. I once tried to rush the process by microwaving for a full minute, and I ended up with a grainy, burnt mess. Learn from my mistake.
Crush Strategically: For the pretzels and Oreos, you want a mix of textures. Some fine crumbs for the “dirt” effect, and some larger pieces for crunch. I like to crush them by hand in a bag because it gives me more control. If you use a food processor, pulse it — don’t let it run continuously, or you’ll end up with dust.
Timing is Everything: The candy eyes need to go on while the chocolate is still warm and sticky. If you wait too long, the surface will harden and the eyes won’t stick. I usually add the Oreo crumbs first, then immediately place the eyes. Work quickly but carefully — you’ve got about 5-7 minutes before the chocolate starts to set.
Scaling for a Crowd: This recipe doubles beautifully. Just use a larger baking sheet or two separate sheets. If you’re making a double batch, melt the white chocolate in two separate bowls to avoid overheating. I’ve made a triple batch for a big holiday party, and it was gone in 20 minutes.
Consistency Secrets: If you want a softer, more fudge-like bark, add an extra tablespoon of coconut oil. If you prefer a firmer, snappier bark, skip the oil entirely. The coconut oil version is easier to cut and has a slightly more luxurious mouthfeel. I personally prefer it with the oil, but both versions are delicious.
Variations & Adaptations
One of the best things about this easy snowman poop cookie bark is how customizable it is. Here are some variations I’ve tried and loved.
Dark Chocolate Version: Swap the white chocolate for dark or semi-sweet chocolate chips. The dark chocolate pairs beautifully with the salty pretzels and gives the bark a more sophisticated flavor. Use white candy eyes for contrast — they really pop against the dark background. I made this version for a friend who doesn’t like white chocolate, and she ate half the batch.
Peppermint Snowman Poop: Add 1/2 teaspoon of peppermint extract to the melted white chocolate, and sprinkle crushed candy canes over the top along with the Oreos. The minty freshness adds a classic holiday twist that everyone loves. Just be careful not to add too much extract — a little goes a long way.
Gluten-Free Adaptation: Use gluten-free pretzels and gluten-free chocolate sandwich cookies. Most candy eyes are naturally gluten-free, but always check the label. I’ve made this version for my gluten-sensitive friends, and they couldn’t tell the difference. The texture is just as crunchy and satisfying.
Nutty Crunch Version: Add 1/2 cup of chopped pecans or almonds along with the pretzels. The nuts add extra crunch and a toasty flavor that complements the white chocolate beautifully. I tried this during a test batch and now I make it every other time — it’s that good.
Halloween Edition: Swap the candy eyes for orange and black sprinkles, and use chocolate cookies for the “dirt.” Call it “Monster Poop Bark” and watch it disappear at your Halloween party. The same basic recipe works — just change the decorations to match the holiday.
Serving & Storage Suggestions
This easy snowman poop cookie bark is best served cold or at room temperature. I prefer it straight from the fridge — the white chocolate has a satisfying snap, and the marshmallows stay chewy. If you’re serving it at a party, arrange the pieces on a festive platter or in a decorative tin. The candy eyes should be visible, so don’t pile them too high.
What to Serve Alongside: This bark pairs beautifully with hot cocoa, eggnog, or a warm cup of coffee. The sweet-and-salty flavor profile also works well with other holiday treats like gingerbread cookies or peppermint bark. If you’re hosting a dessert table, place the bark next to something simple like sugar cookies — the contrast in textures and flavors will make both treats shine.
Storage Instructions: Store the bark in an airtight container in the refrigerator for up to 2 weeks. Separate layers with parchment paper to prevent sticking. The bark also freezes beautifully — just wrap it tightly in plastic wrap and then in foil, and freeze for up to 3 months. To thaw, transfer it to the refrigerator overnight.
Reheating Tips: This bark is best enjoyed cold, so reheating isn’t necessary. If you’ve frozen it, let it thaw in the fridge for a few hours before serving. The texture will be exactly the same as fresh.
Flavor Development: The flavors actually meld together after a day or two in the fridge. The marshmallows soften slightly, and the pretzels absorb a bit of the white chocolate’s sweetness. I honestly think it tastes even better on day two. If you’re making this for a party, I recommend making it a day ahead — it saves you stress on the day of, and the flavor is even better.
Nutritional Information & Benefits
Let’s be real — this is a treat, not a health food. But here’s the estimated nutritional information per serving (based on 16 pieces from the full recipe):
| Nutrient | Amount Per Serving |
|---|---|
| Calories | 210 |
| Total Fat | 11g |
| Saturated Fat | 7g |
| Carbohydrates | 27g |
| Sugar | 20g |
| Protein | 2g |
| Sodium | 120mg |
Health Benefits of Key Ingredients: White chocolate contains cocoa butter, which is rich in antioxidants and healthy fats. Pretzels provide a quick source of carbohydrates for energy. And let’s be honest — the biggest benefit is the joy and laughter this treat brings to your holiday gatherings. Sometimes, that’s the most important nutrient of all.
Dietary Considerations: This recipe contains dairy (white chocolate), gluten (pretzels and Oreos), and soy (often in chocolate). It’s not suitable for vegans unless you use dairy-free alternatives. Always check labels for allergen information, especially with the candy eyes.
My Personal Wellness Perspective: I believe in balance. This bark is a treat for special occasions, and it’s meant to be enjoyed without guilt. One or two pieces with a cup of coffee is the perfect way to indulge during the holidays. Life is too short to skip the fun desserts.
FAQs
Can I use white chocolate melting wafers instead of chips?
You can, but I don’t recommend it. Melting wafers contain added oils that can make the bark greasy and less flavorful. Real white chocolate chips give you a much better texture and taste. If you only have wafers, add an extra tablespoon of crushed pretzels to help absorb some of the excess oil.
How do I prevent the candy eyes from falling off?
Press them into the bark while the white chocolate is still warm and sticky. If you wait until the chocolate has started to set, they won’t stick as well. If some do fall off after cutting, you can dab a tiny bit of melted chocolate on the back and reattach them. I keep a few extra candy eyes on hand for exactly this reason.
Can I make this recipe nut-free?
Absolutely. The base recipe is naturally nut-free as long as you use nut-free pretzels and check the labels on your white chocolate and Oreos. Skip the coconut oil (some people with nut allergies react to coconut) and use a neutral vegetable oil instead. Always read labels carefully to ensure all ingredients are safe.
How far in advance can I make this bark?
You can make it up to 2 weeks ahead and store it in an airtight container in the refrigerator. It also freezes beautifully for up to 3 months. I actually prefer the flavor after a day or two in the fridge — the marshmallows soften slightly, and the flavors meld together beautifully. Just make sure it’s well-wrapped to prevent any fridge odors from seeping in.
Can I double or triple this recipe?
Yes, this recipe scales beautifully. For a double batch, use a larger baking sheet (or two standard sheets) and melt the white chocolate in two separate bowls to avoid overheating. I’ve made a triple batch for a big holiday party, and it was the first thing to disappear from the dessert table. Just make sure you have enough refrigerator space to chill everything.
Conclusion
This easy snowman poop cookie bark is more than just a funny holiday treat — it’s a memory in the making. It’s the dessert that makes people laugh, that gets photographed, that disappears before the cookies even make it to the table. It’s proof that the best recipes don’t have to be complicated or fancy. Sometimes, they just need a little creativity and a sense of humor.
I love this recipe because it saves me during the busiest time of the year. No oven required, no complicated techniques, no stress. Just melt, mix, chill, and serve. It’s the perfect last-minute dessert for holiday parties, potlucks, or just a quiet night when you want something sweet and silly.
I’d love to hear how yours turns out! Did you add your own twist? Did the candy eyes make everyone laugh? Drop a comment below and share your version — I read every single one. And if you loved this recipe, share it with a friend who needs a little holiday humor in their life. Happy holidays, and happy snacking!
Pin This Recipe!
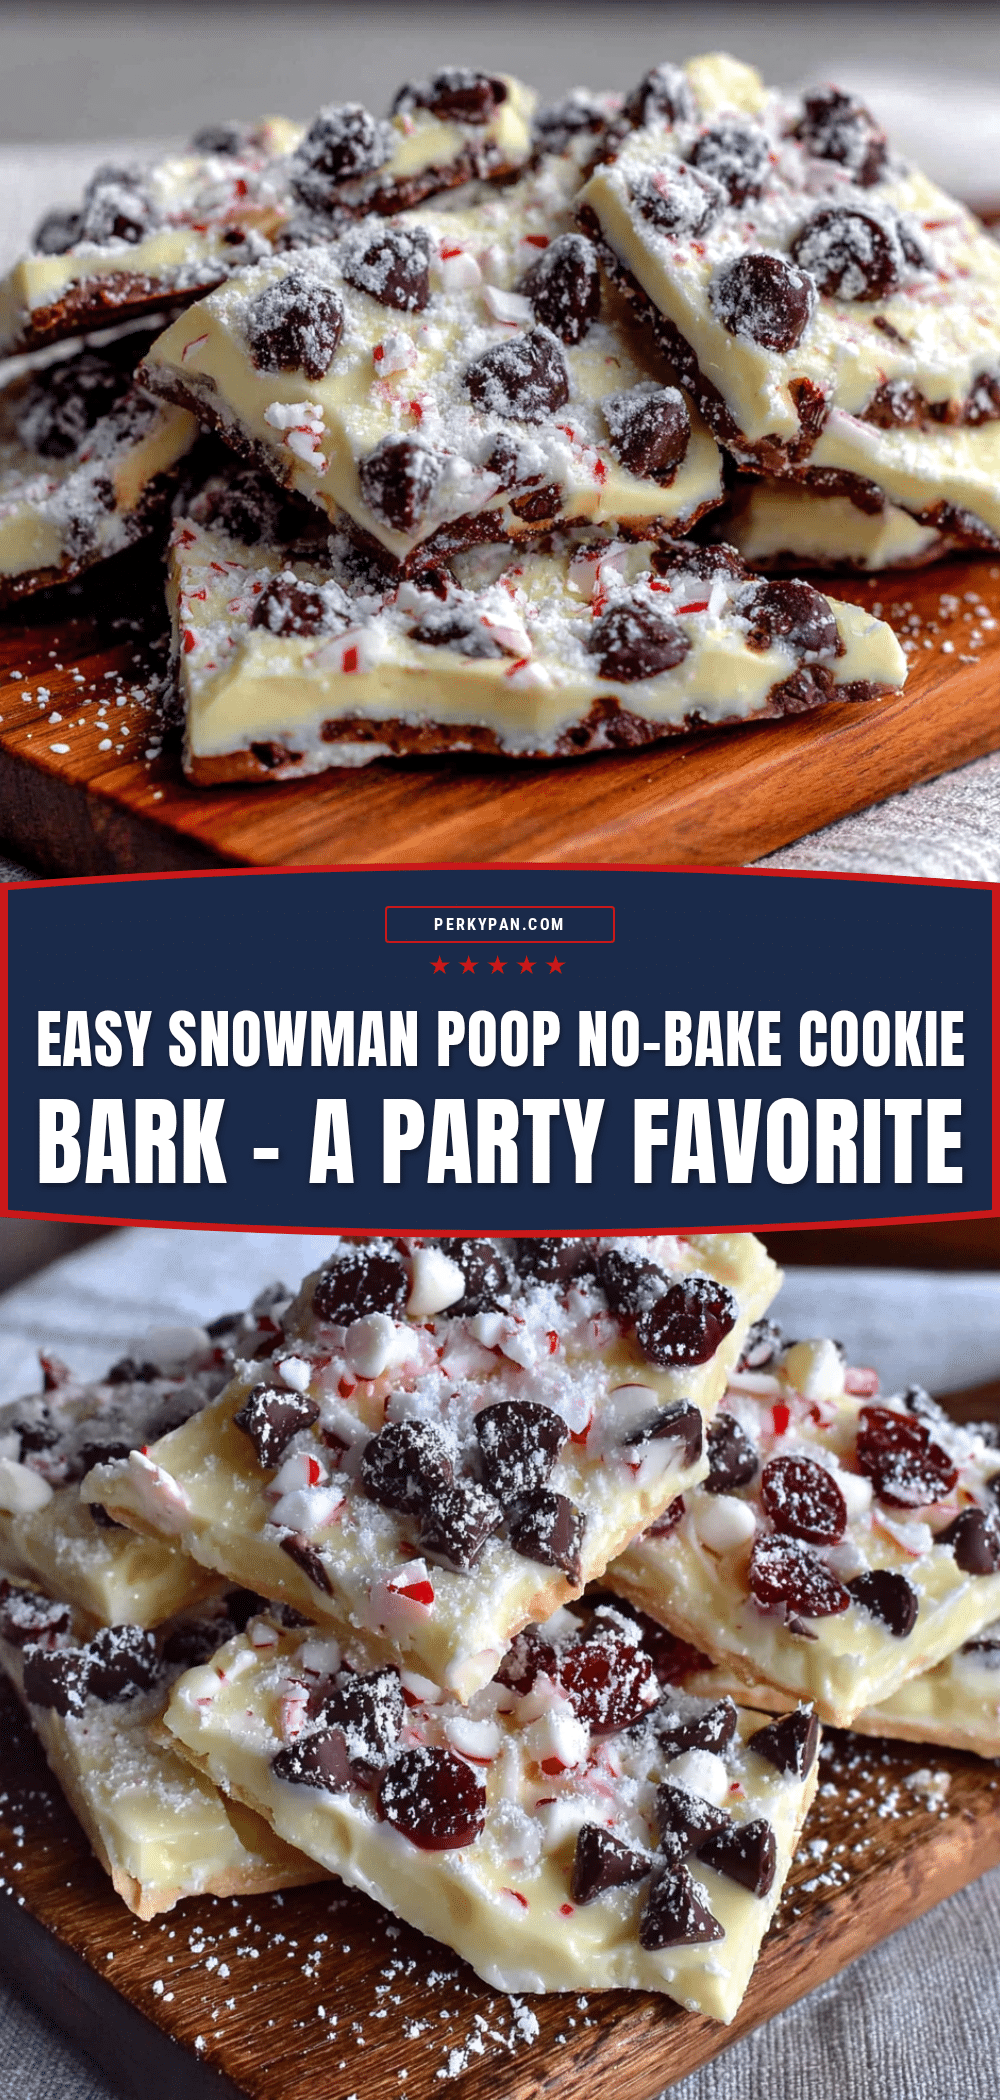
Easy Snowman Poop Cookie Bark: Best No-Bake Holiday Treat
A hilarious and delicious no-bake holiday treat made with white chocolate, pretzels, Oreos, marshmallows, and candy eyes. Ready in 20 minutes, this sweet-and-salty bark is a guaranteed conversation starter at any party.
- Prep Time: 20 minutes
- Cook Time: 0 minutes
- Total Time: 1 hour 20 minutes (including chilling)
- Yield: 16 servings 1x
- Category: Dessert
- Cuisine: American
Ingredients
- 2 cups (12 oz) white chocolate chips
- 1 cup mini pretzel twists, crushed
- 1 cup Oreo cookies, crushed
- 1 cup mini marshmallows
- 1/4 cup candy eyes (about 24–30 pieces)
- 1 teaspoon coconut oil (optional)
Instructions
- Line a large rimmed baking sheet with parchment paper or a silicone baking mat. Set aside.
- Place mini pretzel twists in a zip-top bag and crush with a rolling pin into a mix of fine crumbs and small chunks. Transfer to a small bowl. Repeat with Oreo cookies in a separate bag.
- Place white chocolate chips and coconut oil (if using) in a medium microwave-safe bowl. Microwave in 30-second intervals, stirring well after each, until smooth and melted (about 2-3 intervals).
- Add crushed pretzels and mini marshmallows to the melted white chocolate. Stir gently until evenly coated.
- Pour the mixture onto the prepared baking sheet. Spread into an even layer about 1/4 to 1/2 inch thick.
- While still warm, sprinkle crushed Oreos evenly over the top and gently press them in. Randomly place candy eyes around the bark, pressing gently to stick.
- Refrigerate for 1-2 hours until firm (or freeze for 30 minutes).
- Lift bark from sheet using parchment paper. Cut into irregular 2-inch pieces with a sharp knife. Serve cold or at room temperature.
Notes
For best results, use real white chocolate chips (not melting wafers). Press candy eyes into warm chocolate to ensure they stick. Bark can be stored in an airtight container in the refrigerator for up to 2 weeks or frozen for up to 3 months. For a softer bark, add extra coconut oil; for firmer bark, skip the oil.
Nutrition
- Serving Size: 1 piece (about 2 inc
- Calories: 210
- Sugar: 20
- Sodium: 120
- Fat: 11
- Saturated Fat: 7
- Carbohydrates: 27
- Protein: 2
Keywords: snowman poop, cookie bark, no-bake, holiday treat, white chocolate, pretzel, Oreo, candy eyes, easy dessert