Love this? Save it for later!
Share the inspiration with your friends
My niece wasn’t trying to impress anyone. I’d stopped by to drop off a birthday gift and the smell of toasted bread hit me before I even got past the screen door. She was standing at the counter, a cookie cutter in one hand and a slice of cheese in the other, completely focused on her project. Her mom looked at me and shrugged like this was just a normal Tuesday afternoon—which, I guess, for them, it was.
I watched her press that little cutter into the bread, peel away the edges, and arrange the pieces on a plate. She didn’t say a word about it. Just slid the plate toward her little brother, who grinned like he’d won something. That’s when it hit me—sometimes the best recipes aren’t recipes at all. They’re just clever little ideas that make people happy. And honestly, isn’t that what lunchtime should be about?
That day, I learned that a simple smiley face turkey and cheese sandwich cutout isn’t just food. It’s a mood changer. It’s the kind of thing that turns a regular afternoon into something your kid talks about at dinner. Maybe you’ve been there—staring into the fridge, wondering how to make the same old turkey sandwich feel new again. This is the answer, and it takes about five minutes. Let me tell you, once you start making these, you won’t stop.
Why You’ll Love This Recipe
Let’s be real for a second. Getting kids to eat a balanced lunch can feel like a negotiation you didn’t sign up for. But these smiley face turkey and cheese sandwich cutouts? They change the game completely. Here’s why this simple idea has earned a permanent spot in my lunch rotation:
- Quick & Easy: You can put this together in under five minutes. No cooking, no complicated steps, just assembly and a little creativity. Perfect for busy mornings when you’re racing against the school bus.
- Simple Ingredients: You probably already have everything you need. Bread, turkey slices, cheese, and maybe a little butter or mayo. No special grocery trips required—that’s the beauty of it.
- Perfect for Lunchboxes: These cutouts hold up surprisingly well in a lunch bag. They’re sturdy enough to survive the backpack shuffle and still bring a smile at lunchtime.
- Crowd-Pleaser: I’ve served these at playdates, birthday parties, and even for grown-ups who secretly love them. Kids and adults alike can’t resist a sandwich that looks back at them.
- Unbelievably Fun: There’s something about food with a face that makes eating more enjoyable. It’s comfort food with personality—and honestly, we could all use a little more of that.
What makes this different from just making a regular sandwich? It’s the presentation. The cookie cutter does the heavy lifting, turning plain ingredients into something that feels special. You’re not just feeding them—you’re making them smile. And that, my friend, is worth the extra thirty seconds it takes.
What Ingredients You Will Need
This recipe uses the simplest ingredients to create something that feels anything but ordinary. You probably have most of these in your kitchen right now, which is exactly the point. Let’s break down what you’ll need and why each ingredient matters.
- Bread (2 slices per sandwich): White bread works best for a clean cut, but whole wheat, sourdough, or even brioche are great options. I personally prefer a soft sandwich bread because it presses nicely without tearing. (For a sturdier cutout, lightly toast the bread first.)
- Turkey slices (2-3 slices per sandwich): Deli turkey is the classic choice here. I recommend oven-roasted or honey turkey for a mild flavor that kids love. You can use thick or thin slices—just make sure they fit inside the cookie cutter shape.
- Cheese slices (1 slice per sandwich): American cheese is the gold standard for meltability and that bright yellow color that makes the smiley face pop. Cheddar, provolone, or even mozzarella work well too. For a dairy-free option, use vegan cheese slices—just check that they cut cleanly.
- Butter or mayonnaise (optional, 1 teaspoon per sandwich): A thin layer on the outside of the bread helps the sandwich toast evenly if you’re going for a warm version. It also adds a little richness. I skip this for cold lunchbox sandwiches to keep things simple.
- Smiley face cookie cutter (1-2 inches wide): This is your secret weapon. You can find these at craft stores, online, or even in the baking aisle at the grocery store. A round cutter with a face pattern works best, but any small shaped cutter will do in a pinch.
That’s it. Five ingredients, one cookie cutter, and you’re ready to go. The beauty of this recipe is its flexibility—you can swap out the turkey for ham, roast beef, or even a plant-based alternative. The cheese can be swapped for whatever you have in the drawer. The bread can be gluten-free if needed. This recipe adapts to you, not the other way around.
Equipment Needed
You don’t need a fancy kitchen to make these smiley face sandwiches. In fact, you probably already own everything on this list. Here’s what you’ll need:
- Smiley face cookie cutter: This is the star of the show. Look for one that’s about 2 inches wide—big enough to show the face details but small enough to fit multiple cutouts on one slice of bread. I bought mine at a craft store for under five dollars, and it’s still going strong after years of use.
- Cutting board: A clean, flat surface makes cutting easier. I use a plastic cutting board that’s dedicated to sandwiches, but any sturdy board will work.
- Butter knife: For spreading butter or mayo if you’re using it. A dull knife is fine here—you don’t need anything sharp.
- Small plate or tray: To arrange the finished cutouts. I like using a small wooden board for a rustic look, but a regular plate works just as well.
- Toaster or skillet (optional): If you want a warm, slightly crispy sandwich, a toaster or non-stick skillet will do the job. I use a skillet on medium heat for about 2 minutes per side.
If you don’t have a smiley face cookie cutter, don’t worry. You can use any small shaped cutter—stars, hearts, animals—and draw a face on with a food-safe marker or a little ketchup. It’s not quite the same, but it gets the job done. I’ve used a star cutter in a pinch, and my niece didn’t complain one bit.
Preparation Method

Alright, let’s get to the fun part. Making these smiley face turkey and cheese sandwich cutouts is almost too easy, but I’ll walk you through it step by step so you get perfect results every time.
- Lay out your bread slices. Place two slices of bread on your cutting board. If you’re toasting them, pop them in the toaster now on a light setting—you want them slightly firm but not crunchy. For cold sandwiches, leave them as is.
- Spread a thin layer of butter or mayo (optional). If you’re going for a warm sandwich, spread a thin layer of butter on the outside of each bread slice. This helps the bread toast evenly and adds a nice golden color. For cold sandwiches, skip this step.
- Layer the turkey and cheese. Place 2-3 slices of turkey on one slice of bread. Top with a slice of cheese. If you’re making multiple sandwiches, repeat this for each one. Make sure the cheese is centered so it cuts evenly.
- Press the cookie cutter through. Take your smiley face cookie cutter and press it firmly through the top slice of bread, the turkey, and the cheese. Push all the way down until you feel the cutter hit the bottom slice of bread. You should feel a clean cut—if it’s sticking, twist the cutter slightly as you pull it up.
- Remove the excess bread and filling. Lift the cutter and gently push out the cutout. You’ll have a perfect smiley face shape with turkey and cheese inside. The leftover bread and filling can be saved for breadcrumbs or a snack (trust me, the scraps are delicious).
- Repeat for more cutouts. Depending on the size of your cookie cutter, you can get 2-3 cutouts per slice of bread. Press the cutter into different areas to maximize the number of shapes. I usually get two per slice, which is plenty for a kid’s lunch.
- Toast the sandwich (optional). If you want a warm, crispy sandwich, place the assembled cutouts in a skillet over medium heat. Cook for 2-3 minutes per side until the bread is golden and the cheese is slightly melted. Watch closely—the smiley face details can burn if left too long.
- Arrange and serve. Place the cutouts on a plate or in a lunchbox. You can serve them as is or add a side of fruit, veggie sticks, or a small dip. The smiley faces look best when they’re staring right at you, so arrange them with the face pointing up.
A quick note: if the cheese is sticking to the cutter, dip the cutter in a little flour or spray it with cooking spray before pressing. This trick works like a charm and keeps the edges clean. I learned this the hard way after a few messy attempts—now it’s second nature.
Cooking Tips & Techniques
I’ve made these smiley face sandwiches more times than I can count, and I’ve picked up a few tricks along the way. Here’s what I’ve learned from my own kitchen experiments:
Use slightly stale bread for cleaner cuts. Fresh bread is soft and tends to squish when you press the cutter down. Day-old bread or bread that’s been lightly toasted holds its shape much better. If you only have fresh bread, pop it in the toaster on the lowest setting for about 30 seconds—just enough to firm it up without browning it.
Chill the cheese before cutting. Cold cheese cuts more cleanly than room-temperature cheese. Pop your cheese slice in the fridge for 5-10 minutes before assembling the sandwich. This prevents the cheese from smearing or sticking to the cutter. I keep a few slices in the fridge just for this purpose.
Don’t press too hard. You want a clean cut, but pressing too hard can crush the bread and make the cutout look flat. Use firm, even pressure and let the cutter do the work. If you’re struggling, try a sharper cookie cutter—dull ones are the #1 cause of messy edges.
Toast after cutting, not before. If you’re making warm sandwiches, cut the shapes first and then toast them. Cutting after toasting can cause the bread to crumble, especially around the delicate smiley face details. Trust me on this one—I ruined a whole batch learning that lesson.
Save the scraps for later. All those bread and cheese scraps? Don’t throw them away. You can pulse them in a food processor to make breadcrumbs, or toast them in the oven for croutons. The turkey scraps are great in soups or salads. Nothing goes to waste in my kitchen.
Variations & Adaptations
One of the best things about this recipe is how easy it is to change up. Here are some of my favorite variations, all tested and approved by picky eaters:
Vegetarian Version: Swap the turkey for hummus, cream cheese, or mashed avocado. The creamy texture pairs beautifully with the cheese and bread. I’ve made these with roasted red pepper hummus and they were a huge hit at a playdate—nobody missed the meat.
Gluten-Free Option: Use gluten-free bread and check that your turkey and cheese are gluten-free (most are, but always read labels). Gluten-free bread can be a bit crumbly, so toasting it lightly before cutting helps a lot. I’ve had good results with a brand called Canyon Bakehouse.
Dairy-Free Adaptation: Use vegan cheese slices and dairy-free butter. The cheese might not melt as smoothly, but it still cuts well and tastes great. I recommend Daiya or Violife for the best texture.
Holiday Themes: Switch out the smiley face cutter for seasonal shapes—pumpkins for fall, stars for the Fourth of July, hearts for Valentine’s Day. The same method works with any cookie cutter. My niece loves the heart-shaped ones with strawberry cream cheese inside.
Breakfast Version: Use the same technique with croissants or bagels, filled with cream cheese and turkey or ham. It’s a fun twist on a breakfast sandwich that kids actually look forward to eating.
I once tried a version with pepper jack cheese for a little kick, and it was surprisingly good. The spice was mild enough for kids but added a nice warmth for adults. Don’t be afraid to experiment—the worst that happens is you end up with a tasty snack.
Serving & Storage Suggestions
These smiley face sandwiches are best enjoyed fresh, but they hold up well for a few hours if you need to prep ahead. Here’s how to serve and store them:
Serving Temperature: Serve cold or at room temperature for lunchboxes. If you’re making them for breakfast or a snack, a warm version with slightly melted cheese is absolutely delightful. I like to serve them on a plate with a side of baby carrots or apple slices for a balanced meal.
Presentation Ideas: Arrange the cutouts on a plate with the smiley faces facing up. You can add “hair” made from shredded carrots or “eyes” from raisins for extra fun. For parties, stack them on a skewer with grapes and cheese cubes for a cute kabob.
Storage Instructions: Place assembled sandwiches in an airtight container in the refrigerator for up to 24 hours. If you’re packing them for lunch, wrap them in parchment paper or a reusable beeswax wrap to keep them fresh. Avoid plastic wrap—it can make the bread soggy.
Freezing Tips: You can freeze the assembled, uncooked sandwiches for up to a month. Place them on a baking sheet in the freezer until solid, then transfer to a freezer bag. To serve, thaw in the fridge overnight and toast or eat cold. The smiley face details might fade slightly, but they still taste great.
Reheating Methods: For warm sandwiches, reheat in a toaster oven at 350°F for 5 minutes, or in a skillet over medium heat for 2-3 minutes per side. Avoid the microwave—it makes the bread rubbery and the cheese tough. Trust me, I’ve made that mistake more than once.
One thing I love about these sandwiches is that the flavors actually get better after a few hours in the fridge. The bread absorbs a little moisture from the turkey and cheese, making everything taste more cohesive. It’s not quite as good as fresh, but it’s still pretty darn good.
Nutritional Information & Benefits
Let’s talk about what’s actually in these little cutouts. While they’re undeniably fun, they also pack some solid nutritional value. Here’s a rough breakdown per sandwich (two cutouts):
| Nutrient | Amount |
|---|---|
| Calories | 280-320 |
| Protein | 18-22g |
| Carbohydrates | 28-32g |
| Fat | 10-14g |
| Fiber | 2-4g |
| Sodium | 600-800mg |
Turkey is a fantastic source of lean protein, which helps kids stay full and focused throughout the afternoon. Cheese adds calcium for strong bones and teeth, plus a little fat for energy. The bread provides complex carbohydrates for sustained energy—whole wheat options add extra fiber and B vitamins.
If you’re watching sodium, look for low-sodium turkey and cheese options. You can also use whole grain bread for added nutrients. For a lower-calorie version, use thin-sliced bread and reduced-fat cheese. The fun factor stays the same regardless of the ingredients you choose.
From a personal perspective, I love that this recipe lets me sneak in protein and dairy without any complaints. My niece doesn’t even realize she’s eating something nutritious—she’s too busy admiring the smiley face. And honestly, that’s the best kind of healthy eating: the kind that doesn’t feel like a chore.
Conclusion
These smiley face turkey and cheese sandwich cutouts are more than just a lunch idea—they’re a little act of love. In the time it takes to pour a bowl of cereal, you can create something that makes your kid feel seen and special. And isn’t that what cooking is all about?
I’ve made these for school lunches, rainy day snacks, and even for myself on days when I needed a pick-me-up. They never fail to make me smile. The best part? You can customize them however you want. Swap the turkey for ham, use a different cheese, or try a different cookie cutter shape. The possibilities are endless, and the joy is guaranteed.
So go ahead—grab that cookie cutter and give it a try. Your kids will thank you, your inner child will thank you, and you’ll wonder why you didn’t think of this sooner. If you make these, I’d love to hear about it. Drop a comment below and let me know what shape you used or how your kids reacted. Happy sandwich making!
Frequently Asked Questions
Can I make these ahead of time for school lunches?
Absolutely. Assemble the sandwiches the night before, wrap them tightly, and store them in the fridge. They’ll stay fresh for up to 24 hours. Just add any wet ingredients like tomato or cucumber right before serving to prevent sogginess.
What if I don’t have a smiley face cookie cutter?
No problem at all. You can use any small cookie cutter you have—stars, hearts, animals, or even a simple round biscuit cutter. If you don’t have any cutters, use a small knife to freehand a shape. It won’t be perfect, but it’ll still be fun.
Can I use other types of meat instead of turkey?
Definitely. Ham, roast beef, chicken, or even salami work great. Just make sure the meat is thinly sliced so it cuts cleanly with the cookie cutter. For a vegetarian option, try hummus, cream cheese, or mashed avocado.
How do I keep the cheese from sticking to the cutter?
Dip the cutter in a little flour or spray it with cooking spray before each use. You can also chill the cheese slice in the fridge for a few minutes before cutting. Both methods help the cheese release cleanly without smearing.
Can I freeze these sandwiches?
Yes, you can freeze the assembled, uncooked sandwiches for up to a month. Place them on a baking sheet in the freezer until solid, then transfer to a freezer bag. Thaw in the fridge overnight before serving or toasting.
Pin This Recipe!
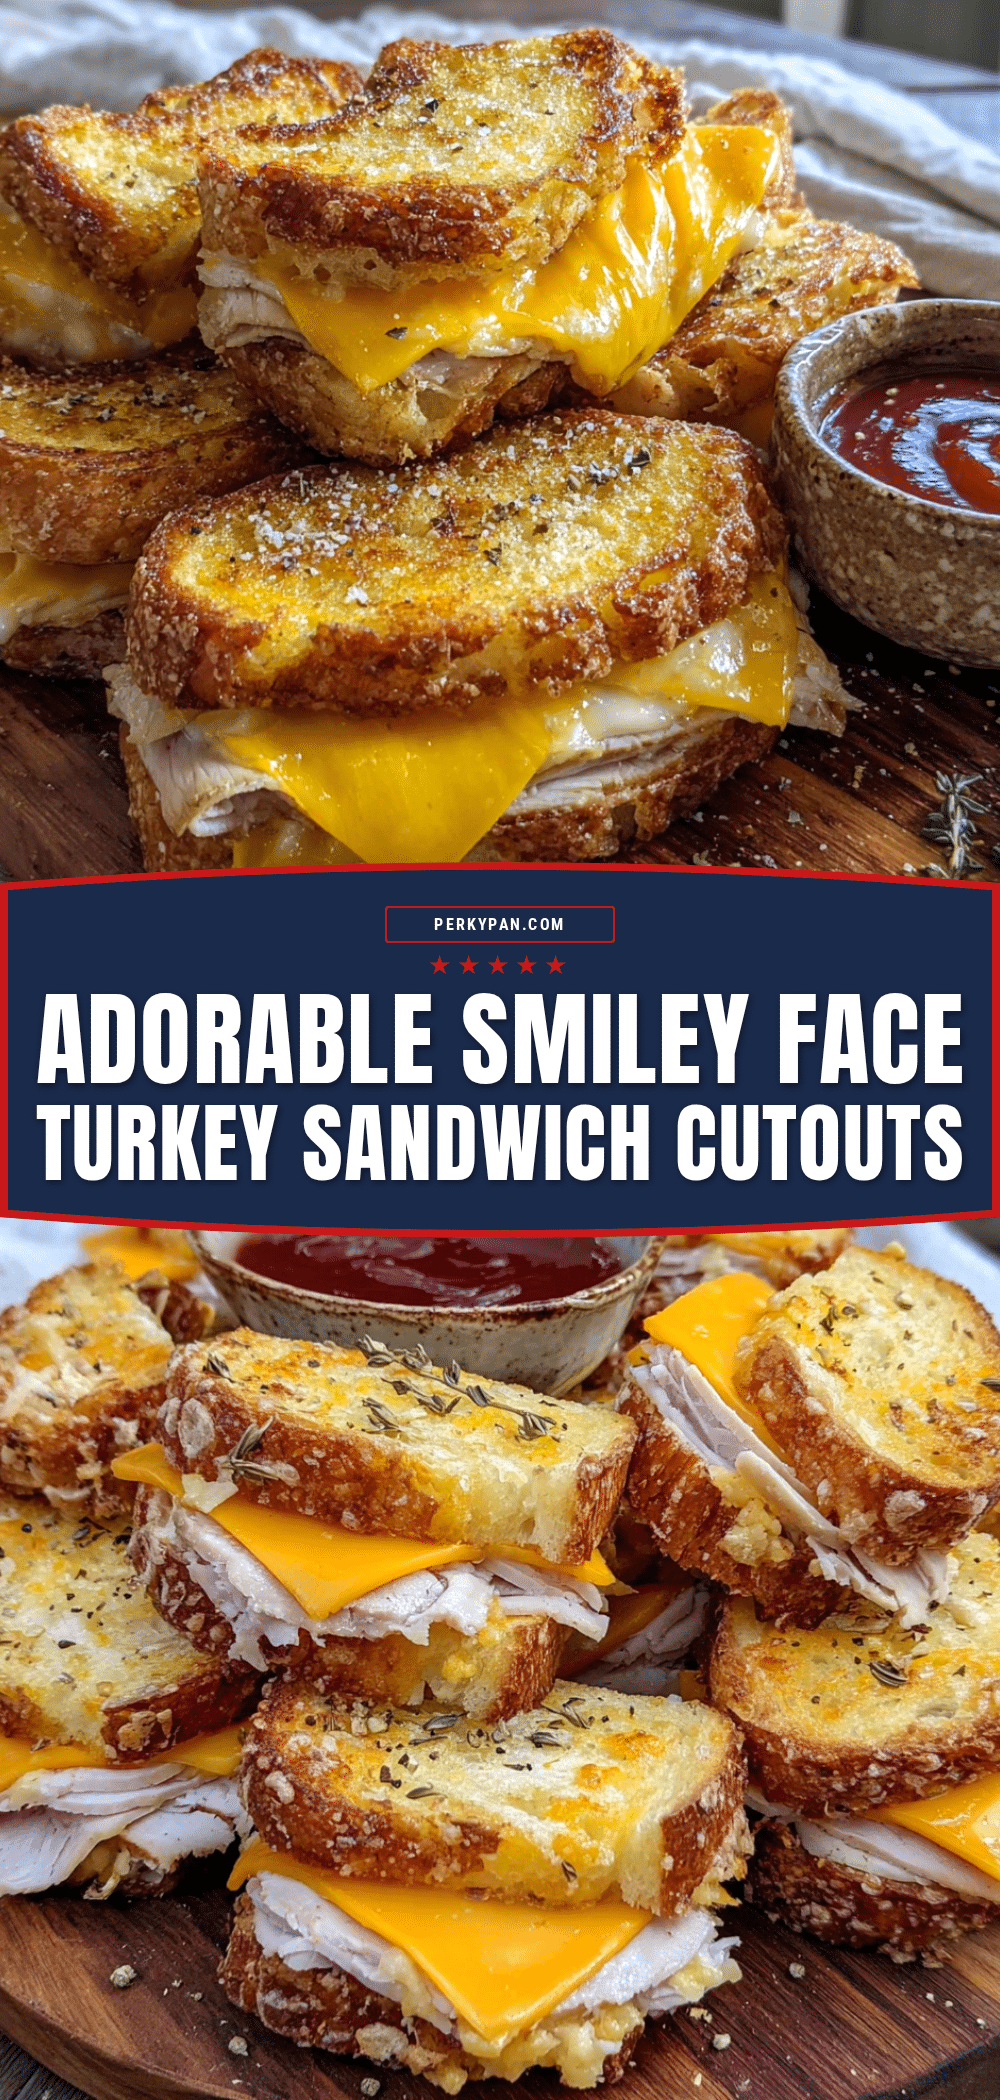
Easy Smiley Face Turkey Cheese Sandwich Cutouts: Fun Lunch Idea

Turn a regular turkey and cheese sandwich into a fun, smiley face cutout that kids love. This quick and easy lunch idea takes under five minutes and uses simple ingredients to create a mood-changing meal.
- Prep Time: 5 minutes
- Cook Time: 5 minutes
- Total Time: 10 minutes
- Yield: 1 serving (2 cutouts) 1x
- Category: Lunch
- Cuisine: American
Ingredients
- 2 slices bread (white, whole wheat, sourdough, or brioche)
- 2–3 slices deli turkey (oven-roasted or honey turkey recommended)
- 1 slice cheese (American, cheddar, provolone, or mozzarella)
- 1 teaspoon butter or mayonnaise (optional, for toasting)
- Smiley face cookie cutter (1-2 inches wide)
Instructions
- Lay out two slices of bread on a cutting board. If toasting, lightly toast the bread until slightly firm but not crunchy.
- Spread a thin layer of butter or mayonnaise on the outside of each bread slice (optional, for warm sandwiches).
- Place 2-3 slices of turkey on one slice of bread. Top with a slice of cheese, centered so it cuts evenly.
- Press the smiley face cookie cutter firmly through the top slice of bread, turkey, and cheese until you feel it hit the bottom slice. Twist slightly if sticking.
- Lift the cutter and gently push out the cutout. Repeat to make additional cutouts (2-3 per slice of bread).
- For warm sandwiches, place assembled cutouts in a skillet over medium heat. Cook for 2-3 minutes per side until golden and cheese is slightly melted.
- Arrange cutouts on a plate or in a lunchbox with the smiley faces facing up. Serve as is or with sides like fruit, veggie sticks, or dip.
Notes
For cleaner cuts, use slightly stale or lightly toasted bread. Chill cheese in the fridge for 5-10 minutes before cutting to prevent sticking. Dip the cookie cutter in flour or spray with cooking spray if cheese sticks. Save bread and cheese scraps for breadcrumbs or croutons. For best results, cut shapes before toasting, not after.
Nutrition
- Serving Size: 2 cutouts
- Calories: 300
- Sugar: 4
- Sodium: 700
- Fat: 12
- Saturated Fat: 5
- Carbohydrates: 30
- Fiber: 3
- Protein: 20
Keywords: smiley face sandwich, turkey cheese sandwich, fun lunch for kids, easy lunch idea, sandwich cutouts, kid-friendly lunch


