Love this? Save it for later!
Share the inspiration with your friends
This was supposed to be a batch of granola. I had the oats measured, the honey warming on the stove, and a mental picture of crunchy clusters that would make my kitchen smell like a bakery. But somewhere between answering a work email and realizing I was out of almonds, I grabbed the wrong bag from the pantry. Instead of sunflower seeds, I pulled out a stash of pumpkin seeds left over from a Halloween carving session that had somehow survived until February. I was tired, it was a Tuesday, and I was already annoyed at myself for not checking the pantry list I swear I wrote down. The granola went in the oven anyway because I was too stubborn to start over, and honestly, what came out was nothing like the plan—and better. Those pumpkin seeds, scattered through the oats, toasted up into these little salty, crunchy nuggets that stole the show. I picked every single one out of the granola and ate them standing over the counter. That was the moment I realized I had been overcomplicating snacks my whole life. This quick oven-roasted sea salt pumpkin seeds recipe is what happens when you stop panicking and let a mistake lead you somewhere good. Maybe you’ve been there—staring at a half-failed project, ready to toss it all, only to discover the happy accident hiding in plain sight. I keep making these seeds because they remind me that not everything needs to be perfect to be exactly right.
Why You’ll Love This Recipe
Let me tell you why this quick oven-roasted sea salt pumpkin seeds recipe has earned a permanent spot in my snack rotation. It’s not just another roasted seed recipe—it’s the one I’ve tested through burnt batches, overseasoned disasters, and one particularly sad attempt where I forgot to dry the seeds at all. Here’s what makes it different:
- Quick & Easy : From prep to plate in under 25 minutes. No soaking, no boiling, no complicated steps. This is a weeknight win.
- Simple Ingredients : You need exactly three things: pumpkin seeds, oil, and sea salt. That’s it. No fancy grocery trips required.
- Perfect for Snacking : Great for lunchboxes, movie nights, salad toppings, or that 4 PM slump when you need something crunchy.
- Crowd-Pleaser : I’ve brought these to potlucks and watched them disappear faster than the chips. Kids and adults both go for them.
- Unbelievably Delicious : The texture is what gets me—crispy on the outside, with a little pop when you bite down. The sea salt brings out this nutty sweetness you didn’t know pumpkin seeds had.
What sets this version apart is the technique. Instead of the usual low-and-slow method that takes forever and leaves seeds chewy, I crank the heat and roast them fast. It’s a trick I learned after burning three batches trying to follow fussy recipes online. The high heat creates that shatteringly crisp texture without drying the seeds out. Plus, I add the salt after roasting, not before, so it sticks better and doesn’t get bitter in the oven. This recipe is the kind that makes you close your eyes after the first bite—comfort food reimagined as a simple, salty snack you can feel good about.
What Ingredients You Will Need
This recipe uses simple, wholesome ingredients to deliver bold flavor and satisfying texture without the fuss. You probably already have everything in your kitchen right now, which is exactly the point. Here’s what you need and why each ingredient matters:
- Fresh pumpkin seeds (1 cup / 120g): These are the star of the show. I recommend using seeds straight from a pumpkin if you’ve just carved one—rinse them well and pat them bone-dry. But honestly, store-bought raw pumpkin seeds (sometimes labeled pepitas) work beautifully and save you the scooping step. Look for seeds that are evenly greenish-white, not brown or shriveled. Freshness matters here because old seeds can taste stale no matter how you roast them.
- Neutral oil (1 tablespoon / 15ml): You need just enough to help the salt stick and encourage browning. I prefer avocado oil for its high smoke point and clean flavor, but melted coconut oil or grapeseed oil work great too. Olive oil can be used in a pinch, though it adds a slightly stronger flavor that some people love. Don’t skip the oil—dry-roasted seeds tend to burn before they crisp up.
- Flaky sea salt (½ teaspoon / 3g, plus more to taste): This is where the magic happens. I use Maldon sea salt because the large, delicate crystals add little bursts of salinity that make each seed interesting. Regular table salt works, but you’ll need less of it since it’s more concentrated. The key is to add the salt after roasting—if you salt them before, the heat can make the salt taste harsh and metallic. Trust me on this one, I learned the hard way.
Optional add-ins if you want to get fancy (but totally not required):
- A pinch of garlic powder or smoked paprika for savory depth
- A sprinkle of cayenne if you like heat
- A tiny drizzle of maple syrup for sweet-and-salty vibes
Substitution guidance: If you’re avoiding oil, you can dry-roast the seeds in a non-stick pan, but watch them like a hawk—they burn fast. For a lower-sodium version, use less salt or try a salt substitute. And if you only have salted pumpkin seeds, skip the added salt entirely and just roast them plain.
Equipment Needed
You don’t need a fancy kitchen to make this recipe work. Here’s what I use and what you can swap in:
- Baking sheet (rimmed): A standard half-sheet pan works perfectly. The rim keeps seeds from rolling off, which I learned after sweeping seeds off my oven floor more times than I’d like to admit. If you only have a cookie sheet without edges, just be careful when stirring.
- Parchment paper or silicone baking mat: Not mandatory, but it makes cleanup a breeze. I use parchment because the seeds release easily and I can just toss the paper when I’m done. If you skip it, lightly grease the pan.
- Kitchen towel or paper towels: For drying the seeds thoroughly. This step is more important than you think—wet seeds steam instead of roast, and nobody wants soggy pumpkin seeds.
- Mixing bowl: Any medium bowl works for tossing the seeds with oil. I use a stainless steel one because it doesn’t absorb smells.
- Spatula or wooden spoon: For stirring the seeds halfway through roasting. A thin metal spatula works too.
Budget-friendly tip: Don’t run out and buy special equipment. A regular baking pan and some paper towels are all you truly need. I’ve made these seeds in a toaster oven on a tiny pan and they turned out just as good.
Preparation Method
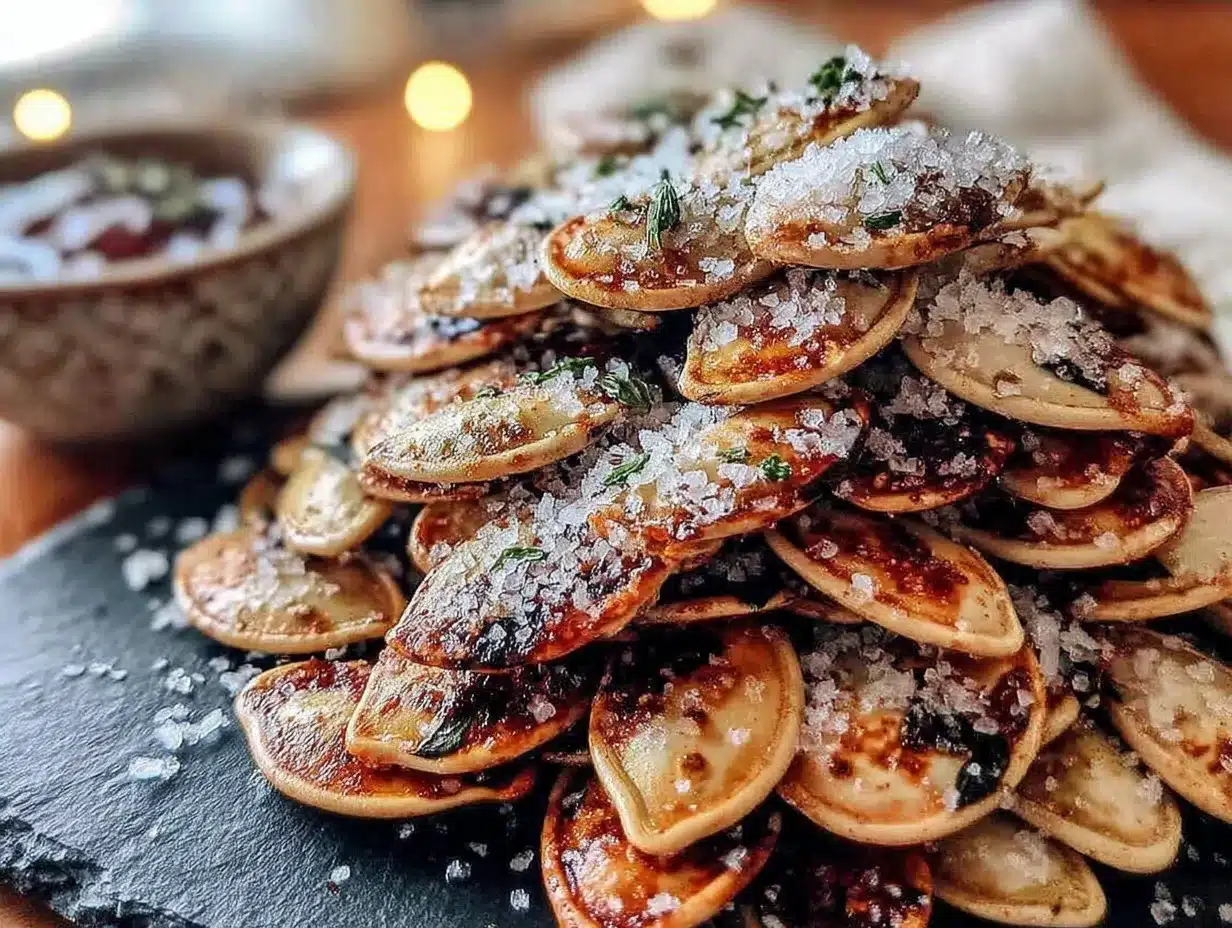
Follow these steps carefully, and you’ll have perfectly crispy, salty pumpkin seeds in under 25 minutes. I’ve included all the little details I wish someone had told me the first time.
- Preheat your oven to 400°F (200°C). This high heat is the secret to quick roasting. While the oven heats, line a rimmed baking sheet with parchment paper for easy cleanup.
- Clean and dry the pumpkin seeds thoroughly. If you’re using fresh pumpkin seeds, rinse them in a colander under cool water, picking off any stringy pumpkin flesh. Spread them on a clean kitchen towel and pat them dry. Then let them sit for 5 minutes to air-dry any remaining moisture. This step is non-negotiable—wet seeds won’t crisp up. If you’re using store-bought raw seeds, skip the rinsing and just give them a quick pat to remove any dust.
- Toss the seeds with oil. In a medium mixing bowl, combine the dried pumpkin seeds and 1 tablespoon of neutral oil. Use a spatula to stir until every seed is lightly coated. You’re not looking for pools of oil—just a thin, even sheen.
- Spread the seeds in a single layer. Pour the oiled seeds onto the prepared baking sheet. Use the back of a spoon or your fingers to spread them out evenly. If seeds overlap, they’ll steam instead of roast, so take a moment to separate any clumps. I usually leave a little space between each seed if I have the patience.
- Roast for 10 minutes. Place the baking sheet on the middle rack of your preheated oven. Set a timer for 10 minutes. At this point, the seeds should be starting to turn golden and you’ll smell a toasty, nutty aroma. Don’t walk away—these seeds go from golden to burnt fast.
- Stir and rotate the pan. After 10 minutes, pull the pan out and give the seeds a good stir with a spatula. This ensures even browning. If your oven has hot spots (most do), rotate the pan front to back. Return to the oven.
- Roast for another 3-5 minutes. Continue roasting until the seeds are deep golden brown and you can hear them making a faint popping or crackling sound. This usually takes 13-15 minutes total, but ovens vary. At 14 minutes, start checking every 30 seconds. The seeds should look dry and slightly darkened, not dark brown.
- Season immediately with sea salt. As soon as the seeds come out of the oven, transfer them to a plate or a clean bowl. Sprinkle with ½ teaspoon of flaky sea salt while they’re still hot. Toss gently to distribute. The heat helps the salt stick perfectly. Taste one and add more salt if needed—I usually end up adding another pinch because I love salty snacks.
- Cool completely before storing. Spread the seasoned seeds on a plate or baking sheet in a single layer and let them cool for at least 10 minutes. They’ll continue to crisp up as they cool. I know it’s tempting to dig in right away, but warm seeds can be slightly soft—patience rewards you with that perfect crunch.
Cooking Tips & Techniques
I’ve made more batches of pumpkin seeds than I can count, and I’ve messed up plenty along the way. Here’s what I’ve learned so you don’t have to repeat my mistakes.
The biggest mistake is not drying the seeds enough. I once rinsed fresh pumpkin seeds and tossed them straight into the oven thinking “close enough.” The result was a sad, chewy mess that took twice as long to roast and never got crispy. Take the extra 5 minutes to pat them dry. Your future self will thank you.
Watch the oven like a hawk in the last few minutes. Pumpkin seeds go from perfectly golden to acrid and burnt in under a minute. I learned this while answering a text message—by the time I looked up, my kitchen smelled like a campfire. Set a timer and stay nearby. The crackling sound they make is a good cue that they’re almost done.
Don’t crowd the pan. If you double the recipe, use two baking sheets instead of one. Overlapping seeds trap steam and prevent that crispy texture. I’ve tried cramming them all onto one pan to save time, and it never works. Spread them out—they deserve personal space.
Salt after roasting, not before. This is the tip I wish someone had told me years ago. Salting before roasting makes the salt dissolve into the seeds and can turn bitter in the high heat. Salting while they’re hot lets the crystals stick without that harsh flavor. It’s a small change that makes a huge difference.
Multitasking strategy: While the seeds roast, use those 13 minutes to clean up your workspace or prep other parts of your meal. I often chop veggies for a salad while the seeds are in the oven. It makes the whole process feel efficient and satisfying.
Variations & Adaptations
Once you’ve mastered the basic recipe, it’s fun to play around. Here are some variations I’ve tried and loved:
- Spicy Chili Lime: Add ½ teaspoon chili powder and the zest of one lime to the oil before roasting. Sprinkle with salt and a squeeze of lime juice after roasting. The tangy heat is incredible on tacos or just eaten by the handful.
- Sweet Cinnamon: Toss the roasted seeds with 1 teaspoon of maple syrup and ½ teaspoon of cinnamon while they’re still warm. Spread them back on the pan to cool. They turn into little crunchy clusters that taste like autumn.
- Garlic Parmesan: After roasting, toss the hot seeds with 1 tablespoon of finely grated Parmesan cheese and ¼ teaspoon garlic powder. The cheese melts slightly and creates these savory, umami-packed bites. Great for salad toppings.
- Everything Bagel: Mix 1 teaspoon of everything bagel seasoning into the seeds before roasting. The sesame, poppy, garlic, and onion flavors make these dangerously addictive.
Dietary adaptations: This recipe is naturally gluten-free, dairy-free (unless you add Parmesan), and vegan as written. For a nut-free option, you’re already good—pumpkin seeds are seeds, not nuts. For a lower-fat version, reduce the oil to ½ tablespoon and watch the seeds even more carefully to prevent burning.
I once tried a curry-spiced version with turmeric and cumin that was surprisingly good, though it stained my fingers yellow for a day. Worth it.
Serving & Storage Suggestions
These quick oven-roasted sea salt pumpkin seeds are best served at room temperature, straight from the cooling plate. But they’re also fantastic in so many ways:
- As a snack: Pile them in a bowl and serve alongside other crunchy snacks like popcorn or nuts. They’re perfect for movie nights or afternoon cravings.
- On salads: Sprinkle over a simple green salad with vinaigrette for added crunch. They’re especially good on kale or spinach salads.
- On soups: Use them as a garnish for creamy pumpkin soup, butternut squash soup, or tomato bisque. The saltiness cuts through the richness beautifully.
- In trail mix: Combine with dried cranberries, dark chocolate chips, and almonds for a homemade trail mix that beats anything from the store.
Storage instructions: Once completely cool, transfer the seeds to an airtight container. They’ll stay fresh and crispy at room temperature for up to 2 weeks. If you live in a humid climate (I feel your pain), store them in the refrigerator to maintain crunchiness. I don’t recommend freezing them—the texture can turn slightly soft upon thawing.
Reheating tip: If your seeds lose their crunch after a few days, spread them on a baking sheet and pop them in a 300°F (150°C) oven for 3-4 minutes. Let them cool, and they’ll crisp right back up. This trick has saved many a batch in my house.
Flavor note: These seeds actually taste even better the next day. The salt settles in and the flavors meld together. So don’t worry if you can’t finish them all in one sitting—they’ll be waiting for you.
Nutritional Information & Benefits
Here’s a rough estimate for a ¼-cup serving (about 30g) of these roasted pumpkin seeds:
| Nutrient | Amount |
|---|---|
| Calories | 180 |
| Total Fat | 15g |
| Saturated Fat | 2.5g |
| Sodium | 180mg (varies with salt) |
| Carbohydrates | 5g |
| Fiber | 2g |
| Protein | 8g |
Pumpkin seeds are a nutritional powerhouse. They’re packed with magnesium, which helps with muscle function and sleep quality. They also contain zinc, which supports immune health, and healthy fats that keep you feeling full and satisfied. The protein content makes them a great post-workout snack or a smart addition to a plant-based diet.
Dietary considerations: This recipe is naturally gluten-free, vegan, and dairy-free. It’s low in sugar and fits into most low-carb or keto eating plans if you watch your portion size. The main allergen to note is that some people with seed allergies may need to avoid pumpkin seeds—always check with your doctor if you’re unsure.
From my perspective, these seeds are one of those rare snacks that feel indulgent but are actually good for you. I love that I can satisfy a salty craving without reaching for processed chips.
Conclusion
This quick oven-roasted sea salt pumpkin seeds recipe is proof that the best things often come from happy accidents. What started as a failed granola experiment turned into my go-to snack for busy weeknights, lazy Sundays, and everything in between. It’s simple, it’s fast, and it delivers that perfect salty crunch every single time.
I hope you’ll give this recipe a try and make it your own. Maybe you’ll add a pinch of cayenne for heat, or a drizzle of maple for sweetness. Maybe you’ll double the batch because one never seems to be enough. Whatever you do, don’t stress about getting it perfect—remember, this whole thing started because I grabbed the wrong bag. Sometimes the best recipes are the ones that teach us to let go a little.
If you make these seeds, I’d love to hear about it. Drop a comment below and let me know how they turned out, or share your favorite variation. And if you’re looking for another quick snack idea, you might enjoy my quick spicy roasted chickpeas for another crunchy, salty fix. Happy roasting!
Frequently Asked Questions
Can I use salted pumpkin seeds for this recipe?
Yes, but skip the added salt. Just roast them plain with oil and they’ll be plenty salty on their own. Taste before adding any extra salt after roasting.
Why are my pumpkin seeds chewy instead of crispy?
Most likely they weren’t dry enough before roasting, or they were crowded on the pan. Make sure to pat them completely dry and spread them in a single layer with space between each seed.
Can I roast pumpkin seeds without oil?
You can, but they’ll be drier and more prone to burning. If you go oil-free, watch them very closely and reduce the oven temperature to 350°F (175°C). They’ll take a few minutes longer.
How long do roasted pumpkin seeds stay fresh?
Stored in an airtight container at room temperature, they’ll stay crispy for up to 2 weeks. In the refrigerator, they can last up to a month. Just make sure they’re completely cool before storing.
Can I roast pumpkin seeds from any pumpkin?
Absolutely! Seeds from sugar pumpkins (pie pumpkins) tend to be smaller and more tender, while seeds from carving pumpkins are larger and have a thicker shell. Both work great—just adjust roasting time slightly for larger seeds.
PrintEasy Roasted Sea Salt Pumpkin Seeds Recipe
A quick and easy recipe for perfectly crispy, salty pumpkin seeds roasted at high heat. This simple snack uses just three ingredients and comes together in under 25 minutes.
- Prep Time: 10 minutes
- Cook Time: 13-15 minutes
- Total Time: 25 minutes
- Yield: 4 servings 1x
- Category: Snack
- Cuisine: American
Ingredients
- 1 cup (120g) fresh pumpkin seeds or raw pepitas
- 1 tablespoon (15ml) neutral oil (avocado, melted coconut, or grapeseed)
- ½ teaspoon (3g) flaky sea salt (plus more to taste)
- Optional: garlic powder, smoked paprika, cayenne, or maple syrup
Instructions
- Preheat your oven to 400°F (200°C). Line a rimmed baking sheet with parchment paper.
- Clean and dry the pumpkin seeds thoroughly. If using fresh seeds, rinse in a colander, remove any stringy flesh, pat dry with a kitchen towel, and let air-dry for 5 minutes. If using store-bought raw seeds, just pat them dry.
- In a medium mixing bowl, toss the dried pumpkin seeds with 1 tablespoon of neutral oil until every seed is lightly coated.
- Spread the oiled seeds in a single layer on the prepared baking sheet, separating any clumps.
- Roast for 10 minutes. The seeds should start turning golden and smell toasty.
- Stir the seeds and rotate the pan. Return to the oven.
- Roast for another 3-5 minutes, until deep golden brown and you hear a faint popping or crackling sound. Total roasting time is 13-15 minutes. Check every 30 seconds after 14 minutes.
- Immediately transfer the hot seeds to a plate or bowl. Sprinkle with ½ teaspoon flaky sea salt while still hot and toss gently. Add more salt to taste.
- Cool completely on a plate or baking sheet in a single layer for at least 10 minutes before storing.
Notes
The biggest mistake is not drying the seeds enough—wet seeds steam instead of roast. Watch the oven closely in the last few minutes as seeds go from golden to burnt quickly. Salt after roasting to avoid bitterness. For best crunch, spread seeds in a single layer and don’t crowd the pan.
Nutrition
- Serving Size: ¼ cup (30g)
- Calories: 180
- Sodium: 180
- Fat: 15
- Saturated Fat: 2.5
- Carbohydrates: 5
- Fiber: 2
- Protein: 8
Keywords: roasted pumpkin seeds, sea salt pumpkin seeds, easy snack, healthy snack, quick recipe, gluten-free, vegan


