Love this? Save it for later!
Share the inspiration with your friends
My neighbor, a retired baker named Frank, watched me wrestling with a finicky oven on a sweltering July afternoon. He didn’t say anything at first. Then he just shook his head, walked over to his own kitchen door, and called out, “Put down the flour, kid. Come here.” That afternoon, sitting on his back porch with a glass of iced tea, he handed me a plate of these creamy, tangy bars. He told me they were his wife’s secret weapon for summer parties—no oven required, just a little patience and a whole lot of cream cheese. I remember thinking, honestly, this is the smartest dessert I’ve ever seen. No sweating over a hot stove, no worrying about a sunken crust. Just pure, sweet, citrusy relief. I tweaked his recipe over the years, adding a little more lemon zest here and a thicker strawberry swirl there. But the soul of it—that easy, no-bake magic—is all Frank. Maybe you’ve been there, standing in a hot kitchen wondering why you’re making something complicated when all you want is a cool, refreshing treat. These bars are the answer. They’re the kind of dessert that makes you look like a pro without ever turning on the oven, and honestly, that’s my favorite kind of recipe to share.
I keep coming back to these easy no-bake strawberry lemonade cheesecake bars because they solve a real problem: how do you get a decadent, impressive dessert on the table when it’s too hot to bake? The answer is this simple, creamy, and utterly delicious recipe. Every time I make them, I remember Frank’s knowing smile, and I feel that same quiet confidence that a perfect dessert doesn’t have to be a project. It can be a conversation, a shared secret, a cool slice of summer on a plate.
Why You’ll Love This Recipe
Let me tell you why these bars have become my go-to for every summer barbecue, potluck, and lazy Sunday. They aren’t just another dessert; they are a little slice of genius. I’ve tested this recipe more times than I can count, and it’s the one that gets the most “can I have the recipe?” texts within minutes of being served. Here’s what makes them so special:
- No Oven Required: This is the real star of the show. When the temperature hits 90 degrees, the last thing you want to do is turn on your oven. These bars set up perfectly in the refrigerator, leaving your kitchen cool and comfortable.
- Simple, Everyday Ingredients: You won’t need to hunt down any weird specialty items. Graham crackers, cream cheese, strawberries, lemons, and a few pantry staples are all it takes. You probably have most of them right now.
- Quick to Assemble: The active prep time is about 20 minutes. Yes, you read that right. The hardest part is waiting for them to chill, and that’s a waiting game I’m always happy to play.
- Perfect for a Crowd: These bars are a guaranteed crowd-pleaser. The tangy lemon and sweet strawberry combination is a classic for a reason. Kids love the creamy texture, and adults appreciate the bright, refreshing flavor. They disappear fast, so I recommend making a double batch.
- Unbelievably Delicious: The texture is what gets me every time. The buttery, crunchy graham cracker crust, the velvety smooth lemon cheesecake filling, and that gorgeous, jewel-toned strawberry swirl on top. It’s a party in your mouth, and everyone’s invited.
What really sets these bars apart from other no-bake cheesecakes is the technique. Instead of just mixing everything together, I use a little trick I learned from a pastry chef friend: you beat the cream cheese and sugar until it’s light and fluffy before adding the lemon juice. This prevents the filling from becoming too dense and ensures that silky, mousse-like texture. It’s a small step that makes a huge difference. This isn’t just another no-bake cheesecake; it’s the best version of it.
Honestly, this recipe is comfort food reimagined. It’s the kind of dessert that makes you close your eyes after the first bite. It’s perfect for impressing guests without any stress, or turning a simple weekday meal into something truly memorable. It’s the dessert equivalent of a deep breath on a hot day.
What Ingredients You Will Need
This easy no-bake strawberry lemonade cheesecake bars recipe relies on a handful of simple, wholesome ingredients that work together to deliver incredible flavor and a satisfying texture. Here’s everything you’ll need, along with a few tips I’ve picked up along the way.
For the Graham Cracker Crust
- 2 cups (200g) graham cracker crumbs: You can buy these pre-crushed, which is a huge time-saver. But honestly, I prefer to crush my own. I put a few sheets in a zip-top bag and go at them with a rolling pin. It’s a great way to release some stress, and the texture is more consistent. Plus, you get those satisfying little pockets of buttery crunch.
- 1/2 cup (113g) unsalted butter, melted: Use real butter here. The flavor is irreplaceable. I like to use salted butter and then just skip the added salt in the crust. It gives a nice subtle savory edge that balances the sweet filling.
- 1/4 cup (50g) granulated sugar: Just a touch of sweetness to bind the crust together.
For the Strawberry Lemonade Cheesecake Filling
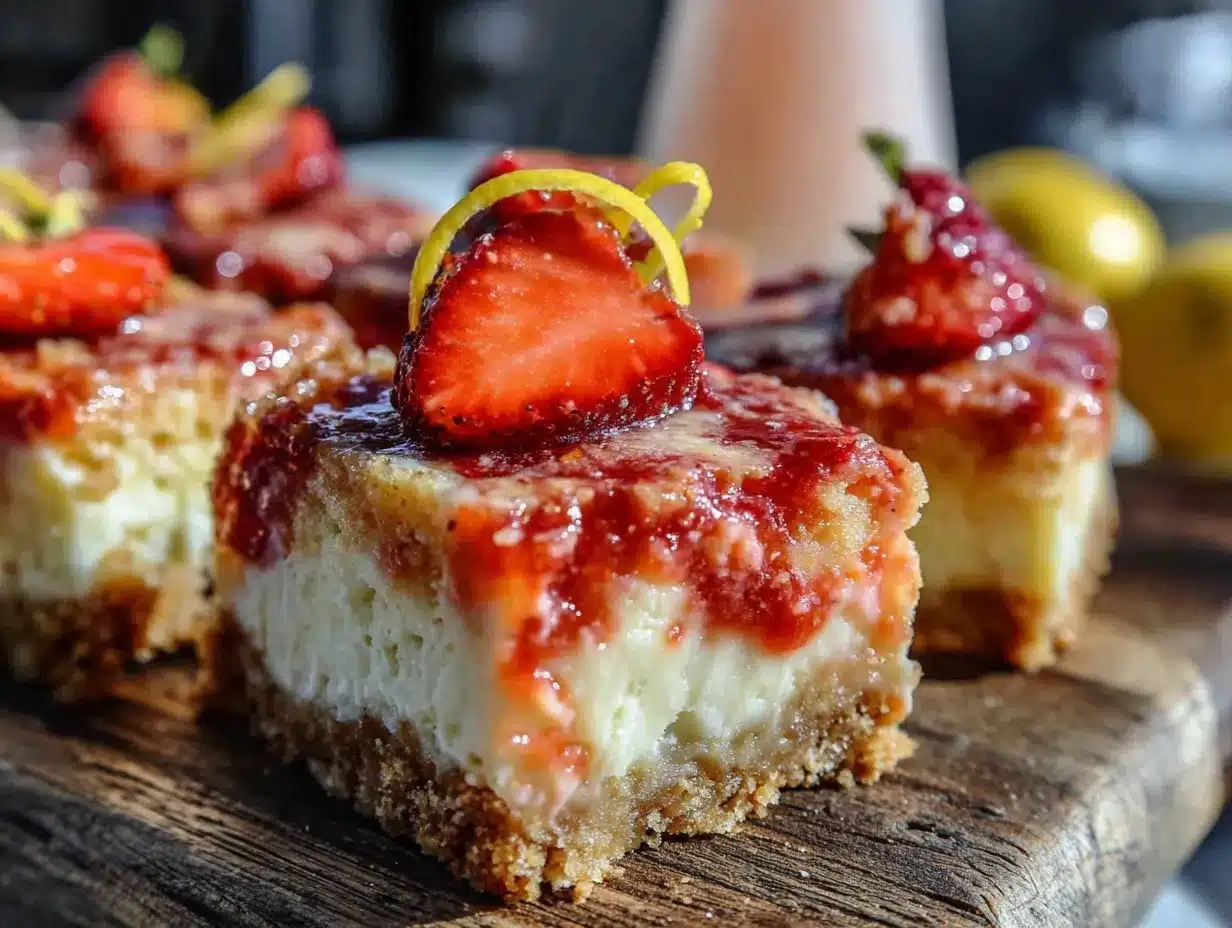
- 16 oz (450g) full-fat cream cheese, softened: This is non-negotiable. Low-fat or Neufchâtel cheese will make the filling runny and prevent it from setting properly. Take the cream cheese out of the fridge at least an hour before you start. You want it to be soft enough that you can easily press a fingerprint into it. This ensures a perfectly smooth, lump-free filling.
- 1 cup (200g) granulated sugar: This provides the sweetness to balance the tart lemon and the rich cream cheese.
- 1/2 cup (120ml) fresh lemon juice: Please, for the love of all things delicious, do not use bottled lemon juice. The flavor is flat and artificial. You need the bright, zesty pop of fresh lemons. This is the heart of the “lemonade” flavor. I recommend using Meyer lemons if you can find them—they are a little sweeter and less acidic.
- 2 tablespoons lemon zest: This is where the intense lemon aroma comes from. Make sure you zest the lemons before you juice them. I like to use a microplane for the finest zest, which melts right into the filling.
- 1 cup (240ml) heavy whipping cream: This is what gives the filling its light, airy, mousse-like texture. It’s a game-changer. Don’t substitute with milk or half-and-half; you need the high fat content to whip up properly.
- 1 cup (150g) fresh or frozen strawberries, chopped: I’ve used both, and they both work beautifully. If using frozen, don’t thaw them first. The cold berries help the swirl set up faster. In the summer, I use fresh, local berries because they’re just so much sweeter and more flavorful.
- 2 tablespoons strawberry jam or preserves: This is my secret ingredient. It adds a concentrated strawberry flavor and helps thicken the swirl so it doesn’t just sink to the bottom of the pan.
Ingredient Selection Tips
I always recommend using a high-quality brand of cream cheese, like Philadelphia. It has a consistency that’s hard to beat. For the strawberries, if they’re not in season, frozen strawberries are actually a better bet than those pale, flavorless ones you find in the grocery store in January. They are picked at peak ripeness and flash-frozen, so they retain all their sweet, summery flavor.
Substitution Guidance
If you need a gluten-free option, you can easily substitute the graham crackers with gluten-free graham crackers or even crushed gluten-free vanilla wafers. For a dairy-free version, you can use a high-quality vegan cream cheese and a dairy-free heavy cream alternative, like coconut cream. Just be aware that the texture might be slightly different, and the setting time could be a bit longer.
Equipment Needed
One of the best things about this recipe is that you don’t need any fancy equipment. Here’s what you’ll need:
- 9×9-inch (or 8×8-inch) baking pan: A metal or glass pan works perfectly. If you use a smaller pan, your bars will just be a little thicker. I personally love my 9×9-inch glass dish because I can see the beautiful layers as they set.
- Parchment paper: This is essential for easy removal. You’ll line the pan with two long strips that hang over the sides, creating a sling. This lets you lift the entire block of cheesecake out in one piece for clean, perfect slices.
- Mixing bowls: You’ll need a large bowl for the crust, a large bowl for the cream cheese filling, and a medium bowl for the strawberry swirl.
- Electric hand mixer or stand mixer: While you can do this by hand with a whisk and a lot of elbow grease, an electric mixer makes the job much easier and ensures a perfectly smooth, lump-free filling.
- Zester or microplane: For getting all that wonderful lemon zest.
- Citrus juicer: A simple handheld juicer makes quick work of the lemons.
- Small saucepan or microwave-safe bowl: For melting the butter and for making the strawberry swirl.
- Rubber spatula: For scraping down the sides of the bowl and folding in the whipped cream.
If you don’t have a 9×9-inch pan, you can use a standard 9×13-inch pan. Your bars will just be thinner, so you might need to reduce the chilling time a little. And if you don’t have a microplane, the small side of a box grater works just fine for zesting. It’s a little more work, but it gets the job done.
Preparation Method
Alright, let’s get to the fun part. Follow these steps, and you’ll have a stunning dessert that will have everyone asking for your secret.
Step 1: Prepare the Pan
Line your 9×9-inch baking pan with two long sheets of parchment paper, crossing them in the middle so they hang over all four sides. This creates a sling that will allow you to lift the whole cheesecake out later. Set the pan aside.
Step 2: Make the Graham Cracker Crust
In a medium bowl, combine the graham cracker crumbs and the 1/4 cup of sugar. Pour in the melted butter and stir with a fork until the mixture looks like wet sand and all the crumbs are evenly coated. Press the mixture firmly and evenly into the bottom of your prepared pan. I like to use the bottom of a flat measuring cup to really pack it down. A tight crust means clean slices later. Pop the pan in the refrigerator to chill while you make the filling.
Step 3: Make the Strawberry Swirl
In a small saucepan over medium heat, combine the chopped strawberries and the 2 tablespoons of strawberry jam. Cook for about 5-7 minutes, stirring occasionally, until the berries have broken down and the mixture has thickened slightly. Remove from the heat and let it cool completely. You can speed this up by spreading it on a plate and putting it in the fridge. The swirl needs to be cool, or it will melt the cheesecake filling.
Step 4: Whip the Heavy Cream
In a medium bowl, using your electric mixer with the whisk attachment, whip the heavy cream until stiff peaks form. This means when you lift the beaters, the cream stands up in firm, pointy peaks. Be careful not to over-whip, or you’ll end up with butter. Set the whipped cream aside in the refrigerator.
Step 5: Make the Lemon Cheesecake Filling
In a large bowl, beat the softened cream cheese with an electric mixer on medium speed until it’s completely smooth and fluffy, about 2 minutes. Scrape down the sides and bottom of the bowl. Add the 1 cup of sugar and beat again until combined. Now, with the mixer on low, slowly pour in the fresh lemon juice. The mixture might look a little grainy or curdled at this point—don’t panic! That’s completely normal. It will come together once we add the whipped cream. Add the lemon zest and mix until just combined.
Step 6: Fold Everything Together
Remove the whipped cream from the fridge. Using a rubber spatula, gently fold about one-third of the whipped cream into the cream cheese mixture. This lightens the batter and makes it easier to incorporate the rest. Then, gently fold in the remaining whipped cream until no white streaks remain. Be gentle—you want to keep as much air in the mixture as possible. This is what gives the bars their light, mousse-like texture.
Step 7: Assemble the Bars
Pour the lemon cheesecake filling over the chilled crust and spread it into an even layer. Drop spoonfuls of the cooled strawberry mixture over the top. Use a knife or a toothpick to gently swirl the strawberry into the cheesecake. Don’t over-swirl, or you’ll lose the pretty marbled effect. Just a few gentle figure-eight motions is all it takes.
Step 8: Chill and Set
Place the pan in the refrigerator and let it chill for at least 6 hours, but preferably overnight. This is the hardest part! The bars need this time to fully set up so you can get clean slices. If you try to cut them too soon, you’ll end up with a delicious but messy puddle. Trust me on this one. I’ve learned from experience.
Step 9: Slice and Serve
Once the bars are completely firm, use the parchment paper sling to lift the entire block out of the pan. Place it on a cutting board. Use a sharp, clean knife to slice into squares. For the cleanest cuts, wipe the knife clean between each slice. Serve cold.
Cooking Tips & Techniques
Over the years, I’ve made a few mistakes with this recipe so you don’t have to. Here are my best tips for getting perfect results every time.
The Magic of Room Temperature Ingredients: This is probably the most important tip. Cold cream cheese will give you a lumpy, grainy filling no matter how long you beat it. Let it sit on the counter for at least an hour. The same goes for the heavy cream, though it should be cold when you whip it. For the filling, the cream cheese needs to be soft, but the cream needs to be cold. It’s a balancing act.
Don’t Over-Whip the Cream: I can’t stress this enough. You want stiff peaks, but if you go too far, the cream will separate and become grainy. It will still taste fine, but the texture of your bars won’t be as silky. Stop as soon as the peaks hold their shape.
The “Curdled” Filling is Not a Problem: When you add the lemon juice to the cream cheese and sugar, it will almost certainly look like it’s curdled. Don’t freak out. This is just the acid in the lemon reacting with the fat in the cream cheese. It will smooth out completely once you fold in the whipped cream. I remember the first time I made this, I almost threw the whole batch away. I’m so glad I didn’t!
Patience is a Virtue: The 6-hour minimum chill time is not a suggestion. It’s a requirement. The filling needs that time to firm up. If you’re in a rush, you can pop the pan in the freezer for about 2-3 hours, but keep an eye on it. You don’t want it to freeze solid. The texture is best when it’s just chilled through from the fridge.
Use a Hot Knife for Clean Slices: For absolutely perfect, clean slices, run your knife under hot water, dry it off, and then make your cut. Wipe the blade clean and repeat for each slice. It makes a world of difference.
Variations & Adaptations
This recipe is a fantastic base for experimentation. Here are a few of my favorite variations.
Blueberry Lemonade Cheesecake Bars: This is my personal favorite twist. Simply swap the strawberries and strawberry jam for blueberries and blueberry jam. The sweet-tart blueberry pairs beautifully with the lemon. I made this for a Fourth of July party last year, and it was the first thing to disappear.
Raspberry Lime Cheesecake Bars: For a completely different flavor profile, use raspberries and lime. The lime gives it a more tropical, zesty kick. It’s incredibly refreshing on a hot day. You can use raspberry jam or even a little lime marmalade for the swirl.
Vegan & Dairy-Free Version: This is easier than you might think. Use a high-quality vegan cream cheese (like Kite Hill or Violife) and a dairy-free heavy cream alternative, such as canned full-fat coconut cream (chilled overnight). The process is exactly the same, though the bars might be slightly softer. They are just as delicious, and you won’t miss the dairy at all.
Gluten-Free Version: As I mentioned, simply swap the graham crackers for your favorite gluten-free graham crackers or crushed gluten-free vanilla wafers. Everything else in the recipe is naturally gluten-free.
Low-Sugar Version: You can reduce the sugar in the filling to 3/4 cup without affecting the texture too much. You can also use a sugar substitute like monk fruit or allulose in the filling and the crust. For the strawberry swirl, skip the jam and just use the berries, or use a sugar-free jam.
Serving & Storage Suggestions
These bars are best served cold, straight from the refrigerator. I like to let them sit at room temperature for about 5 minutes before slicing, just to take the chill off. This makes the filling a little softer and even more luscious.
Presentation: For a beautiful presentation, arrange the bars on a platter and garnish with a few fresh strawberry slices, a thin curl of lemon zest, and a sprig of mint. The bright colors are so inviting.
What to Serve With Them: These bars are pretty perfect on their own, but they are wonderful with a dollop of fresh whipped cream or a scoop of vanilla bean ice cream. For a drink pairing, a tall glass of iced tea or a crisp, dry Prosecco is a match made in heaven.
Storage: Store any leftover bars in an airtight container in the refrigerator. They will keep well for up to 5 days, though they rarely last that long in my house. The flavors actually meld together and become even more delicious after a day or two.
Freezing: You can absolutely freeze these bars! Once they are fully set, lift them out of the pan using the parchment sling. Place the whole block on a baking sheet and freeze until solid (about 2 hours). Then, wrap it tightly in plastic wrap and then a layer of aluminum foil. You can freeze the bars for up to 3 months. To serve, thaw them in the refrigerator overnight. The texture will be just as perfect as the day you made them.
Nutritional Information & Benefits
While these are definitely a treat, they do have a few redeeming qualities. The exact nutritional values will vary based on the specific ingredients you use, but here is an estimate per bar (based on 9 servings):
Estimated Nutritional Information (per bar):
- Calories: 380-420
- Fat: 28g
- Carbohydrates: 34g
- Protein: 5g
- Sugar: 26g
Health Benefits:
The star ingredients here are the lemons and strawberries. Lemons are packed with Vitamin C, a powerful antioxidant that supports your immune system and skin health. Strawberries are also an excellent source of Vitamin C, along with fiber and manganese. They are also known for their anti-inflammatory properties. So, while you’re enjoying a decadent dessert, you’re also getting a little boost of goodness. It’s all about balance, right?
Dietary Considerations:
This recipe can easily be adapted to be gluten-free and dairy-free (as noted in the variations). It is naturally vegetarian. Please note that it does contain dairy and gluten in its standard form.
Frequently Asked Questions
Can I use low-fat cream cheese?
I strongly advise against it. Low-fat cream cheese has a higher water content, which will prevent the bars from setting properly. They will be runny and won’t hold their shape. Full-fat cream cheese is essential for the perfect texture.
Why did my filling turn out lumpy?
This usually happens if your cream cheese was too cold. Make sure it is completely softened to room temperature before you start. If you do end up with a few small lumps, don’t worry—they will be less noticeable after the bars chill.
Can I use bottled lemon juice?
I really don’t recommend it. The flavor of fresh lemon juice is so much brighter and more vibrant. Bottled juice often has a metallic or flat taste that will affect the final result. Trust me, the extra minute it takes to juice a few lemons is worth it.
How do I know when the bars are fully set?
The filling should be firm to the touch and should not jiggle when you gently shake the pan. If you press it lightly with your finger, it should feel solid, not soft or squishy. This usually takes at least 6 hours.
Can I make these bars in a 9×13-inch pan?
Yes, you can! The bars will just be thinner. You might want to reduce the chilling time to about 4 hours. The baking time for the crust (if you pre-bake it) would also be a few minutes less. Just keep an eye on it.
Conclusion
These easy no-bake strawberry lemonade cheesecake bars are more than just a recipe; they are a solution. They are the answer to a hot summer day, a busy week, or any time you need a stunning dessert without the stress. The combination of the buttery crust, the silky lemon filling, and the sweet strawberry swirl is simply unforgettable. I love this recipe because it reminds me that the best things in life don’t have to be complicated. They just have to be made with care and a little bit of joy.
I encourage you to make these bars your own. Play with the fruit, adjust the sweetness, and find the combination that makes you smile. That’s the real beauty of cooking. When you do make them, I’d love to hear about it. Leave a comment below and tell me how they turned out, or share a photo of your beautiful creation on social media. Don’t forget to save this recipe for later!
Now go ahead, keep your oven off, and treat yourself to a slice of pure, summery bliss. You’ve absolutely earned it.
Pin This Recipe!
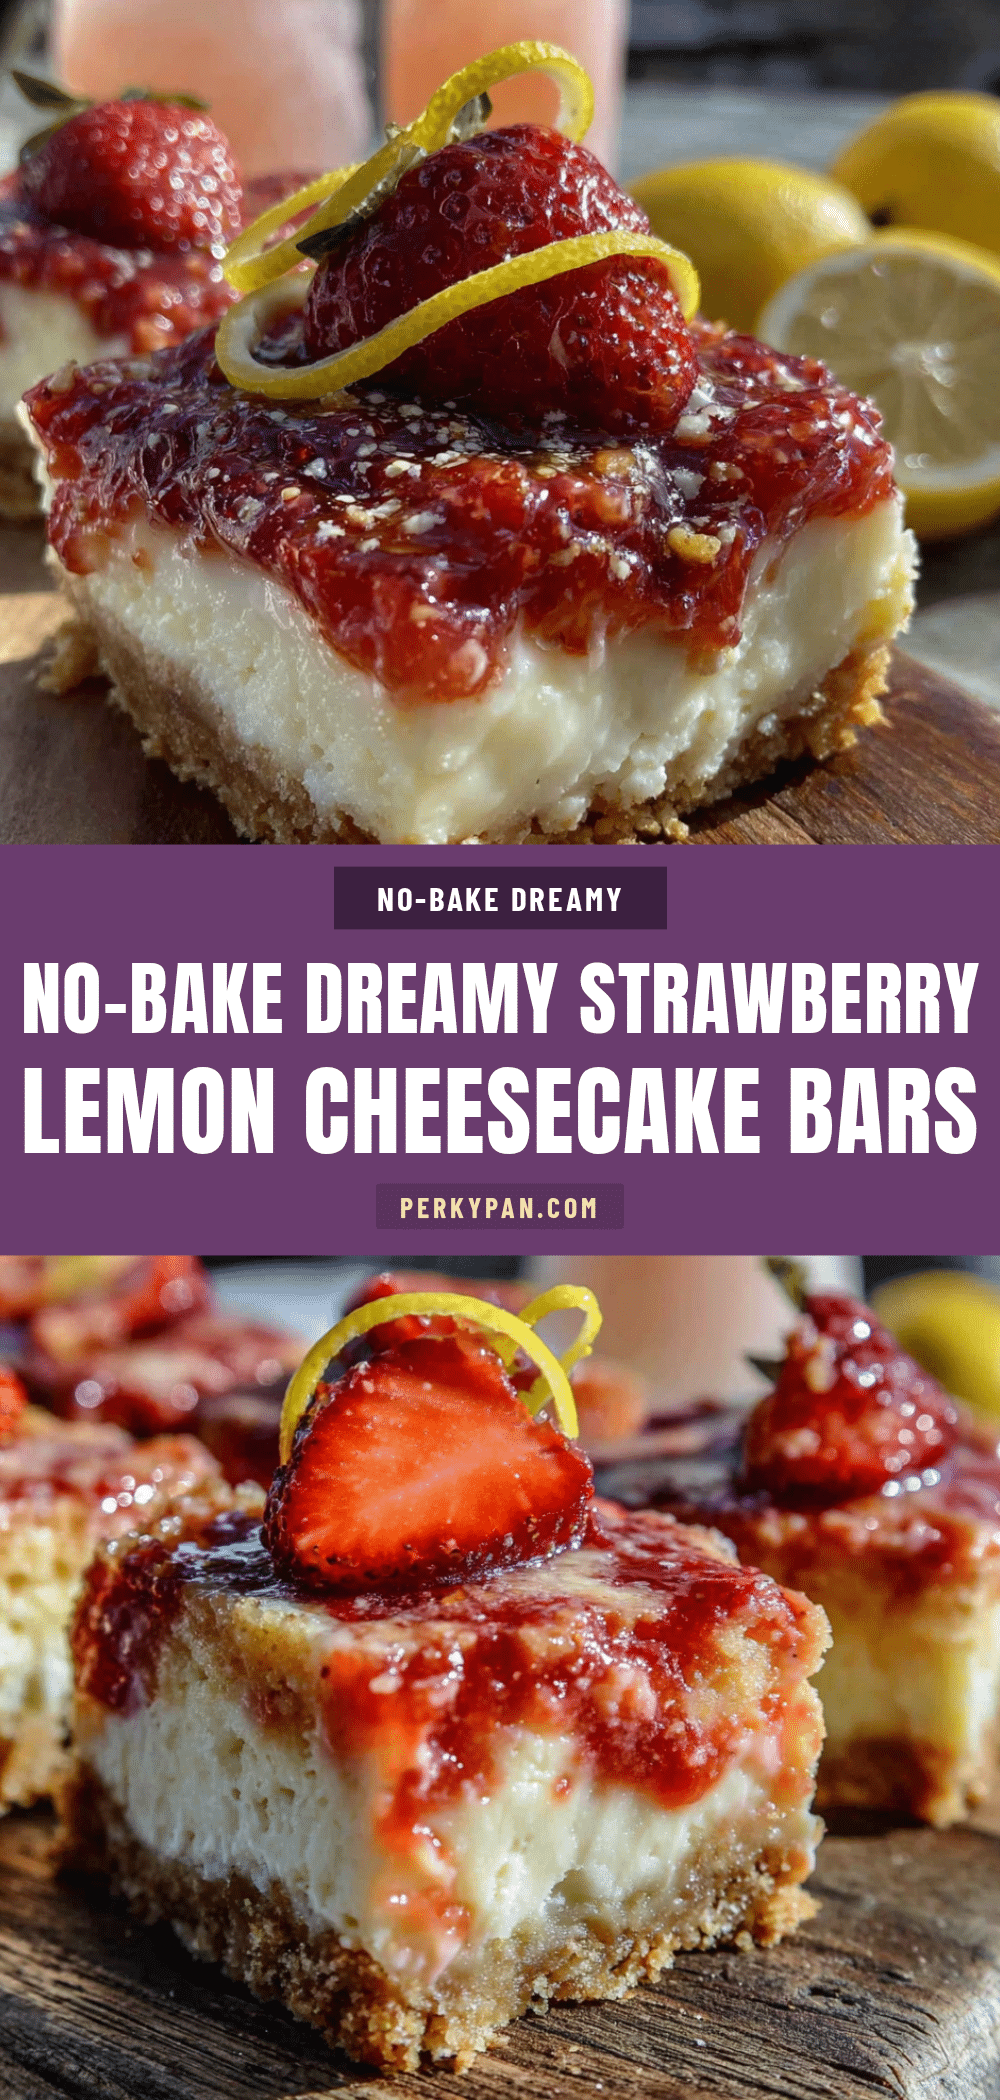
Easy No-Bake Strawberry Lemonade Cheesecake Bars
These creamy, tangy no-bake cheesecake bars feature a buttery graham cracker crust, a silky lemon cheesecake filling, and a gorgeous strawberry swirl. Perfect for hot summer days when you want a stunning dessert without turning on the oven.
- Prep Time: 20 minutes
- Cook Time: 10 minutes
- Total Time: 6 hours 30 minutes (includes chilling)
- Yield: 9 servings 1x
- Category: Dessert
- Cuisine: American
Ingredients
- 2 cups (200g) graham cracker crumbs
- 1/2 cup (113g) unsalted butter, melted
- 1/4 cup (50g) granulated sugar
- 16 oz (450g) full-fat cream cheese, softened
- 1 cup (200g) granulated sugar
- 1/2 cup (120ml) fresh lemon juice
- 2 tablespoons lemon zest
- 1 cup (240ml) heavy whipping cream
- 1 cup (150g) fresh or frozen strawberries, chopped
- 2 tablespoons strawberry jam or preserves
Instructions
- Line a 9×9-inch baking pan with two long sheets of parchment paper, crossing them in the middle so they hang over all four sides. Set aside.
- In a medium bowl, combine graham cracker crumbs and 1/4 cup sugar. Pour in melted butter and stir with a fork until mixture looks like wet sand. Press firmly and evenly into the bottom of the prepared pan. Refrigerate while making the filling.
- In a small saucepan over medium heat, combine chopped strawberries and strawberry jam. Cook for 5-7 minutes, stirring occasionally, until berries have broken down and mixture has thickened slightly. Remove from heat and let cool completely.
- In a medium bowl, using an electric mixer with whisk attachment, whip heavy cream until stiff peaks form. Set aside in the refrigerator.
- In a large bowl, beat softened cream cheese with an electric mixer on medium speed until smooth and fluffy, about 2 minutes. Scrape down sides. Add 1 cup sugar and beat until combined. With mixer on low, slowly pour in fresh lemon juice (mixture may look grainy or curdled—this is normal). Add lemon zest and mix until just combined.
- Remove whipped cream from fridge. Using a rubber spatula, gently fold about one-third of the whipped cream into the cream cheese mixture to lighten it. Then gently fold in remaining whipped cream until no white streaks remain.
- Pour lemon cheesecake filling over chilled crust and spread into an even layer. Drop spoonfuls of cooled strawberry mixture over the top. Use a knife or toothpick to gently swirl the strawberry into the cheesecake (do not over-swirl).
- Place pan in refrigerator and chill for at least 6 hours, preferably overnight, until bars are firm.
- Once firm, use parchment paper sling to lift entire block out of pan. Place on cutting board. Use a sharp, clean knife to slice into squares. Wipe knife clean between slices for clean cuts. Serve cold.
Notes
Use full-fat cream cheese for best texture. Let cream cheese soften to room temperature before starting. Do not over-whip the cream. The filling may look curdled when lemon juice is added—this is normal and will smooth out when whipped cream is folded in. Chill for at least 6 hours, preferably overnight. For clean slices, use a hot knife and wipe clean between cuts.
Nutrition
- Serving Size: 1 bar
- Calories: 400
- Sugar: 26
- Sodium: 280
- Fat: 28
- Saturated Fat: 16
- Carbohydrates: 34
- Fiber: 1
- Protein: 5
Keywords: no-bake cheesecake, strawberry lemonade, cheesecake bars, summer dessert, easy dessert, no-bake dessert


