Love this? Save it for later!
Share the inspiration with your friends
The neighborhood fall block party was in less than six hours and I’d completely forgotten. Everyone else would be bringing elaborate pies from scratch, those fancy caramel apple bars that take three days, and one neighbor was apparently known for her mile-high pumpkin meringue pie. I had a block of cream cheese, a can of pumpkin puree, and about two hours before I needed to leave. Let me tell you, the panic was real. I mean, I’d agreed to bring dessert for thirty people and my kitchen looked like a disaster zone of half-empty coffee cups and grocery lists.
I started frantically pulling things from the fridge and pantry. Graham crackers from the back of the cabinet. Butter that was definitely not room temperature. A can of sweetened condensed milk I’d bought on a whim last month. And then I saw the mini muffin tin collecting dust in the corner. Honestly, I’d bought it for a recipe I never made. But right then, in that moment of pure desperation, it became my lifeline. I figured I could make little crusts, whip up a quick pumpkin cheesecake filling, and hope for the best. The goal wasn’t to win anything — it was just to show up with something edible.
I worked fast. I burned my fingers on the melted butter. I dropped a graham cracker crumb on the floor and left it there. The filling was a little lumpy because I was too impatient to let the cream cheese fully soften. But I pressed on, poured the filling into those tiny cups, and popped them in the oven. When I pulled them out, the kitchen smelled incredible — warm pumpkin, cinnamon, and a little bit of victory. I let them cool, popped them out of the tin, and arranged them on a platter I’d borrowed from my mom three years ago. I figured they’d be fine. Edible. Acceptable.
They were gone in twenty minutes. People were coming up to me asking for the recipe. The neighbor with the mile-high pie asked if I’d cater her next party. I stood there in my slightly flour-dusted sweater, completely shocked. These little pumpkin cheesecake cups — the ones I’d thrown together in a panic — stole the whole show. And that’s why I keep making them. They’re proof that sometimes the best things happen when you’re not trying so hard. Maybe you’ve been there too, scrambling at the last minute and somehow pulling off a miracle. These cups are that miracle, every single time.
Why You’ll Love This Recipe
These mini pumpkin cheesecake cups aren’t just another fall dessert. They’re the kind of recipe that makes you look like you planned ahead when you absolutely did not. I’ve tested this recipe at least a dozen times to get the texture just right — creamy but firm enough to hold their shape, with a buttery crust that doesn’t crumble into a thousand pieces. Here’s why they’re a total winner:
- Quick & Easy: From start to finish, you’re looking at about 45 minutes. That includes baking time. Perfect for when you remember the party is tonight.
- Simple Ingredients: No weird specialty items. Cream cheese, pumpkin puree, eggs, sugar, and graham crackers. You probably have most of this stuff already.
- Perfect for Hosting: These are bite-size, which means guests can grab one (or three) without needing a plate and fork. They’re the ultimate mingling dessert.
- Crowd-Pleaser: I’ve served these at potlucks, Thanksgiving, office parties, and casual get-togethers. They disappear every single time. Kids love them. Adults love them. Even people who “don’t like pumpkin” have been converted.
- Unbelievably Delicious: The texture is what gets people. It’s creamy and rich but not heavy. The pumpkin flavor is warm and spiced, but the cream cheese keeps it from being too sweet. It’s balanced perfection.
What makes this version different from all the other pumpkin cheesecake recipes out there? It’s the ratio. I spent a lot of time tweaking the amounts of cream cheese to pumpkin to get that silky texture that doesn’t crack or sink. Plus, using a mini muffin tin means you get that perfect crust-to-filling ratio in every single bite. No soggy bottoms, no dry edges. Just pure, creamy pumpkin goodness in a tidy little package. And honestly, there’s something deeply satisfying about popping one of these in your mouth whole. It feels like a little secret indulgence.
This recipe isn’t just good — it’s the kind that makes people close their eyes after the first bite. It’s comfort food reimagined as a party-friendly, stress-free dessert. Perfect for impressing guests without breaking a sweat, or turning a simple fall evening into something memorable.
What Ingredients You Will Need
This recipe uses simple, wholesome ingredients that work together to create something truly special. Most of these are pantry staples during the fall season, which makes this recipe even more convenient.
For the Crust
- 1 ½ cups graham cracker crumbs (about 12 full sheets, crushed finely — I prefer the Honey Maid brand for consistent texture)
- ¼ cup granulated sugar
- 6 tablespoons unsalted butter, melted (salted butter works too, just reduce the added salt later)
- Pinch of salt (skip if using salted butter)
You can also use crushed shortbread cookies or vanilla wafers for a different flavor profile. I’ve tried both, and they’re delicious, but graham crackers give that classic cheesecake vibe.
For the Pumpkin Cheesecake Filling
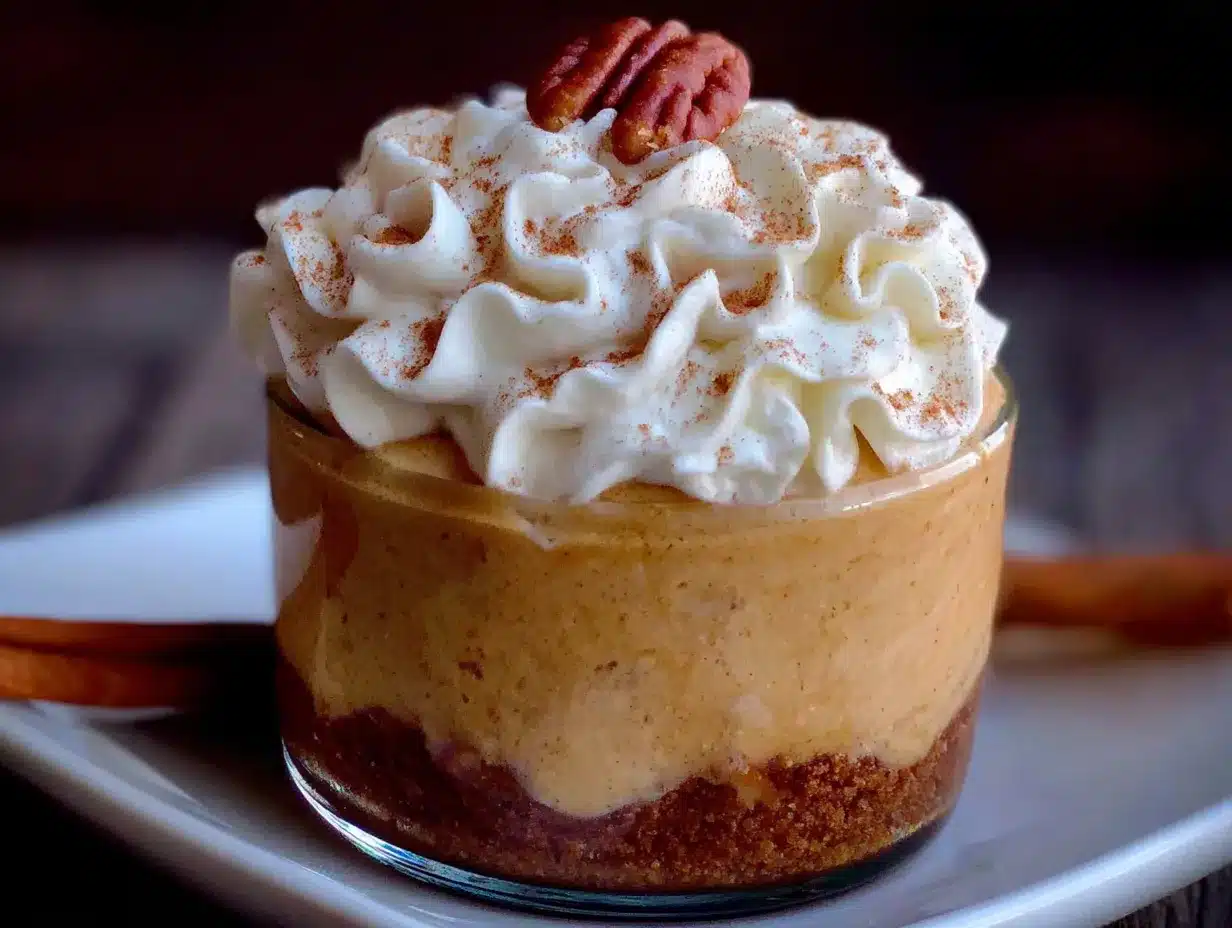
- 16 ounces cream cheese, softened (full-fat is best for texture, but Neufchâtel works in a pinch — just expect a slightly less firm set)
- ¾ cup granulated sugar
- 1 cup pumpkin puree (not pumpkin pie filling — make sure it’s 100% pumpkin. Libby’s is my go-to)
- 2 large eggs, room temperature (cold eggs can make the filling lumpy)
- 1 teaspoon vanilla extract
- 1 teaspoon pumpkin pie spice (or make your own: ½ tsp cinnamon, ¼ tsp ginger, ¼ tsp nutmeg, pinch of cloves)
- ½ teaspoon ground cinnamon
- ¼ teaspoon salt
For the Topping (Optional but Recommended)
- ¾ cup sour cream
- 2 tablespoons powdered sugar
- ½ teaspoon vanilla extract
- Whipped cream, for serving
- Caramel sauce, for drizzling (store-bought is fine, but homemade is incredible)
- Pumpkin pie spice or cinnamon, for dusting
The sour cream topping adds a lovely tangy contrast to the sweet pumpkin filling. It’s not strictly necessary, but it does take these cups from “really good” to “absolutely unforgettable.” I’ve skipped it in a pinch and they were still a hit, but when I have the extra five minutes, I always make it.
For the pumpkin puree, look for cans that are firm and not dented. I’ve noticed that fresher cans have a brighter color and more vibrant flavor. And please, for the love of all things pumpkin, do not accidentally grab pumpkin pie filling. That stuff has sugar and spices already added, and it will throw off the entire recipe. I made that mistake once. Once.
Equipment Needed
You don’t need a professional bakery setup for these little beauties. Here’s what you’ll want to have on hand:
- Mini muffin tin (24-cup size is ideal — I use the Wilton non-stick one and it’s never let me down)
- Food processor or zip-top bag and rolling pin (for crushing graham crackers — the bag method is great stress relief)
- Electric hand mixer or stand mixer (you can mix by hand, but your arm will get tired and the texture won’t be as smooth)
- Mixing bowls (medium and large)
- Measuring cups and spoons
- Rubber spatula (for scraping every last bit of filling — waste not, want not)
- Small cookie scoop or tablespoon (for portioning the filling evenly)
- Cooling rack
- Plastic wrap (for covering while they chill)
If you don’t have a mini muffin tin, you can absolutely use a regular 12-cup muffin tin — just increase the baking time by about 5-7 minutes. The cups will be bigger, but just as delicious. I’ve also used silicone mini muffin molds with great success. They’re non-stick and easy to pop the cups out of, though they can be a bit wobbly when carrying to the oven.
One tip: if you’re using a non-stick pan, don’t use cooking spray on the cups. The crust has enough butter to prevent sticking, and spray can create a weird film. Trust me on this one.
Preparation Method
Let’s get these little guys made. I’ve broken it down into simple steps so you can follow along without any stress.
- Preheat your oven to 325°F (163°C). Line your mini muffin tin with paper liners if you want easy removal, or just grease the cups lightly with butter. I usually skip the liners because I like the look of the exposed crust.
- Make the crust. In a medium bowl, combine the graham cracker crumbs, sugar, and salt. Pour in the melted butter and stir with a fork until the mixture looks like wet sand. It should clump together when you squeeze it in your hand. If it’s too dry, add another tablespoon of melted butter.
- Press the crust into the muffin cups. Drop about 1 tablespoon of the crust mixture into each mini muffin cup. Use the bottom of a small glass or a shot glass to press it down firmly. You want it compacted so it holds together after baking. Don’t press it up the sides — just a flat layer on the bottom is perfect. Bake for 5 minutes, then set aside to cool slightly.
- Make the filling. In a large bowl, beat the softened cream cheese with an electric mixer on medium speed until smooth and creamy — about 2 minutes. Scrape down the sides of the bowl with a rubber spatula. Add the sugar and beat until combined, another minute. Add the pumpkin puree, eggs, vanilla, pumpkin pie spice, cinnamon, and salt. Mix on low speed until just combined. Don’t overmix! Overmixing incorporates too much air and can cause cracks later.
- Fill the cups. Spoon or scoop the filling into each prepared crust, filling almost to the top — about 1 tablespoon per cup. The filling will puff up slightly but won’t overflow if you leave a tiny bit of room. I use a small cookie scoop for this and it makes the process so much faster.
- Bake. Place the muffin tin in the preheated oven and bake for 15-18 minutes. The edges should look set and slightly puffed, but the centers will still jiggle slightly when you gently shake the pan. That’s exactly what you want. They’ll continue to set as they cool.
- Cool completely. Remove the tin from the oven and let it cool on a wire rack for 20 minutes. Then carefully remove the cheesecake cups from the tin (run a knife around the edges if needed) and place them on the rack to cool completely, about another 30 minutes.
- Make the topping (optional). While the cups cool, whisk together the sour cream, powdered sugar, and vanilla extract in a small bowl. Once the cups are completely cool, spoon a small dollop on top of each one and spread gently. Return them to the refrigerator for at least 2 hours, or overnight.
- Serve. Just before serving, top with a swirl of whipped cream, a drizzle of caramel sauce, and a light dusting of pumpkin pie spice. Arrange them on a beautiful platter and watch them disappear.
A few notes from my many trials: If your cream cheese is still a little cold and lumpy, microwave it for 10-second intervals until it’s soft. Don’t rush this step. Cold cream cheese = lumpy filling. Also, if you see any cracks forming on top of your cups after baking, don’t panic. The sour cream topping will cover them right up. No one will ever know.
Cooking Tips & Techniques
After making these pumpkin cheesecake cups more times than I can count, I’ve picked up a few tricks that make a real difference. Let me share them so you don’t have to learn the hard way.
Room temperature ingredients are non-negotiable. I know, I know, you’re in a hurry. But cold eggs and cold cream cheese will give you a lumpy, uneven filling that doesn’t bake properly. Take them out of the fridge at least 30 minutes before you start. Set a timer if you have to. I’ve forgotten this step and ended up with filling that looked like cottage cheese. Not cute.
Don’t overmix the filling. This was my biggest mistake early on. I thought more mixing meant smoother texture. Nope. Overmixing incorporates too much air, which causes the cheesecake to puff up dramatically in the oven and then collapse, leaving cracks. Mix just until everything comes together. A few tiny lumps are fine — they’ll smooth out during baking.
Use a water bath? Not necessary here. Because these are mini cups, they bake quickly and evenly without a water bath. The small size means less risk of cracking. Just don’t overbake them. When in doubt, take them out. A slightly jiggly center will set perfectly in the fridge.
Let them chill overnight if you can. I know it’s hard to wait, but the texture really improves after a full night in the refrigerator. The flavors meld together, the texture becomes creamier, and they’re easier to remove from the pan. If you’re making these for a party, make them the day before. Your future self will thank you.
Multitasking strategy: While the crust is baking (only 5 minutes), get your cream cheese and eggs out if they’re not already room temperature. While the crust cools, make the filling. While the filled cups bake, clean up your workspace and make the sour cream topping. This way, everything flows smoothly and you’re not standing around waiting.
One more thing — if you’re nervous about removing the cups from the pan without breaking them, let them cool completely on the counter, then pop the whole pan in the freezer for 15 minutes. The slight chill makes them firm enough to remove cleanly. Just don’t forget they’re in there (I may or may not have discovered a frozen tray weeks later).
Variations & Adaptations
One of the best things about this recipe is how easily it adapts to different tastes and dietary needs. Here are some variations I’ve tried and loved:
Gluten-Free Version: Swap the graham crackers for gluten-free graham crackers or use crushed gluten-free vanilla cookies. I’ve also used almond flour mixed with a little butter and sugar for a low-carb crust. It’s not quite the same texture, but it’s delicious in its own right.
Dairy-Free Version: Use dairy-free cream cheese (Kite Hill is my favorite) and a plant-based butter substitute. The texture will be slightly softer, so chill them extra long before serving. Coconut cream can replace the sour cream topping.
Pumpkin Spice Latte Twist: Add 1 tablespoon of instant espresso powder dissolved in 1 teaspoon of water to the filling. The coffee flavor enhances the pumpkin and spices beautifully. Top with a dusting of cocoa powder for extra flair.
Chocolate Lover’s Version: Add ¼ cup of melted dark chocolate to the filling and swirl it in gently before baking. Or, drizzle melted chocolate over the finished cups instead of caramel. I made these for a friend who “doesn’t do pumpkin” and she ate six.
No-Bake Version: For hot days when you don’t want to turn on the oven, you can make a no-bake version. Use the same crust (baked or just pressed and chilled), and for the filling, beat the cream cheese with sugar, then fold in pumpkin puree mixed with 1 package of instant vanilla pudding mix. Fold in 1 cup of whipped cream. Spoon into crusts and chill for 4 hours. They’re lighter and fluffier, but still incredibly good.
I once made a batch with a gingersnap crust for a holiday party and it was a game-changer. The spicy ginger flavor paired perfectly with the pumpkin. If you’re feeling adventurous, give that a try.
Serving & Storage Suggestions
These mini pumpkin cheesecake cups are best served cold, straight from the refrigerator. The texture is firmer and the flavors are more pronounced. I like to take them out about 10 minutes before serving to take the chill off slightly, but that’s personal preference.
Presentation tips for hosting: Arrange them on a white platter or cake stand for maximum visual impact. The golden-orange color of the pumpkin against the white topping is gorgeous. Add a few mini pumpkins or fall leaves around the platter for a festive touch. If you’re feeling fancy, drizzle caramel sauce in a zigzag pattern across the whole platter before placing the cups.
What to serve alongside: These cups pair beautifully with hot apple cider, spiced chai tea, or a bold coffee. For a dessert spread, serve them alongside apple crisp, pecan bars, or a simple vanilla panna cotta. They’re also perfect on a brunch table next to pumpkin muffins and cinnamon rolls.
Storage: Store the cheesecake cups in an airtight container in the refrigerator for up to 5 days. Place them in a single layer or separate layers with parchment paper so the toppings don’t smudge. I’ve found they actually taste better on day two after the flavors have had time to meld.
Freezing instructions: These freeze beautifully. Place the cooled, un-topped cups on a baking sheet and freeze until solid, about 2 hours. Transfer to a freezer-safe container with parchment paper between layers. They’ll keep for up to 3 months. To serve, thaw overnight in the refrigerator, then add toppings just before serving. I always keep a batch in my freezer for unexpected guests or late-night cravings.
Reheating: Honestly, I don’t recommend reheating these. They’re meant to be served cold. If you want a warm pumpkin dessert, try these cups at room temperature, but never microwave them — the texture gets weird and the crust gets soggy.
Nutritional Information & Benefits
Here’s the approximate nutritional breakdown for one mini cheesecake cup (based on 24 servings, without optional toppings):
- Calories: 145
- Fat: 9g
- Carbohydrates: 14g
- Protein: 3g
- Sugar: 10g
- Fiber: 1g
- Sodium: 125mg
These numbers will vary slightly depending on the brands you use and whether you add the sour cream topping and caramel drizzle. But the good news is, because they’re bite-size, portion control is built right in. You can enjoy a few without derailing your day.
From a health perspective, pumpkin is a nutritional powerhouse. It’s packed with vitamin A (great for eye health and immune function), fiber (keeps you full and happy), and antioxidants. The cream cheese provides calcium and protein, while the eggs add more protein and healthy fats. Is it a health food? No. But it’s a dessert that offers a little more than empty calories.
For those watching their sugar intake, you can reduce the sugar to ½ cup without affecting the texture too much. I’ve done it, and while it’s less sweet, the pumpkin and spice flavors shine through more prominently. You can also use a sugar substitute like monk fruit or stevia, but I haven’t tested those myself, so proceed with caution.
These cups are vegetarian and can be made gluten-free and dairy-free with the substitutions mentioned earlier. They contain dairy, eggs, and gluten (from the graham crackers), so please keep that in mind when serving guests with allergies.
Conclusion
These mini pumpkin cheesecake cups are the dessert you didn’t know you needed in your life. They’re simple enough for a Tuesday night treat, but impressive enough for a holiday feast. They’ve saved me from potluck panic more times than I can count, and they’ve earned a permanent spot in my fall recipe rotation.
What I love most about this recipe is how forgiving it is. You can mess up the timing, forget an ingredient, or burn your fingers on melted butter (guilty), and they still turn out amazing. They’re proof that you don’t need to be a professional baker to create something that makes people smile. You just need good ingredients, a little patience, and a recipe that works.
I’d love to hear how these turn out for you. Did you add your own twist? Did they disappear at your party as fast as they did at mine? Drop a comment below and let me know. And if you’re looking for more crowd-pleasing desserts, check out my easy pumpkin bundt cake or these no-bake chocolate pecan pie bars. Happy baking, and remember — sometimes the best recipes come from the biggest messes.
Frequently Asked Questions
Can I use pumpkin pie filling instead of pumpkin puree?
No, please don’t. Pumpkin pie filling already has sugar and spices added, which will throw off the sweetness and texture of this recipe. Stick with 100% pure pumpkin puree for the best results. If you only have pie filling, you’ll need to adjust the sugar and spices, but I can’t guarantee the outcome.
Why did my cheesecake cups crack on top?
Cracks usually happen from overmixing the filling or overbaking. Mix just until the ingredients are combined, and take the cups out of the oven when the centers are still slightly jiggly. They’ll continue to set as they cool. If cracks do appear, don’t worry — the sour cream topping or a dollop of whipped cream will hide them perfectly.
Can I make these in a regular muffin tin?
Absolutely. Use a standard 12-cup muffin tin and increase the baking time by 5-7 minutes. You’ll get bigger portions, so adjust your serving size accordingly. The crust and filling amounts will make about 12 regular-sized cups instead of 24 mini ones.
How far in advance can I make these?
You can make these up to 3 days in advance if stored properly in the refrigerator. They actually taste better after a day or two because the flavors have time to meld. You can also freeze them (without toppings) for up to 3 months. Just add the toppings after thawing.
Can I skip the sour cream topping?
Yes, the topping is completely optional. The cheesecake cups are delicious on their own. The sour cream topping adds a tangy contrast and a beautiful presentation, but if you’re short on time or ingredients, feel free to skip it. A simple dusting of cinnamon or pumpkin pie spice is lovely too.
Pin This Recipe!
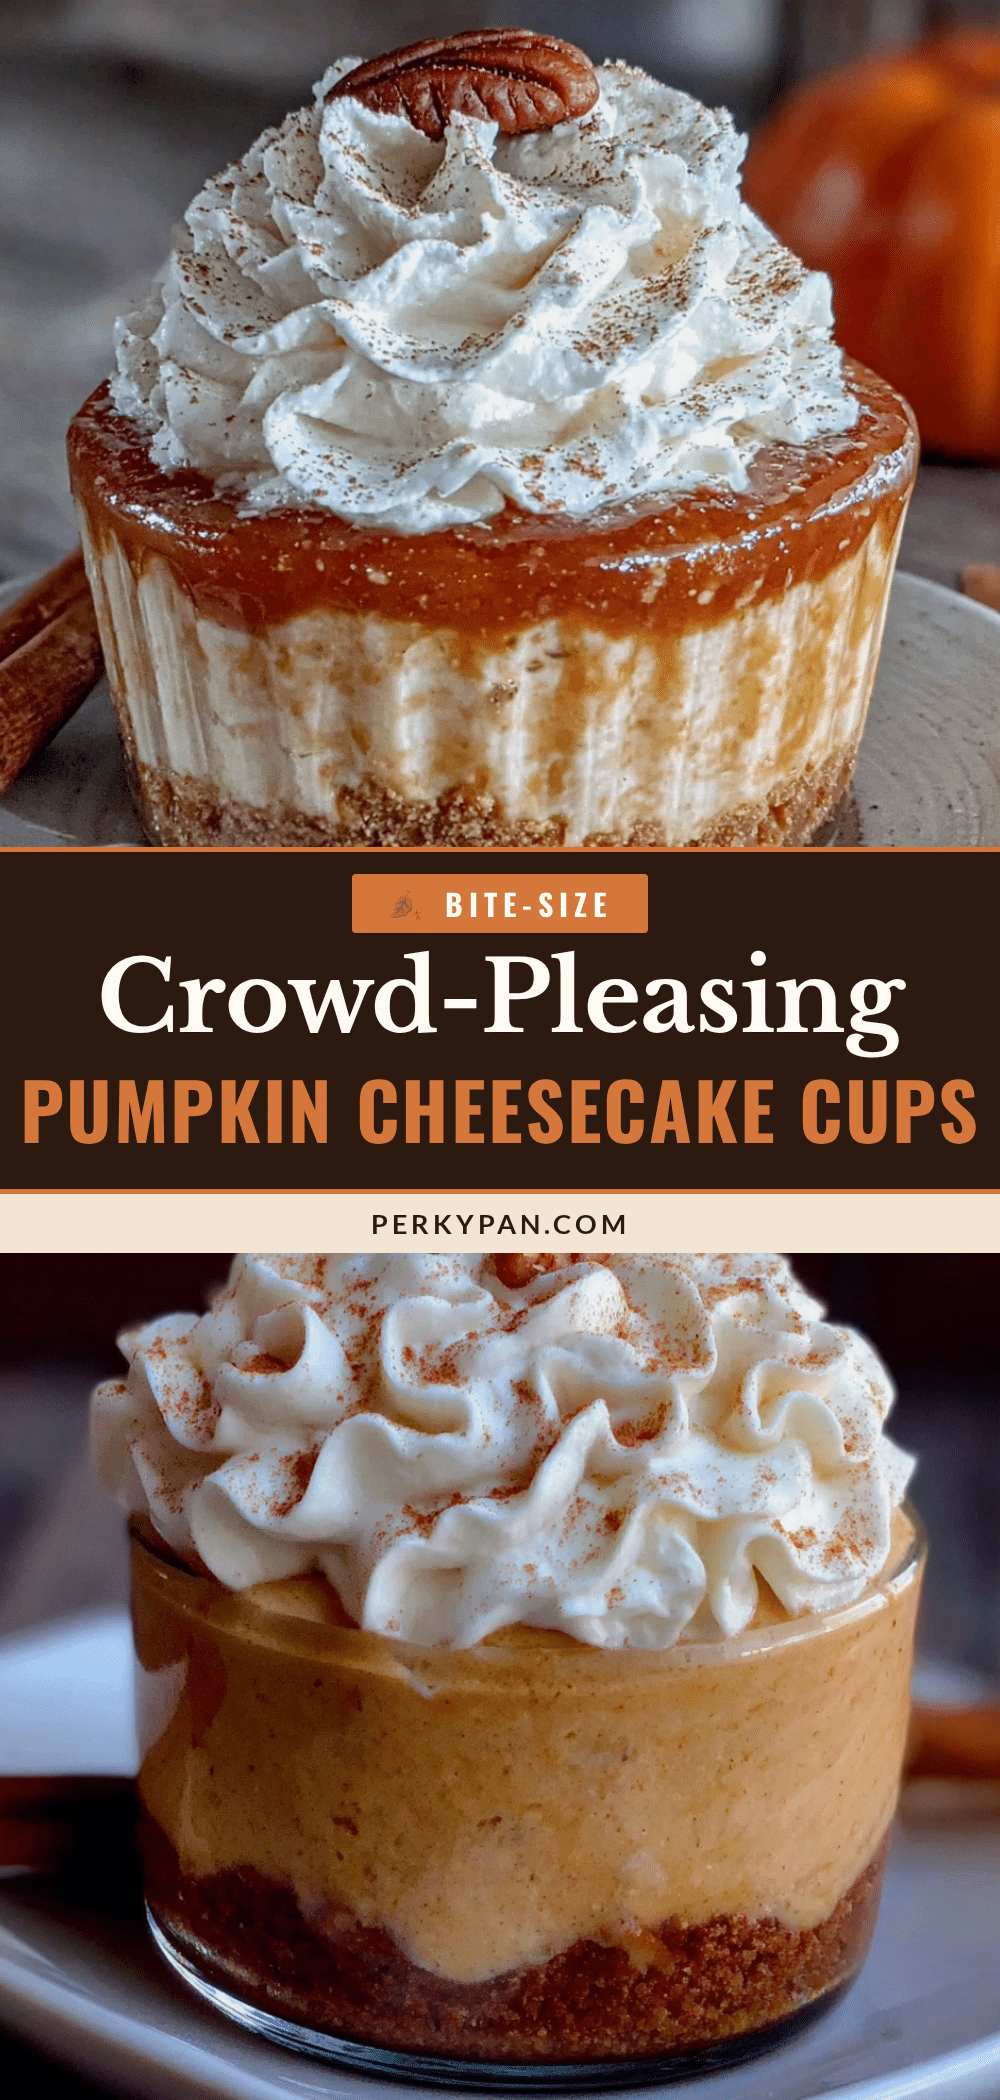
Easy Mini Pumpkin Cheesecake Cups: Best Bite-Size Dessert
These mini pumpkin cheesecake cups are creamy, bite-size, and perfect for fall gatherings. Made with a buttery graham cracker crust and a spiced pumpkin cheesecake filling, they’re a crowd-pleasing dessert that comes together in about 45 minutes.
- Prep Time: 20 minutes
- Cook Time: 18 minutes
- Total Time: 45 minutes
- Yield: 24 servings 1x
- Category: Dessert
- Cuisine: American
Ingredients
- 1 ½ cups graham cracker crumbs (about 12 full sheets)
- ¼ cup granulated sugar
- 6 tablespoons unsalted butter, melted
- Pinch of salt
- 16 ounces cream cheese, softened
- ¾ cup granulated sugar
- 1 cup pumpkin puree (100% pumpkin, not pie filling)
- 2 large eggs, room temperature
- 1 teaspoon vanilla extract
- 1 teaspoon pumpkin pie spice
- ½ teaspoon ground cinnamon
- ¼ teaspoon salt
- ¾ cup sour cream (for topping, optional)
- 2 tablespoons powdered sugar (for topping, optional)
- ½ teaspoon vanilla extract (for topping, optional)
- Whipped cream, for serving (optional)
- Caramel sauce, for drizzling (optional)
- Pumpkin pie spice or cinnamon, for dusting (optional)
Instructions
- Preheat your oven to 325°F (163°C). Line a 24-cup mini muffin tin with paper liners or grease lightly with butter.
- Make the crust: In a medium bowl, combine graham cracker crumbs, ¼ cup sugar, and a pinch of salt. Pour in melted butter and stir with a fork until the mixture looks like wet sand and clumps together when squeezed.
- Press about 1 tablespoon of the crust mixture into each mini muffin cup. Use the bottom of a small glass to press it down firmly into a flat layer. Bake for 5 minutes, then set aside to cool slightly.
- Make the filling: In a large bowl, beat softened cream cheese with an electric mixer on medium speed until smooth and creamy, about 2 minutes. Scrape down the sides of the bowl.
- Add ¾ cup sugar and beat until combined, about 1 minute. Add pumpkin puree, eggs, 1 teaspoon vanilla, pumpkin pie spice, cinnamon, and ¼ teaspoon salt. Mix on low speed until just combined. Do not overmix.
- Spoon or scoop about 1 tablespoon of filling into each prepared crust, filling almost to the top.
- Bake for 15-18 minutes, until the edges are set and slightly puffed but the centers still jiggle slightly when shaken.
- Remove from oven and cool on a wire rack for 20 minutes. Carefully remove cups from the tin and cool completely on the rack, about 30 minutes.
- Make the topping (optional): In a small bowl, whisk together sour cream, powdered sugar, and ½ teaspoon vanilla. Spoon a small dollop on top of each cooled cup and spread gently.
- Refrigerate for at least 2 hours, or overnight. Just before serving, top with whipped cream, a drizzle of caramel sauce, and a dusting of pumpkin pie spice.
Notes
Room temperature ingredients are key for a smooth filling. Do not overmix the filling to avoid cracks. The sour cream topping is optional but recommended. For best texture, chill overnight. These freeze well (without toppings) for up to 3 months.
Nutrition
- Serving Size: 1 mini cheesecake cu
- Calories: 145
- Sugar: 10
- Sodium: 125
- Fat: 9
- Carbohydrates: 14
- Fiber: 1
- Protein: 3
Keywords: mini pumpkin cheesecake cups, bite-size dessert, fall dessert, pumpkin cheesecake, easy dessert recipe, mini cheesecake, pumpkin dessert, potluck dessert


