Love this? Save it for later!
Share the inspiration with your friends
My eight-year-old nephew asked me last week why I couldn’t just skip the butter and use applesauce instead. I was in the middle of explaining the science of scones—how cold butter creates those flaky layers we all love—when I stopped. Honestly, I had no good reason other than “that’s how it’s always done.” So I let him dump in the applesauce while I held my breath, fully expecting a dense, gummy disaster.
The scones came out of the oven soft, tender, and shockingly good. Not flaky in the traditional sense, but moist in a way that made my husband ask for seconds before the glaze even hit them. I had spent years perfecting my pumpkin scone recipe, and this kid cracked it open in five minutes with a pantry swap I never would have considered. Maybe you’ve been there—so sure a shortcut will ruin things that you never even try it.
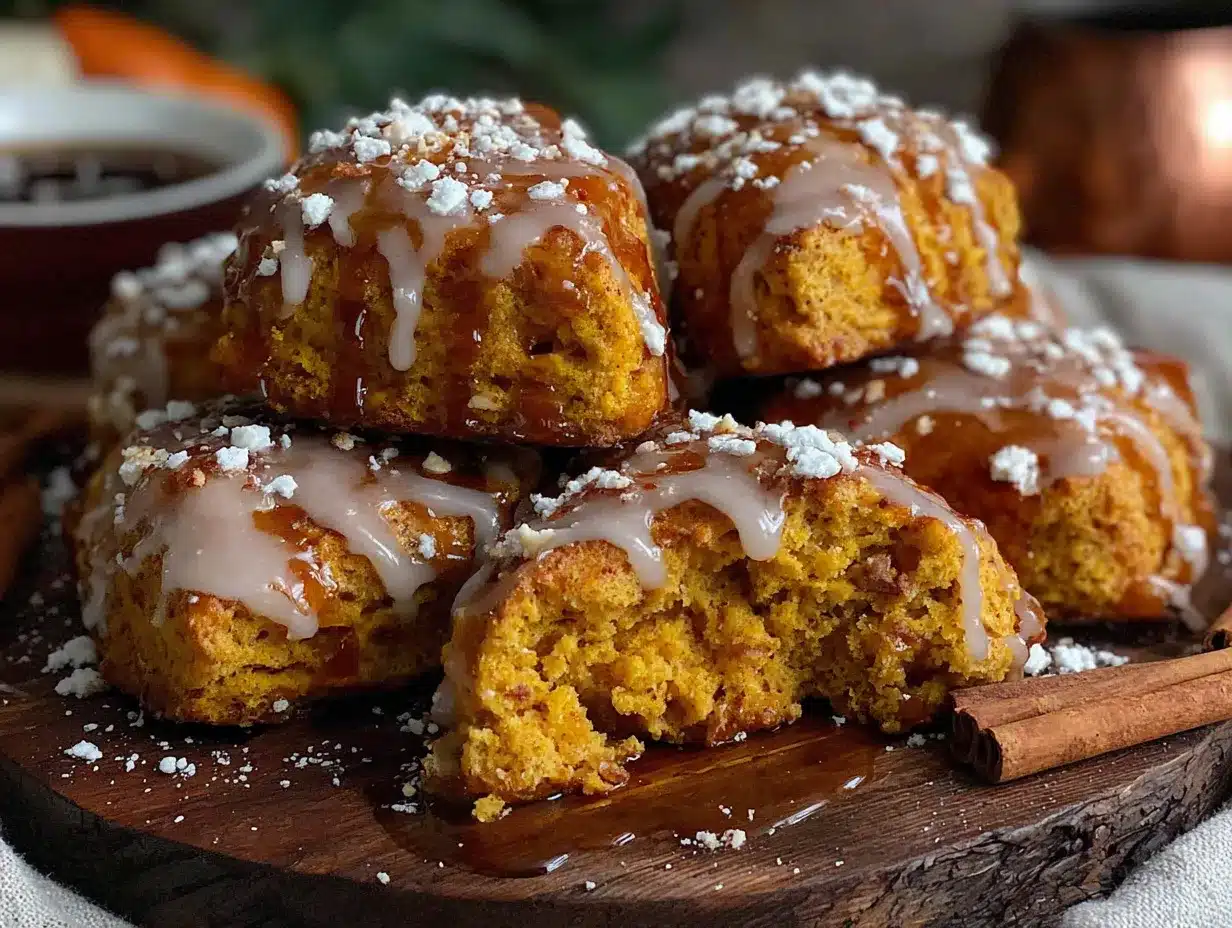
That afternoon changed how I think about baking with kids. These Kid-Approved Cinnamon Pumpkin Scones with Maple Glaze aren’t just easy enough for little hands to help with—they actually taste better because of their input. The applesauce keeps them from drying out, the pumpkin adds a velvety crumb, and that maple glaze on top? Pure magic. I keep making them because they remind me that sometimes the best recipes come from letting go of control.
Why You’ll Love This Recipe
These scones are the kind of recipe that makes you look like a rockstar without actually working that hard. I tested this version six times before I got it just right—three times with my nephew, twice alone, and once with my neighbor’s kids who are notoriously picky eaters. Every single batch disappeared within hours.
- Quick & Easy : From mixing bowl to cooling rack in under 35 minutes. No yeast, no chilling, no fuss.
- Simple Ingredients : You probably have everything in your pantry right now—flour, sugar, pumpkin puree, cinnamon, and that applesauce swap I mentioned.
- Perfect for Fall Mornings : Great for school breakfasts, weekend brunches, or surprise treats for the bus stop crew.
- Crowd-Pleaser : My picky nephew devoured three. His mom texted me asking for the recipe before I even cleaned up.
- Unbelievably Delicious : The texture is soft and tender—not dry like some scones—with that warm cinnamon-pumpkin flavor that tastes like autumn in every bite.
What makes these different from other pumpkin scone recipes is the applesauce trick. It cuts the fat without cutting the moisture, so you get a scone that stays soft even the next day. No hockey pucks here, I promise. Plus, the maple glaze adds just enough sweetness to make them feel like a bakery treat without being over the top.
This is the kind of recipe that makes you close your eyes after the first bite. It’s comfort food reimagined—healthier, faster, but with the same soul-soothing satisfaction. Perfect for impressing your kid’s friends without stress, or turning a regular Tuesday morning into something memorable.
What Ingredients You Will Need
This recipe uses simple, wholesome ingredients to deliver bold flavor and satisfying texture without the fuss. Most of these are pantry staples, which means you can whip up a batch whenever the craving hits.
For the Scones
- 2 cups all-purpose flour (I prefer Gold Medal for consistent results)
- 1/2 cup granulated sugar
- 1 tablespoon baking powder
- 1 teaspoon ground cinnamon (use Vietnamese cinnamon for extra warmth)
- 1/2 teaspoon ground nutmeg
- 1/4 teaspoon ground ginger
- 1/4 teaspoon salt
- 1/2 cup cold unsalted butter, cut into small cubes (adds richness and tenderness)
- 1/2 cup pumpkin puree (not pumpkin pie filling—look for 100% pumpkin)
- 1/4 cup unsweetened applesauce (the secret ingredient for moisture)
- 1/4 cup milk (whole milk works best, but 2% is fine)
- 1 large egg
- 1 teaspoon vanilla extract
For the Maple Glaze
- 1 cup powdered sugar, sifted
- 3 tablespoons pure maple syrup (not pancake syrup—the real stuff matters here)
- 1-2 tablespoons milk (to thin the glaze)
- Pinch of cinnamon (optional, for extra warmth)
Ingredient Tips: For the pumpkin puree, I recommend Libby’s—it’s consistently thick and not watery. If you’re using a store brand, drain off any excess liquid before measuring. The applesauce can be homemade or store-bought; just make sure it’s unsweetened so you control the sugar level. For a dairy-free version, swap the butter with vegan butter and use oat milk in the glaze.
Equipment Needed
You don’t need fancy equipment for these scones, which is part of their charm. Here’s what I use every time:
- Large mixing bowl (any size works, but bigger is better for mixing without mess)
- Pastry cutter or two forks (for cutting butter into flour—I’ve used both, and honestly, forks work fine in a pinch)
- Baking sheet (lined with parchment paper for easy cleanup)
- Parchment paper (non-negotiable—trust me, it saves you from scrubbing)
- Whisk (for combining dry ingredients)
- Measuring cups and spoons
- Bench scraper or sharp knife (for cutting the dough into triangles)
- Cooling rack (helps the glaze set properly)
- Small bowl and whisk (for the glaze)
If you don’t have a pastry cutter, don’t stress. I once used my fingers to rub the butter into the flour—it took a little longer, but the scones turned out just fine. The key is keeping the butter cold, not having the perfect tool.
Preparation Method
Let me walk you through this step by step. I’ve made these scones so many times I could do them in my sleep, but I still check the oven halfway through every time. Old habits, right?
- Preheat your oven to 400°F (200°C) and line a baking sheet with parchment paper. I always do this first so the oven is hot and ready when the dough is.
- Mix the dry ingredients. In a large bowl, whisk together the flour, sugar, baking powder, cinnamon, nutmeg, ginger, and salt. Make sure the baking powder is evenly distributed—nobody wants a bitter bite of baking powder.
- Cut in the cold butter. Add the cold butter cubes to the flour mixture. Use a pastry cutter or two forks to cut the butter into the flour until it resembles coarse crumbs with pea-sized butter pieces. Pro tip: If the butter starts to soften, pop the bowl in the fridge for 5 minutes.
- Combine the wet ingredients. In a separate small bowl, whisk together the pumpkin puree, applesauce, milk, egg, and vanilla extract until smooth. It should look like a thick, orange milkshake.
- Bring it all together. Pour the wet ingredients into the dry ingredients and stir with a spatula until just combined. The dough will be sticky—that’s normal. Do not overmix, or your scones will be tough. Stop when you can’t see any more dry flour.
- Shape the dough. Turn the dough out onto a lightly floured surface. Gently pat it into a circle about 3/4-inch thick. Don’t use a rolling pin—your hands are better here. The circle should be about 8 inches across.
- Cut into triangles. Use a bench scraper or sharp knife to cut the circle into 8 wedges, like a pizza. Honestly, I’ve also used a pizza cutter in a pinch and it worked great.
- Bake. Place the scones on the prepared baking sheet, spacing them about 2 inches apart. Bake for 14-16 minutes, until the edges are lightly golden and the tops look set. They will feel soft—that’s okay. Sensory cue: Your kitchen should smell like a pumpkin spice candle exploded.
- Cool completely. Transfer the scones to a cooling rack and let them cool for at least 15 minutes before glazing. I know it’s hard to wait, but warm glaze just slides right off.
- Make the glaze. While the scones cool, whisk together the powdered sugar, maple syrup, and 1 tablespoon of milk. Add more milk a teaspoon at a time until the glaze is thick but pourable. Drizzle over the cooled scones.
Troubleshooting: If your dough feels too sticky to handle, dust your hands with a little flour. If it’s too dry, add a tablespoon of milk. The first time I made these, I added too much flour and they turned out dense—still tasty, but not as tender. Live and learn!
Cooking Tips & Techniques
I learned most of these tips the hard way—through failed batches and disappointed taste-testers. You’re welcome to benefit from my mistakes.
- Keep everything cold. Cold butter is non-negotiable for tender scones. If your kitchen is warm, chill your mixing bowl and flour for 10 minutes before starting. I once made these on a hot July afternoon and had to refrigerate the dough for 15 minutes before baking.
- Don’t twist the cutter. If you’re using a round cutter instead of cutting triangles, press straight down without twisting. Twisting seals the edges and prevents the scones from rising properly.
- Use a light hand. Overworking the dough develops gluten, which makes scones tough. Mix until just combined, and handle the dough as little as possible. I remind myself this every single time because I’m a naturally aggressive mixer.
- Bake on the middle rack. The middle rack provides the most even heat. I once put them on the top rack and the bottoms burned before the tops were done. Rookie move.
- Double the batch. These freeze beautifully (more on that later), so I always make extra. It’s the same amount of effort for double the payoff.
- Test for doneness with a toothpick. Insert a toothpick into the center of a scone—if it comes out clean or with a few moist crumbs, they’re done. If it’s wet batter, give them another 2 minutes.
Variations & Adaptations
One of the best things about this recipe is how flexible it is. I’ve tried several variations over the years, and here are my favorites:
- Gluten-Free Version: Substitute the all-purpose flour with a 1:1 gluten-free baking flour blend. I’ve used Bob’s Red Mill with great results. Add an extra tablespoon of milk since gluten-free flours tend to absorb more liquid.
- Vegan Adaptation: Use vegan butter, replace the egg with a flax egg (1 tablespoon ground flaxseed mixed with 3 tablespoons water), and use oat milk. The texture is slightly denser but still delicious.
- Chocolate Chip Pumpkin Scones: Fold in 1/2 cup of mini chocolate chips before shaping the dough. My nephew insisted on this version, and honestly, it’s amazing. The chocolate and pumpkin are a surprisingly good match.
- Spiced Cranberry Variation: Add 1/2 cup dried cranberries and an extra 1/4 teaspoon of cinnamon. The tartness cuts through the sweetness beautifully.
- Less Sugar Option: Reduce the sugar in the scones to 1/3 cup and use a lighter drizzle of glaze. The pumpkin provides natural sweetness, so you won’t miss it much.
- Air Fryer Method: Cook at 320°F (160°C) for 8-10 minutes, flipping halfway through. The tops get less golden, but they cook faster and stay incredibly moist.
I personally love the chocolate chip version—it feels like a treat without being over-the-top. My husband swears by the cranberry one, so I usually split the batch and make both.
Serving & Storage Suggestions
These scones are best served slightly warm with a cup of coffee or cold milk. The maple glaze should be set but still soft—that’s the sweet spot.
Serving Ideas:
- For breakfast: Serve with scrambled eggs and fresh fruit for a balanced meal.
- For brunch: Arrange on a platter with other pastries and a bowl of whipped butter.
- For an afternoon snack: Pair with hot apple cider or chai tea.
- For dessert: Warm them up and serve with a scoop of vanilla ice cream—trust me on this.
Storage Instructions:
- Room Temperature: Store in an airtight container for up to 3 days. Place a paper towel in the container to absorb excess moisture.
- Refrigerator: They’ll keep for up to 5 days in the fridge, but the texture will be denser. Reheat in the microwave for 10-15 seconds to restore softness.
- Freezer: Freeze unglazed scones in a single layer on a baking sheet, then transfer to a freezer bag. They’ll keep for up to 3 months. Glaze after thawing and reheating.
Reheating Tips: For the best texture, reheat scones in a 300°F (150°C) oven for 5-7 minutes. The microwave works in a pinch, but the edges can get chewy. If you’re reheating glazed scones, be gentle—the glaze can melt and get sticky.
The flavors actually develop overnight. I honestly prefer these on day two—the pumpkin and spices meld together, and the texture softens just enough to be perfect.
Nutritional Information & Benefits
Here’s the approximate nutritional breakdown per scone (with glaze):
- Calories: 285
- Fat: 10g
- Carbohydrates: 44g
- Protein: 4g
- Fiber: 2g
- Sugar: 24g
Health Benefits: Pumpkin is packed with vitamin A (great for eye health) and fiber. The applesauce reduces the fat content compared to traditional scone recipes, making these a slightly lighter option. Cinnamon may help regulate blood sugar levels, which is a nice bonus when you’re eating something this sweet.
Dietary Considerations: This recipe can be made gluten-free and vegan with simple swaps (see variations above). It contains dairy and gluten in its original form. The sugar content is moderate for a baked good, but you can reduce the glaze for a lighter option.
I’m not a nutritionist, but I feel good about serving these to my family—they’re made with real ingredients, and the pumpkin adds actual nutritional value. That’s more than I can say for most store-bought pastries.
Conclusion
These Kid-Approved Cinnamon Pumpkin Scones with Maple Glaze have become a staple in my kitchen for good reason. They’re easy enough for a Tuesday morning, special enough for a holiday brunch, and forgiving enough for beginner bakers. Plus, they actually get better with time—how many recipes can say that?
I love that this recipe came from a moment of letting go—of letting a kid challenge what I thought I knew. It reminds me that cooking (and life) is more fun when you stay open to surprises. So go ahead, make a mess, let your kids dump in the applesauce, and enjoy every single bite.
If you try these scones, I’d love to hear how they turned out! Drop a comment below with your variations, tag me in your photos, or tell me what your family thought. And if you’re looking for more easy breakfast ideas, check out my easy pumpkin muffins recipe or these simple cinnamon rolls that my nephew also helped develop. Happy baking!
Frequently Asked Questions
Can I use pumpkin pie filling instead of pumpkin puree?
No, please don’t. Pumpkin pie filling has added sugar and spices that will throw off the balance of this recipe. Stick with 100% pure pumpkin puree for the best results. If you only have pie filling, reduce the sugar in the recipe by half and skip the cinnamon and nutmeg—but honestly, it’s better to just buy the right stuff.
Why did my scones turn out dry?
This usually happens for one of two reasons: too much flour or overbaking. Make sure you measure your flour correctly (spoon it into the cup and level it off, don’t scoop directly). Also, check your scones at the 14-minute mark—ovens vary, and those extra two minutes can make a big difference.
Can I make the dough ahead of time?
Absolutely. Shape the scones, place them on a parchment-lined baking sheet, and refrigerate for up to 24 hours. You can even freeze them at this point. When you’re ready to bake, add 2-3 minutes to the baking time if starting from cold, or bake directly from frozen for 16-18 minutes.
What can I use instead of applesauce?
If you don’t have applesauce, you can use an equal amount of mashed banana (this will add banana flavor), Greek yogurt (makes them slightly tangier), or an extra 1/4 cup of pumpkin puree. The texture will vary slightly, but all options work well.
How do I get the glaze to look pretty?
Let the scones cool completely before glazing—warm scones will melt the glaze into a puddle. Use a spoon to drizzle back and forth in a zigzag pattern, or dip the tops directly into the glaze for a more uniform look. If the glaze is too thick, add milk a teaspoon at a time; if too thin, add more powdered sugar.
Pin This Recipe!

Easy Kid-Approved Pumpkin Scones with Maple Glaze

These soft and tender pumpkin scones use a secret applesauce swap for moisture, making them kid-friendly and perfect for fall mornings. Ready in under 35 minutes with a sweet maple glaze.
- Prep Time: 15 minutes
- Cook Time: 16 minutes
- Total Time: 31 minutes
- Yield: 8 servings 1x
- Category: Breakfast
- Cuisine: American
Ingredients
- 2 cups all-purpose flour
- 1/2 cup granulated sugar
- 1 tablespoon baking powder
- 1 teaspoon ground cinnamon
- 1/2 teaspoon ground nutmeg
- 1/4 teaspoon ground ginger
- 1/4 teaspoon salt
- 1/2 cup cold unsalted butter, cut into small cubes
- 1/2 cup pumpkin puree (not pumpkin pie filling)
- 1/4 cup unsweetened applesauce
- 1/4 cup milk (whole milk preferred)
- 1 large egg
- 1 teaspoon vanilla extract
- 1 cup powdered sugar, sifted
- 3 tablespoons pure maple syrup
- 1–2 tablespoons milk (for glaze)
- Pinch of cinnamon (optional, for glaze)
Instructions
- Preheat your oven to 400°F (200°C) and line a baking sheet with parchment paper.
- In a large bowl, whisk together the flour, sugar, baking powder, cinnamon, nutmeg, ginger, and salt.
- Add the cold butter cubes to the flour mixture. Use a pastry cutter or two forks to cut the butter into the flour until it resembles coarse crumbs with pea-sized butter pieces.
- In a separate small bowl, whisk together the pumpkin puree, applesauce, milk, egg, and vanilla extract until smooth.
- Pour the wet ingredients into the dry ingredients and stir with a spatula until just combined. Do not overmix.
- Turn the dough out onto a lightly floured surface. Gently pat it into a circle about 3/4-inch thick and 8 inches across.
- Use a bench scraper or sharp knife to cut the circle into 8 wedges.
- Place the scones on the prepared baking sheet, spacing them about 2 inches apart. Bake for 14-16 minutes, until the edges are lightly golden and the tops look set.
- Transfer the scones to a cooling rack and let them cool for at least 15 minutes before glazing.
- While the scones cool, whisk together the powdered sugar, maple syrup, and 1 tablespoon of milk. Add more milk a teaspoon at a time until the glaze is thick but pourable. Drizzle over the cooled scones.
Notes
Keep butter cold for tender scones. Do not overmix the dough. For best results, let scones cool completely before glazing. Scones can be frozen unglazed for up to 3 months.
Nutrition
- Serving Size: 1 scone
- Calories: 285
- Sugar: 24
- Sodium: 280
- Fat: 10
- Saturated Fat: 6
- Carbohydrates: 44
- Fiber: 2
- Protein: 4
Keywords: pumpkin scones, maple glaze, kid-friendly, fall baking, easy scones, applesauce scones


