Love this? Save it for later!
Share the inspiration with your friends
My neighbor across the hall, a retired baker named Frank, watched me wrestling with a roll of sticky gluten-free dough one December afternoon. He didn’t say anything at first, just leaned against his doorframe with a cup of coffee, a small smile on his face. Finally, he said, “You know, the secret isn’t in the flour blend. It’s in how you treat it.” He disappeared into his apartment and came back with a worn index card, the edges soft and the ink smudged. “Try this,” he said. “It’s my wife’s recipe. She figured out gluten-free long before it was trendy.” That card, with its faded handwriting and a tiny grease stain in the corner, became the foundation for these Easy Gluten-Free Gingerbread House Cookies. Honestly, I was skeptical at first. My previous attempts at gluten-free gingerbread had resulted in cookies that were either as hard as ceramic tiles or crumbled into a sad pile of spiced dust the moment I tried to cut them into walls and roofs. But Frank’s recipe, born from his wife’s decade of trial and error, was different. It was forgiving. The dough held together like a promise, rolled out without cracking, and baked into sturdy, fragrant cookies that tasted like Christmas morning. I’ve tweaked it a little over the years—added a touch more molasses for color, swapped in my favorite 1-to-1 flour blend—but the soul of it is still that little index card. Maybe you’ve been there, staring at a Pinterest board of perfect gingerbread houses, wondering if it’s even possible without gluten. Let me tell you, it is. And it’s easier than you think.
Why You’ll Love This Recipe
These aren’t just any gingerbread cookies. They are the result of a retired baker’s wife’s determination to make a holiday classic inclusive for everyone. I’ve tested this recipe more times than I care to count, tweaking the flour ratios and baking times until it was foolproof. It’s a recipe I’m proud to share.
- Quick & Easy: The dough comes together in under 15 minutes and needs just one hour to chill. From mixing to decorating, you can have a finished house in about two hours.
- Simple Ingredients: No weird gums or hard-to-find starches. You likely have everything you need in your pantry right now—flour, butter, sugar, molasses, and spices.
- Perfect for Holiday Gatherings: This is the ultimate activity for a cozy afternoon with kids, a fun holiday party project, or a thoughtful homemade gift.
- Crowd-Pleaser: Honestly, no one will guess these are gluten-free. They’re that good. The texture is perfectly crisp, and the flavor is deep and warmly spiced.
- Unbelievably Delicious: The secret is in the balance of molasses and brown sugar. It creates a cookie that is sturdy enough to build with but soft enough to enjoy eating.
What makes this recipe different from the rest is its reliability. I’ve spent years perfecting gluten-free baking, and this dough is a dream to work with. It doesn’t crumble, it doesn’t spread, and it bakes flat every single time. It’s the kind of recipe that makes you close your eyes after the first bite—a little bit of holiday magic without the stress.
What Ingredients You Will Need
This recipe uses simple, wholesome ingredients to deliver that classic gingerbread flavor and a texture that holds up beautifully to construction. Most of these are pantry staples, which makes this a perfect last-minute project.
- For the Cookies:
- 2 ½ cups (300g) gluten-free 1-to-1 baking flour blend (I recommend Bob’s Red Mill or King Arthur Measure for Measure for the best results)
- 1 teaspoon baking soda (for lift and crispness)
- ½ teaspoon salt (balances the sweetness)
- 2 teaspoons ground ginger (the star of the show)
- 1 ½ teaspoons ground cinnamon (adds warmth)
- ½ teaspoon ground cloves (for that classic holiday depth)
- ½ teaspoon ground nutmeg (optional, but I love the extra layer)
- ½ cup (113g) unsalted butter, softened (adds richness and tenderness)
- ½ cup (100g) packed brown sugar (adds moisture and a hint of caramel)
- ½ cup (170g) molasses (not blackstrap—use regular for the best flavor and texture)
- 1 large egg, room temperature (binds the dough)
- 1 teaspoon vanilla extract (enhances the spices)
- For the Royal Icing (Glue & Decoration):
- 3 cups (360g) powdered sugar
- 2 large egg whites (or 3 tablespoons meringue powder + 4 tablespoons water)
- 1 teaspoon lemon juice (adds stability and a touch of brightness)
Ingredient Tips: When choosing your flour blend, look for one that contains xanthan gum, as it helps mimic the elasticity of gluten. If your blend doesn’t have it, add 1 teaspoon of xanthan or guar gum. For the molasses, I find that Grandma’s Original works perfectly. It gives the cookies a beautiful dark color and that unmistakable gingerbread taste without being overly bitter.
Equipment Needed
You don’t need a lot of fancy gear to make these cookies, which is part of their charm. Here’s what you’ll need to get started.
- Mixing Bowls: One large bowl for the dry ingredients and one medium bowl for the wet.
- Electric Mixer: A hand mixer or stand mixer works well for creaming the butter and sugar. You can do it by hand, but a mixer makes it much easier.
- Rolling Pin: A standard rolling pin is perfect. If you don’t have one, a wine bottle works in a pinch—just make sure it’s clean!
- Parchment Paper: Absolutely essential for rolling out the dough without sticking and for lining your baking sheets.
- Gingerbread House Cookie Cutters: You can buy a set online or at most kitchen stores. A basic set includes a base, walls, and roof pieces.
- Baking Sheets: At least two, so you can bake multiple sheets at once or let one cool while the other bakes.
- Piping Bags or Ziploc Bags: For the royal icing. A small round tip (like a #2 or #3) is great for detail work.
Budget Tip: If you don’t have gingerbread house cutters, you can print a template online, cut it out, and use a sharp knife to trace the shapes onto the rolled-out dough. It takes a little more time, but it works beautifully.
Preparation Method
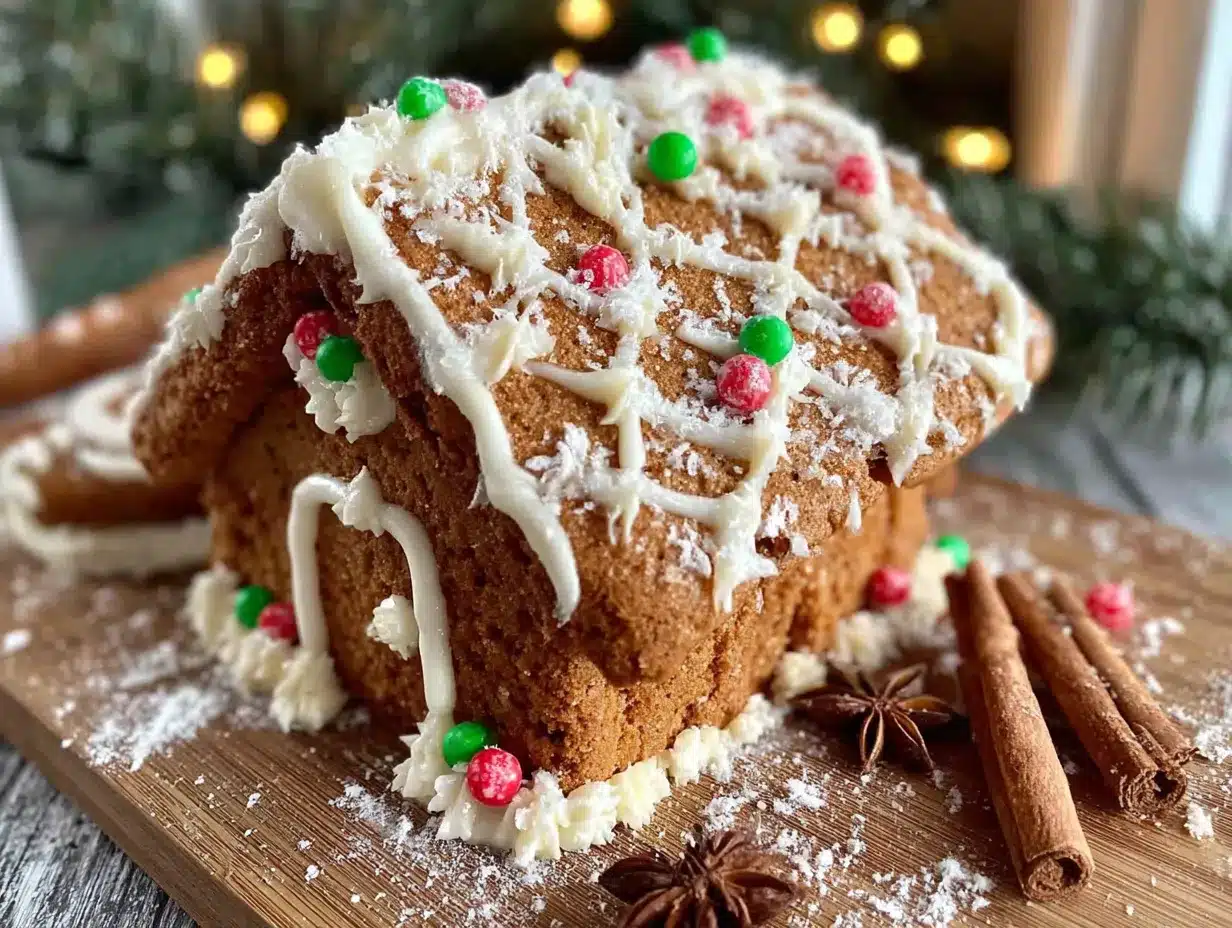
Making these cookies is a straightforward process, but a few key steps will ensure your house is a success. Take your time, and don’t rush the chilling.
- Mix the Dry Ingredients: In a medium bowl, whisk together the gluten-free flour, baking soda, salt, ginger, cinnamon, cloves, and nutmeg. Set this aside. This step ensures the spices are evenly distributed throughout the dough.
- Cream the Butter and Sugar: In a large bowl, beat the softened butter and brown sugar together with an electric mixer on medium speed until light and fluffy, about 2-3 minutes. Scrape down the sides of the bowl as needed.
- Add the Wet Ingredients: Beat in the molasses, egg, and vanilla extract until well combined. The mixture might look a little separated at this point—that’s totally fine. It will come together when you add the dry ingredients.
- Combine Wet and Dry: Gradually add the dry ingredients to the wet mixture, mixing on low speed until a soft dough forms. The dough will be slightly sticky but should hold together when pressed. If it feels too sticky, add an extra tablespoon of flour. If it’s too dry, add a teaspoon of water.
- Chill the Dough: Divide the dough in half, flatten each half into a disc, wrap tightly in plastic wrap, and refrigerate for at least 1 hour. This is a non-negotiable step. Chilling solidifies the fat, prevents spreading, and makes the dough much easier to roll out without cracking.
- Preheat and Prep: When you’re ready to bake, preheat your oven to 350°F (175°C). Line two baking sheets with parchment paper.
- Roll Out the Dough: Place one disc of dough between two large sheets of parchment paper. Roll it out to about ¼-inch (6mm) thickness. Rolling between parchment means you won’t need extra flour, which can dry out the dough. If the edges crack, just pinch them back together.
- Cut Out the Shapes: Using your gingerbread house cutters, cut out the shapes. For a standard house, you’ll need two wall pieces, two roof pieces, and one base. You can also cut out small windows and a door for extra charm. Use a spatula to transfer the cutouts to the prepared baking sheets, leaving about an inch between each cookie.
- Bake: Bake for 10-12 minutes, or until the edges are just firm and the centers look set. The cookies will still be slightly soft to the touch but will firm up as they cool. For extra-sturdy walls, you can bake them for 12 minutes, but watch them closely so they don’t burn.
- Cool Completely: Let the cookies cool on the baking sheet for 5 minutes, then transfer them to a wire rack to cool completely. This is crucial. If you try to move them too soon, they will break. Patience is a virtue here!
Cooking Tips & Techniques
I’ve made plenty of mistakes with gingerbread houses over the years, so you don’t have to. Here are the lessons I learned the hard way.
The Dough Temperature is Everything. If your dough gets too warm while you’re rolling it out, it becomes sticky and difficult to handle. If that happens, just pop it back in the fridge for 10-15 minutes. Cold dough is happy dough. I once tried to rush this step and ended up with a sticky mess that I had to scrap entirely. Learn from my impatience!
Use a Sharp Cutter. A dull cutter will drag the dough and distort the shapes. If your cutters aren’t super sharp, you can dip them in a little gluten-free flour before each cut to help them slice cleanly. For the cleanest edges, press straight down and pull straight up—don’t twist.
Bake in Batches. If you’re making a big house or multiple houses, bake the cookies in batches and let the baking sheets cool completely between batches. Putting dough onto a hot sheet will cause the butter to melt immediately, leading to spreading and misshapen cookies.
The Royal Icing Glue Trick. For the strongest hold, let your royal icing sit for about 5 minutes after mixing. This allows the air bubbles to rise to the surface. When you pipe it, use a thick, steady line. Hold each piece in place for about 30 seconds to let the icing set before moving on. If you’re building a complex house, let the walls dry for 15-20 minutes before adding the roof.
My Biggest Failure: The first time I made these, I didn’t chill the dough long enough. The cookies spread into weird, thin blobs that looked nothing like a house. I ended up eating the evidence and starting over. Now, I always set a timer for the chilling step. It’s a small thing that makes a world of difference.
Variations & Adaptations
One of the best things about this recipe is how adaptable it is. You can tweak it to fit your diet, your taste, or the occasion.
- Vegan Gingerbread: Swap the butter for a high-quality vegan butter (like Earth Balance) and use a flax egg (1 tablespoon ground flaxseed mixed with 3 tablespoons water, let sit for 5 minutes). The texture will be slightly less tender, but the flavor is still spot-on.
- Spice It Up: For a bolder gingerbread, add an extra teaspoon of fresh grated ginger to the wet ingredients. Or, add a pinch of black pepper for a subtle, warm kick that’s surprisingly good.
- Chocolate Gingerbread: Replace ¼ cup (30g) of the gluten-free flour with ¼ cup (20g) of unsweetened cocoa powder. This creates a rich, dark chocolate gingerbread that’s perfect for a Halloween haunted house or a wintery twist.
- Mini Cookie Houses: Use smaller cutters to create individual cookie houses. These are perfect for party favors or for kids to decorate on their own. The baking time will be shorter, around 8-10 minutes.
- No Molasses? If you’re out of molasses, you can substitute it with an equal amount of honey or maple syrup. The cookies will be a little lighter in color and flavor, but they’ll still be delicious and sturdy enough to build with.
I once tried a version with a pinch of cayenne pepper, and it was surprisingly addictive. It gave the cookies a little warmth that lingered on the tongue. Don’t be afraid to experiment!
Serving & Storage Suggestions
These gingerbread house cookies are best enjoyed as a centerpiece, but they’re also wonderful for snacking. Here’s how to handle them.
Serving: Once assembled, your gingerbread house makes a beautiful holiday decoration. You can display it on a cake stand or a large platter. If you’re serving the cookies on their own (without building a house), they’re perfect with a cup of hot cocoa, mulled cider, or a strong cup of coffee. The spices pair beautifully with a scoop of vanilla ice cream, too.
Storage: Baked, undecorated cookies can be stored in an airtight container at room temperature for up to 2 weeks. Layer them between sheets of parchment paper to prevent them from breaking. If you’ve already built a house, it’s best to keep it in a cool, dry place away from direct sunlight. The royal icing acts as a preservative, so the house can last for several weeks.
Freezing: You can freeze the raw dough for up to 3 months. Wrap it tightly in plastic wrap and then in a layer of foil. When you’re ready to bake, thaw it in the refrigerator overnight and then proceed with rolling and cutting. Baked cookies also freeze well for up to 3 months. Just thaw them at room temperature before decorating.
Reheating: If your cookies have lost a bit of their crispness, you can pop them in a 300°F (150°C) oven for 3-5 minutes. Let them cool completely before decorating. The flavor actually improves over a day or two, as the spices have time to meld together.
Nutritional Information & Benefits
While these are a treat, they do offer a few surprising benefits. Here’s a quick look at what’s in a single undecorated cookie (based on a standard wall piece).
Estimated Nutrition (per cookie): Calories: 120 | Fat: 4g | Carbs: 20g | Fiber: 1g | Sugar: 10g | Protein: 2g
Health Highlights: The molasses is a good source of iron, calcium, and magnesium. It also has a lower glycemic index than refined sugar, meaning it doesn’t spike your blood sugar as dramatically. The ginger and cinnamon are both known for their anti-inflammatory properties. So, while you shouldn’t eat a whole house in one sitting, you can feel a little better about enjoying a piece or two.
Dietary Considerations: This recipe is naturally gluten-free (when using a certified gluten-free flour blend) and can easily be made dairy-free and vegan with the substitutions mentioned above. It contains eggs and nuts (if your flour blend contains almond flour), so be sure to check your labels if you have allergies.
I love that I can share these with my friends who have celiac disease or gluten sensitivities without them feeling left out during the holidays. It’s a small way to make everyone feel included.
Conclusion
These Easy Gluten-Free Gingerbread House Cookies are more than just a recipe. They’re a way to create a little bit of holiday magic without the stress and frustration that often comes with gluten-free baking. They’re sturdy, flavorful, and forgiving—everything you could want in a holiday project. Whether you’re building a grand masterpiece or just baking a batch of spiced cookies to enjoy with your morning coffee, this recipe is one you’ll come back to year after year.
I encourage you to make this recipe your own. Add extra spice, swap in your favorite flour blend, or go wild with the decorations. The best part of baking is making it yours. I’d love to hear how your gingerbread house turns out! Drop a comment below and share a photo of your creation. Happy baking, and may your holidays be filled with warmth, laughter, and the smell of gingerbread.
Frequently Asked Questions
Can I use a different gluten-free flour blend?
Absolutely! I recommend a 1-to-1 blend that contains xanthan gum for the best texture. Brands like Bob’s Red Mill, King Arthur Measure for Measure, and Cup4Cup all work wonderfully. If you use a single flour like almond or coconut, the results will be different, so stick with a blend for this recipe.
My dough is cracking when I roll it out. What should I do?
This usually means the dough is too cold or too dry. Let it sit at room temperature for 5-10 minutes to soften slightly. If it’s still cracking, you can knead in a teaspoon of water at a time until it comes together. Rolling between two sheets of parchment paper also helps prevent cracking.
How do I get my royal icing to be the right consistency for piping?
For outlining and gluing the house together, you want a stiff consistency—like toothpaste. For flooding (filling in large areas), you want a slightly thinner consistency—like honey. To thin it, add a few drops of water at a time. To thicken it, add a little more powdered sugar.
Can I make the dough ahead of time?
Yes! The dough can be made up to 3 days in advance and stored in the refrigerator. Just make sure it’s tightly wrapped in plastic wrap so it doesn’t dry out. You can also freeze the dough for up to 3 months.
My cookies spread in the oven. What went wrong?
This is almost always a temperature issue. Make sure your dough is well-chilled before baking. Also, check that your butter isn’t too soft when you start. If the kitchen is warm, you might need to chill the cut-out cookies on the baking sheet for 10 minutes before putting them in the oven.
Pin This Recipe!
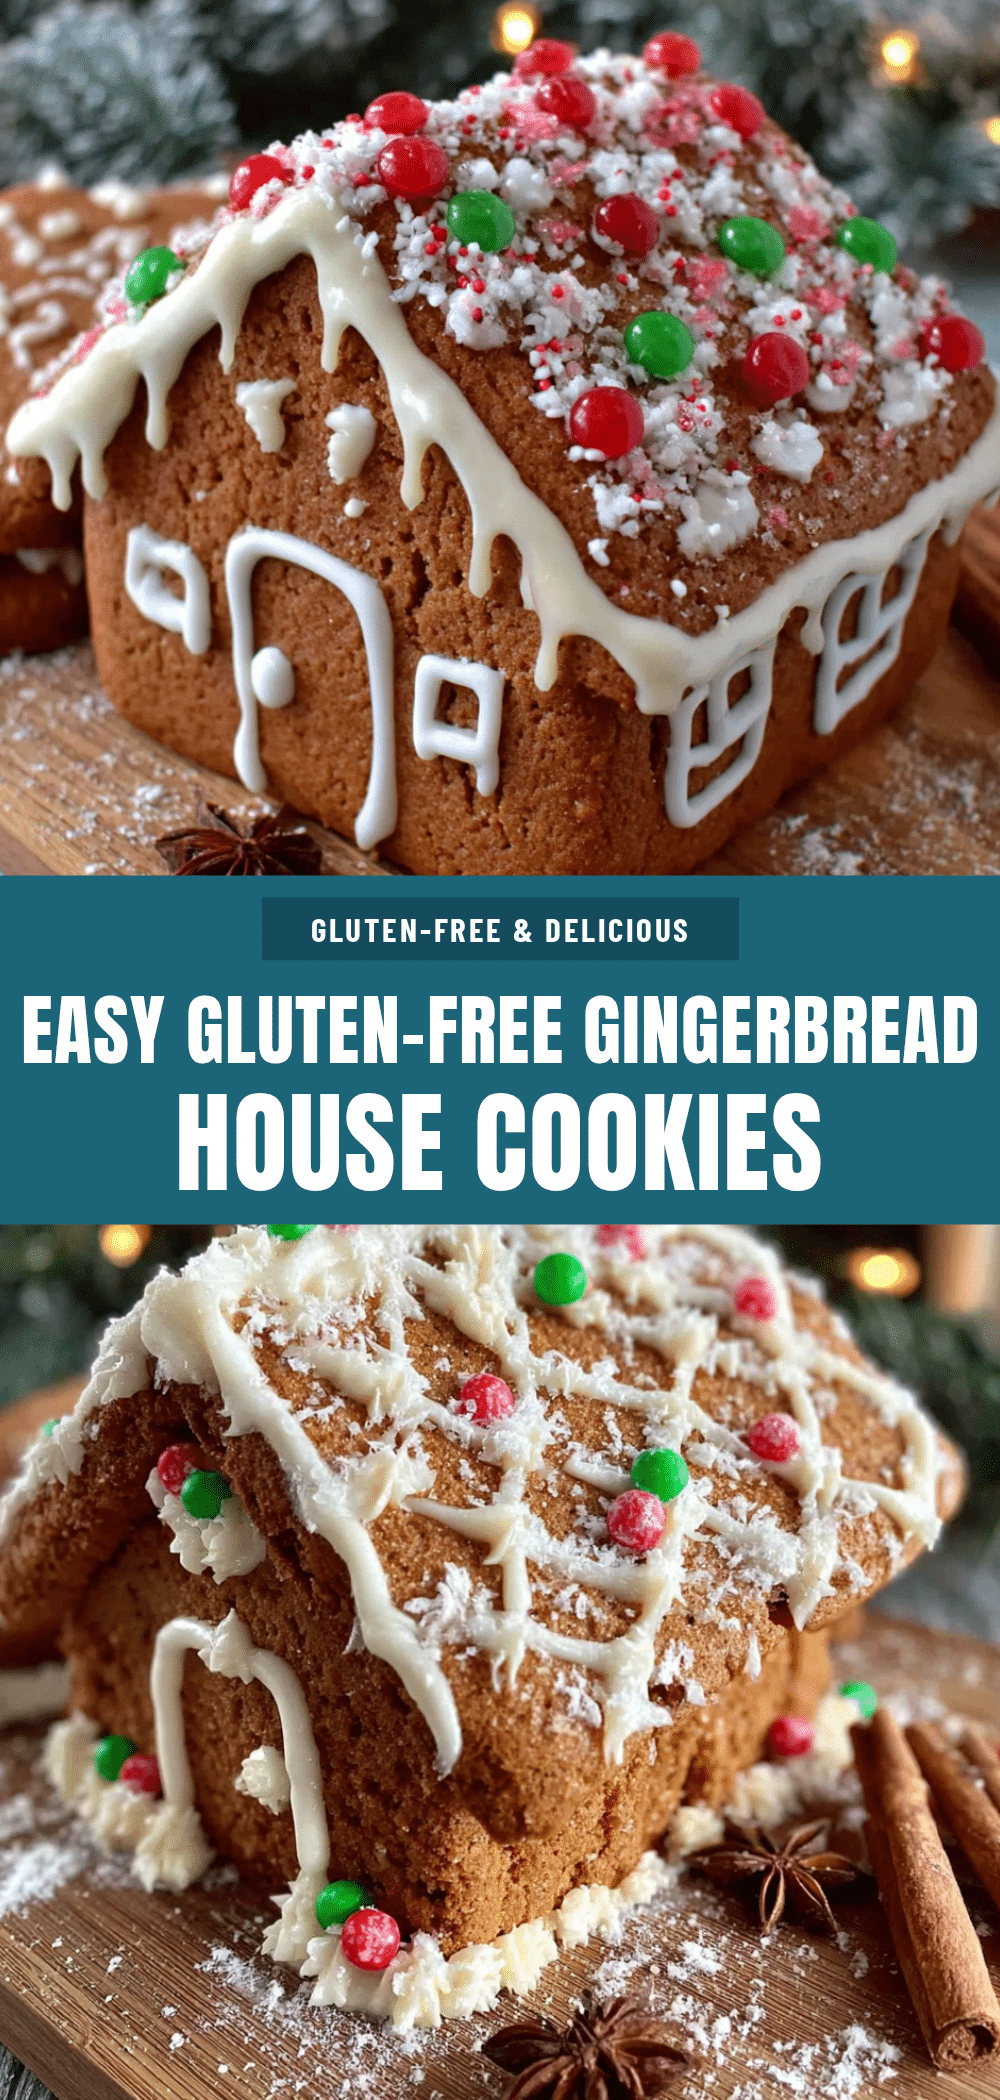
Easy Gluten-Free Gingerbread House Cookies

These sturdy, flavorful gluten-free gingerbread cookies are perfect for building holiday houses. The forgiving dough rolls out without cracking and bakes into fragrant cookies that taste like Christmas morning.
- Prep Time: 15 minutes
- Cook Time: 12 minutes
- Total Time: 1 hour 27 minutes (including 1 hour chilling)
- Yield: 24 cookies (enough for 1-2 houses) 1x
- Category: Dessert
- Cuisine: American
Ingredients
- 2 ½ cups (300g) gluten-free 1-to-1 baking flour blend (e.g., Bob’s Red Mill or King Arthur Measure for Measure)
- 1 teaspoon baking soda
- ½ teaspoon salt
- 2 teaspoons ground ginger
- 1 ½ teaspoons ground cinnamon
- ½ teaspoon ground cloves
- ½ teaspoon ground nutmeg (optional)
- ½ cup (113g) unsalted butter, softened
- ½ cup (100g) packed brown sugar
- ½ cup (170g) molasses (not blackstrap)
- 1 large egg, room temperature
- 1 teaspoon vanilla extract
- 3 cups (360g) powdered sugar
- 2 large egg whites (or 3 tablespoons meringue powder + 4 tablespoons water)
- 1 teaspoon lemon juice
Instructions
- Mix the Dry Ingredients: In a medium bowl, whisk together the gluten-free flour, baking soda, salt, ginger, cinnamon, cloves, and nutmeg. Set aside.
- Cream the Butter and Sugar: In a large bowl, beat the softened butter and brown sugar together with an electric mixer on medium speed until light and fluffy, about 2-3 minutes. Scrape down the sides of the bowl as needed.
- Add the Wet Ingredients: Beat in the molasses, egg, and vanilla extract until well combined. The mixture might look a little separated at this point—that’s totally fine. It will come together when you add the dry ingredients.
- Combine Wet and Dry: Gradually add the dry ingredients to the wet mixture, mixing on low speed until a soft dough forms. The dough will be slightly sticky but should hold together when pressed. If it feels too sticky, add an extra tablespoon of flour. If it’s too dry, add a teaspoon of water.
- Chill the Dough: Divide the dough in half, flatten each half into a disc, wrap tightly in plastic wrap, and refrigerate for at least 1 hour. This is a non-negotiable step. Chilling solidifies the fat, prevents spreading, and makes the dough much easier to roll out without cracking.
- Preheat and Prep: When you’re ready to bake, preheat your oven to 350°F (175°C). Line two baking sheets with parchment paper.
- Roll Out the Dough: Place one disc of dough between two large sheets of parchment paper. Roll it out to about ¼-inch (6mm) thickness. Rolling between parchment means you won’t need extra flour, which can dry out the dough. If the edges crack, just pinch them back together.
- Cut Out the Shapes: Using your gingerbread house cutters, cut out the shapes. For a standard house, you’ll need two wall pieces, two roof pieces, and one base. You can also cut out small windows and a door for extra charm. Use a spatula to transfer the cutouts to the prepared baking sheets, leaving about an inch between each cookie.
- Bake: Bake for 10-12 minutes, or until the edges are just firm and the centers look set. The cookies will still be slightly soft to the touch but will firm up as they cool. For extra-sturdy walls, you can bake them for 12 minutes, but watch them closely so they don’t burn.
- Cool Completely: Let the cookies cool on the baking sheet for 5 minutes, then transfer them to a wire rack to cool completely. This is crucial. If you try to move them too soon, they will break. Patience is a virtue here!
Notes
For the strongest hold, let royal icing sit for 5 minutes after mixing to allow air bubbles to rise. Pipe a thick, steady line and hold each piece in place for about 30 seconds. If building a complex house, let walls dry for 15-20 minutes before adding the roof. If dough gets too warm while rolling, pop it back in the fridge for 10-15 minutes. For cleanest edges, press cutter straight down and pull straight up—don’t twist.
Nutrition
- Serving Size: 1 undecorated cookie
- Calories: 120
- Sugar: 10
- Sodium: 120
- Fat: 4
- Saturated Fat: 2
- Carbohydrates: 20
- Fiber: 1
- Protein: 2
Keywords: gluten-free gingerbread, gingerbread house cookies, gluten-free Christmas cookies, holiday baking, gingerbread house, gluten-free gingerbread house