Love this? Save it for later!
Share the inspiration with your friends
This was supposed to be a classic French meringue—the kind you pipe into neat little kisses for afternoon tea. I had everything measured out, the eggs were at room temperature, and I was feeling pretty good about myself. Then I grabbed the cocoa powder instead of the cornstarch (they’re right next to each other in my pantry, which is a design flaw I keep meaning to fix), the mixer was on way too high a speed, and I was already running late for a phone call with my sister. What came out was nothing like the plan—and better.
The meringue was too stiff, almost dry, and when I tried to pipe those perfect little kisses, they came out looking like lumpy ghosts. Honestly, I almost scraped the whole batch into the trash. But I had spent good eggs on this, and I was stubborn. I piped them anyway, popped them in the oven, and walked away. When I came back an hour later, I had a baking sheet full of the most adorable, slightly lopsided little ghost shapes you’ve ever seen. My niece named them “spooky ghosts” that Halloween, and now I can’t make meringues any other way.
These ghost meringue cookies are crispy on the outside, chewy in the middle, and so light they practically float off the plate. They’re the perfect Halloween treat—scary cute, not scary complicated. Maybe you’ve been there, staring at a kitchen disaster and wondering if you should just order pizza. Trust me, sometimes the mistakes turn into the best recipes. And honestly, these little ghosts have become my most requested Halloween bake.
Why You’ll Love This Recipe
I’ve tested this recipe about a dozen times—through humid summer days, dry winter afternoons, and one particularly disastrous attempt with a hand mixer that was on its last legs. Here’s why this version works every single time:
- Quick & Easy: You only need 15 minutes of active prep time. The oven does the rest of the work while you focus on costume prep or pumpkin carving.
- Simple Ingredients: Egg whites, sugar, cream of tartar, and vanilla. That’s it. No fancy grocery trips, no specialty baking aisles.
- Perfect for Halloween Parties: These are the star of any spooky spread. Kids love them, adults sneak them when no one’s looking.
- Crowd-Pleaser: Gluten-free, low-fat, and naturally dairy-free. They work for almost every dietary restriction.
- Unbelievably Delicious: The texture is this perfect combination of airy crunch and melt-in-your-mouth softness. The vanilla flavor is subtle but so satisfying.
What makes this recipe different from all the other meringue recipes out there? It’s the technique. I learned the hard way that over-whipping meringue is actually a good thing for ghost shapes—it gives you that stiff, stable structure that holds its shape. Most recipes tell you to stop at stiff peaks, but for ghosts, you want to go just a tiny bit further. It’s a hack I stumbled into by accident, and it works beautifully.
This isn’t just another meringue cookie. It’s the kind that makes you close your eyes after the first bite. The kind that turns a simple Halloween snack into something memorable. Perfect for impressing guests without stress, or for making a rainy October afternoon feel special.
What Ingredients You Will Need
This recipe uses simple, pantry-friendly ingredients to deliver that signature light-as-air texture and sweet vanilla flavor. Here’s what you’ll need:
For the Meringue Base
- 4 large egg whites, room temperature (cold eggs won’t whip as high; leave them out for 30 minutes)
- 1 cup (200g) granulated sugar (I recommend Domino or C&H for consistent results)
- 1/4 teaspoon cream of tartar (this stabilizes the meringue and prevents weeping)
- 1 teaspoon vanilla extract (pure, not imitation—trust me on this)
- Pinch of salt (just a tiny one, to balance the sweetness)
For the Ghost Faces
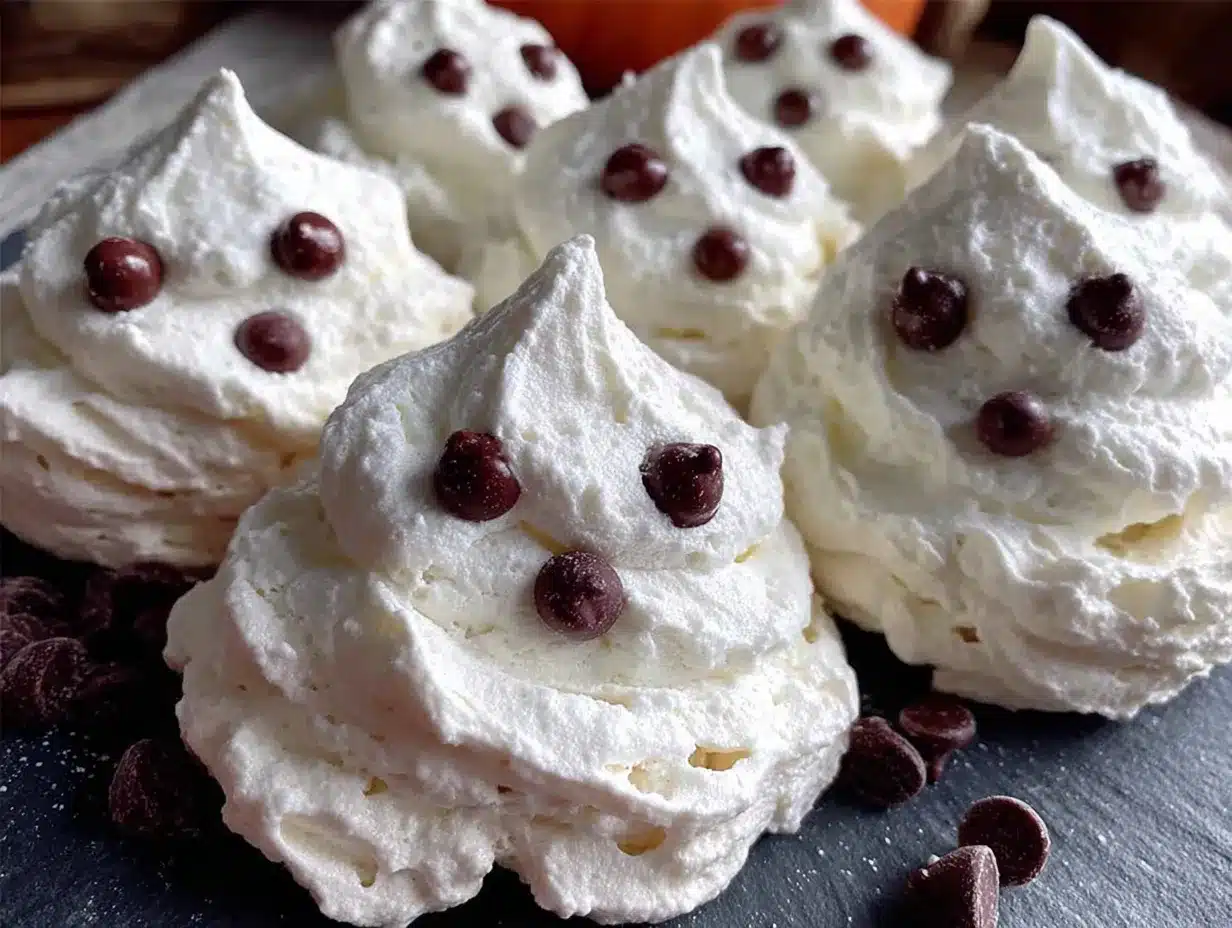
- 1/4 cup (60g) mini chocolate chips (for eyes and mouths; you can also use black sanding sugar or edible markers)
- Optional: 1-2 drops black gel food coloring (if you want to paint faces instead of using chips)
Ingredient Tips & Substitutions:
- For the best texture, use fresh eggs. Older egg whites whip up higher, but they’re also more prone to collapsing. I use eggs that are about a week old.
- Can’t find cream of tartar? Substitute 1 teaspoon of lemon juice or white vinegar. It does the same job of stabilizing the egg whites.
- For a vanilla bean version, scrape the seeds from half a vanilla bean and add them with the sugar. It’s a splurge, but the speckled look is gorgeous.
- If you’re avoiding refined sugar, try superfine baker’s sugar or even powdered monk fruit sweetener (though the texture will be slightly different).
Equipment Needed
- Electric stand mixer or hand mixer (whipping meringue by hand is possible, but your arm will hate you—I speak from experience)
- Large mixing bowl (glass or metal; plastic bowls can hold onto grease)
- Baking sheet (I use a Nordic Ware half-sheet pan)
- Parchment paper (silicone baking mats work too, but parchment gives better browning)
- Piping bag with a round tip (a zip-top bag with the corner snipped off works in a pinch)
- Cooling rack
If you don’t have a piping bag, don’t stress. You can spoon the meringue into ghost-shaped dollops directly on the parchment. They won’t be as uniform, but they’ll be just as delicious. I’ve done it both ways, and honestly, the spooned ones have more personality.
Preparation Method
- Preheat your oven to 200°F (93°C). Yes, this is very low. We’re drying the meringues, not baking them. Line a large baking sheet with parchment paper.
- Clean your mixing bowl and whisk attachment thoroughly. Any trace of grease or yolk will prevent the egg whites from whipping properly. I wipe mine down with a bit of lemon juice on a paper towel—old baker’s trick.
- Separate the eggs while they’re cold. Cold yolks are firmer and less likely to break. Separate each egg white into a small bowl first, then transfer to your mixing bowl. This way, if one yolk breaks, you don’t ruin the whole batch. I learned this the hard way after three broken yolks in a row.
- Let the egg whites come to room temperature. This takes about 30 minutes. Don’t rush this step—cold egg whites won’t whip to their full volume. Use this time to measure out your sugar and set up your piping bag.
- Add the cream of tartar and salt to the egg whites. Start whipping on medium speed. After about 2 minutes, you’ll see soft, foamy bubbles. This is the “foamy stage.”
- Increase speed to medium-high. When the whites form soft peaks that flop over when you lift the whisk, start adding the sugar. Add it one tablespoon at a time, waiting about 15 seconds between each addition. This gradual addition is crucial—dumping all the sugar at once will deflate your meringue.
- Keep whipping on high speed. After all the sugar is added, continue whipping for another 5-7 minutes. The meringue should be glossy, stiff, and hold a firm peak when you lift the whisk. Here’s the test: rub a tiny bit between your fingers. If it feels gritty, keep whipping. If it’s smooth, you’re done. For ghost shapes, whip just until the meringue starts to look slightly dry—about 30 seconds past the “smooth” stage.
- Add the vanilla extract. Fold it in gently with a spatula. Don’t overmix, or you’ll deflate all that lovely air.
- Transfer the meringue to your piping bag. If using a zip-top bag, snip about 1/2 inch off one corner. No tip needed—just a straight cut works fine for ghost shapes.
- Pipe the ghosts. Hold the bag perpendicular to the baking sheet. Apply steady pressure to create a round base, then lift the bag straight up while reducing pressure to form a tall, tapered top. Release pressure and pull away. Each ghost should be about 2 inches tall. Leave about 1 inch between them—they don’t spread much, but they need airflow.
- Add the faces immediately. While the meringue is still wet, gently press two mini chocolate chips for eyes and one or two for a mouth. Don’t push too hard, or you’ll deflate the ghost. If you’re using an edible marker, wait until the meringues are completely cool.
- Bake for 60-75 minutes. The meringues should be dry to the touch and easily lift off the parchment. They shouldn’t be browned at all—if they start to color, your oven is too hot. Turn it down by 25 degrees.
- Turn off the oven and leave the meringues inside for another 30 minutes. This helps them dry out completely and prevents that sticky, chewy center. Propped the oven door open with a wooden spoon handle to let moisture escape.
- Cool completely on the baking sheet. Don’t try to move them while they’re warm—they’re fragile and will crumble. Once completely cool, transfer to a wire rack.
Cooking Tips & Techniques
I’ve made this recipe more times than I care to count, and I’ve learned a few things the hard way. Here’s what I wish someone had told me:
Humidity is the enemy. Meringue is basically sugar and air, and sugar loves water. If it’s a rainy day, your meringues might come out sticky or flat. Save this recipe for a dry day, or run a dehumidifier in your kitchen for an hour before you start. I once tried making these during a thunderstorm, and they came out looking like sad, flat pancakes. Never again.
Don’t overbake, but don’t underbake either. The perfect meringue is dry on the outside and slightly chewy on the inside. If you bake them too long, they’ll be crunchy all the way through. If you underbake them, they’ll stick to the parchment and collapse. The 60-75 minute range is a guideline—check them at 60 minutes and go from there.
Timing is everything. Start your meringues early in the day. They need to cool completely in the oven, which adds another 30 minutes. Plus, they’re best when they’ve had a few hours to set up. I usually make these in the morning for a Halloween party that evening.
One mistake I made: I once tried to double the batch and use a smaller bowl. The meringue didn’t have enough room to expand, and I ended up with a sticky, sugary mess. Use a large bowl, and don’t overcrowd your baking sheets. Give those ghosts room to breathe.
Variations & Adaptations
These ghost meringues are endlessly customizable. Here are some variations I’ve tried:
Chocolate Ghosts
Replace 2 tablespoons of the sugar with unsweetened cocoa powder. Sift it in with the cream of tartar. The ghosts will be a pale brown, which is actually pretty spooky. I made these for a haunted house party, and they looked like little mud ghosts.
Peppermint Ghosts
Add 1/2 teaspoon peppermint extract along with the vanilla. Crush a few candy canes and sprinkle them on top before baking. These are perfect for a Christmas-themed Halloween party or for using up holiday candy.
Vegan Ghosts
Use aquafaba (the liquid from a can of chickpeas) instead of egg whites. You’ll need about 1/2 cup of aquafaba for this recipe. Whip it with cream of tartar just like egg whites. The texture is slightly different—more marshmallow-like—but still delicious. I tried this for a vegan friend’s Halloween party, and nobody could tell the difference.
Spicy Ghosts
Add 1/4 teaspoon of cinnamon and a pinch of cayenne pepper to the sugar before whipping. The heat sneaks up on you, which is very on-brand for Halloween. My brother-in-law calls these “angry ghosts.”
Serving & Storage Suggestions
These ghost meringues are best served at room temperature. Arrange them on a platter with some fake spiderwebs or dry ice for a spooky effect. They look amazing on a tiered cake stand surrounded by candy corn and pumpkin-shaped candies.
For a Halloween party, I like to serve them alongside hot chocolate or apple cider. The sweetness of the meringue balances the tartness of the cider perfectly. They’re also great crumbled over vanilla ice cream for a “spooky sundae.”
Storage: Keep your ghost meringues in an airtight container at room temperature. They’ll stay fresh for up to 2 weeks. Don’t refrigerate them—the humidity will make them sticky. If you live in a humid climate, add a silica gel packet to the container to keep them crisp.
Freezing: You can freeze baked meringues for up to 3 months. Layer them between sheets of parchment paper in a freezer-safe container. Thaw at room temperature for about 30 minutes before serving. The texture will be slightly softer, but still delicious.
One thing worth noting: these meringues actually get better after a day or two. The flavors meld, and the texture becomes perfectly crisp on the outside and chewy on the inside. So don’t be afraid to make them ahead of time.
Nutritional Information & Benefits
Per ghost meringue (based on 24 cookies):
- Calories: 35
- Fat: 0g
- Carbohydrates: 8g
- Sugar: 8g
- Protein: 1g
- Sodium: 10mg
These ghost meringues are naturally gluten-free, dairy-free, and low in fat. They’re a lighter alternative to traditional Halloween treats like candy bars or cupcakes. The egg whites provide a small amount of protein, and the vanilla offers a touch of antioxidant benefits.
From a wellness perspective, I love that these cookies satisfy my sweet tooth without leaving me feeling heavy or sluggish. They’re perfect for parties where you want something indulgent but not overly decadent. Plus, they’re fun to make with kids—just be prepared for a lot of giggling over the ghost faces.
Allergen Note: This recipe contains eggs. It is free of nuts, soy, and gluten. If you use the vegan aquafaba version, it’s completely egg-free.
Conclusion
These ghost meringue cookies started as a happy accident, but they’ve become a Halloween tradition in my house. They’re proof that sometimes the best recipes come from mistakes, and that a little kitchen disaster can turn into something truly magical. I love how simple they are—just a few ingredients, a little patience, and you’ve got a platter full of spooky, adorable treats.
I encourage you to make these your own. Play with the faces, try different flavors, and don’t worry if they come out a little lopsided. That’s part of their charm. Every batch is different, and that’s what makes them special.
If you make these ghost meringues, I’d love to hear about it. Leave a comment below with your favorite variation, or tag me in your photos on social media. Happy Halloween, and happy baking!
Frequently Asked Questions
Can I make these ghost meringues in advance?
Absolutely! These cookies store beautifully for up to 2 weeks in an airtight container at room temperature. They’re actually perfect for make-ahead Halloween party prep.
Why did my meringue turn out flat?
Flat meringue usually means one of three things: your bowl wasn’t clean, there was a trace of egg yolk in the whites, or it was a humid day. Make sure your equipment is spotless and grease-free, and save this recipe for a dry day.
Can I use liquid egg whites from a carton?
I don’t recommend it. Carton egg whites are pasteurized, which changes the protein structure and makes them harder to whip to stiff peaks. Fresh egg whites give you the best volume and texture.
How do I know when the meringue is whipped enough?
Rub a tiny bit between your fingers. If it feels smooth and not gritty, it’s done. The meringue should also hold a stiff peak when you lift the whisk—the peak should stand straight up without drooping.
Can I add food coloring to make colored ghosts?
Yes! Use gel food coloring, not liquid, because liquid will deflate your meringue. Add it at the same time as the vanilla and fold gently. Purple, orange, or green ghosts are especially fun for Halloween.
Pin This Recipe!
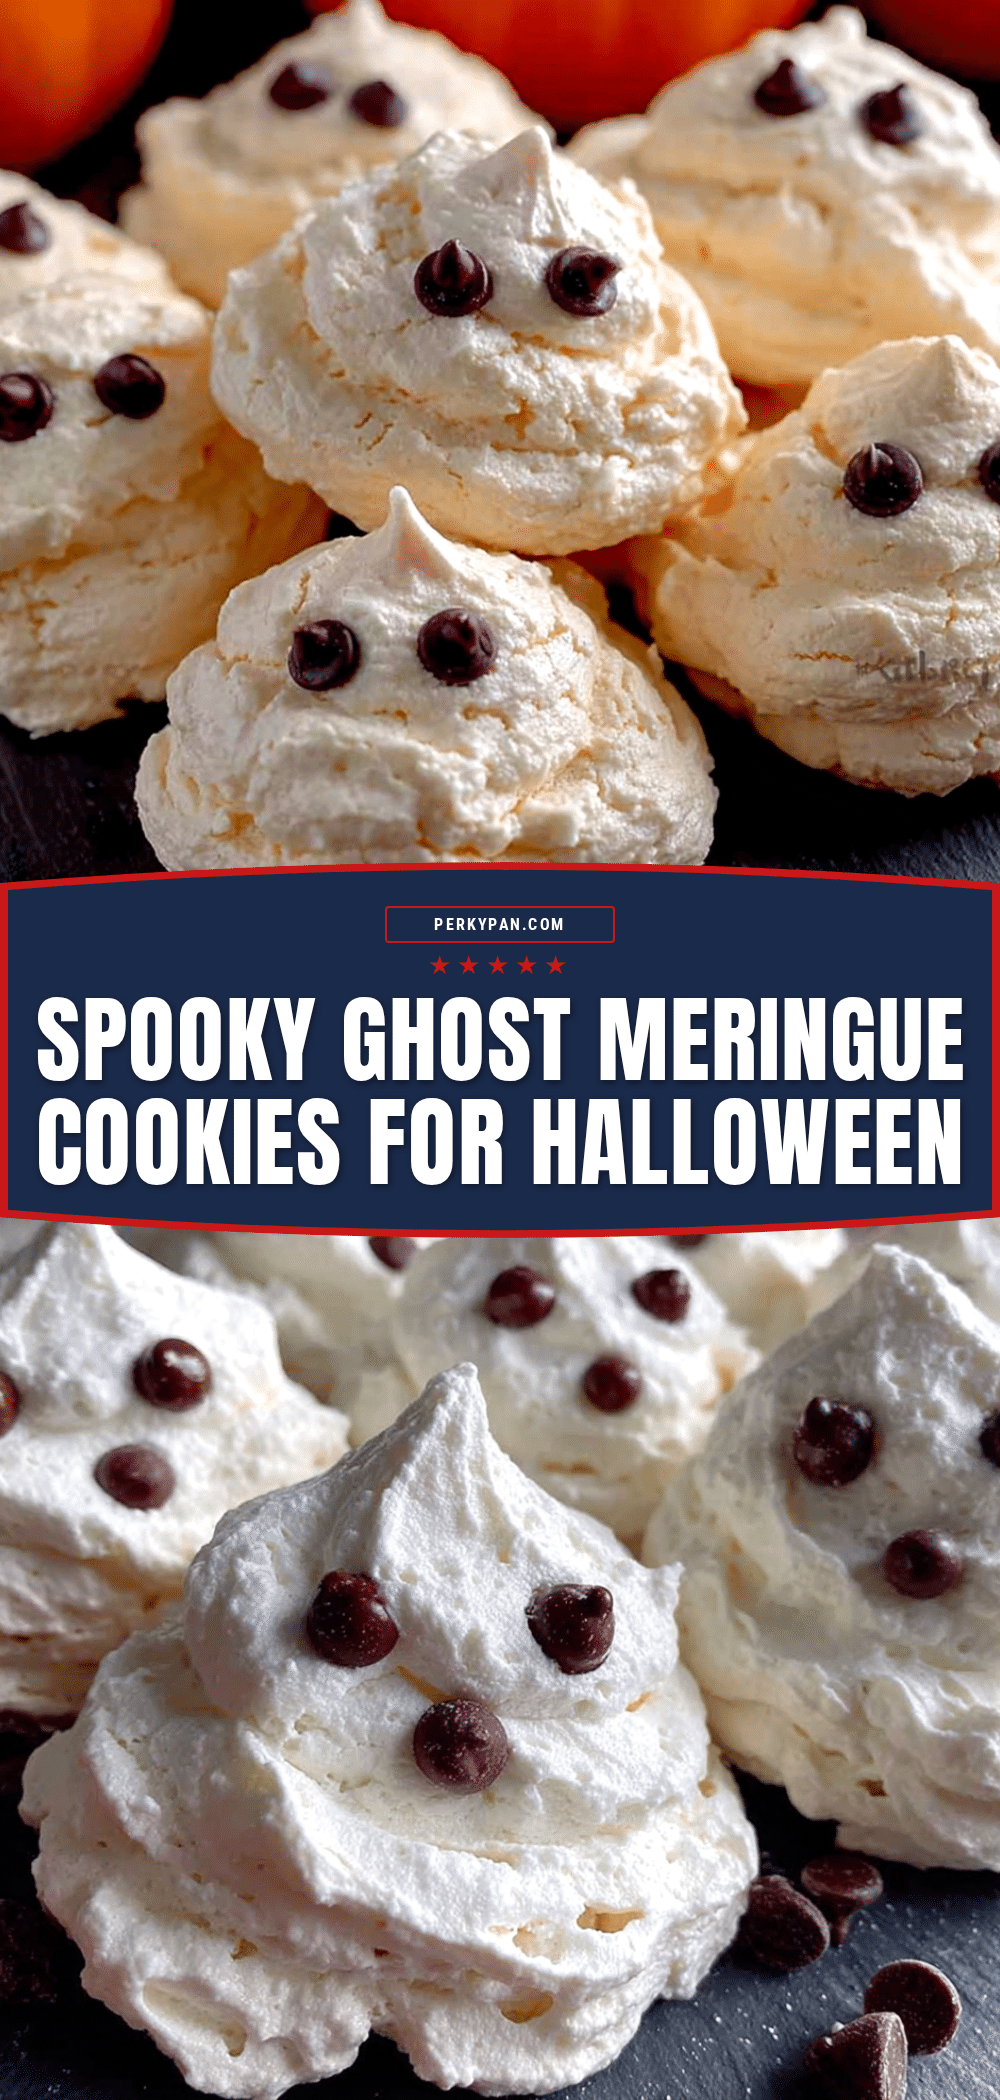
Easy Ghost Meringue Cookies: Best Spooky Halloween Treat
These ghost meringue cookies are crispy on the outside, chewy in the middle, and so light they practically float off the plate. They’re the perfect Halloween treat—scary cute, not scary complicated.
- Prep Time: 15 minutes
- Cook Time: 60-75 minutes
- Total Time: 1 hour 45 minutes (including cooling in oven)
- Yield: 24 cookies 1x
- Category: Dessert
- Cuisine: American
Ingredients
- 4 large egg whites, room temperature
- 1 cup (200g) granulated sugar
- 1/4 teaspoon cream of tartar
- 1 teaspoon vanilla extract (pure)
- Pinch of salt
- 1/4 cup (60g) mini chocolate chips (for ghost faces)
- Optional: 1-2 drops black gel food coloring (for painting faces)
Instructions
- Preheat your oven to 200°F (93°C). Line a large baking sheet with parchment paper.
- Clean your mixing bowl and whisk attachment thoroughly to remove any grease or yolk.
- Separate the eggs while they’re cold, transferring each white to a small bowl first, then to the mixing bowl.
- Let the egg whites come to room temperature (about 30 minutes).
- Add the cream of tartar and salt to the egg whites. Start whipping on medium speed until foamy (about 2 minutes).
- Increase speed to medium-high. When soft peaks form, add sugar one tablespoon at a time, waiting about 15 seconds between each addition.
- Continue whipping on high speed for 5-7 minutes until meringue is glossy, stiff, and holds a firm peak. For ghost shapes, whip just until it starts to look slightly dry (about 30 seconds past smooth stage).
- Fold in vanilla extract gently with a spatula.
- Transfer meringue to a piping bag with a round tip (or a zip-top bag with 1/2 inch corner snipped off).
- Pipe ghosts: Hold bag perpendicular to baking sheet, apply steady pressure for a round base, then lift straight up while reducing pressure to form a tall, tapered top. Leave 1 inch between ghosts.
- Immediately press mini chocolate chips into the wet meringue for eyes and mouth.
- Bake for 60-75 minutes until dry to the touch and easily lifting off parchment.
- Turn off oven and leave meringues inside for another 30 minutes with door propped open to dry completely.
- Cool completely on baking sheet before transferring to a wire rack.
Notes
Humidity is the enemy of meringue—save for a dry day. For best results, use fresh eggs at room temperature. Over-whipping slightly (until meringue looks slightly dry) helps ghost shapes hold their form. Meringues actually improve after a day or two. Store in airtight container at room temperature for up to 2 weeks; do not refrigerate.
Nutrition
- Serving Size: 1 ghost meringue coo
- Calories: 35
- Sugar: 8
- Sodium: 10
- Carbohydrates: 8
- Protein: 1
Keywords: ghost meringue cookies, Halloween cookies, meringue ghosts, spooky treats, easy Halloween dessert, gluten-free cookies, dairy-free cookies


