Love this? Save it for later!
Share the inspiration with your friends
The holiday cookie exchange was in two days and I had completely forgotten. Everyone else would be bringing those elaborate, multi-day projects—you know, the ones with homemade caramel and hand-dipped chocolate that look like they came from a bakery. I had a pantry full of cocoa powder, a bag of marshmallows I’d bought on a whim, and about twenty minutes before I needed to leave for my son’s school play. Honestly, I felt my stomach drop. There was no way I could compete with that level of baking prowess in forty-eight hours.
But then I had this ridiculous, slightly desperate idea. What if I didn’t bake at all? What if I just, you know, assembled things? I grabbed some mason jars I’d been saving from pasta sauce, tied a ribbon around them, and layered in cocoa mix, chocolate chips, and a handful of those mini marshmallows. I scribbled “just add hot water and love” on a tag. It felt almost embarrassingly simple. I mean, it wasn’t even cooking.
So I showed up to the cookie swap with my little jars, feeling like I’d brought a store-bought pie to a bake-off. But here’s the thing—people went nuts. Not in a polite, “oh, how nice” way, but in a genuine, “where did you get this, I need the recipe” way. One jar got snatched up before I even put it on the table. Someone’s aunt asked me for three. And I just stood there, sheepish, admitting, “I made it in five minutes.” That night, I learned a valuable lesson: sometimes the best thing you can bring to a gathering isn’t the most complicated thing. It’s the most thoughtful thing. And these DIY hot cocoa bar mix gift jars? They’ve been my secret weapon for every holiday party, teacher gift, and last-minute hostess present ever since. Maybe you’ve been in that same panic before, staring at your calendar and wondering how you’ll pull it off. Trust me, I’ve got you.
Why You’ll Love This Recipe
Let me tell you why these DIY hot cocoa bar mix gift jars have become my absolute go-to for every holiday season and winter gathering. They solve so many problems at once, and they do it with style.
- Quick & Easy: You can whip up a batch of these in under five minutes. No oven, no stove, no fuss. It’s the perfect solution for those days when you realize you need fifteen teacher gifts by tomorrow morning.
- Simple Ingredients: You probably already have everything in your pantry. Cocoa powder, sugar, chocolate chips, marshmallows—nothing fancy, nothing that requires a special trip to a gourmet store.
- Perfect for Gifting: These jars are ideal for holiday parties, cookie swaps, neighbor gifts, coworker presents, or even as a thoughtful hostess gift. They’re personal without being stressful.
- Crowd-Pleaser: Who doesn’t love a warm, cozy cup of hot cocoa? Kids adore it, adults appreciate it, and everyone thinks you put way more effort into it than you actually did.
- Unbelievably Customizable: This is where it gets fun. You can tailor every jar to the person receiving it—peppermint for your sister, salted caramel for your boss, extra chocolate for your best friend. It makes each gift feel special and personal.
What makes this recipe different from every other hot cocoa mix out there? It’s the layering. The way the ingredients sit in the jar creates a beautiful, gift-worthy presentation that looks like you spent hours on it. Plus, I’ve tested the ratios over countless batches to make sure the cocoa is rich and creamy, never watery or bland. This isn’t just another version of hot cocoa mix—it’s your best version. And honestly, it’s the kind of gift that makes people close their eyes after that first sip. It’s comfort in a jar, but with a personal touch that says “I thought of you.” Perfect for impressing guests without stress, or turning a simple gathering into something memorable.
What Ingredients You Will Need
This recipe uses simple, pantry-friendly ingredients to create a rich and satisfying hot cocoa experience. Each component plays a specific role, and the beauty is that you can swap things around based on what you have or who you’re gifting to.
- For the Cocoa Base:
- 1 cup granulated sugar
- 1/2 cup unsweetened cocoa powder (I prefer Ghirardelli or Hershey’s Special Dark for a richer flavor)
- 1/2 cup powdered milk (adds creaminess; use dairy-free powder if needed)
- 1/4 teaspoon salt (just a pinch to balance the sweetness)
- For the Mix-Ins (Layer These in the Jar):
- 1/2 cup semi-sweet chocolate chips (or dark chocolate chunks for extra indulgence)
- 1/2 cup mini marshmallows (the tiny ones layer best)
- Optional: 1/4 cup crushed candy canes for a peppermint version
- Optional: 1/4 cup toffee bits for a buttery twist
- For Serving (Not in the Jar):
- Hot water or milk (whole milk makes it extra creamy)
- Whipped cream (for that cafe-style finish)
- Extra marshmallows or chocolate shavings for garnish
A few ingredient selection tips I’ve learned through trial and error. Look for a good-quality cocoa powder—it makes a huge difference in the final taste. I’ve tried cheaper brands, and they just don’t have that deep, chocolatey punch. For the powdered milk, I recommend Nestle Nido or Carnation; they dissolve smoothly without clumping. If you’re making these for someone who’s dairy-free, swap in coconut milk powder and dairy-free chocolate chips. It works beautifully.
For the chocolate chips, use whatever you love to eat. Semi-sweet is a safe bet because it’s not too sweet and not too bitter. But if you’re a milk chocolate person, go for it. And here’s a pro tip: if you’re making a batch for kids, use white chocolate chips and add a pinch of cinnamon. It tastes like a fancy hot chocolate from a ski lodge.
Substitution guidance? Absolutely. Use coconut sugar instead of granulated for a less refined option. Swap the marshmallows for dehydrated marshmallow bits if you want them to stay crunchy longer. And if you don’t have powdered milk, you can leave it out and just tell the recipient to use milk instead of water when making the cocoa. Simple as that.
Equipment Needed
You don’t need much for this project, which is part of the charm. Here’s what you’ll want to have on hand.
- Mason Jars: Pint-sized (16 oz) jars work perfectly. I use Ball or Kerr brand because they’re sturdy and widely available. You can also use Weck jars or any glass jar with a tight-fitting lid.
- Funnel: A small funnel is a lifesaver for getting the dry ingredients into the jar without making a mess. I use a metal one from my kitchen scale set, but a plastic one works just fine.
- Ribbon or Twine: For decorating the jar. Baker’s twine is my favorite, but any festive ribbon works.
- Gift Tags: Small tags where you can write the instructions. I buy plain kraft tags and stamp them with a little snowflake.
- Measuring Cups and Spoons: Standard set for portioning out the ingredients.
- A Small Bowl: For mixing the cocoa base ingredients together before layering.
If you don’t have a funnel, don’t worry. You can make one by rolling a piece of paper into a cone shape and snipping the tip. It’s not fancy, but it works. And if you’re making a big batch, consider using a canning funnel—it’s wider and makes the process even faster. I’ve also used repurposed spaghetti sauce jars in a pinch, and they looked just as cute with a little ribbon around the neck.
Preparation Method
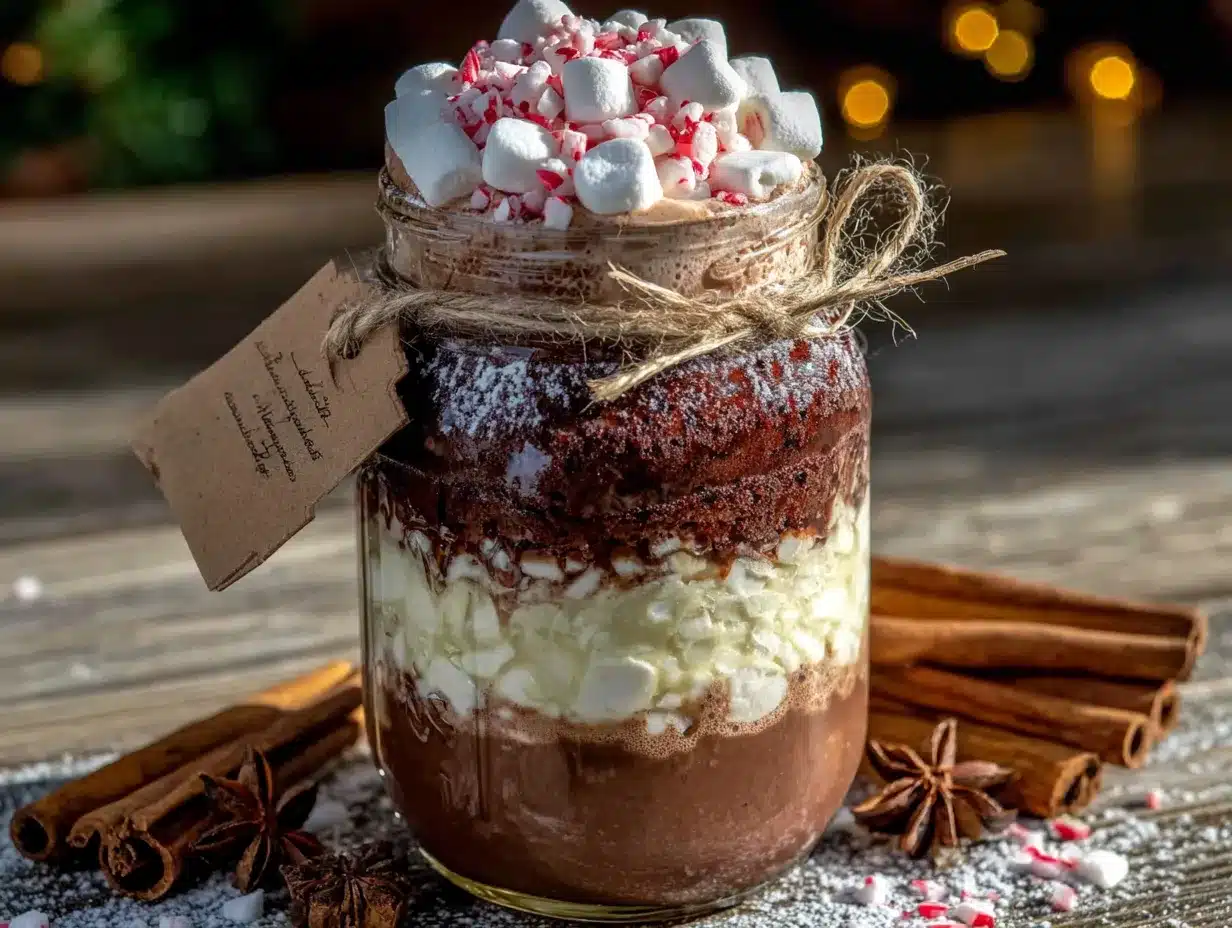
Alright, let’s get to the fun part. Here’s how to assemble these DIY hot cocoa bar mix gift jars in five simple steps.
- Mix the Cocoa Base (2 minutes): In a small bowl, whisk together the granulated sugar, unsweetened cocoa powder, powdered milk, and salt. Make sure there are no lumps. The mixture should look like a fine, dark powder. If you see clumps, sift it through a fine-mesh strainer. Trust me, nobody wants a lumpy hot cocoa.
- Layer the Ingredients (2 minutes): Using your funnel, start by adding about 1/3 cup of the cocoa base mixture to the bottom of your clean, dry mason jar. Gently tap the jar on the counter to level it out. Next, add a layer of chocolate chips—about 1/4 cup. Then add another 1/3 cup of the cocoa base. Tap again. Follow with a layer of mini marshmallows (about 1/4 cup). Finish with the remaining cocoa base mixture on top. The key is to pack each layer lightly so the colors stay distinct and pretty.
- Add the Toppings (30 seconds): On the very top, add a final sprinkle of chocolate chips and a few marshmallows. This is what people see first, so make it look inviting. If you’re doing a flavored version, add your crushed candy canes or toffee bits here.
- Seal and Decorate (30 seconds): Screw the lid on tightly. Cut a square of fabric or a circle of parchment paper to place under the lid ring for a rustic look. Tie a piece of ribbon or twine around the neck of the jar. Attach a gift tag with the following instructions: “Empty contents into a mug. Add 1 cup of hot water or milk. Stir well. Enjoy!”
- Store or Gift (immediate): That’s it. You’re done. Store the jars in a cool, dry place for up to 3 months. If you’re gifting them, just make sure they’re kept out of direct sunlight and away from heat sources, as the chocolate chips can melt.
A few troubleshooting tips I’ve picked up. If the layers start to blur together, it means your jar was a little damp. Make sure everything is bone dry before you start. Also, if you’re making a big batch, line up all your jars and do the same layer across all of them at once. It’s way faster than doing one jar at a time. And here’s a sensory cue for you: when you tap the jar, you should hear a solid, compact sound. If it sounds hollow, you need to pack it down more. The layers should look like a beautiful striped sand art project when you’re done.
Cooking Tips & Techniques
Over the years, I’ve made a few mistakes with these jars so you don’t have to. Let me share what I’ve learned the hard way.
The Marshmallow Problem: Fresh marshmallows are soft and sticky, which means they can clump together and get messy in the jar. I learned this after one particularly humid December when all my jars turned into a sticky mess. The solution? Use dehydrated marshmallows or the mini ones that are a little firmer. They layer better and don’t turn into a sugary brick after a week.
Layer Order Matters: I once put the marshmallows at the bottom of the jar. Bad idea. They got crushed under the weight of the cocoa mix and looked terrible. Always put the heavier ingredients—cocoa base, chocolate chips—at the bottom and the lighter, fluffier things on top. It’s not just about looks; it’s about the mix staying intact until it’s ready to be used.
Timing Your Batch: If you’re making these for a holiday party, don’t assemble them more than two weeks in advance. The marshmallows can start to soften and the layers can settle. I aim for the weekend before any event. It’s a great activity to do while watching a Christmas movie.
Multitasking Strategy: While your cocoa base is mixing, have your jars lined up and your funnel ready. I like to put on some music and just zone out. It’s meditative, honestly. And if you have kids, get them involved in the layering. They love seeing the colors stack up.
Consistency Tip: For the best-tasting cocoa, tell your gift recipients to use milk instead of water. The powdered milk in the mix is just a base—using fresh milk makes it taste like it came from a cafe. I always write that on my gift tags: “For extra creaminess, use hot milk instead of water.”
Variations & Adaptations
This is where you can really make these jars your own. I’ve tried dozens of variations over the years, and these are my absolute favorites.
Peppermint Hot Cocoa: Add 1/4 cup of crushed candy canes to the marshmallow layer. When the recipient stirs it into hot milk, the peppermint melts into the cocoa and creates this incredible wintery flavor. I made these for my book club last December, and they were gone in ten minutes.
Salted Caramel Hot Cocoa: Swap the semi-sweet chocolate chips for caramel chips (or chop up soft caramels into small pieces). Add a pinch of flaky sea salt to the cocoa base layer. The salty-sweet combination is addictive. I like to use Maldon sea salt for this—it has a nice crunch.
Spiced Mexican Hot Cocoa: Add 1 teaspoon of cinnamon, 1/4 teaspoon of cayenne pepper, and a pinch of nutmeg to the cocoa base mixture. This one is for the adventurous eaters in your life. It’s warm, a little spicy, and incredibly cozy on a cold night.
Vegan Version: Use coconut milk powder instead of regular powdered milk, and dairy-free chocolate chips. Make sure your marshmallows are vegan-friendly (Dandies brand works great). Everything else is naturally plant-based.
White Chocolate Dream: Replace the semi-sweet chips with white chocolate chips, and add a teaspoon of vanilla bean powder to the cocoa base. It’s sweeter and creamier, like a vanilla latte in cocoa form. My niece requests this every year for her birthday.
One personal variation I tried last winter was a “S’mores” version. I added crushed graham crackers as a layer, used milk chocolate chips, and topped it with toasted marshmallow bits. The graham crackers got a little soft after a week, but the flavor was incredible. Just something to keep in mind if you’re gifting them far in advance.
Serving & Storage Suggestions
These jars are designed to be gifted, but they’re also perfect for keeping on hand for yourself. Here’s how to make the most of them.
How to Serve: Empty the entire contents of the jar into a large mug. Add 1 cup of hot water or milk (I strongly recommend milk). Stir until everything is dissolved and smooth. Top with whipped cream, extra marshmallows, or a drizzle of chocolate syrup. Serve immediately while it’s hot and steamy.
What to Serve Alongside: These cocoa jars pair beautifully with a plate of sugar cookies, a slice of gingerbread, or even a simple butter cookie. If you’re hosting a hot cocoa bar, set out bowls of additional toppings like crushed peppermint, caramel sauce, and cinnamon sticks. Let guests customize their own mugs.
Storage Instructions: Store the jars in a cool, dark place like a pantry or cupboard. Avoid the refrigerator—the moisture can cause the powdered milk to clump. Properly stored, these jars will last up to 3 months. The marshmallows might get a little chewy after a month, but they’re still delicious.
Reheating Tips: If your cocoa has cooled down, just pop the mug in the microwave for 30 seconds. Stir it again before drinking. If you’re making a big batch for a party, you can prepare the cocoa in a slow cooker on low heat. Just empty several jars into the slow cooker, add hot milk, and whisk until smooth. Keep it on warm for guests to serve themselves.
Flavor Development: Here’s something interesting—the flavors actually meld together after about a week. The cocoa powder absorbs the aroma of the chocolate chips and marshmallows, creating a more complex taste. So if you can wait a few days before gifting, the cocoa will taste even better. I usually make my jars a week before I need them for this reason.
Nutritional Information & Benefits
Let’s be real—hot cocoa is a treat, not a health food. But it does have some surprising benefits, especially when you make it with quality ingredients.
Estimated Nutritional Values (per serving, using water):
- Calories: 280
- Fat: 8g
- Carbohydrates: 52g
- Protein: 5g
- Sugar: 42g
Health Benefits: Cocoa powder is rich in antioxidants called flavonoids, which can help reduce inflammation and improve heart health. The dark chocolate chips add even more of these beneficial compounds. Plus, the warm milk or water can be soothing and comforting, especially on a cold day. It’s not a superfood, but it’s a feel-good treat that can warm you from the inside out.
Dietary Considerations: This recipe can easily be made dairy-free, vegan, or gluten-free (just check your marshmallow brand). It’s not low-sugar, but you can reduce the sugar by using a sugar substitute like monk fruit sweetener in the cocoa base. The powdered milk adds a bit of calcium and protein, which is a nice bonus.
Potential Allergens: This recipe contains dairy (from the powdered milk and chocolate chips). It may also contain traces of nuts if your chocolate chips are processed in a facility that handles them. Always check labels if you’re gifting to someone with allergies.
My Wellness Perspective: I believe in balance. These hot cocoa jars are a special treat for the holidays, not an everyday drink. They’re meant to be enjoyed mindfully, sipped slowly by the fire, or shared with loved ones. And honestly, the joy they bring is worth every calorie.
Conclusion
So there you have it—my tried-and-true recipe for DIY hot cocoa bar mix gift jars that have saved me from holiday panic more times than I can count. They’re quick, they’re thoughtful, and they’re endlessly customizable. Whether you’re making them for teachers, neighbors, coworkers, or just stocking your own pantry, these jars deliver every single time.
I love this recipe because it proves that you don’t need to spend hours in the kitchen to give a meaningful gift. Sometimes the simplest things—a jar, some cocoa, a ribbon—carry the most warmth. And isn’t that what the holidays are all about? So go ahead, grab those mason jars and get layering. Your future self (and everyone on your gift list) will thank you.
I’d love to hear how your jars turn out! Drop a comment below and let me know what variations you tried. Did you go with peppermint? Salted caramel? Something totally new? Share your creations and tag me on Pinterest—I’m always looking for fresh ideas. Happy gifting, and stay warm out there!
Frequently Asked Questions
Can I use hot water instead of milk with this mix?
Absolutely! The mix includes powdered milk, so it will still be creamy with hot water. However, using warm milk will give you a richer, more decadent cup of cocoa. It’s totally up to you.
How long do these hot cocoa jars last?
Stored in a cool, dry place, they’ll stay fresh for up to 3 months. The marshmallows might get a little chewy after a month, but the flavor will still be great. Just keep them away from heat and moisture.
Can I make these jars with sugar-free ingredients?
Yes! Substitute the granulated sugar with a monk fruit sweetener or erythritol. Use sugar-free chocolate chips and check that your marshmallows are sugar-free as well. The layering will look the same, and the taste will still be satisfying.
What size jar should I use?
A 16-ounce (pint-sized) mason jar is perfect. It holds enough mix for about 3-4 servings, which makes it a generous gift. You can use smaller jars for single servings, but adjust the ingredient amounts accordingly.
Can I add other mix-ins like nuts or dried fruit?
Sure! Just keep in mind that nuts can get soggy over time, and dried fruit might change the flavor. I’d recommend adding those as a separate topping on the gift tag rather than layering them in the jar. That way, the recipient can add them fresh.
Pin This Recipe!
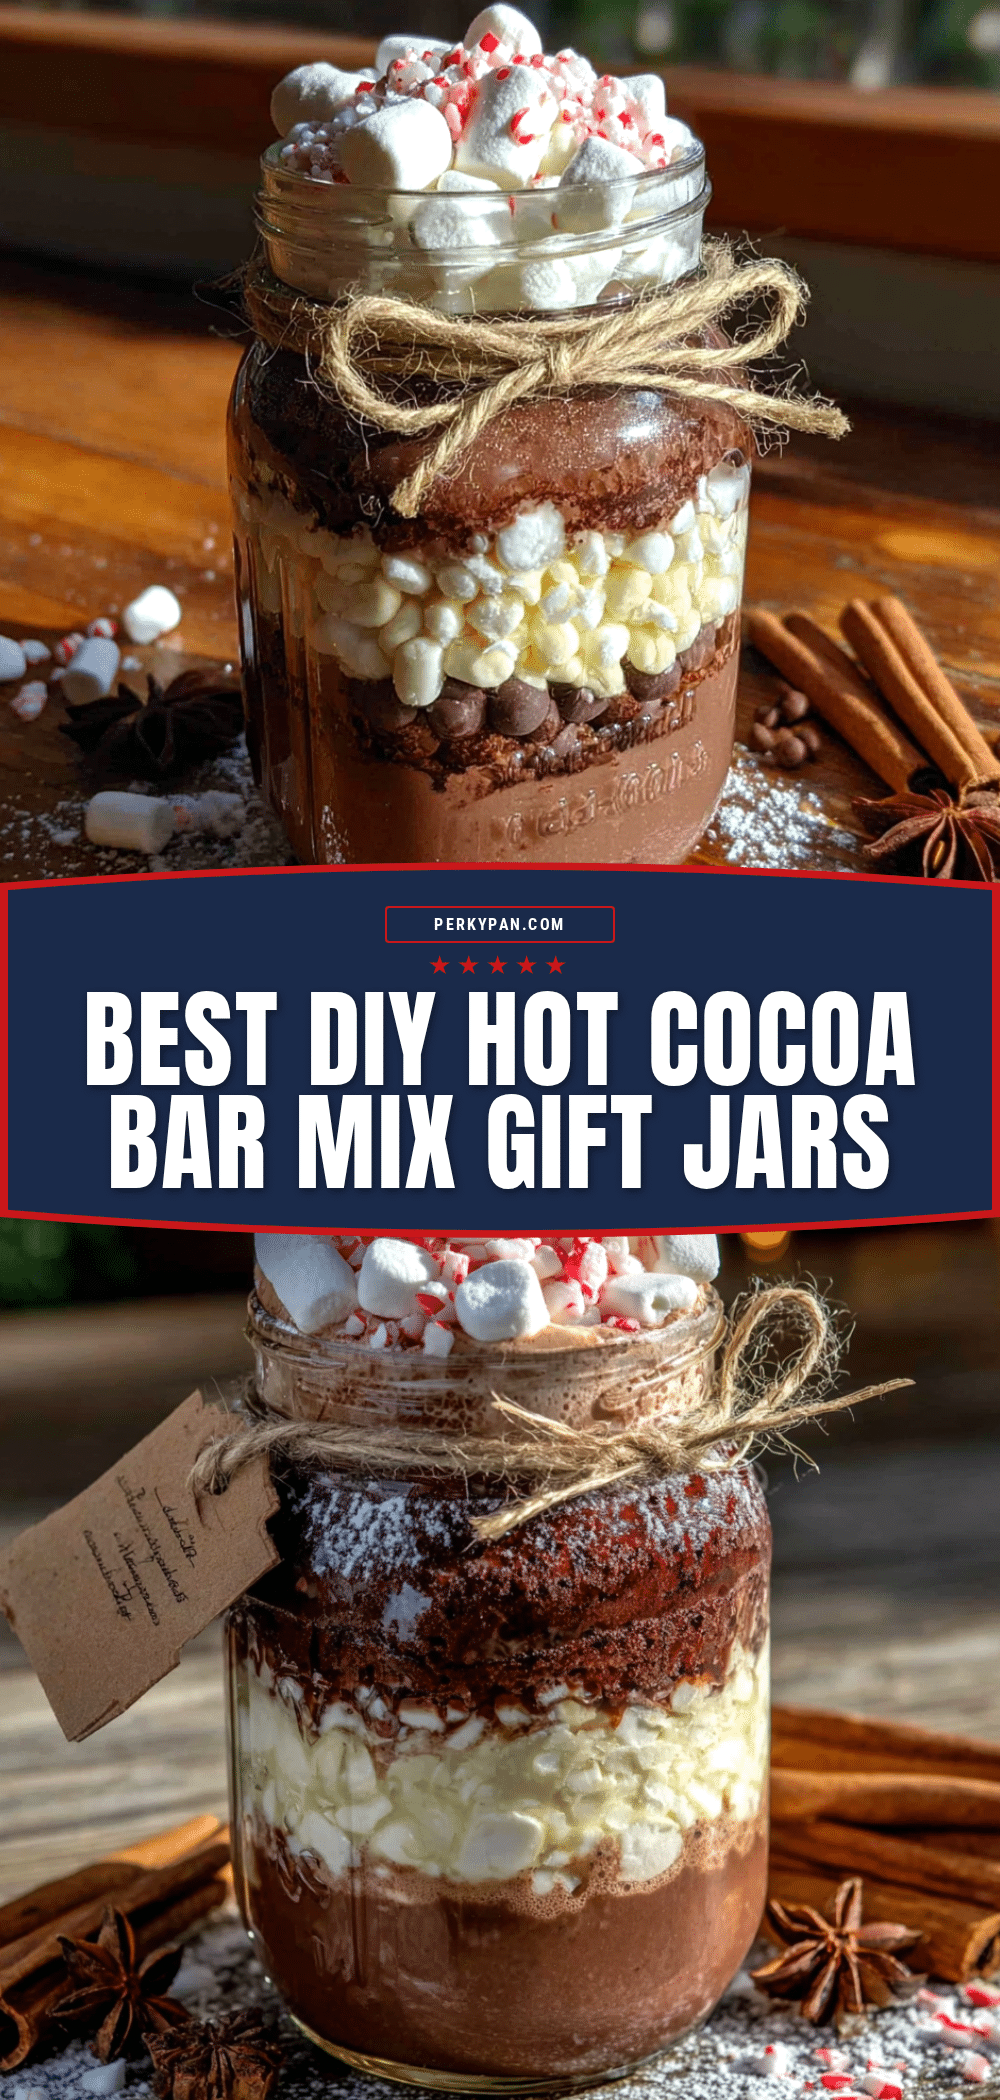
Easy DIY Hot Cocoa Bar Mix Gift Jars (5 Minutes)
These DIY hot cocoa bar mix gift jars are the perfect last-minute holiday gift or hostess present. Made in just 5 minutes with simple pantry ingredients, they’re customizable, thoughtful, and always a crowd-pleaser.
- Prep Time: 5 minutes
- Cook Time: 0 minutes
- Total Time: 5 minutes
- Yield: 1 jar (makes 3-4 servings) 1x
- Category: Beverage
- Cuisine: American
Ingredients
- 1 cup granulated sugar
- 1/2 cup unsweetened cocoa powder (preferably Ghirardelli or Hershey’s Special Dark)
- 1/2 cup powdered milk (e.g., Nestle Nido or Carnation; use dairy-free if needed)
- 1/4 teaspoon salt
- 1/2 cup semi-sweet chocolate chips (or dark chocolate chunks)
- 1/2 cup mini marshmallows
- Optional: 1/4 cup crushed candy canes (for peppermint version)
- Optional: 1/4 cup toffee bits (for buttery twist)
- For serving: hot water or milk, whipped cream, extra marshmallows or chocolate shavings
Instructions
- Mix the Cocoa Base (2 minutes): In a small bowl, whisk together the granulated sugar, unsweetened cocoa powder, powdered milk, and salt until no lumps remain. Sift if necessary.
- Layer the Ingredients (2 minutes): Using a funnel, add about 1/3 cup of the cocoa base mixture to the bottom of a clean, dry 16-ounce mason jar. Gently tap the jar to level. Add a layer of 1/4 cup chocolate chips. Add another 1/3 cup cocoa base, tap again. Add a layer of 1/4 cup mini marshmallows. Finish with the remaining cocoa base on top. Pack each layer lightly so colors stay distinct.
- Add the Toppings (30 seconds): On top, add a final sprinkle of chocolate chips and a few marshmallows. For flavored versions, add crushed candy canes or toffee bits here.
- Seal and Decorate (30 seconds): Screw the lid on tightly. Optionally, place a square of fabric or parchment paper under the lid ring for a rustic look. Tie ribbon or twine around the neck. Attach a gift tag with instructions: ‘Empty contents into a mug. Add 1 cup of hot water or milk. Stir well. Enjoy!’
- Store or Gift: Store jars in a cool, dry place for up to 3 months. If gifting, keep out of direct sunlight and away from heat sources.
Notes
Use dehydrated or firmer mini marshmallows to prevent clumping. Layer heavier ingredients at the bottom. For best flavor, use milk instead of water when serving. Jars can be made up to 2 weeks in advance for optimal freshness. For a vegan version, use coconut milk powder, dairy-free chocolate chips, and vegan marshmallows.
Nutrition
- Serving Size: 1 mug (using 1 jar's
- Calories: 280
- Sugar: 42
- Sodium: 180
- Fat: 8
- Saturated Fat: 4
- Carbohydrates: 52
- Fiber: 3
- Protein: 5
Keywords: hot cocoa mix, DIY gift, mason jar gift, holiday gift, last-minute gift, hot chocolate, cocoa bar, teacher gift, hostess gift


