Love this? Save it for later!
Share the inspiration with your friends
The woman at the next stall watched me pick up three ears of corn, put them back, then pick them up again. She had this patient look, like she’d seen this hesitation a hundred times before. “You’re overthinking it,” she finally said, not unkindly. “Corn doesn’t need a complicated plan. Just grab a bag of frozen kernels and a block of cheddar. You’re making a casserole, right?” I laughed because she was spot on. I’d been standing at that farmers’ market for ten minutes, trying to justify buying fresh corn for a weeknight side dish I didn’t even have a recipe for yet.
Her name was Rosa, and she ran the tortilla stand two rows over. We got to talking while I finally committed to a bag of frozen sweet corn (her recommendation, not mine). She told me about the casserole her family makes when they need something fast that still feels like a real meal. “Jalapeño for heat, cheese for soul,” she said, scribbling ingredients on a napkin. I stuffed that napkin in my pocket and forgot about it for three days. When I found it crumpled in the laundry, I figured it was a sign.
Honestly, the first time I made it, I burned the top because I got distracted by a phone call. You know how it goes. But even scorched, that cheesy corn casserole was the best thing I’d eaten all week. The sweetness of the corn, the sharp cheddar, the little kick from the jalapeño—it all worked together like it had been planned. I’ve tweaked Rosa’s original a bit over the years, mostly to make it even faster for nights when I’m racing the clock. But the heart of it? That’s still her. This is the side dish that saves dinner, and I keep making it because it actually works when you’re tired and hungry and out of ideas.
Why You’ll Love This Recipe
Let’s be real for a second. Weeknight cooking can feel like a chore, especially when you’re staring at the clock and wondering how to get a decent meal on the table in under an hour. This Easy Cheesy Jalapeño Corn Casserole is my answer to that problem. It’s the side dish that doesn’t demand much from you but delivers big on flavor. Here’s why it’s become a staple in my kitchen:
- Quick & Easy: From fridge to table in just 30 minutes. No marinating, no complicated steps, no waiting around. It’s perfect for those nights when you walk in the door at 6 PM and need food by 6:30.
- Simple Ingredients: You probably have most of these things in your kitchen right now. Frozen corn, cheddar cheese, cream cheese, jalapeños, butter, and a few pantry staples. No specialty grocery runs required.
- Perfect for Weeknights: This casserole pairs with almost anything—grilled chicken, tacos, burgers, or even a simple salad. It’s the kind of side that makes a plain dinner feel like more.
- Crowd-Pleaser: I’ve brought this to potlucks and family dinners, and it always gets polished off first. Kids love the cheesy goodness, and adults appreciate the subtle heat from the jalapeños.
- Unbelievably Delicious: The combination of sweet corn, creamy cheese, and spicy jalapeño is pure comfort food magic. It’s rich without being heavy, and the texture is just right—creamy on the inside with a golden, bubbly top.
What sets this apart from other corn casseroles? It’s the balance. A lot of recipes go overboard on the cream or the butter, making everything gloppy and one-note. I’ve tested this version until the ratios were just right—enough cream cheese to make it luscious, plenty of sharp cheddar for flavor, and fresh jalapeños for brightness. It’s not just another corn dish; it’s the one you’ll actually want to make again. And honestly, isn’t that what we’re all looking for?
What Ingredients You Will Need
This recipe uses simple, everyday ingredients that come together to create something truly satisfying. The beauty of this casserole is that you don’t need anything fancy—just good, honest staples that do their job well.
For the Casserole Base
- Frozen sweet corn, 4 cups (about 20 oz): I prefer frozen corn here because it’s convenient and consistently sweet. No shucking, no silk, no fuss. Thaw it slightly by running it under warm water for a minute, then drain well. Fresh corn works too if it’s in season—just cut the kernels off 6-8 ears.
- Sharp cheddar cheese, 2 cups shredded (8 oz): Please shred your own cheese. The pre-shredded stuff has anti-caking agents that prevent it from melting smoothly. I like a sharp cheddar for maximum flavor, but a medium cheddar works fine too. If you want to get fancy, try a mix of cheddar and Monterey Jack.
- Cream cheese, 4 oz, softened: This is the secret to the creamy texture. Make sure it’s at room temperature so it blends in smoothly. If you forget to take it out of the fridge, microwave it for 10-15 seconds—just don’t overdo it or it’ll get grainy.
- Unsalted butter, 4 tablespoons (½ stick), melted: Butter adds richness and helps everything come together. I use unsalted so I can control the salt level, but salted butter works too—just reduce the added salt by ¼ teaspoon.
- Jalapeños, 2-3 medium, seeded and diced: This is where the heat comes from. For a milder casserole, remove all the seeds and membranes. For more kick, leave some seeds in. I usually use two jalapeños for a gentle warmth that doesn’t overpower.
- Sour cream, ½ cup: Adds tanginess and extra creaminess. Full-fat sour cream gives the best results, but light sour cream works in a pinch. Greek yogurt can be substituted if that’s what you have on hand.
- Large eggs, 2: Eggs help bind the casserole and give it a custard-like texture. Let them come to room temperature for easier mixing.
- All-purpose flour, 2 tablespoons: A small amount of flour helps thicken the casserole so it’s not watery. If you’re gluten-free, use a 1:1 gluten-free flour blend or cornstarch (use 1 tablespoon).
- Sugar, 1 teaspoon: Just a pinch to enhance the natural sweetness of the corn. You can skip this if your corn is already very sweet.
- Salt, ½ teaspoon: I use fine sea salt. Adjust to taste, especially if you’re using salted butter.
- Black pepper, ¼ teaspoon: Freshly ground is always better.
For the Topping (Optional but Recommended)
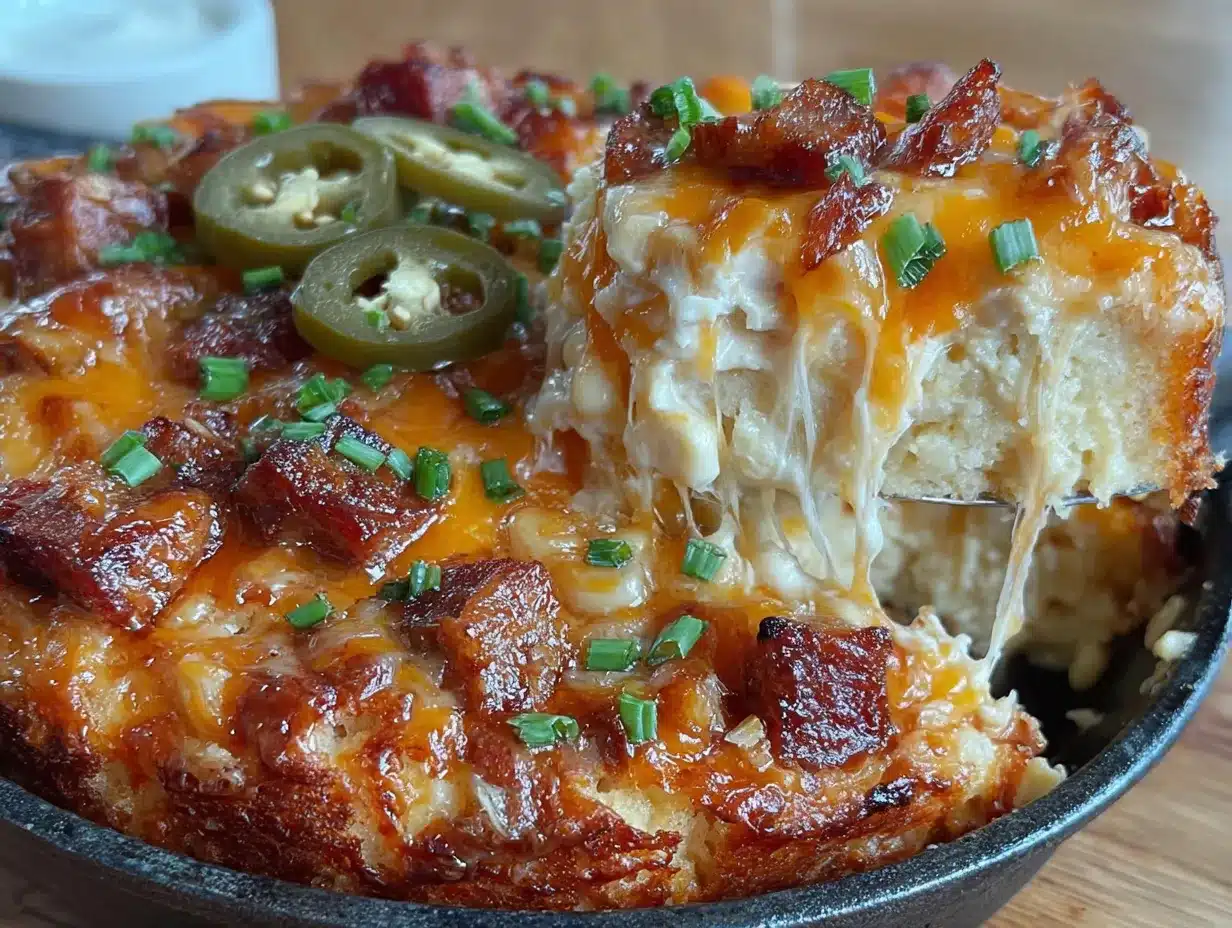
- Panko breadcrumbs, ½ cup: These give the casserole a lovely crunchy top. Regular breadcrumbs work too, but panko stays crispier.
- Butter, 2 tablespoons, melted: To toss with the breadcrumbs before sprinkling on top.
- Additional shredded cheddar, ¼ cup: Because more cheese is never a bad idea. Sprinkle this on top during the last 5 minutes of baking.
Ingredient Swap Ideas: If you want to make this dairy-free, use vegan cream cheese, vegan butter, and a dairy-free cheddar shred. For a lower-carb version, swap the flour for almond flour or skip it entirely (the casserole will be a bit looser but still delicious).
Equipment Needed
You don’t need a fancy kitchen to pull this off. Here’s what I use every time I make this Easy Cheesy Jalapeño Corn Casserole:
- 8×8-inch baking dish: This size is perfect for a side dish that serves 6-8 people. A 9×9-inch dish works too, but the casserole will be slightly thinner and may bake a few minutes faster. If you’re doubling the recipe, use a 9×13-inch dish.
- Large mixing bowl: For combining all the ingredients. Any medium-to-large bowl will do.
- Whisk: To beat the eggs and mix everything smoothly. A fork works in a pinch, but a whisk is easier.
- Cheese grater: For shredding your own cheese. A box grater or a microplane both work fine.
- Cutting board and knife: For dicing the jalapeños. Use a sharp knife to avoid crushing the peppers.
- Measuring cups and spoons: Standard set for accuracy.
- Spatula or wooden spoon: For stirring the mixture.
Budget-Friendly Tip: If you don’t have an 8×8 baking dish, you can use a cast-iron skillet (10-inch) or even a disposable aluminum pan. The bake time might vary by a few minutes, so keep an eye on it. I’ve also made this in a muffin tin for individual portions—just reduce the bake time to 15-18 minutes.
Preparation Method
Alright, let’s get cooking. This comes together fast, so I like to have everything prepped and measured before I start. Trust me, it makes the whole process smoother.
- Preheat your oven to 375°F (190°C). While it’s heating up, lightly grease your 8×8 baking dish with butter or non-stick spray. Set it aside.
- Thaw and drain the corn. Place the frozen corn in a colander and run cool water over it for about a minute. Shake off the excess water and let it drain while you prep the other ingredients. You want it thawed but not soaking wet—excess water will make the casserole watery.
- Dice the jalapeños. Cut off the stems, slice the peppers in half lengthwise, and scrape out the seeds and white membranes with a small spoon. Then dice them into small pieces—about ¼-inch. If you’re sensitive to heat, wear gloves or wash your hands thoroughly afterward. Trust me on this one.
- Shred the cheese. Grate your cheddar cheese on the large holes of a box grater. You need 2 cups for the casserole and an extra ¼ cup for the topping if you’re using it.
- Mix the wet ingredients. In your large mixing bowl, whisk together the softened cream cheese, sour cream, and melted butter until smooth. It’s okay if there are a few small lumps—they’ll smooth out as you mix. Add the eggs and whisk until fully combined.
- Add the dry ingredients. Sprinkle the flour, sugar, salt, and pepper over the wet mixture. Whisk again until everything is incorporated and no streaks of flour remain.
- Fold in the corn, jalapeños, and 2 cups of shredded cheese. Use a spatula to gently fold everything together until the corn and cheese are evenly distributed. Don’t overmix—just fold until it’s combined.
- Pour the mixture into the prepared baking dish. Spread it out evenly with your spatula.
- Prepare the topping (if using). In a small bowl, toss the panko breadcrumbs with the 2 tablespoons of melted butter until the crumbs are evenly coated. Sprinkle this mixture over the top of the casserole.
- Bake for 25 minutes. Place the dish on the middle rack of your preheated oven. After 20 minutes, check it—the edges should be bubbly and the center should be set but still slightly jiggly. If you’re adding the extra ¼ cup of cheese on top, sprinkle it on now and bake for another 5 minutes, until the cheese is melted and golden.
- Let it rest for 5 minutes. This is important! The casserole needs a few minutes to set up after baking. If you cut into it right away, it’ll be too loose. Patience, my friend.
Sensory Cues: You’ll know the casserole is done when the top is golden brown and bubbly, and the edges are pulling away from the sides of the dish just a bit. The kitchen should smell like toasted butter and roasted corn. If you give the dish a gentle shake, the center should be firm but with a slight wobble—like a cheesecake, but less dramatic.
Cooking Tips & Techniques
I’ve made this casserole more times than I can count, and I’ve learned a few things along the way. Some of these tips came from happy accidents, others from straight-up failures.
Don’t skip draining the corn. The first time I made this, I was in a hurry and dumped the frozen corn straight into the bowl without thawing or draining it. The result? A watery casserole that took forever to bake and never really set up properly. Frozen corn releases a surprising amount of water as it thaws, so taking that extra minute to drain it makes a huge difference.
Room temperature ingredients matter. I know, I know—who has time for that? But trust me, cold cream cheese and cold eggs will give you a lumpy batter that doesn’t bake evenly. If you forget to set them out, here’s a shortcut: place the cream cheese (still wrapped) in a bowl of warm water for 10 minutes, and put the eggs in a cup of warm water for 5 minutes. Works like a charm.
Watch the jalapeños. Jalapeño heat levels vary wildly. One pepper might be mild as a bell pepper, while another could light your mouth on fire. I always taste a tiny piece of the jalapeño before dicing it. If it’s super spicy, I use only one pepper or remove all the seeds and membranes. If it’s mild, I might add a third one for extra flavor.
Multitasking is your friend. While the casserole is baking, you can prep the rest of your dinner. This dish goes great with grilled chicken, tacos, or even a simple pan-seared fish. I usually start the main dish about 10 minutes after the casserole goes in the oven, so everything finishes around the same time.
My biggest failure: I once tried to double the recipe and bake it in a 9×13 dish without adjusting the time. The edges were burnt and the center was still raw. Now I know: when you double the recipe, increase the bake time by about 10-15 minutes, and check it with a knife inserted in the center—it should come out clean or with just a few moist crumbs.
Variations & Adaptations
This casserole is a great base recipe that you can tweak depending on what you have on hand or what you’re craving. Here are some of my favorite variations:
Spicy Southwest Version: Add 1 can of drained and rinsed black beans, ½ cup of diced red bell pepper, and 1 teaspoon of cumin to the mixture. Top with crushed tortilla chips instead of panko. This turns it into a heartier side that could almost be a main dish with a salad on the side.
Milder Family-Friendly Version: Swap the jalapeños for a can of diced green chiles (4 oz) instead. You get the flavor without the heat. I do this when I’m serving it to kids or spice-averse guests, and no one ever complains.
Bacon and Chive Version: Cook 4 slices of bacon until crispy, crumble them, and fold them into the casserole along with 2 tablespoons of chopped fresh chives. Sprinkle extra bacon on top before baking. Honestly, bacon makes everything better, and the salty crunch is amazing against the sweet corn.
Dairy-Free Adaptation: Use vegan cream cheese, vegan butter, and a good-quality dairy-free cheddar shred (I like the ones from Violife or Miyoko’s). The texture will be slightly different, but it still tastes great. You might need to add an extra tablespoon of flour to help with binding.
Gluten-Free Version: Substitute the all-purpose flour with a 1:1 gluten-free flour blend or use 1 tablespoon of cornstarch. Make sure your panko breadcrumbs are gluten-free (some brands are, some aren’t). I’ve tested this with King Arthur’s gluten-free flour, and it works perfectly.
Serving & Storage Suggestions
This casserole is best served warm, straight from the oven, when the cheese is still gooey and the top is crispy. But let’s be honest—it’s also pretty good at room temperature, especially if you’re eating it straight from the dish while standing at the counter. No judgment here.
Serving Suggestions: Scoop it onto plates as a side dish alongside grilled chicken, steak, pork chops, or fish. It’s also fantastic with tacos, enchiladas, or any Mexican-inspired meal. For a vegetarian dinner, serve it with a big green salad and some black beans. I’ve even spooned leftovers over nachos for a quick lunch.
Storage: Leftovers keep well in an airtight container in the refrigerator for up to 4 days. The topping will soften as it sits, but the flavor actually gets better after a day or two as the flavors meld together.
Reheating: The best way to reheat this is in the oven at 350°F (175°C) for about 10 minutes, or until warmed through. The microwave works in a pinch (about 1-2 minutes per serving), but the topping won’t be as crispy. If you want to restore some crunch, sprinkle a few fresh panko crumbs on top before reheating in the oven.
Freezing: This casserole freezes surprisingly well. Bake it as directed, let it cool completely, then wrap it tightly in plastic wrap and aluminum foil. Freeze for up to 3 months. To serve, thaw overnight in the refrigerator and reheat in a 350°F oven until hot and bubbly. I’ve also frozen it unbaked—just assemble everything in the dish, cover tightly, and freeze. Bake straight from frozen, adding about 15-20 minutes to the bake time.
Nutritional Information & Benefits
Let’s talk numbers. This recipe makes about 8 servings, and each serving (based on the recipe as written) contains approximately:
- Calories: 320
- Fat: 22g
- Saturated Fat: 13g
- Carbohydrates: 24g
- Fiber: 2g
- Sugar: 6g
- Protein: 11g
- Sodium: 420mg
Health Benefits: Corn is a good source of fiber, antioxidants like lutein and zeaxanthin (great for eye health), and B vitamins. Jalapeños add a dose of vitamin C and capsaicin, which may boost metabolism. Cheddar cheese provides calcium and protein, while eggs contribute high-quality protein and choline for brain health. Is this a health food? No. But it’s a comfort food that uses real ingredients, and that counts for something.
Dietary Considerations: This recipe contains gluten (from the flour and panko) and dairy (from the cheeses, butter, and sour cream). For gluten-free and dairy-free options, see the variations section above. It’s also naturally nut-free and soy-free.
Conclusion
This Easy Cheesy Jalapeño Corn Casserole is one of those recipes that proves you don’t need a lot of time or fancy ingredients to make something genuinely delicious. It’s the side dish that saves weeknight dinners, the one you can throw together without thinking, the one that makes everyone at the table happy. I love it because it’s forgiving—you can tweak the heat, swap the cheese, or add whatever you have in the fridge, and it still turns out great.
I hope you give this a try, and I hope it becomes a staple in your kitchen the way it has in mine. If you make it, let me know how it goes! Leave a comment below and tell me what variations you tried, or share a photo on Pinterest with your own twist. I read every single comment, and honestly, hearing about your kitchen wins makes my day.
Go ahead—grab that bag of frozen corn and get cooking. Your weeknight dinner just got a whole lot better.
Frequently Asked Questions
Can I use fresh corn instead of frozen?
Absolutely. If corn is in season, fresh corn is wonderful here. You’ll need about 6-8 ears of corn to get 4 cups of kernels. Just cut the kernels off the cob and use them raw—they’ll cook perfectly in the oven. The texture will be slightly crunchier than frozen corn, which some people prefer.
Can I make this casserole ahead of time?
Yes! You can assemble the casserole a day in advance, cover it, and store it in the refrigerator. When you’re ready to bake, just add about 10 minutes to the bake time since you’re starting from cold. You can also bake it fully, then reheat it the next day—the flavors actually get better overnight.
How do I make this less spicy?
Easy. Use only one jalapeño and remove all the seeds and white membranes (that’s where most of the heat lives). Or swap the jalapeños for a 4-ounce can of diced green chiles, which are very mild. You’ll still get that nice green pepper flavor without the burn.
Can I add meat to this casserole?
Sure! Cooked and crumbled bacon, diced ham, or shredded rotisserie chicken all work great. Fold them in with the corn and cheese before baking. If you’re adding meat, you might want to reduce the salt slightly since many meats are already salty.
Why is my casserole watery?
This usually happens for one of two reasons: either the frozen corn wasn’t drained well enough, or the casserole wasn’t baked long enough. Make sure to thaw and drain your corn thoroughly, and bake until the center is set and the edges are bubbly. If it still seems loose, let it rest for 10 minutes after baking—it will firm up as it cools.
Pin This Recipe!
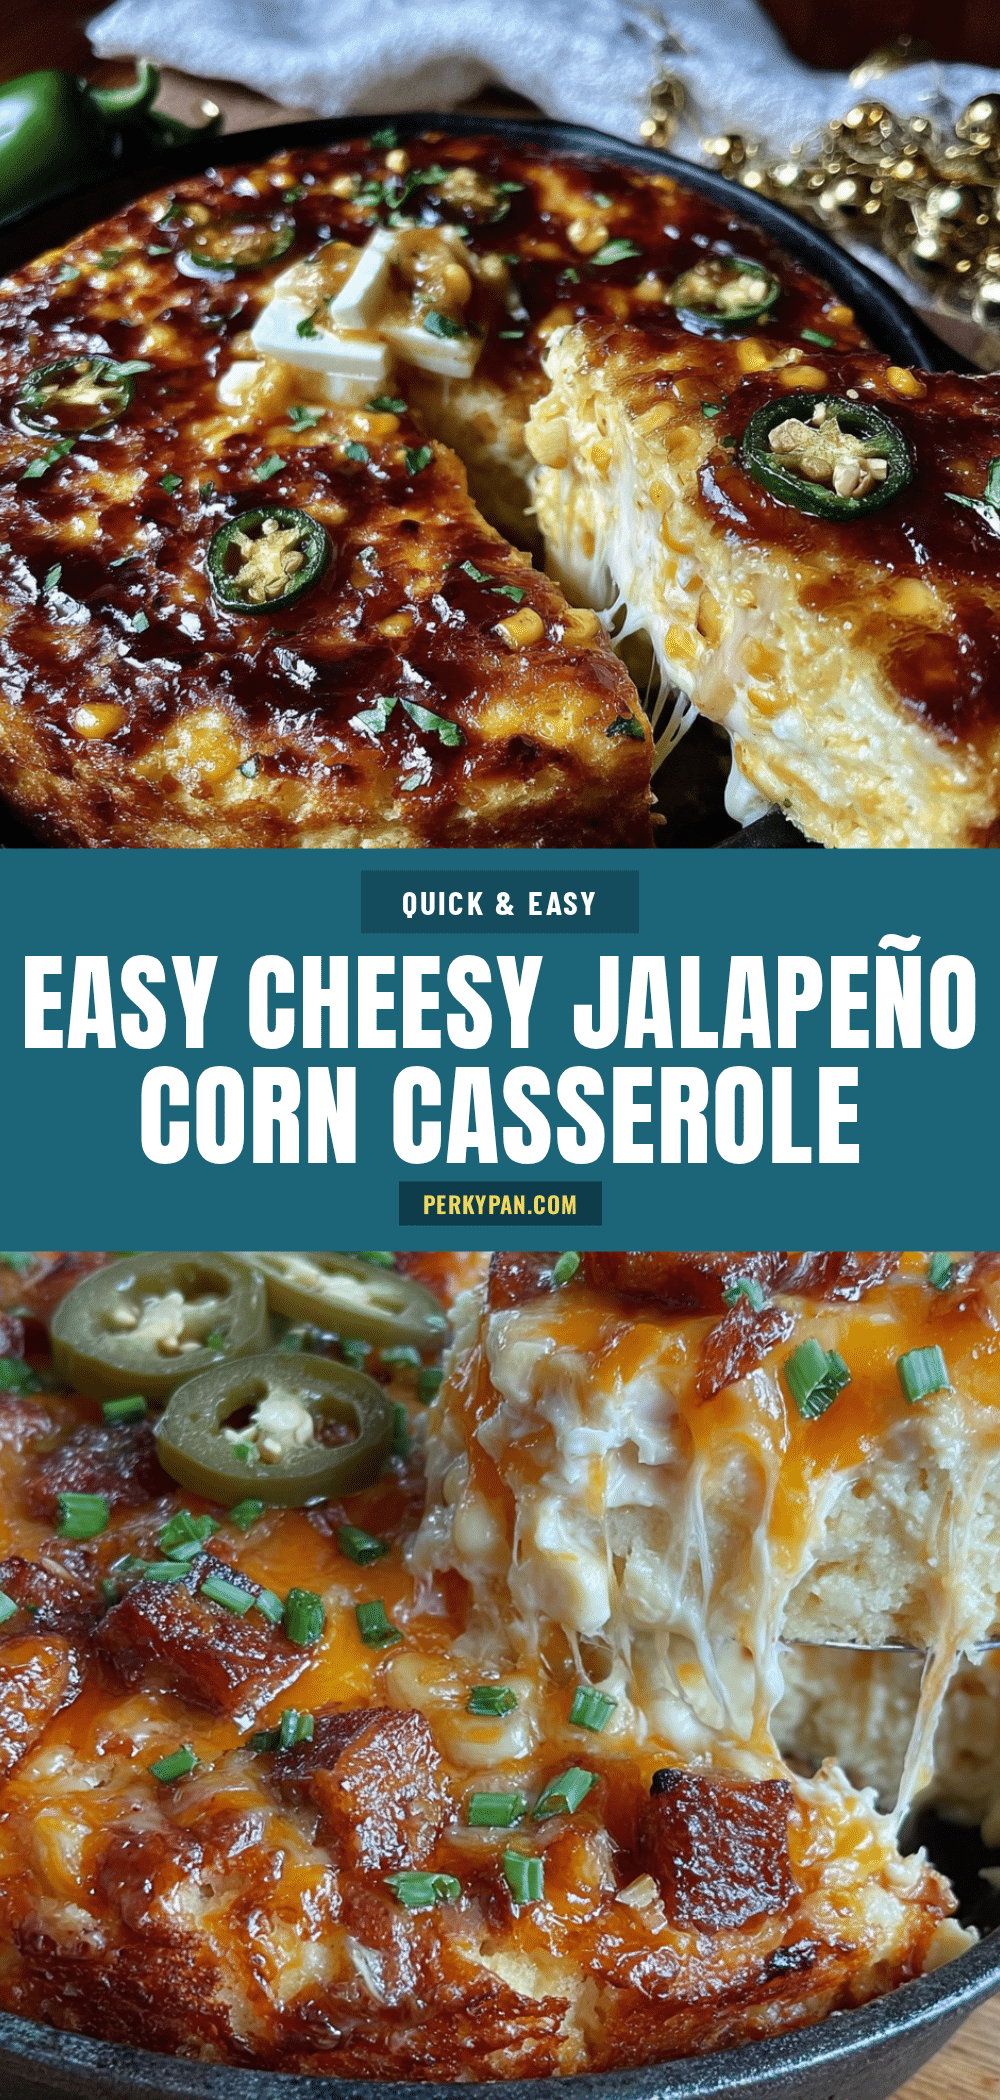
Easy Cheesy Jalapeño Corn Casserole: Best 30-Minute Side

This quick and easy corn casserole combines sweet corn, sharp cheddar, and spicy jalapeños for a creamy, crowd-pleasing side dish that goes from fridge to table in just 30 minutes. Perfect for weeknights, potlucks, or any meal that needs a comforting boost.
- Prep Time: 10 minutes
- Cook Time: 25 minutes
- Total Time: 35 minutes
- Yield: 8 servings 1x
- Category: Side Dish
- Cuisine: American
Ingredients
- 4 cups frozen sweet corn (about 20 oz), thawed and drained
- 2 cups sharp cheddar cheese, shredded (8 oz), plus 1/4 cup for topping (optional)
- 4 oz cream cheese, softened
- 4 tablespoons unsalted butter, melted (plus 2 tablespoons for topping, optional)
- 2–3 medium jalapeños, seeded and diced
- 1/2 cup sour cream
- 2 large eggs, room temperature
- 2 tablespoons all-purpose flour
- 1 teaspoon sugar
- 1/2 teaspoon fine sea salt
- 1/4 teaspoon black pepper
- 1/2 cup panko breadcrumbs (optional, for topping)
- 2 tablespoons unsalted butter, melted (for topping, optional)
Instructions
- Preheat oven to 375°F (190°C). Lightly grease an 8×8-inch baking dish with butter or non-stick spray.
- Thaw and drain the corn: Place frozen corn in a colander and run cool water over it for about a minute. Shake off excess water and let drain.
- Dice the jalapeños: Cut off stems, slice peppers in half lengthwise, remove seeds and membranes, then dice into small pieces (about 1/4-inch).
- Shred the cheddar cheese using the large holes of a box grater. Measure 2 cups for the casserole and reserve 1/4 cup for topping if using.
- In a large mixing bowl, whisk together softened cream cheese, sour cream, and melted butter until smooth. Add eggs and whisk until fully combined.
- Sprinkle flour, sugar, salt, and pepper over the wet mixture. Whisk until incorporated and no streaks of flour remain.
- Fold in the corn, diced jalapeños, and 2 cups shredded cheddar using a spatula until evenly distributed. Do not overmix.
- Pour the mixture into the prepared baking dish and spread evenly.
- If using topping: In a small bowl, toss panko breadcrumbs with 2 tablespoons melted butter until evenly coated. Sprinkle over the casserole.
- Bake for 25 minutes. After 20 minutes, check: edges should be bubbly and center set but slightly jiggly. If adding extra 1/4 cup cheese, sprinkle on top and bake for another 5 minutes until melted and golden.
- Let rest for 5 minutes before serving. The casserole will set as it cools.
Notes
For best results, use room temperature cream cheese and eggs to avoid a lumpy batter. Drain frozen corn thoroughly to prevent a watery casserole. Jalapeño heat varies; taste a small piece before dicing and adjust quantity accordingly. Let the casserole rest for 5 minutes after baking to set properly. To make ahead, assemble and refrigerate up to 1 day before baking; add 10 minutes to bake time. Leftovers keep in the refrigerator for up to 4 days.
Nutrition
- Serving Size: 1 serving (about 1/8
- Calories: 320
- Sugar: 6
- Sodium: 420
- Fat: 22
- Saturated Fat: 13
- Carbohydrates: 24
- Fiber: 2
- Protein: 11
Keywords: corn casserole, cheesy corn casserole, jalapeño corn casserole, easy side dish, weeknight side, 30-minute recipe, comfort food, potluck side