Love this? Save it for later!
Share the inspiration with your friends
The neighborhood potluck was in six hours and I’d completely forgotten. Everyone else would be bringing their signature dishes—you know the ones, the kind that take two days and a spreadsheet to prepare. My neighbor Karen was famous for her triple-layer chocolate cake that looked like it belonged in a bakery window. Across the street, the Johnsons always brought something they’d learned in a cooking class in Tuscany. And me? I’d been so busy with work that week that I’d barely remembered to buy milk.
I stood in my kitchen, staring into the pantry like it might magically produce a show-stopping dessert. Honestly, it was a little pathetic. I had a package of Biscoff cookies leftover from a flight, some cream cheese, and not much else. The panic was real, let me tell you. I mean, you know that feeling when you’re supposed to bring something impressive and all you’ve got is odds and ends?
So I did what any reasonable person would do under pressure—I started throwing things together and hoping for the best. I crushed those cookies into a crust, mixed up a simple cheesecake filling, and drizzled some of that magical Biscoff spread on top. No fancy techniques, no complicated steps. Just a prayer and a spatula. The bars came out of the oven looking… okay. Nothing special, honestly. I cut them into squares, arranged them on a platter, and headed to the potluck feeling like I’d already lost.
But here’s the thing about these Biscoff cheesecake bars—they’re sneaky. By the end of the night, the platter was empty. Karen asked me for the recipe. The Johnsons wanted to know where I’d learned to bake like that. I just smiled and said it was nothing, which it kind of was. That’s the moment I realized I’d accidentally created something worth keeping. And now, every time I make them, I remember that panicked morning and how something so simple ended up stealing the show.
Why You’ll Love This Recipe
Let me tell you why these Biscoff cheesecake bars have become my secret weapon for every gathering. They’re the kind of dessert that makes people think you spent hours in the kitchen when really, you barely broke a sweat.
- Quick & Easy: These bars come together in about 30 minutes of active prep time. The oven does the rest of the work while you get ready for your guests or tackle that last-minute to-do list.
- Simple Ingredients: No fancy grocery trips needed. You likely already have most of these in your kitchen. The star ingredient, Biscoff spread, is easy to find these days in most grocery stores.
- Perfect for Gatherings: These bars are made for sharing. They cut cleanly, travel well, and look gorgeous on a dessert table. Plus, they’re easy to grab and eat without plates or forks.
- Crowd-Pleaser: I’ve brought these to potlucks, office parties, and family dinners. They disappear every single time. Kids love them, adults love them, and people who claim they don’t like sweets love them.
- Unbelievably Delicious: The combination of buttery Biscoff crust, creamy cheesecake filling, and that signature spiced cookie flavor is next-level comfort food. It’s the kind of dessert that makes you close your eyes after the first bite.
What makes these bars different from other cheesecake recipes is the texture. The crust stays perfectly crunchy, the filling is silky smooth without being too dense, and the Biscoff drizzle on top adds this gorgeous caramelized finish. I’ve tested this recipe at least a dozen times to get the ratios just right. Trust me, this isn’t just another version—it’s the best version.
What Ingredients You Will Need
This recipe uses simple, wholesome ingredients to deliver bold flavor and satisfying texture without the fuss. Most of these are pantry staples, and the few special items are worth tracking down for the incredible result.
For the Biscoff Crust
- 2 cups Biscoff cookie crumbs (about 24-26 cookies, crushed finely) — I recommend using the original Lotus Biscoff cookies for the best flavor. The spiced notes are essential.
- 5 tablespoons unsalted butter, melted — Use good-quality butter here since it’s a primary flavor in the crust. Salted butter works too, just reduce any added salt elsewhere.
- 2 tablespoons granulated sugar — This helps the crust hold together and adds a touch of sweetness. You can skip it if you’re watching sugar, but I find it helps the texture.
- Pinch of salt — Just a tiny pinch to balance the sweetness and enhance the cookie flavor.
For the Cheesecake Filling
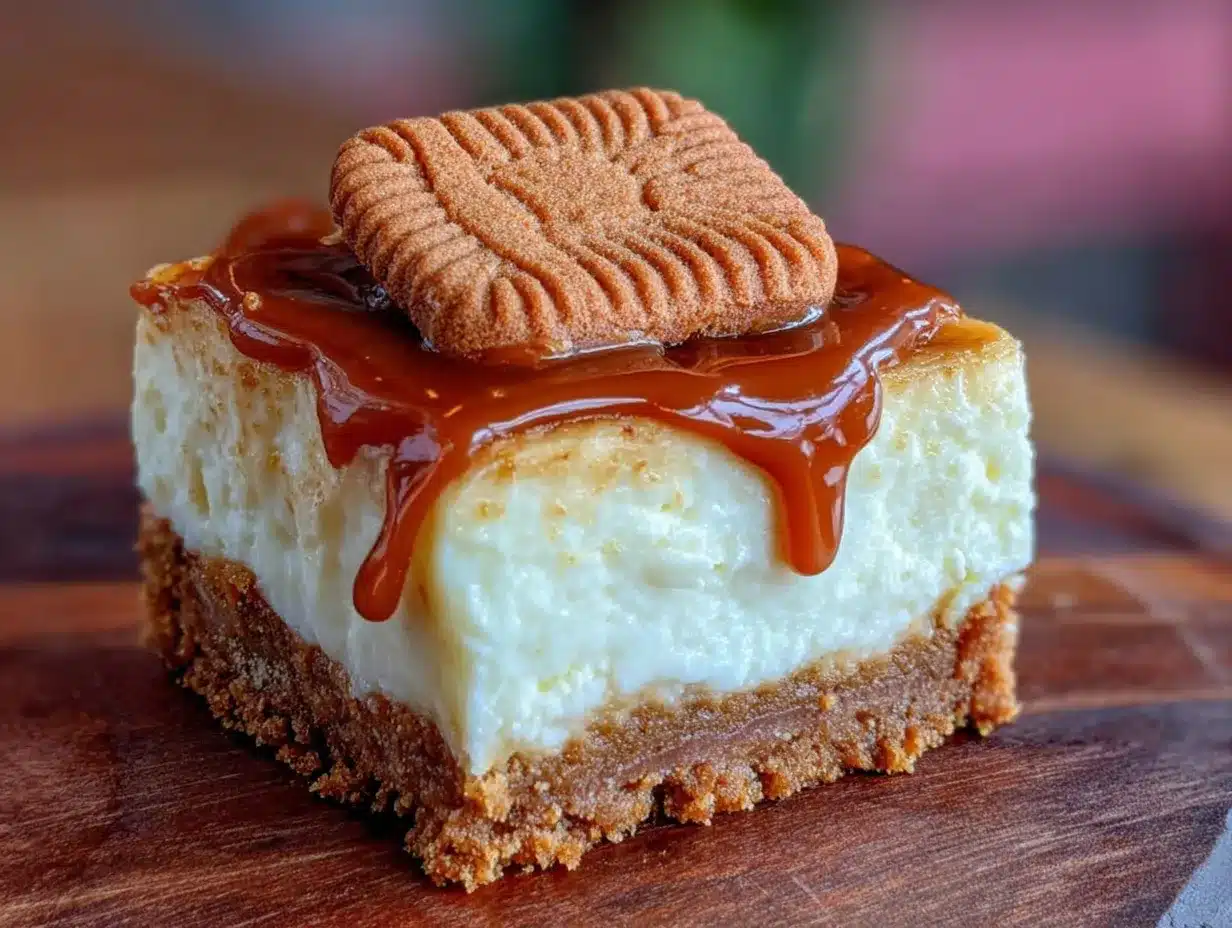
- 16 ounces cream cheese, softened to room temperature — Full-fat cream cheese gives the best texture. I’ve tried reduced-fat versions and they work, but the filling won’t be as luxuriously creamy. Let it sit out for at least an hour before starting.
- 3/4 cup granulated sugar — Just enough to sweeten without overpowering the Biscoff flavor. You can reduce this to 1/2 cup if you prefer a less sweet dessert.
- 2 large eggs, room temperature — Cold eggs can make the filling lumpy. Pop them in a bowl of warm water for 5 minutes if you forgot to take them out ahead of time.
- 1 teaspoon vanilla extract — Pure vanilla extract makes a difference here. The artificial stuff has a chemical aftertaste that doesn’t play well with the Biscoff spices.
- 1/2 cup Biscoff spread (crunchy or smooth) — This is the secret ingredient that takes the filling from good to unforgettable. I like the crunchy version for texture, but smooth works beautifully too.
For the Topping
- 1/3 cup Biscoff spread, warmed slightly for drizzling — Microwave it for about 15 seconds until it’s pourable but not hot. This creates that gorgeous marbled effect on top.
- Optional: 2-3 tablespoons crushed Biscoff cookies for garnish — Adds a nice crunch and visual appeal. Save a few cookies from the crust batch.
When choosing your Biscoff spread, look for the creamy cookie butter in the peanut butter aisle or international foods section. Some stores carry it near the jams and spreads. If you can’t find it, speculoos cookie butter works as a substitute, though the flavor will be slightly different. I’ve also used Trader Joe’s cookie butter in a pinch and it turned out great.
Equipment Needed
You don’t need a fancy kitchen to make these bars, which is part of their beauty. Here’s what you’ll need:
- 9×9-inch baking pan — This is the ideal size for getting thick, satisfying bars. An 8×8 pan works too, but your bars will be a bit taller and may need an extra 5 minutes of baking time. I’ve also used a 9×13 pan for thinner bars that are perfect for larger crowds.
- Parchment paper — This is non-negotiable for easy removal. Leave some overhang on two sides to create handles. Trust me, trying to cut bars stuck to the pan is a nightmare.
- Food processor or zip-top bag and rolling pin — For crushing the cookies into fine crumbs. The food processor is faster and gives more consistent results, but the bag-and-rolling-pin method works great if you need a little arm workout.
- Electric hand mixer or stand mixer — For getting that silky smooth cheesecake filling. A whisk will work in a pinch, but your arm will get tired and the texture won’t be as smooth.
- Mixing bowls — One medium bowl for the crust, one large bowl for the filling. Glass or stainless steel works best.
- Rubber spatula — For scraping every last bit of filling into the pan. I’m a big fan of the one-piece silicone spatulas that don’t have crevices for batter to hide in.
- Measuring cups and spoons — For accuracy. Eyeballing ingredients in baking can lead to sad results.
Budget-friendly tip: If you don’t have a food processor, place the cookies in a sturdy zip-top bag and go at them with a rolling pin. It’s oddly satisfying and saves you from buying another gadget. I did this for years before I got my food processor.
Preparation Method
Let’s walk through this step by step. I’ve made these bars so many times that I’ve got the process down to a science. Follow along and you’ll have a pan of gorgeous Biscoff cheesecake bars in no time.
- Preheat your oven to 325°F (160°C). Line your 9×9 baking pan with parchment paper, leaving about 2 inches of overhang on two opposite sides. This creates handles that make lifting the bars out a breeze. Lightly grease the parchment with cooking spray or butter.
- Make the crust. Place the Biscoff cookies in your food processor and pulse until you have fine crumbs. You should have about 2 cups. Transfer to a medium bowl, add the melted butter, sugar, and salt. Stir with a fork until the mixture looks like wet sand and holds together when pressed. Don’t overmix or the crust can become greasy.
- Press the crust into the pan. Dump the crumb mixture into your prepared pan. Use the bottom of a measuring cup or a flat glass to press it down firmly and evenly. I like to start at the edges and work my way to the center. Make sure the crust is compact—this prevents it from crumbling when you cut the bars later. Bake for 10 minutes, then set aside to cool slightly while you make the filling.
- Beat the cream cheese. In a large mixing bowl, beat the softened cream cheese with an electric mixer on medium speed until smooth and creamy, about 2 minutes. Scrape down the sides and bottom of the bowl with your spatula. This step is crucial—any lumps now will remain in the finished cheesecake.
- Add the sugar and vanilla. Add the sugar and vanilla extract to the cream cheese. Beat on medium speed until combined, about 1 minute. Scrape the bowl again. Don’t overbeat here or you’ll incorporate too much air, which can cause cracks in the cheesecake.
- Add the eggs one at a time. Crack one egg into the bowl and beat on low speed just until incorporated. Add the second egg and repeat. Mixing on low speed prevents too much air from getting into the batter. The mixture should be smooth and glossy.
- Mix in the Biscoff spread. Add 1/2 cup of Biscoff spread to the batter. Beat on low speed until just combined. You want the spread to be fully incorporated, but don’t overmix. The batter will have a beautiful caramel color and smell incredible at this point.
- Pour the filling over the crust. Pour the cheesecake filling over the pre-baked crust. Use your spatula to spread it evenly to the edges. Give the pan a gentle tap on the counter to release any air bubbles.
- Add the topping. Warm the remaining 1/3 cup of Biscoff spread in the microwave for about 15 seconds until it’s pourable. Drop spoonfuls of the warm spread over the cheesecake filling. Use a knife or toothpick to swirl it into a marbled pattern. Don’t over-swirl or you’ll lose the distinct ribbons of cookie butter.
- Bake the cheesecake bars. Place the pan in the preheated oven and bake for 35-40 minutes. The edges should look set and slightly puffed, but the center should still have a slight jiggle when you gently shake the pan. This jiggle is important—it means the center will set to a creamy texture as it cools. Overbaking leads to dry, cracked cheesecake.
- Cool completely. Remove the pan from the oven and place it on a wire rack. Let the bars cool at room temperature for about 1 hour. Then transfer the pan to the refrigerator and chill for at least 4 hours, preferably overnight. This step is non-negotiable for clean slices and the best texture. I know it’s hard to wait, but trust me.
- Cut and serve. Once fully chilled, use the parchment handles to lift the entire block of cheesecake bars out of the pan. Place on a cutting board and use a sharp knife to cut into 16 squares. Wipe the knife clean between cuts for the neatest edges. Sprinkle with crushed Biscoff cookies if desired.
Cooking Tips & Techniques
After making these bars more times than I can count, I’ve collected some hard-won wisdom. Here are the tips that make the difference between good bars and unforgettable ones.
Room temperature ingredients are non-negotiable. I learned this the hard way when I made a batch with cold cream cheese and ended up with lumpy filling that never smoothed out. Let your cream cheese and eggs sit on the counter for at least an hour before starting. If you’re in a rush, cut the cream cheese into cubes and microwave it in 10-second bursts until it’s soft but not melted.
Don’t overmix the filling. This is probably the most common mistake I see. Once you add the eggs, mix on low speed and stop as soon as everything comes together. Overmixing incorporates too much air, which causes the cheesecake to puff up in the oven and then collapse, creating cracks on the surface. You want a dense, creamy texture, not a fluffy one.
The water bath shortcut. Traditional cheesecake recipes call for a water bath to prevent cracking, but I’ve found that for these bars, it’s not necessary. The smaller pan size and shorter baking time mean they’re less prone to cracking. If you’re nervous about it, place a pan of hot water on the rack below the cheesecake bars. The steam creates a humid environment that helps prevent cracks.
Patience with chilling. I know it’s tempting to cut into these bars after an hour or two in the fridge, but they really need that full 4 hours (or overnight) to set properly. The texture goes from soft and almost mousse-like to perfectly sliceable and creamy. I once served them after only 3 hours and they were a mess—delicious, but a mess.
Sharp knife for clean cuts. Use a long, sharp knife and wipe it clean between each cut. I run mine under hot water and dry it off before each slice. This gives you those beautiful, Instagram-worthy edges that make people think you’re a professional baker.
Variations & Adaptations
One of the things I love about this recipe is how adaptable it is. Here are some variations I’ve tried and loved.
Chocolate Biscoff Bars: Add 1/4 cup of melted dark chocolate to the cheesecake filling along with the Biscoff spread. The chocolate and Biscoff flavors are a match made in heaven. I made these for a friend’s birthday and they were gone before the cake I’d also brought.
Gluten-Free Version: These bars are naturally gluten-free if you use certified gluten-free Biscoff cookies. The original Lotus Biscoff cookies are made with wheat flour, but many stores carry gluten-free speculoos cookies that work beautifully. The filling has no flour, so you’re just swapping the crust cookies.
Vegan Adaptation: Use vegan cream cheese (I like the Kite Hill brand) and a flax egg (1 tablespoon ground flaxseed mixed with 3 tablespoons water per egg). The texture will be slightly softer, but the flavor is still incredible. I’ve served these to vegan friends who couldn’t tell the difference.
Mini Cheesecake Bites: Press the crust into a mini muffin tin lined with paper liners, fill with cheesecake batter, and bake for 12-15 minutes. These are perfect for parties where people want to grab and go. Just make sure to chill them thoroughly before removing the liners.
Peanut Butter Swirl: Swap half the Biscoff spread in the filling for creamy peanut butter. The combination of peanut butter and Biscoff is outrageously good. My sister requests these every time she visits, and I don’t blame her.
Serving & Storage Suggestions
These Biscoff cheesecake bars are versatile when it comes to serving. Here’s how to make them shine.
Serve chilled or at room temperature. I prefer them straight from the fridge when the filling is firm and the crust is extra crunchy. But they’re also delicious after sitting out for 15-20 minutes, which softens the filling to a creamier texture. For parties, I usually take them out of the fridge about 20 minutes before serving.
Presentation tips. Arrange the bars on a white platter or cake stand to make the caramel color pop. Sprinkle with crushed Biscoff cookies and a light dusting of powdered sugar for a professional touch. A dollop of whipped cream on the side never hurts either.
What to serve alongside. These bars pair beautifully with coffee or espresso. The bitterness of the coffee balances the sweetness of the bars perfectly. For a dessert spread, serve them alongside fresh berries or a simple fruit salad. The acidity of the fruit cuts through the richness.
Storage instructions. Store the bars in an airtight container in the refrigerator for up to 5 days. Layer them with parchment paper between each layer to prevent sticking. They actually taste better on day two after the flavors have had time to meld together.
Freezing instructions. These bars freeze beautifully. Wrap individual bars in plastic wrap, then place them in a freezer-safe bag or container. They’ll keep for up to 3 months. To thaw, transfer to the refrigerator overnight or let sit at room temperature for about 30 minutes. I always keep a stash in my freezer for unexpected guests or late-night cravings.
Nutritional Information & Benefits
Let’s be real—these are a treat, not a health food. But knowing what’s in them helps with mindful indulgence.
Per bar (based on 16 servings):
- Calories: 285
- Fat: 18g
- Carbohydrates: 28g
- Protein: 5g
- Sugar: 20g
- Sodium: 220mg
The cream cheese provides a good amount of calcium and protein, while the eggs add additional protein and essential vitamins. The Biscoff cookies and spread are made with wheat flour and contain small amounts of iron and B vitamins. Of course, this is a dessert meant for special occasions, so I don’t stress about the numbers. I just enjoy every bite.
For those with dietary concerns, these bars contain dairy, eggs, and wheat. They are not suitable for vegans or those with celiac disease unless modified as suggested in the variations section. If you’re watching your sugar intake, you can reduce the sugar in the filling to 1/2 cup without sacrificing too much texture.
Frequently Asked Questions
Can I use a different cookie for the crust?
Absolutely. Graham crackers, digestive biscuits, or vanilla wafers all work well. The flavor will be different, but the texture will be similar. If you use a less sweet cookie, you might want to add an extra tablespoon of sugar to the crust.
Why did my cheesecake bars crack on top?
Cracking usually happens from overbaking or overmixing the filling. Make sure you remove the bars from the oven when the center still has a slight jiggle. Also, avoid mixing the filling on high speed once you’ve added the eggs. A little crack isn’t the end of the world—the Biscoff swirl on top hides imperfections beautifully.
Can I make these bars ahead of time?
Yes, and I actually recommend it. These bars need at least 4 hours of chilling anyway, so making them the day before your event is perfect. The flavors meld together overnight and the texture becomes even creamier. Just keep them covered in the fridge until you’re ready to serve.
How do I get clean, neat slices?
Use a sharp knife and wipe it clean between each cut. For the cleanest slices, dip the knife in hot water and dry it off before each cut. This melts through the cheesecake smoothly instead of dragging through it. Also, make sure the bars are fully chilled—warm cheesecake is a mess to cut.
Can I double this recipe for a larger crowd?
Definitely. Double all the ingredients and use a 9×13 baking pan. You’ll need to increase the baking time to about 45-50 minutes. Keep an eye on the edges—they should look set while the center still jiggles slightly. The chilling time remains the same.
Conclusion
These Biscoff cheesecake bars have become my go-to for every gathering, and I don’t see that changing anytime soon. They’re simple enough for a weekday treat but impressive enough for a holiday table. The combination of that crunchy, spiced crust and the silky, creamy filling is honestly something special.
What I love most about this recipe is how forgiving it is. You don’t need to be a pastry chef or have fancy equipment. You just need a little time, some good ingredients, and the willingness to wait for them to chill. And when you pull that pan out of the fridge and cut into those perfect, creamy bars, you’ll be so glad you did.
I’d love to hear how these turn out for you. Did you try any variations? Did they disappear at your party as fast as they do at mine? Drop a comment below and let me know. And if you’re looking for another crowd-pleasing dessert, you might want to try my no-bake cookie dough bites or these salted caramel cheesecake bars that use a similar technique. Happy baking, friends!
Pin This Recipe!
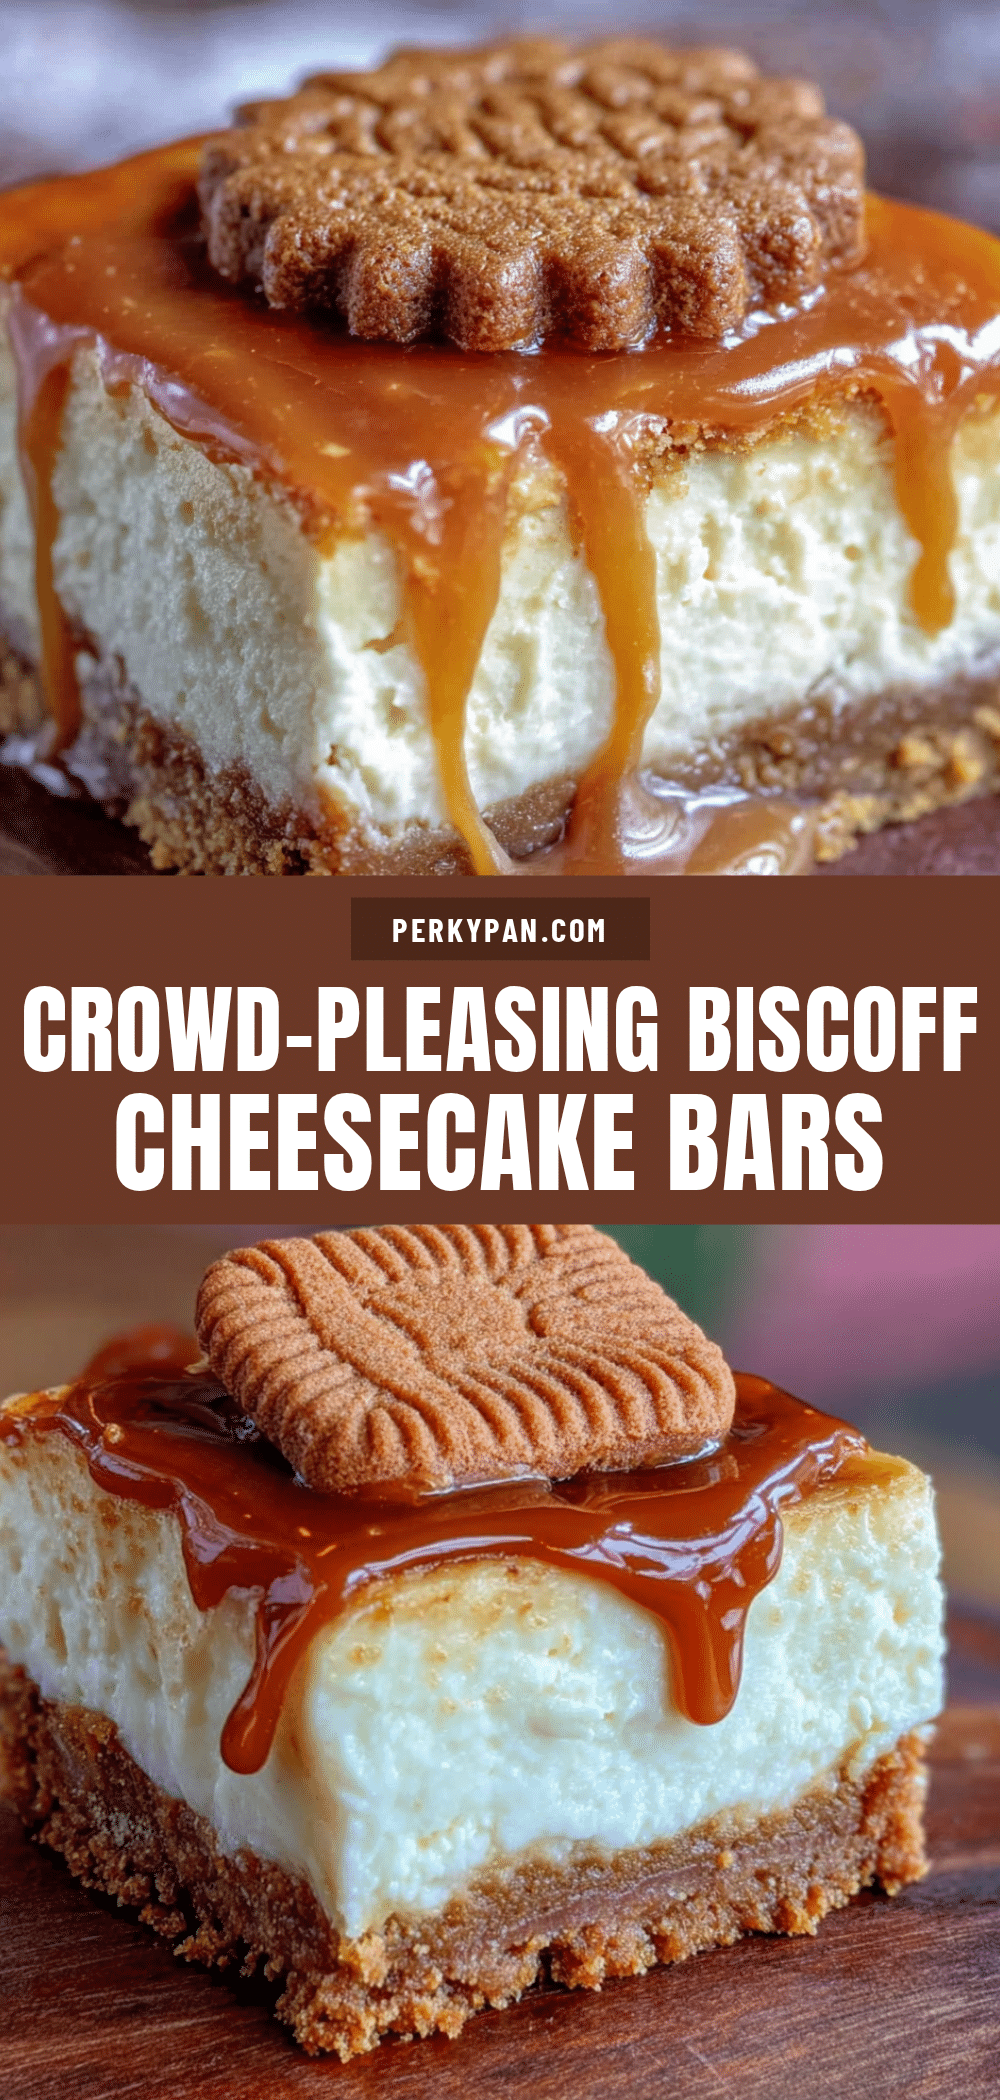
Easy Biscoff Cheesecake Bars: Best Crowd-Pleasing Recipe
These Biscoff cheesecake bars feature a crunchy spiced cookie crust, a silky smooth cheesecake filling, and a gorgeous Biscoff swirl on top. They’re quick, easy, and perfect for potlucks, parties, or any gathering.
- Prep Time: 30 minutes
- Cook Time: 35-40 minutes
- Total Time: 4 hours 35 minutes (including chilling)
- Yield: 16 servings 1x
- Category: Dessert
- Cuisine: American
Ingredients
- 2 cups Biscoff cookie crumbs (about 24–26 cookies, crushed finely)
- 5 tablespoons unsalted butter, melted
- 2 tablespoons granulated sugar
- Pinch of salt
- 16 ounces cream cheese, softened to room temperature
- 3/4 cup granulated sugar
- 2 large eggs, room temperature
- 1 teaspoon vanilla extract
- 1/2 cup Biscoff spread (crunchy or smooth)
- 1/3 cup Biscoff spread, warmed slightly for drizzling
- Optional: 2-3 tablespoons crushed Biscoff cookies for garnish
Instructions
- Preheat your oven to 325°F (160°C). Line your 9×9 baking pan with parchment paper, leaving about 2 inches of overhang on two opposite sides. Lightly grease the parchment with cooking spray or butter.
- Make the crust: Place the Biscoff cookies in your food processor and pulse until you have fine crumbs. Transfer to a medium bowl, add the melted butter, sugar, and salt. Stir with a fork until the mixture looks like wet sand and holds together when pressed.
- Press the crust into the pan: Dump the crumb mixture into your prepared pan. Use the bottom of a measuring cup or a flat glass to press it down firmly and evenly. Bake for 10 minutes, then set aside to cool slightly while you make the filling.
- Beat the cream cheese: In a large mixing bowl, beat the softened cream cheese with an electric mixer on medium speed until smooth and creamy, about 2 minutes. Scrape down the sides and bottom of the bowl with your spatula.
- Add the sugar and vanilla: Add the sugar and vanilla extract to the cream cheese. Beat on medium speed until combined, about 1 minute. Scrape the bowl again.
- Add the eggs one at a time: Crack one egg into the bowl and beat on low speed just until incorporated. Add the second egg and repeat. Mixing on low speed prevents too much air from getting into the batter.
- Mix in the Biscoff spread: Add 1/2 cup of Biscoff spread to the batter. Beat on low speed until just combined.
- Pour the filling over the crust: Pour the cheesecake filling over the pre-baked crust. Use your spatula to spread it evenly to the edges. Give the pan a gentle tap on the counter to release any air bubbles.
- Add the topping: Warm the remaining 1/3 cup of Biscoff spread in the microwave for about 15 seconds until it’s pourable. Drop spoonfuls of the warm spread over the cheesecake filling. Use a knife or toothpick to swirl it into a marbled pattern.
- Bake the cheesecake bars: Place the pan in the preheated oven and bake for 35-40 minutes. The edges should look set and slightly puffed, but the center should still have a slight jiggle when you gently shake the pan.
- Cool completely: Remove the pan from the oven and place it on a wire rack. Let the bars cool at room temperature for about 1 hour. Then transfer the pan to the refrigerator and chill for at least 4 hours, preferably overnight.
- Cut and serve: Once fully chilled, use the parchment handles to lift the entire block of cheesecake bars out of the pan. Place on a cutting board and use a sharp knife to cut into 16 squares. Wipe the knife clean between cuts for the neatest edges. Sprinkle with crushed Biscoff cookies if desired.
Notes
Room temperature ingredients are non-negotiable for a smooth filling. Don’t overmix the filling once eggs are added to prevent cracks. The water bath is not necessary for these bars, but placing a pan of hot water on the rack below can help prevent cracking. Patience with chilling is key for clean slices. Use a sharp knife wiped clean between cuts for neat edges.
Nutrition
- Serving Size: 1 bar
- Calories: 285
- Sugar: 20
- Sodium: 220
- Fat: 18
- Saturated Fat: 10
- Carbohydrates: 28
- Fiber: 1
- Protein: 5
Keywords: Biscoff cheesecake bars, easy cheesecake bars, Biscoff dessert, potluck dessert, crowd-pleasing dessert


