Love this? Save it for later!
Share the inspiration with your friends
Last fall, I was at my local farmers’ market, absolutely failing at picking a good bunch of rosemary. I kept grabbing stems that were all woody and dry, looking clueless as the line behind me grew. The woman running the herb stall—an older lady named Gloria with dirt permanently under her fingernails—watched me struggle for a solid minute before she finally spoke up. “You want the tips, dear,” she said, reaching over my hand to snap off a sprig that practically perfumed the air around us. “That’s where the flavor lives.” We got to talking, and she told me about her Sunday suppers, the ones where she’d throw chicken and potatoes into one pan with that very rosemary and let the oven do the heavy lifting. She wasn’t teaching me a recipe, exactly. She was just describing what she did, like it was no big deal. But the way she talked about the crispy skin and the potatoes soaking up all those juices? I couldn’t shake it. I went home, grabbed a cast iron skillet, and tried to recreate what she’d described from memory. Honestly, the first attempt was a mess—I crowded the pan and ended up with soggy skin. But I kept tweaking, kept thinking about Gloria’s confident hands, and eventually, this dish became my go-to. There’s something about a single pan doing all the work while the house fills with that woodsy, warm rosemary smell. Maybe you’ve had that moment where a stranger shares something small and it just sticks with you. This recipe is that moment, every single time I make it.
Why You’ll Love This Recipe
Let me tell you why this dish has earned a permanent spot in my weekly rotation. It’s not just another chicken recipe—it’s the kind of meal that makes you feel like a rockstar with almost zero effort.
- One Pan Wonder: Everything cooks in a single skillet, which means less cleanup and more time enjoying your evening. The potatoes roast right alongside the chicken, soaking up all those savory drippings.
- Foolproof Crispy Skin: I’ve tested this method more times than I care to admit, and the secret is starting the chicken skin-side down in a cold pan. That little trick guarantees shatteringly crisp skin every single time.
- Pantry-Friendly Ingredients: No exotic spices or hard-to-find items here. You probably have most of these ingredients in your kitchen right now, which makes this perfect for those “what’s for dinner?” panic moments.
- Weeknight Elegant, Sunday Impressive: This dish looks and tastes like something you’d order at a cozy bistro, but it comes together in about an hour with minimal hands-on time. It’s fancy enough for company, easy enough for a Tuesday.
- Deep, Layered Flavor: The rosemary infuses everything with that earthy, piney goodness, while the chicken fat bastes the potatoes into golden, crispy perfection. Every bite has this incredible savory depth that keeps you coming back.
I’ve made this for picky kids, dinner guests, and even just for myself on a quiet Wednesday night. It never disappoints. The first time I served it to my brother, he actually stopped mid-chew and said, “Wait, this is chicken?” That’s the kind of reaction this recipe gets.
What Ingredients You Will Need
This recipe relies on simple, high-quality ingredients that work together to create something truly special. The beauty is in the simplicity—each component plays a crucial role in building flavor and texture.
- Bone-in, skin-on chicken thighs (6-8 thighs, about 2.5-3 lbs total): This is non-negotiable for the crispiest results. The bone keeps the meat juicy, and the skin is what gives you that golden crackle. I prefer thighs over breasts here—they’re more forgiving and stay tender even if you cook them a few minutes extra. Look for thighs with the skin still attached and intact.
- Fresh rosemary (3-4 sprigs, plus 2 tablespoons chopped): Please, please use fresh here. Dried rosemary just doesn’t have the same punch, and it can get woody and unpleasant. Gloria was right—the tips of the sprigs are where the most essential oils live. Give the leaves a good chop before using.
- Yukon Gold potatoes (2 lbs, halved or quartered): These are my absolute favorite for roasting. They have that perfect balance of starch and waxiness, so they get crispy on the outside while staying creamy and fluffy inside. Russets work in a pinch, but Yukon Golds really shine here.
- Garlic (6-8 cloves, smashed): Whole cloves, lightly smashed with the side of your knife. They’ll soften and sweeten as they roast, becoming these little buttery morsels you’ll want to eat straight from the pan. Don’t skip these.
- Olive oil (3 tablespoons, divided): A good quality extra virgin olive oil adds richness and helps everything brown beautifully. You’ll use some for the chicken and some for the potatoes.
- Salt (1½ teaspoons, plus more for seasoning): I use kosher salt for its clean flavor and easy pinching. Diamond Crystal is my go-to brand—it’s less salty by volume than table salt, so you have more control.
- Black pepper (1 teaspoon, freshly ground): Freshly ground pepper makes a real difference here. The pre-ground stuff just doesn’t have the same aromatic kick.
- Lemon (1 whole, for serving): A squeeze of fresh lemon juice right before serving cuts through the richness and brightens everything up. Don’t skip this step—it’s magical.
- Optional: Fresh thyme (4-5 sprigs): I sometimes add a few thyme sprigs to the pan for extra herbal depth. It’s not essential, but it’s a lovely addition if you have it on hand.
Equipment Needed
You don’t need a fancy kitchen to nail this recipe, but having the right tools makes the process smoother and the results more consistent.
- 12-inch cast iron skillet or heavy-bottomed oven-safe pan: This is my preferred pan for this recipe. Cast iron retains heat beautifully and gives you that gorgeous even browning. If you don’t have cast iron, any heavy oven-safe skillet will work—just avoid non-stick pans, as they don’t get hot enough for proper crisping.
- Sharp chef’s knife: A good knife makes mincing rosemary and halving potatoes a breeze. I use my 8-inch Wüsthof for everything, but any sharp knife will do. Dull knives are actually more dangerous—they slip more easily.
- Cutting board: Go for a large wooden or plastic board that gives you plenty of room to work. I prefer wood—it’s gentler on knife edges and naturally antimicrobial.
- Tongs: These are essential for flipping the chicken without tearing the skin. Spring-loaded tongs give you the best control. I’ve ruined more chicken skins with forks than I care to admit.
- Paper towels: You’ll need these for drying the chicken skin thoroughly. Patience here is key—wet skin won’t crisp up properly.
- Meat thermometer: This takes the guesswork out of cooking. Chicken thighs are done at 175-185°F, which is higher than breasts, so don’t be alarmed. An instant-read thermometer is my favorite kitchen tool, honestly.
Preparation Method
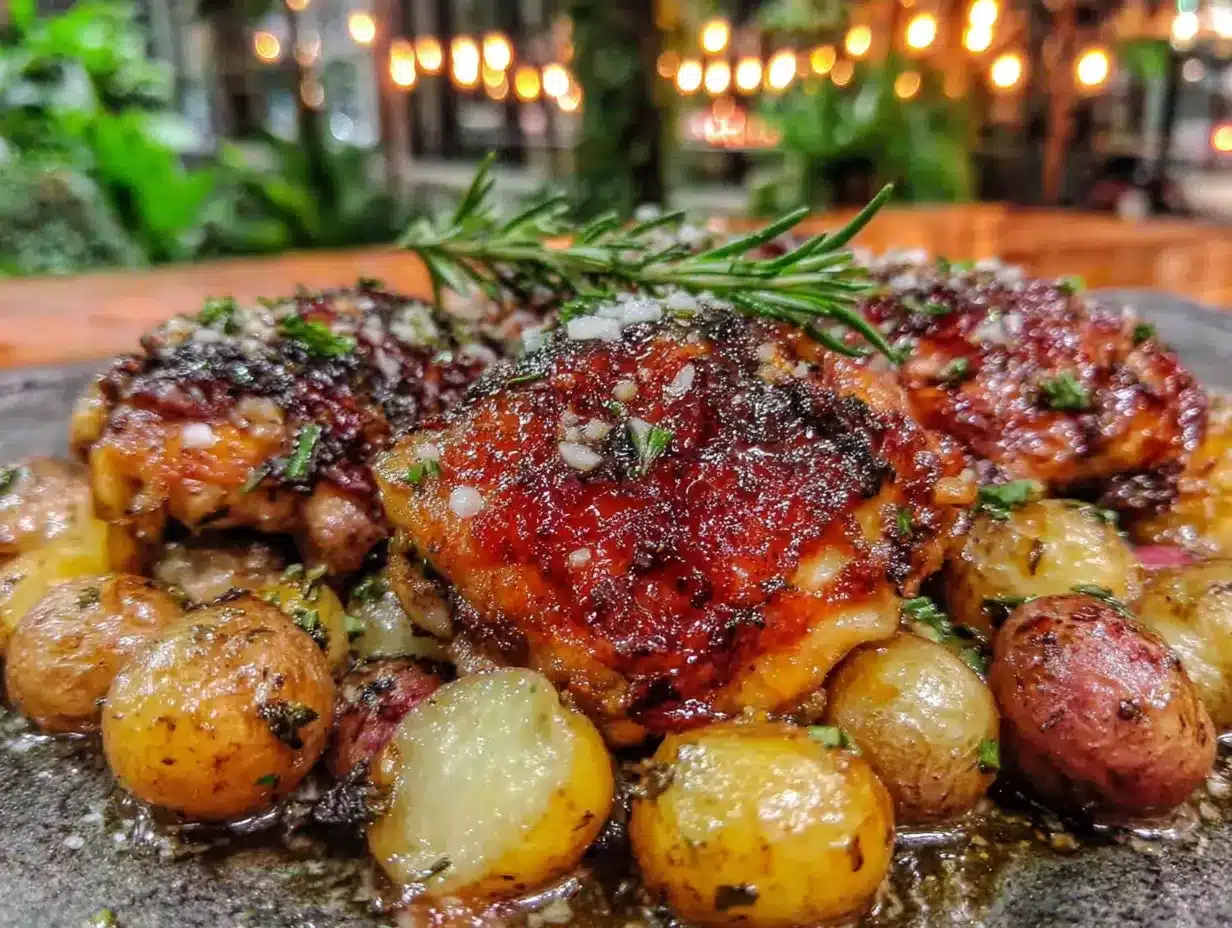
Let’s walk through this step by step. I’ve included all the little details I wish someone had told me when I first started making this dish.
- Preheat your oven to 425°F (220°C). Position the rack in the middle of the oven. Give it a full 20 minutes to come to temperature—a properly hot oven is crucial for that golden crust.
- Pat the chicken thighs completely dry with paper towels. This is the most important step for crispy skin. I mean really dry—get in between the skin and the meat if you can. Any moisture on the surface will steam instead of sear, and you’ll end up with sad, rubbery skin. Let the chicken sit at room temperature for 15 minutes after drying.
- Season the chicken generously. Sprinkle both sides with salt and pepper, focusing a little extra on the skin side. Don’t be shy—chicken thighs can handle a fair amount of seasoning. I use about 1 teaspoon of salt just for the chicken.
- Prep your potatoes. Wash and scrub the Yukon Golds well—no need to peel them, the skin gets deliciously crispy. Cut any larger potatoes into quarters and smaller ones in half, aiming for uniform 1½-inch pieces. Toss them in a bowl with 2 tablespoons olive oil, ½ teaspoon salt, ¼ teaspoon pepper, and 1 tablespoon of the chopped rosemary.
- Start the chicken in a cold pan. Here’s the trick Gloria never told me, but I figured out through trial and error: place the chicken thighs skin-side down in your cold cast iron skillet. Then turn the heat to medium. As the pan slowly heats up, the fat renders out gradually, giving you that impossibly crispy skin. Don’t crowd the pan—leave a little space between each thigh. If you’re making a full batch, you might need to work in two batches.
- Cook the chicken skin-side down for 12-15 minutes. Don’t touch it! Let it sit and do its thing. You’ll hear a gentle sizzle, and the fat will start pooling in the pan. After about 12 minutes, peek under one thigh—the skin should be deep golden brown and crispy. If it’s not there yet, give it another 2-3 minutes.
- Flip the chicken and add the potatoes. Using your tongs, carefully flip each thigh so the skin side is up. The skin should be beautifully browned. Now, add the seasoned potatoes and smashed garlic cloves to the pan, arranging them around the chicken in a single layer. Don’t pile them up—they need space to roast and get crispy. Tuck the rosemary sprigs in among the potatoes.
- Transfer the pan to the oven. Roast everything together for 25-30 minutes. Halfway through, give the pan a gentle shake to redistribute the potatoes, but leave the chicken alone. You want that skin to stay intact and continue crisping.
- Check for doneness. After 25 minutes, insert your meat thermometer into the thickest part of a thigh, avoiding the bone. You’re looking for 175-185°F. The potatoes should be fork-tender and golden brown on the edges. If the chicken needs more time, give it another 5 minutes and check again.
- Rest and serve. Remove the pan from the oven and let everything rest for 5 minutes. This allows the juices to redistribute. Sprinkle the remaining 1 tablespoon of chopped rosemary over everything, and squeeze fresh lemon juice over the top. Serve straight from the pan for maximum rustic appeal.
Cooking Tips & Techniques
After making this dish probably thirty times, I’ve collected a few hard-won lessons that will save you from my early mistakes.
The cold pan start is everything. I know it sounds counterintuitive—usually you want a screaming hot pan for searing, right? But chicken skin is mostly fat and collagen, and it needs gentle, gradual heat to render properly. If you drop it into a hot pan, the skin tightens up and traps the fat underneath, leaving you with a greasy, rubbery texture. Starting cold lets that fat melt away slowly, giving you paper-thin, crackly skin. Trust me on this one—I learned the hard way after three soggy attempts.
Don’t skip the patting dry step. I know it seems fussy, but moisture is the enemy of crispiness. I actually take it a step further: after patting the chicken dry, I leave it uncovered in the fridge for an hour if I have time. This dries out the skin even more, and the results are absolutely worth it. If you’re short on time, just be thorough with the paper towels.
Watch your pan size. If your skillet is too small and the potatoes are piled on top of each other, they’ll steam instead of roast. Use a 12-inch pan minimum, and if you’re doubling the recipe, use two pans. Crowding is the number one mistake I see home cooks make, and it’s the difference between golden potatoes and sad, soggy ones.
Let the pan rest before serving. I know it’s tempting to dig in right away, but that 5-minute rest is crucial. The juices need time to settle back into the meat, and the potatoes continue crisping as they cool slightly. Plus, the residual heat from the cast iron keeps everything warm for a good 15 minutes, so you can actually sit down and enjoy your meal without rushing.
Variations & Adaptations
One of the things I love about this recipe is how flexible it is. Here are some ways to make it your own.
- Herb Swaps: Not a rosemary fan? Try fresh thyme and oregano instead. Or go with a Mediterranean twist using dried oregano and a pinch of smoked paprika. I’ve even used sage and browned butter for a fall-inspired version that’s absolutely divine.
- Vegetable Variations: Swap out half the potatoes for other root vegetables. Carrots, parsnips, and sweet potatoes all work beautifully. Just cut them to similar sizes so they cook evenly. In summer, I sometimes add bell peppers and zucchini halfway through cooking—they don’t need as much time as the potatoes.
- Dairy-Free Adaptation: This recipe is naturally dairy-free, so no changes needed. But if you want a little extra richness, you can add a splash of chicken broth to the pan before roasting—it creates a light pan sauce without adding dairy.
- Spice It Up: Add ½ teaspoon of red pepper flakes along with the rosemary for a subtle heat. Or try a teaspoon of smoked paprika for a deeper, smokier flavor profile. I did this once on a whim and it became my husband’s favorite version.
- Boneless Option: If you’re short on time or prefer boneless meat, use boneless, skin-on thighs. Reduce the initial stovetop cooking time to 8-10 minutes, and the oven time to 20-25 minutes. The skin will still get crispy, but the meat cooks faster without the bone.
Serving & Storage Suggestions
This dish is incredibly versatile when it comes to serving. Here’s how to make the most of it.
Serving Temperature: Serve this straight from the oven while everything is hot and crispy. The cast iron pan keeps it warm for a good 15-20 minutes at the table, which is perfect for family-style dining. I love placing the pan on a trivet in the center of the table and letting everyone help themselves.
What to Serve With It: A simple green salad with a lemon vinaigrette is my go-to side—the acidity cuts through the richness beautifully. Steamed green beans or roasted asparagus also work wonderfully. If you want something starchier, crusty bread is perfect for sopping up the pan juices. For a complete meal, try serving it alongside my garlic butter green beans for a restaurant-quality dinner at home.
Storage: Leftovers keep well in an airtight container in the refrigerator for up to 4 days. The chicken skin will lose some of its crispiness, but the flavor actually gets better as it sits. I often make a double batch just for leftovers—the potatoes are amazing reheated.
Reheating: The best way to reheat this is in a 375°F oven for 10-15 minutes. This helps revive the crispy skin and re-crisps the potatoes. Avoid the microwave—it’ll turn everything soggy and sad. If you’re in a hurry, you can reheat it in a skillet on the stovetop over medium heat, flipping the chicken halfway through.
Freezing: You can freeze the cooked dish for up to 3 months. Let it cool completely, then transfer to a freezer-safe container. To reheat, thaw overnight in the refrigerator, then reheat in a 375°F oven until warmed through. The potatoes won’t be as crispy after freezing, but the flavor is still fantastic.
Nutritional Information & Benefits
Here’s a rough estimate of what you’re getting per serving (based on 4 servings, with 2 thighs and a generous portion of potatoes each).
| Nutrient | Amount Per Serving |
|---|---|
| Calories | 520-580 |
| Protein | 38g |
| Fat | 32g |
| Carbohydrates | 28g |
| Fiber | 4g |
| Iron | 15% DV |
| Vitamin C | 20% DV |
Chicken thighs are a fantastic source of high-quality protein, B vitamins, and selenium, which supports immune function. The skin does add fat, but it’s mostly monounsaturated and polyunsaturated fats—the good kind. Yukon Gold potatoes are surprisingly nutritious, providing more potassium than a banana, along with vitamin C and fiber when you eat the skin. Rosemary is packed with antioxidants and has anti-inflammatory properties. This is comfort food that actually does your body some good.
Conclusion
This crispy rosemary chicken with golden potatoes has become my signature dish for a reason. It’s the recipe I bring to potlucks, the one I make for friends who are having a rough week, the one that makes my kitchen smell like a cozy Italian trattoria. It reminds me of Gloria and that chance conversation at the farmers’ market, and how the best recipes often come from the most unexpected places.
I really hope you give this one a try. Don’t be afraid to make it your own—swap the herbs, change up the vegetables, play with the seasonings. Cooking should feel like a conversation, not a test. And if you do make it, I’d love to hear how it turned out. Drop a comment below and let me know if your family loved it as much as mine does. Did you add your own twist? Did the cold pan trick work for you? Share your stories—I read every single one, and nothing makes me happier than knowing this little recipe found its way into your kitchen.
Until next time, happy cooking, and remember—crispy skin changes everything.
Frequently Asked Questions
Can I use chicken breasts instead of thighs?
You can, but I don’t recommend it for this recipe. Chicken breasts cook faster and dry out more easily, plus they don’t have as much fat to render for crispy skin. If you must use breasts, go for bone-in, skin-on and reduce the oven time to 20-25 minutes. Check the internal temperature—you want 160-165°F.
Why did my chicken skin turn out soggy?
This usually happens for one of three reasons: the skin wasn’t patted dry enough before cooking, the pan was too crowded, or you started with a hot pan instead of a cold one. Make sure to dry the chicken thoroughly, leave space between pieces, and always start in a cold skillet. The good news is, even soggy skin still tastes delicious!
Can I make this recipe ahead of time?
You can prep the ingredients ahead—wash and cut the potatoes, chop the rosemary, and season the chicken—but I recommend cooking it fresh for the best texture. If you need to make it ahead, cook it completely, then reheat in a 375°F oven for 10-15 minutes to refresh the crispiness.
What’s the best way to reheat leftovers?
Oven is best! Pop everything in a 375°F oven for 10-15 minutes. The skin won’t be quite as crispy as fresh, but it’ll be close. Avoid the microwave—it’ll turn the skin rubbery and the potatoes mushy. If you’re in a rush, reheat in a skillet over medium heat, flipping the chicken once.
Can I add other vegetables to the pan?
Absolutely! Root vegetables like carrots, parsnips, and sweet potatoes work great—just cut them to similar sizes as the potatoes. More delicate vegetables like zucchini or bell peppers should be added halfway through cooking so they don’t turn to mush. I love adding a handful of cherry tomatoes in the last 10 minutes—they burst and create a little pan sauce.
Pin This Recipe!
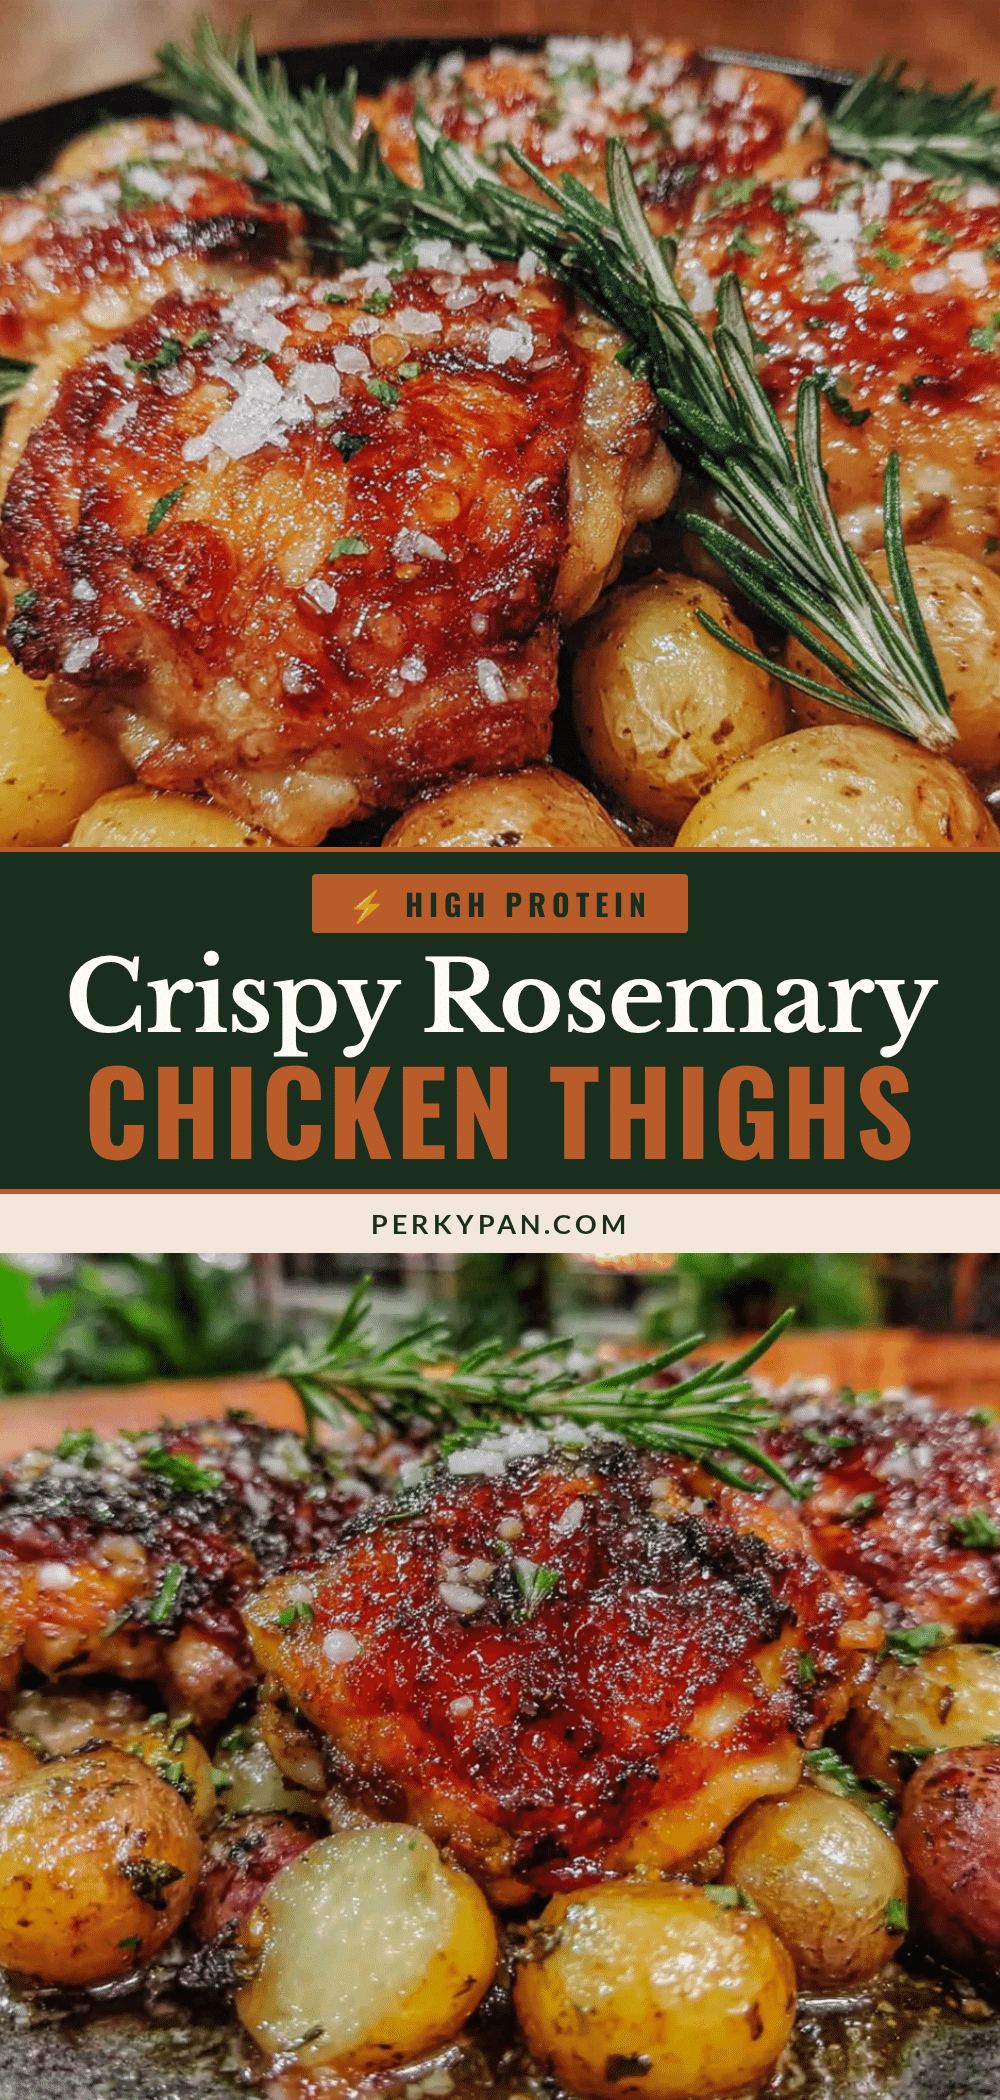
Crispy Rosemary Chicken Thighs with Golden Potatoes

A single-pan wonder featuring bone-in, skin-on chicken thighs roasted with Yukon Gold potatoes and fresh rosemary until the skin is shatteringly crisp and the potatoes are golden and tender. This easy, foolproof recipe delivers deep, savory flavor with minimal cleanup.
- Prep Time: 15 minutes
- Cook Time: 45 minutes
- Total Time: 1 hour
- Yield: 4 servings 1x
- Category: Main Course
- Cuisine: American
Ingredients
- 6–8 bone-in, skin-on chicken thighs (about 2.5–3 lbs total)
- 3–4 sprigs fresh rosemary, plus 2 tablespoons chopped
- 2 lbs Yukon Gold potatoes, halved or quartered
- 6–8 cloves garlic, smashed
- 3 tablespoons olive oil, divided
- 1½ teaspoons kosher salt, plus more for seasoning
- 1 teaspoon freshly ground black pepper
- 1 lemon, for serving
- Optional: 4-5 sprigs fresh thyme
Instructions
- Preheat your oven to 425°F (220°C). Position the rack in the middle of the oven and allow it to fully preheat.
- Pat the chicken thighs completely dry with paper towels, including between the skin and meat. Let sit at room temperature for 15 minutes.
- Season the chicken generously on both sides with salt and pepper, focusing extra on the skin side.
- Wash and scrub the potatoes (no need to peel). Cut larger potatoes into quarters and smaller ones in half, aiming for uniform 1½-inch pieces. Toss with 2 tablespoons olive oil, ½ teaspoon salt, ¼ teaspoon pepper, and 1 tablespoon chopped rosemary.
- Place the chicken thighs skin-side down in a cold 12-inch cast iron skillet or heavy-bottomed oven-safe pan. Turn heat to medium and cook without moving for 12-15 minutes, until the skin is deep golden brown and crispy.
- Flip the chicken so the skin side is up. Add the seasoned potatoes and smashed garlic cloves to the pan, arranging them around the chicken in a single layer. Tuck the rosemary sprigs in among the potatoes.
- Transfer the pan to the oven and roast for 25-30 minutes. Halfway through, gently shake the pan to redistribute the potatoes, but leave the chicken undisturbed.
- Check for doneness: insert a meat thermometer into the thickest part of a thigh (avoiding bone); it should read 175-185°F. Potatoes should be fork-tender and golden brown on the edges. If needed, roast 5 more minutes and check again.
- Remove from oven and let rest for 5 minutes. Sprinkle with remaining 1 tablespoon chopped rosemary and squeeze fresh lemon juice over the top. Serve straight from the pan.
Notes
Start the chicken in a cold pan for the crispiest skin. Pat the chicken thoroughly dry before cooking. Do not crowd the pan; use two pans if doubling the recipe. Let the dish rest for 5 minutes before serving to allow juices to redistribute.
Nutrition
- Serving Size: 2 thighs with potato
- Calories: 520580
- Sugar: 2
- Sodium: 800
- Fat: 32
- Saturated Fat: 8
- Carbohydrates: 28
- Fiber: 4
- Protein: 38
Keywords: crispy chicken thighs, rosemary chicken, one pan chicken, roasted chicken and potatoes, easy chicken dinner, cast iron skillet chicken


