Love this? Save it for later!
Share the inspiration with your friends
Why You’ll Love This Recipe
Is This the Ultimate Oven-Baked Wing?
Let’s be real for a second. We’ve all been there. You order takeout wings, and they arrive either soggy, cold, or so dry they could double as fire starters. I used to think that the only way to get truly crispy wings was to deep fry them in a vat of oil that cost more than my car payment. But after years of testing, failing, and occasionally burning my kitchen down (don’t tell my insurance), I realized there’s a better way. This crispy honey garlic baked chicken wings method changes the game entirely. It’s not just about convenience; it’s about texture. We are talking about skin that shatters when you bite into it, with meat that is juicy enough to make you close your eyes. I tested this recipe at least twelve times before writing it down. Twelve! Some versions were too sweet, some were too salty, and one was so dry I had to feed it to the compost bin with a heavy heart. But this one? This one is the gold standard.
Here is why this recipe deserves a permanent spot in your weekly rotation:
- Quick & Easy: You can have this from freezer to table in under 45 minutes. That is perfect for those busy weeknights when you don’t want to spend hours standing over a stove. Honestly, it’s the fastest way to get a “real” dinner on the table.
- Simple Ingredients: You likely already have everything in your kitchen. Honey, garlic, soy sauce, oil, and chicken. No fancy grocery trips needed. You don’t need to hunt down obscure spices or expensive cuts of meat.
- Perfect for Game Day: Whether it’s the Super Bowl, the World Cup, or just a casual Friday night with friends, these wings are the ultimate crowd-pleaser. They are easy to eat, messy in the best way, and disappear fast.
- Unbelievably Delicious: The combo of sticky, sweet honey and pungent, savory garlic creates a flavor profile that is next-level comfort food. It’s salty, sweet, savory, and crunchy all in one bite.
- Healthier Than Fried: Baking them uses a fraction of the oil compared to deep frying. You get that crispy texture without the heavy, greasy feeling afterward. It feels like a treat, but it’s actually a bit smarter.
What makes this different from other baked wing recipes? Most people just toss wings in seasoning and bake them. But here, we use a specific technique for the glaze. We reduce the honey and garlic mixture slightly before tossing the wings. This ensures the sauce sticks and caramelizes instead of sliding off or making the skin soggy. It’s a small detail that makes a huge difference. This isn’t just another chicken wing recipe; it’s your best version. It’s the kind of dish that makes you feel like a gourmet chef even though you barely lifted a finger.
What Ingredients You Will Need
This recipe relies on simple, wholesome ingredients to deliver bold flavor and satisfying texture without the fuss. The beauty of crispy honey garlic baked chicken wings is that you don’t need a pantry full of exotic spices. The magic happens in the balance between the sweet honey and the sharp garlic. Here is what you need to gather before you start cooking.
For the Wings
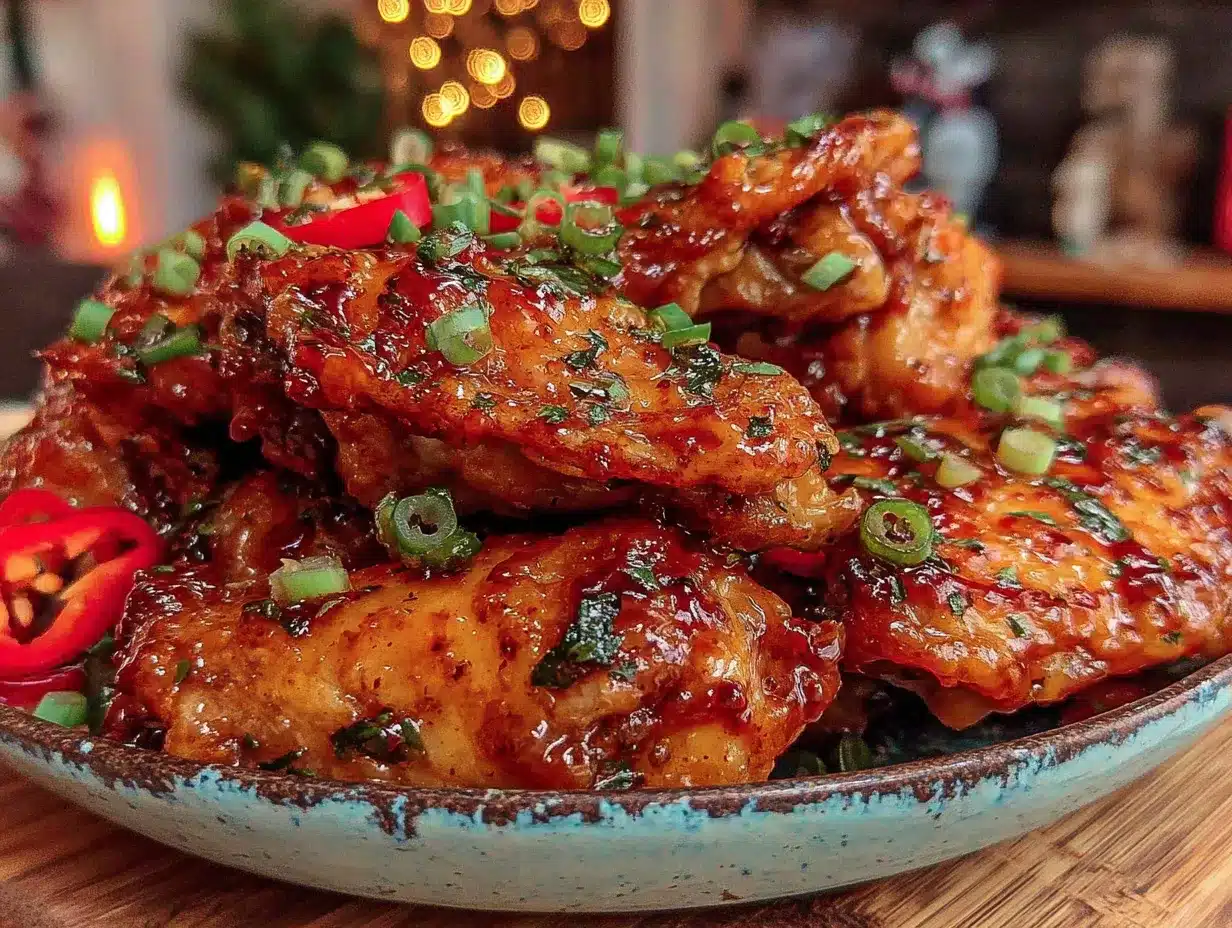
- Chicken Wings: 2 to 3 pounds of chicken wings, separated into drumettes and flats. I prefer buying them in bulk from the freezer section. Look for wings that are still frozen when you buy them; this helps keep the meat fresh longer. If you buy fresh, use them within two days.
- Vegetable Oil or Avocado Oil: 2 tablespoons. You need a high-smoke-point oil to help crisp up the skin. Avocado oil is my personal favorite because it has a neutral taste, but vegetable oil works just fine.
- Baking Powder: 1 tablespoon. This is the secret weapon. It is NOT baking soda. Baking powder changes the pH of the skin, helping it break down and crisp up in the oven. Make sure it is aluminum-free for the best taste.
- Salt: 1 teaspoon. Kosher salt is best because it distributes evenly. Sea salt works too, but you might need to adjust the amount.
- Black Pepper: 1/2 teaspoon. Freshly cracked pepper adds a nice bite.
For the Honey Garlic Glaze
- Honey: 1/3 cup. Use raw honey if you have it, as it has a more complex flavor. But regular golden honey works perfectly well too. I recommend brands like Local Harvest or even the generic store brand; it’s just sugar and bee juice, after all.
- Garlic: 4 to 5 cloves, minced. Fresh garlic is non-negotiable here. Jarred garlic has a metallic taste that ruins the dish. Take the time to mince it finely so it integrates into the sauce smoothly.
- Soy Sauce: 2 tablespoons. This adds the umami and saltiness. Use low-sodium soy sauce if you are watching your salt intake, but regular soy sauce gives a richer color.
- Rice Vinegar: 1 teaspoon. A splash of acidity cuts through the sweetness of the honey and the richness of the chicken. It balances the whole dish.
- Sesame Oil: 1 teaspoon. Toasted sesame oil adds that nutty aroma that screams “Asian-inspired.” Just a little goes a long way.
- Red Pepper Flakes: 1/2 teaspoon. Optional, but recommended if you like a little heat. It adds a nice kick that contrasts with the sweet honey.
For the best texture, I always recommend patting the wings dry with paper towels before seasoning. Moisture is the enemy of crispiness. If the wings are wet, they will steam instead of bake. It’s a small step, but it makes all the difference in the world.
Equipment Needed
You don’t need a lot of fancy gadgets to make these wings, but having the right tools makes the process smoother. First, you’ll need a large baking sheet. I prefer a rimmed baking sheet because it catches any drips from the honey glaze. Without the rim, you’ll have a sticky mess in your oven that is a nightmare to clean. Line it with aluminum foil or parchment paper. Aluminum foil is my go-to because it’s easy to wipe down, but parchment paper is better if you want zero cleanup at all.
A wire cooling rack that fits inside your baking sheet is a game-changer. If you place the wings directly on the sheet, the bottoms can get soggy from the steam. Elevating them allows hot air to circulate all around, ensuring even cooking. If you don’t have a rack, just flip the wings halfway through cooking. A large mixing bowl is needed for tossing the wings in oil and baking powder. Make sure it’s big enough to handle 3 pounds of chicken without spilling. A pair of kitchen tongs is essential for handling the hot wings and tossing them in the glaze. Finally, a small saucepan is needed to simmer the glaze. Any small pot will do, but one with a heavy bottom prevents the honey from burning quickly.
I’ve tried using non-stick spray on the foil, but it often leaves a weird film. Just using a light brush of oil on the foil or rack is better. Also, keep an eye on your oven thermometer. Ovens can be inaccurate, and knowing your actual temperature helps you get that perfect crisp every time.
Preparation Method
Let’s get cooking. This process is straightforward, but attention to detail is key. Follow these steps closely for the best results.
Step 1: Prep the Wings (10 minutes)
Preheat your oven to 425°F (220°C). This high heat is crucial for rendering the fat and crisping the skin. While the oven heats up, take your wings out of the packaging. If they are frozen, let them thaw slightly so you can separate them. Separate the wings at the joint. You’ll have drumettes and flats. Discard the tips, or save them for homemade chicken stock later. Pat the wings completely dry with paper towels. This is the most important step. Remove as much moisture as possible. Place the dried wings in a large bowl.
Step 2: Season and Coat (5 minutes)
Drizzle the vegetable oil over the wings. Toss them with your hands or tongs until every piece is lightly coated. Sprinkle the baking powder, salt, and black pepper over the wings. Toss again until evenly distributed. The baking powder should coat the skin thinly. Do not skip the baking powder; it is the science behind the crispiness. Arrange the wings in a single layer on the prepared baking sheet. Do not crowd them. If the wings are touching, they will steam each other. Leave space between each piece. If you have too many wings, use two baking sheets.
Step 3: Bake the Wings (40-45 minutes)
Place the wings in the preheated oven. Bake for 40 to 45 minutes. Halfway through, at the 20-minute mark, flip the wings over. This ensures even browning on both sides. You want the skin to turn golden brown and crispy. If your oven runs hot, check them earlier. The wings are done when the internal temperature reaches 165°F (74°C) and the skin is crackly.
Step 4: Make the Glaze (5 minutes)
While the wings are baking, make the sauce. In a small saucepan over medium heat, combine the honey, minced garlic, soy sauce, rice vinegar, sesame oil, and red pepper flakes. Whisk everything together. Bring it to a gentle simmer. Let it cook for about 3 to 4 minutes, stirring frequently. The sauce will thicken slightly as the water evaporates and the honey concentrates. Do not let it boil vigorously, or the garlic might burn and turn bitter. Remove it from the heat.
Step 5: Toss and Serve (2 minutes)
Once the wings are out of the oven, immediately transfer them to a large clean bowl. Pour the warm honey garlic glaze over the hot wings. Toss quickly and vigorously until every wing is coated in the sticky sauce. The heat from the wings helps the glaze adhere and caramelize slightly. Serve immediately while they are still hot and crispy. If you let them sit too long, the steam from the meat will soften the crispy skin.
Cooking Tips & Techniques
After making hundreds of batches of wings, I’ve learned a few tricks that separate the amateurs from the pros. First, never skip the drying step. I once rushed this process and ended up with steamed chicken. It was sad. Use plenty of paper towels. Second, the baking powder must be aluminum-free. Aluminum-free baking powder has a cleaner taste and doesn’t leave a metallic aftertaste. Third, if you want extra crispiness, let the seasoned wings sit on the baking sheet in the fridge for an hour before baking. This air-dries the skin further. It’s not necessary, but it’s a nice upgrade.
Another common mistake is overcrowding the pan. Air circulation is your friend. If you have a small oven, cook in batches. Don’t try to fit everything in at once. Also, keep an eye on the glaze. Honey burns easily. If you see the garlic turning dark brown, take it off the heat immediately. Bitter garlic ruins the whole dish. When tossing the wings, do it quickly. You want the glaze to coat them, not soak into them. Finally, serve them on a plate lined with paper towels if you want to absorb any excess oil, though the baking method usually leaves them not too greasy.
Variations & Adaptations
This recipe is a canvas for your creativity. Here are a few ways to tweak it:
- Spicy Honey Garlic: Add 1 tablespoon of sriracha or chili garlic sauce to the glaze. This is perfect for those who like a kick.
- Gluten-Free: Swap the regular soy sauce for tamari or coconut aminos. The rest of the recipe is naturally gluten-free.
- Honey Sriracha: Skip the garlic and rice vinegar. Use more sriracha and lime juice instead for a tangier, spicier profile.
- Low-Sodium: Use low-sodium soy sauce and reduce the added salt. The honey provides plenty of flavor to compensate.
I once tried adding ginger to the glaze, and it was delicious. Fresh grated ginger adds a warm, spicy note that pairs well with honey. It’s a great variation for autumn or winter. You can also add a pinch of five-spice powder for an aromatic twist. The possibilities are endless, so don’t be afraid to experiment.
Serving & Storage Suggestions
These wings are best served immediately. They are hot, sticky, and incredibly satisfying. Pair them with a cold beer, a crisp salad, or some celery sticks with blue cheese dressing for a classic wing night experience. If you have leftovers, store them in an airtight container in the refrigerator for up to 3 days. To reheat, place them in an oven preheated to 375°F (190°C) for about 10 minutes. This restores the crispiness. Avoid the microwave, as it will make the skin soggy. You can also freeze the uncooked wings for later use, but the glaze is best made fresh. The flavors develop over time, but the texture is always best when fresh.
Nutritional Information & Benefits
Each serving (approx. 4 wings) contains roughly 250 calories, 18g of protein, 12g of fat, and 15g of carbohydrates. The honey provides quick energy, while the chicken offers lean protein. Garlic has anti-inflammatory properties, and honey has antimicrobial benefits. This recipe is not low-carb due to the honey, but it is a balanced treat. It is naturally gluten-free if you use tamari. It’s a great option for those who want to enjoy a guilty pleasure without the heavy grease of deep-fried wings.
Conclusion
Making crispy honey garlic baked chicken wings at home is easier than you think. It’s a recipe that brings comfort, flavor, and a bit of excitement to your dinner table. I hope you try it and enjoy it as much as I do. Don’t be afraid to adjust the sweetness or heat to your liking. These wings are versatile and forgiving. If you make this recipe, I’d love to hear how it turns out. Leave a comment below with your thoughts or share a photo. Tag me on social media if you post it. Happy cooking, and enjoy every sticky, crispy bite!
Frequently Asked Questions
Can I use chicken thighs instead of wings?
Yes, you can use bone-in, skin-on chicken thighs. The cooking time might be slightly longer, about 50-55 minutes, to ensure they are fully cooked and crispy. The glaze works perfectly with thighs too.
Why are my wings not crispy?
This usually happens if the wings are not patted dry enough or if the pan is overcrowded. Moisture prevents crisping, and crowded wings steam instead of bake. Make sure to leave space between each wing.
Can I make the glaze ahead of time?
Yes, you can make the glaze up to a week in advance. Store it in the refrigerator in an airtight container. Reheat it gently before tossing the wings. The flavors will meld together nicely.
Is baking powder the same as baking soda?
No, they are different. Baking soda is much stronger and can leave a soapy taste. Baking powder is milder and is specifically needed to alter the pH of the skin for crispiness. Always use baking powder.
How do I store leftover wings?
Store leftovers in an airtight container in the refrigerator for up to 3 days. Reheat in the oven at 375°F for 10 minutes to restore crispiness. Do not use the microwave.
Pin This Recipe!
Crispy Honey Garlic Baked Chicken Wings: Easy Oven Wings

Achieve restaurant-quality crispy chicken wings at home using this easy oven-baked method. Coated in a sticky, sweet, and savory honey garlic glaze, these wings are healthier than deep-fried alternatives and ready in under 45 minutes.
- Prep Time: 15 minutes
- Cook Time: 45 minutes
- Total Time: 60 minutes
- Yield: 4 servings 1x
- Category: Appetizer
- Cuisine: Asian-American
Ingredients
- 2 to 3 pounds chicken wings (separated into drumettes and flats)
- 2 tablespoons vegetable oil or avocado oil
- 1 tablespoon aluminum-free baking powder
- 1 teaspoon kosher salt
- 1/2 teaspoon freshly cracked black pepper
- 1/3 cup honey
- 4 to 5 cloves garlic, minced
- 2 tablespoons soy sauce
- 1 teaspoon rice vinegar
- 1 teaspoon toasted sesame oil
- 1/2 teaspoon red pepper flakes (optional)
Instructions
- Preheat oven to 425°F (220°C). Line a rimmed baking sheet with foil or parchment paper and place a wire rack on top.
- Pat chicken wings completely dry with paper towels to remove moisture.
- Place dried wings in a large bowl. Drizzle with oil and toss to coat evenly.
- Sprinkle baking powder, salt, and black pepper over the wings. Toss until every piece is lightly coated.
- Arrange wings in a single layer on the prepared baking sheet, ensuring they do not touch.
- Bake for 40-45 minutes, flipping wings halfway through (at the 20-minute mark), until skin is golden brown and crispy.
- While wings bake, combine honey, minced garlic, soy sauce, rice vinegar, sesame oil, and red pepper flakes in a small saucepan.
- Simmer the glaze over medium heat for 3-4 minutes until slightly thickened. Do not let it boil vigorously.
- Remove wings from the oven and immediately transfer to a clean large bowl.
- Pour the warm glaze over the hot wings and toss vigorously to coat evenly.
- Serve immediately while hot and crispy.
Notes
Patting the wings dry is crucial for crispiness. Ensure baking powder is aluminum-free to avoid metallic taste. Do not overcrowd the pan; cook in batches if necessary. For extra crispiness, let seasoned wings sit in the fridge for an hour before baking. Reheat leftovers in the oven at 375°F to restore texture.
Nutrition
- Serving Size: Approximately 4 wing
- Calories: 250
- Sugar: 14
- Sodium: 450
- Fat: 12
- Saturated Fat: 3
- Carbohydrates: 15
- Protein: 18
Keywords: crispy chicken wings, baked chicken wings, honey garlic wings, oven wings, game day food, easy appetizer, gluten-free wings


