Love this? Save it for later!
Share the inspiration with your friends
The neighborhood block party was in four hours and I had completely forgotten. Everyone else would be bringing elaborate, multi-day preparations like their famous layered lasagnas or slow-roasted briskets. I had a bag of refrigerated cookie dough, a carton of eggs, and a profound sense of dread.
I stared at the kitchen counter, feeling that familiar knot of anxiety tighten in my stomach. My husband had already left for the office, and the kids were at soccer practice. It was just me, the clock, and the looming threat of showing up empty-handed. I mean, you know that feeling when you realize you’ve dropped the ball on something important? It’s terrible.
I grabbed the dough from the fridge, my hands shaking slightly. I didn’t have time to make anything from scratch. I needed something fast, something spooky, and something that wouldn’t require a degree in culinary arts to assemble. That’s when I remembered a trick my aunt used to teach me about shaping dough into… well, you know what.
I started rolling the dough into small logs, my mind racing. I needed to make them look convincing enough to scare the kids, but not so realistic that they’d ruin dinner for the adults. It was a delicate balance, honestly. I sliced them at an angle to create that jagged, spooky look, then pressed a slivered almond onto each tip.
The almonds looked exactly like dirty fingernails. I couldn’t help but laugh at the absurdity of it all. Here I was, making fake human fingers for a community event, while everyone else was sweating over complex recipes. The irony wasn’t lost on me, but the result? Pure magic.
When I pulled the tray out of the oven, they were golden brown and crispy. The smell of vanilla and butter filled the house, masking any lingering panic. I packed them in a Tupperware container, praying they wouldn’t break in the car.
At the party, I watched as parents and kids alike gasped at the sight of my witch finger cookies. One kid actually pretended to bite one before realizing it was a cookie. It was a small victory, but it felt huge. I hadn’t planned to win, but I did.
That’s why I keep making these crispy Halloween witch finger cookies with almond nails. They are the ultimate underdog dessert. They require minimal effort but deliver maximum scare factor. Plus, they taste better than most fancy pastries I’ve seen at these events.
If you’ve ever been caught off guard by a last-minute social obligation, you know the relief of having a secret weapon in your back pocket. This recipe is that weapon. It’s simple, it’s fun, and it saves the day when you least expect it.
Why You’ll Love This Recipe
There is a specific kind of joy in making cookies that look slightly terrifying but taste incredibly comforting. This recipe isn’t just about the visual gimmick; it’s about the simplicity and the sheer fun of baking something seasonal. I’ve tested this method dozens of times, and it consistently delivers the best results without any fuss. Here is why this recipe deserves a spot in your Halloween rotation:
- Quick & Easy: This recipe comes together in under 30 minutes, perfect for busy weeknights or last-minute party prep. You don’t need to mix a batter or wait for complex rising times.
- Simple Ingredients: No fancy grocery trips needed; you likely already have everything in your kitchen. Most of these items are pantry staples that you probably already own.
- Perfect for Parties: Great for Halloween parties, school bake sales, or cozy dinners with family. They are small, bite-sized, and easy for kids to handle.
- Crowd-Pleaser: Always gets rave reviews from kids and adults alike. The novelty factor makes them a conversation starter at any gathering.
- Unbelievably Delicious: The texture and flavor combo is next-level comfort food. The almond adds a nice crunch that contrasts with the soft, buttery cookie.
What makes this recipe different from the rest is the technique. Many recipes suggest using marzipan or fondant for the “fingernails,” but that requires skill and extra ingredients. By using slivered almonds, you get a natural, organic look that is much easier to achieve. It’s a creative twist that saves time and money.
This recipe isn’t just good—it is the kind that makes you smile after the first bite. It’s comfort food reimagined with a spooky twist. It’s perfect for impressing guests without stress, or turning a simple meal into something memorable. The simplicity allows the flavor of the butter and vanilla to shine through, while the shape adds the fun element.
What Ingredients You Will Need
This recipe uses simple, wholesome ingredients to deliver bold flavor and satisfying texture without the fuss. The beauty of this design lies in its minimalism. You don’t need a dozen different types of flour or exotic spices. Just a few key components that work together to create that perfect crisp-tender cookie.
- Refrigerated Sugar Cookie Dough (1 can): This is the base of your witch fingers. Look for a brand that holds its shape well when baked. I recommend Pillsbury or a local bakery brand for best texture. It saves so much time compared to making dough from scratch.
- Slivered Almonds (1 small container): These serve as the fingernails. Make sure they are slivered or sliced, not whole almonds. You want them to lay flat against the dough. If you can’t find slivered almonds, you can chop almond pieces yourself.
- Unsalted Butter (2 tablespoons, softened): Adding a little extra butter helps keep the cookies tender and adds richness. It also helps the almonds stick in place before baking.
- Egg Yolk (1 large): Brushing the dough with egg yolk before adding the almonds ensures they adhere properly. It also gives the cookies a beautiful golden sheen when baked.
- Vanilla Extract (1 teaspoon): If your dough isn’t pre-flavored, a dash of vanilla enhances the sweetness. Most refrigerated doughs already have this, so check the label first.
- Powdered Sugar (for dusting): Optional, but a light dusting makes them look like they’ve been covered in “dust” from a graveyard. It adds a nice visual contrast to the golden brown cookie.
You can substitute the refrigerated dough with homemade sugar cookie dough if you have the time. However, the refrigerated version is specifically chosen for its consistency and ease of use. For a nut-free option, you can use chocolate chips or raisins as the “nails,” though the almond provides a superior crunch.
Equipment Needed
To make these crispy Halloween witch finger cookies with almond nails, you don’t need a professional kitchen setup. A few basic tools will get the job done efficiently.
- Baking Sheets: Two large sheet pans are ideal. Line them with parchment paper or silicone baking mats. This prevents sticking and makes cleanup a breeze. I prefer silicone mats because they distribute heat evenly.
- Parchment Paper: Essential for easy removal. It also helps prevent the edges from burning too quickly.
- Sharp Knife: You need a sharp chef’s knife to slice the dough logs cleanly. A dull knife will crush the dough and ruin the shape.
- Mixing Bowl: A small bowl for whisking the egg yolk. Any size will do.
- Pastry Brush: For applying the egg wash. If you don’t have one, you can use a clean fork or your finger, but a brush gives more control.
If you don’t have a pastry brush, don’t worry. A silicone baster works well too. The key is to have something to apply the egg wash without smearing the almond nails out of place. Keep your tools clean and ready before you start shaping the dough. It keeps the process smooth and stress-free.
Preparation Method
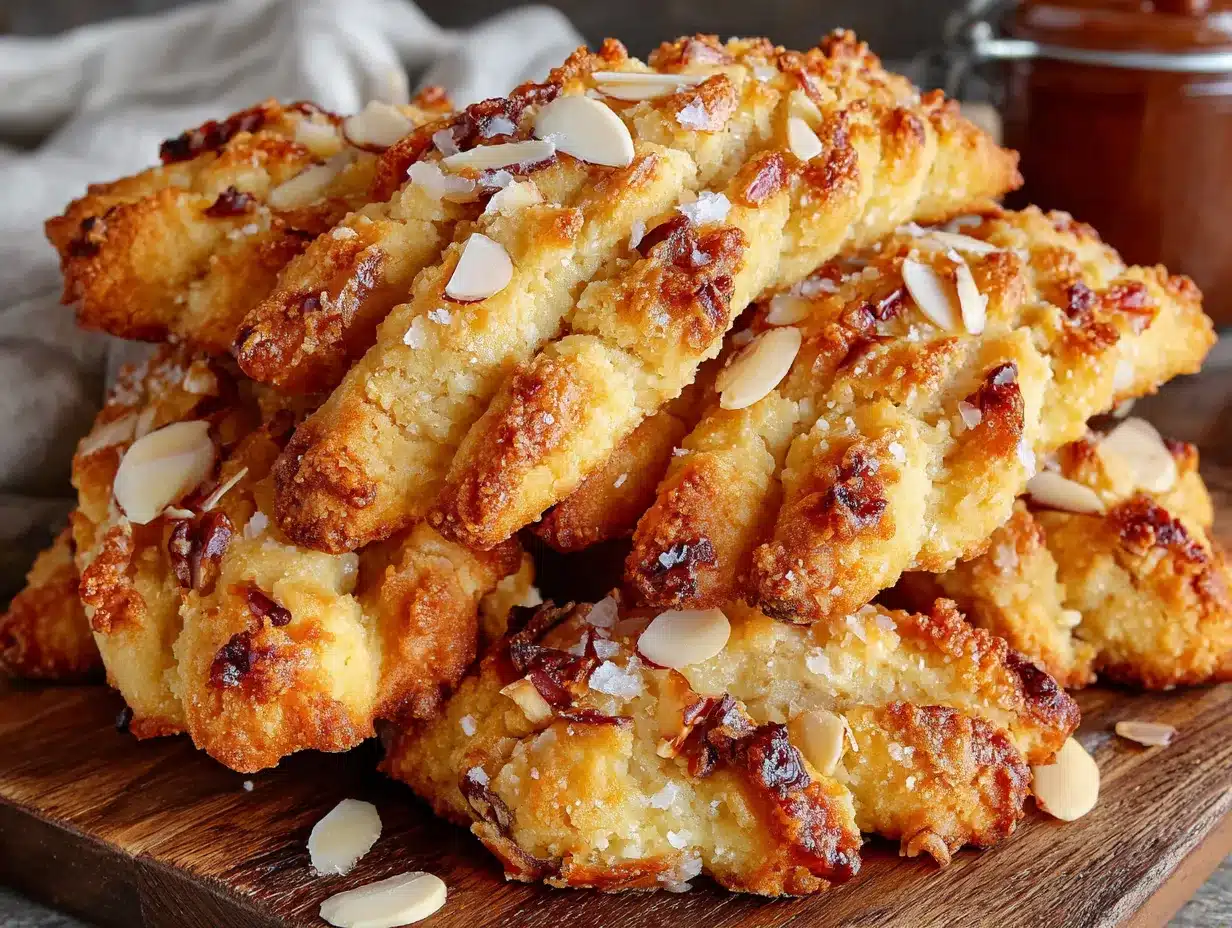
Follow these steps to create your spooky treats. The process is straightforward, but precision helps with the final look.
- Preheat and Prep (5 minutes): Preheat your oven to 350°F (175°C). Line your baking sheets with parchment paper. This step is crucial to prevent sticking and ensure even baking. Take your time here to avoid mess later.
- Prepare the Dough (5 minutes): Open the can of refrigerated cookie dough. If it’s a tube, unroll it carefully. Cut the dough into smaller sections, about 2 inches long. You will need about 10-12 pieces per baking sheet.
- Shape the Fingers (10 minutes): Take a piece of dough and roll it between your palms to form a smooth log, about 3-4 inches long. Taper one end slightly to resemble a finger. Lay it on the prepared baking sheet. Repeat with remaining dough. Keep the logs spaced about 2 inches apart.
- Create the Nails (5 minutes): Slice a slivered almond in half lengthwise if it’s too long. Place one half on the “tip” of each dough finger. Press it down gently so it adheres. This is the most fun part, especially if you have kids helping.
- Apply Egg Wash (2 minutes): Whisk the egg yolk in a small bowl. Use a pastry brush to lightly coat the surface of each dough finger. Be careful not to brush too hard, or the almond might slide off. This step helps with browning and adhesion.
- Bake (12-15 minutes): Place the baking sheets in the oven. Bake for 12-15 minutes, or until the edges are golden brown. Keep an eye on them after 10 minutes, as ovens vary. The cookies should be set but still slightly soft.
- Cool and Finish (10 minutes): Remove the cookies from the oven and let them cool on the baking sheet for 5 minutes. Then transfer them to a wire rack to cool completely. Once cool, you can dust them lightly with powdered sugar for a dusty look.
The key is to not overbake them. You want them crispy on the edges but still chewy in the center. If they burn, they lose their appeal. Let them cool completely before handling to prevent crumbling.
Cooking Tips & Techniques
Mastering these cookies is easy if you pay attention to a few details. I’ve learned through trial and error that small adjustments make a big difference in the final product.
- Temperature Control: Make sure your dough is cold when you start shaping it. If it gets too warm, it becomes sticky and hard to handle. If your kitchen is hot, pop the shaped cookies in the fridge for 10 minutes before baking.
- Even Sizing: Try to make the dough logs the same size. This ensures they all bake evenly. If some are thicker, they will take longer to cook through.
- Almond Placement: Don’t press the almonds in too deeply. You want them to sit on top, not sink into the dough. A light press is enough.
- Batch Baking: If you are making a large batch, rotate the baking sheets halfway through. This helps with even browning, especially if your oven has hot spots.
- Don’t Overcrowd: Leave space between the cookies. They spread slightly as they bake. Crowding them will cause them to merge into one big blob.
I once tried to rush the cooling process and ended up with broken cookies. Patience is key. Let them set on the pan first. It’s better to wait those extra five minutes than to deal with a crumbled mess. Also, using a sharp knife for any trimming ensures clean edges. A dull knife just smashes the dough.
Variations & Adaptations
While the classic almond nail version is my favorite, there are many ways to tweak this recipe. It’s versatile and forgiving, which makes it great for customization.
- Nut-Free Option: For schools or events with nut allergies, use chocolate chips, raisins, or even small pieces of pretzel as the “nails.” Chocolate chips melt slightly, creating a gooey look that is still spooky.
- Gluten-Free: Use a gluten-free refrigerated sugar cookie dough. Many brands now offer this option. Just check the label to ensure it’s safe for your needs.
- Vegan Version: Swap the butter and egg yolk for a vegan egg replacer and plant-based butter. Use vegan cookie dough if available. The texture might be slightly different, but the flavor will still be great.
- Flavor Twist: Add a drop of food coloring to the dough for a green or purple tint. This adds to the Halloween theme. Or, roll the dough in cinnamon sugar before baking for a spicier flavor profile.
- Chocolate Dip: Dip the “knuckle” end of the finger in dark chocolate. It looks like a severed finger with a bite taken out of it. It’s a fun variation for older kids.
I once tried adding matcha powder to the dough for a green color, but it changed the flavor too much. Stick to food coloring if you want color. The almond variation remains the best for texture and ease. Experiment with different toppings to find what your family loves.
Serving & Storage Suggestions
These cookies are best served at room temperature. They have a pleasant crispness that softens if refrigerated. For the best experience, keep them in an airtight container at room temperature for up to one week.
- Serving Ideas: Arrange them on a platter with other Halloween treats. They pair well with milk, hot cocoa, or apple cider. The spooky shape makes them a hit at parties.
- Storage: Store in an airtight container with a slice of bread to keep them soft. If you prefer them crispy, leave the container slightly open for the first hour.
- Freezing: You can freeze the unbaked dough logs. Place them on a baking sheet, freeze until solid, then transfer to a freezer bag. Bake directly from frozen, adding 2-3 minutes to the bake time.
- Reheating: If they go soft, warm them in the oven at 300°F for 5 minutes. This restores their crispness. Avoid the microwave, as it makes them chewy.
The flavors develop nicely over the first two days. The almonds become slightly toasted, enhancing the nutty flavor. If you make them ahead, they actually taste better after a day or two. Just keep them away from moisture to maintain the texture.
Nutritional Information & Benefits
While these are a treat, they offer some basic nutritional value. Sugar cookies are primarily carbohydrates and fats, so enjoy them in moderation.
- Calories: Approximately 120-150 calories per cookie, depending on size.
- Fat: Mainly from the butter and almond oil. Almonds provide healthy fats.
- Protein: Small amount from the almond nails. Not a significant source.
- Carbs: High in simple sugars from the cookie dough.
Almonds add a touch of fiber and vitamin E. This recipe is not particularly high in protein or fiber, so pair it with a balanced meal. It’s a fun, occasional treat rather than a health food. For those with allergies, always check the specific brands used for potential allergens.
Conclusion
These crispy Halloween witch finger cookies with almond nails are a fantastic way to add some fun to your holiday baking. They are easy to make, delicious to eat, and sure to impress. I love this recipe because it combines simplicity with creativity. It doesn’t take much effort to create something that looks impressive.
I encourage you to try this recipe and customize it to your liking. Add your own twists, like different toppings or colors. Share your results with friends and family. The joy of baking is in the sharing and the fun.
If you make these, I’d love to hear how they turned out. Leave a comment below with your experience or any variations you tried. Don’t forget to share your photos on social media. Happy baking, and have a spooky Halloween!
Frequently Asked Questions
Can I use homemade cookie dough for this recipe?
Yes, you can use homemade sugar cookie dough. Just ensure it is firm enough to hold its shape when rolled into logs. Refrigerate the dough before shaping if it is too soft.
How do I keep the almond nails from falling off?
Brushing the dough with egg yolk before placing the almonds helps them stick. Also, pressing them in gently but firmly ensures they adhere during baking.
Can I make these ahead of time?
Yes, you can bake them up to a week in advance. Store them in an airtight container at room temperature. They stay fresh and crispy for several days.
Are these cookies safe for nut allergies?
No, they contain almonds. For nut-free versions, use chocolate chips, raisins, or pretzel pieces as the “nails” instead.
Why are my cookies spreading too much?
This can happen if the dough is too warm. Ensure your dough is cold before shaping. Also, check your oven temperature, as an oven that is too hot can cause excessive spreading.
Pin This Recipe!

Crispy Halloween Witch Finger Cookies

A quick and spooky 4-ingredient Halloween treat made with refrigerated cookie dough and slivered almonds for fingernails. Perfect for last-minute parties and easy enough for kids to help make.
- Prep Time: 22 minutes
- Cook Time: 15 minutes
- Total Time: 37 minutes
- Yield: 20-24 cookies 1x
- Category: Dessert
- Cuisine: American
Ingredients
- 1 can refrigerated sugar cookie dough
- 1 small container slivered almonds
- 2 tablespoons unsalted butter, softened
- 1 large egg yolk
- 1 teaspoon vanilla extract (optional, if dough is not pre-flavored)
- Powdered sugar for dusting (optional)
Instructions
- Preheat oven to 350°F (175°C) and line baking sheets with parchment paper or silicone mats.
- Open the can of cookie dough and cut into sections about 2 inches long.
- Roll each piece into a smooth log, 3-4 inches long, tapering one end to resemble a finger. Place on prepared baking sheets, spacing 2 inches apart.
- Slice slivered almonds in half lengthwise if needed. Place one half on the tip of each dough finger and press gently.
- Whisk the egg yolk in a small bowl and lightly brush the surface of each dough finger with the egg wash.
- Bake for 12-15 minutes until edges are golden brown. Keep an eye on them after 10 minutes.
- Remove from oven and let cool on the baking sheet for 5 minutes, then transfer to a wire rack to cool completely.
- Dust lightly with powdered sugar if desired before serving.
Notes
Ensure dough is cold when shaping to prevent sticking. If your kitchen is warm, chill shaped cookies for 10 minutes before baking. Do not overbake; cookies should be set but slightly soft in the center. For nut-free versions, substitute almonds with chocolate chips or raisins.
Nutrition
- Serving Size: 1 cookie
- Calories: 135
- Sugar: 12
- Sodium: 90
- Fat: 7
- Saturated Fat: 3
- Carbohydrates: 18
- Fiber: 0.5
- Protein: 2
Keywords: Halloween cookies, witch fingers, easy dessert, kid-friendly baking, almond cookies, holiday treats, last-minute party food


