Love this? Save it for later!
Share the inspiration with your friends
The power went out halfway through a storm last October, leaving me in the dark with a very hungry toddler and absolutely no plan for dinner. I was standing in the hallway, trying to figure out how to keep the kids calm, when I heard a knock at the door. It was Dave, the plumber who had been fixing our leaky sink earlier that afternoon. He wasn’t just checking on the pipes; he was holding a Tupperware container that smelled like toasted marshmallows and pure nostalgia.
He saw my panic and offered a solution that felt almost too simple to be true. Dave, a man who fixes garbage disposals for a living, swore that his grandmother’s “spooky crunch” treats were the only thing that could soothe a screaming child during a blackout. I’ll admit, I was skeptical. Rice Krispie treats are usually just a pantry staple, something you throw together in five minutes. But Dave insisted there was a method to the madness, a specific way to get that perfect, shatteringly crisp exterior without the chewy, gummy interior that ruins the vibe.
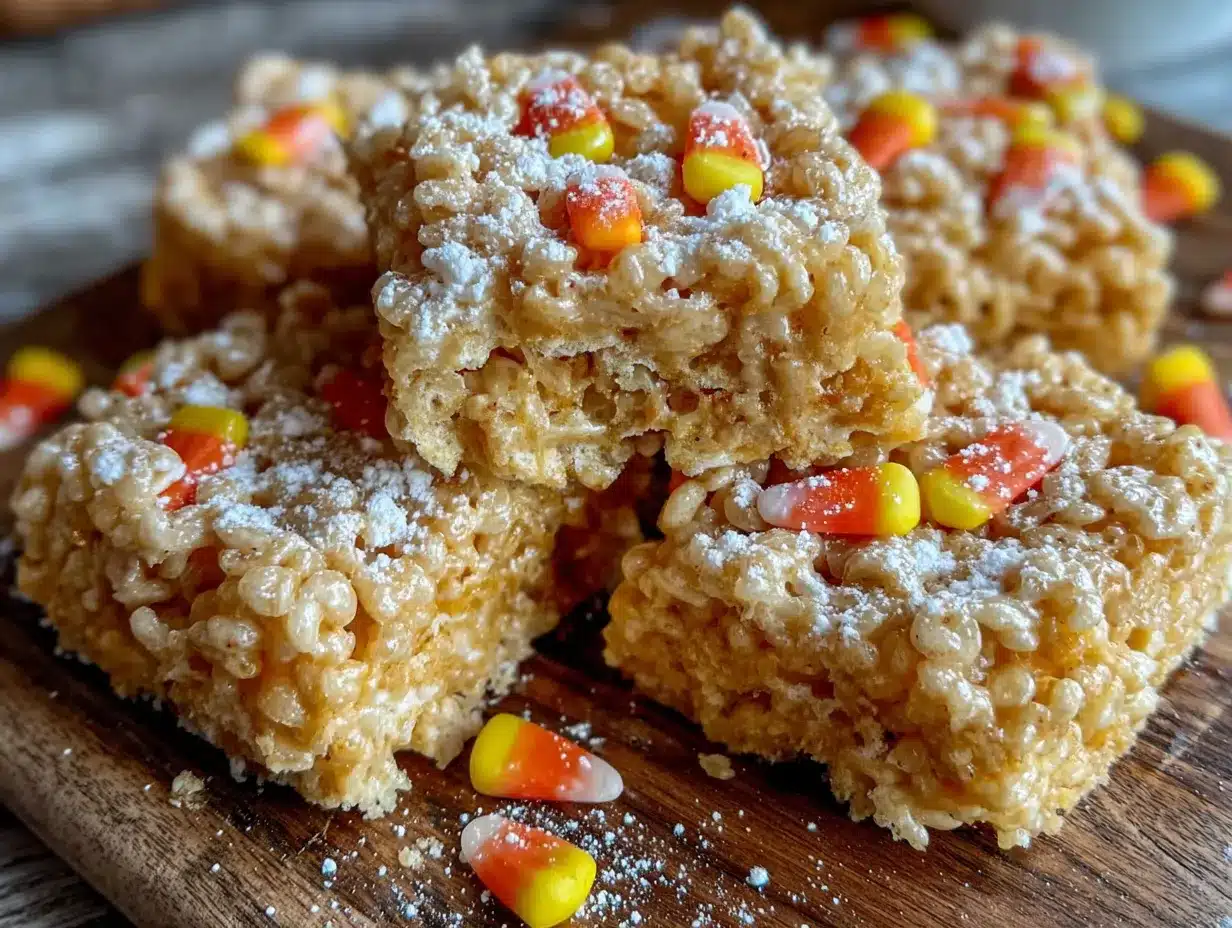
I wasn’t expecting cooking advice from a stranger in work boots, but there I was, standing in my dim kitchen, listening to him describe exactly how to make crispy Halloween Rice Krispie Treats with candy corn. He handed me the container, and the first bite was an immediate revelation. It wasn’t just sweet; it was textured, crunchy, and filled with those little orange and yellow triangles that taste like pure Halloween magic. Honestly, it was better than anything I could have made with my fancy equipment and expensive ingredients.
That night, the power stayed out for hours, but the kids were happy because of a plumber’s secret. I’ve been obsessed with perfecting this recipe ever since. Maybe you’ve been there, staring into an open fridge at midnight, wondering what on earth to feed your family when everything goes wrong. This recipe is my go-to now. It’s reliable, it’s festive, and it has a crunch that keeps you coming back for seconds. Let me tell you, once you try Dave’s method, you’ll never settle for the soft, squishy version again.
Why You’ll Love This Recipe
There is a specific kind of magic that happens when you combine simple pantry staples with a bit of seasonal flair. This recipe isn’t just about feeding the kids; it’s about creating a moment of joy in the kitchen. After years of testing different ratios and techniques, I can confidently say that this version is the gold standard for Halloween baking. It hits all the right notes for texture, flavor, and ease of preparation.
- Quick & Easy: This comes together in under 15 minutes, which is perfect for those busy weeknights or when you need a last-minute treat for a classroom party. You don’t need to be a professional chef to pull this off.
- Simple Ingredients: No fancy grocery trips are needed here. You likely already have everything in your kitchen right now. Rice Krispies, marshmallows, butter, and candy corn are staples that most households keep on hand.
- Perfect for Halloween: The addition of candy corn isn’t just for show. It adds a burst of color and a unique flavor profile that screams autumn. It’s great for potlucks, Halloween morning breakfasts, or cozy movie nights.
- Crowd-Pleaser: These treats get rave reviews from kids and adults alike. The crunch factor is the key. Unlike traditional recipes that can turn into a dense brick, these stay light and airy.
- Unbelievably Delicious: The texture and flavor combo is next-level comfort food. The salty-sweet balance from the candy corn contrasts beautifully with the buttery marshmallow base.
What makes this recipe different from the rest is the attention to the crispness. Many people make Rice Krispie treats that are too chewy or too sticky. By toasting the cereal slightly and using the right temperature for the marshmallow mixture, you ensure a snap that satisfies the crunch lover in everyone. Whether it’s a special technique or just a creative twist on a classic, this is your best version of a Halloween treat. It’s the kind of recipe that makes you close your eyes after the first bite and remember your own childhood. It’s comfort food reimagined—faster, easier, but with the same soul-soothing satisfaction.
What Ingredients You Will Need
This recipe uses simple, wholesome ingredients to deliver bold flavor and satisfying texture without the fuss. The beauty of this dish lies in its simplicity, but the quality of the ingredients matters more than you might think. Using good butter and fresh marshmallows can make a huge difference in the final result.
- 6 cups Rice Krispies cereal: The base of the treat. Make sure it’s fresh and crisp. If your cereal is a few months old, it might not hold up as well. (I prefer Kellogg’s for that perfect snap).
- 10 ounces marshmallows: About 4 cups. Mini marshmallows melt faster and more evenly than large ones, so I always recommend using the small bag. (Adds richness and binds the cereal together).
- 3 tablespoons unsalted butter: Salted butter can work, but unsalted gives you better control over the flavor. (Room temperature is fine, but melting it first saves time).
- 1 cup candy corn: This is the star of the Halloween show. (Use traditional sugar candy corn for the classic taste, or chocolate-covered if you want a twist).
- Pinch of salt: Just a tiny pinch to balance the sweetness. (Optional, but highly recommended if using unsalted butter).
For the best texture, I recommend using a large, heavy-bottomed pot. It helps distribute the heat evenly so the marshmallows don’t burn. If you are looking for a gluten-free option, you can easily swap in gluten-free crispy rice cereal. Just make sure it is certified gluten-free, as cross-contamination can happen with some brands. For a dairy-free version, you can use a high-quality plant-based butter and dairy-free marshmallows, though the texture might be slightly different. In the summer, you might skip the candy corn and use white chocolate chips for a spooky ghost effect, but for Halloween, nothing beats the real thing. Keep an eye on the marshmallows; you want them fully melted but not browned. If they start to separate, it’s too hot. Trust your senses here.
What specific type of marshmallows works best?
Mini marshmallows are the way to go. They have a higher surface area-to-volume ratio, which means they melt much faster and more uniformly than large marshmallows. This ensures a smooth, consistent mixture without any lumps of unmelted marshmallow. If you only have large marshmallows, chop them up finely before melting.
Can I use a different cereal?
While Rice Krispies are the classic choice, you can experiment with other crispy cereals. Corn Flakes can add an extra level of crunch, but they might not hold together as well. Puffed wheat or puffed quinoa can work for a gluten-free alternative, but the texture will be different. Stick to Rice Krispies for that authentic, nostalgic crunch.
How do I prevent the treats from being too sticky?
Greasing your hands and your pan with butter or non-stick cooking spray is crucial. Also, make sure you don’t overcook the marshmallow mixture. Once the marshmallows are melted and combined with the butter, remove it from the heat immediately. Overheating can cause the sugar to crystallize and become sticky.
Equipment Needed
You don’t need a fancy kitchen to make these treats, but having the right tools makes the process much smoother. A large pot is essential because the marshmallows expand when they melt. If you use a small pot, you’ll end up with a sticky mess on your stovetop. I recommend a 4-quart or larger stockpot.
A silicone spatula is your best friend here. It allows you to scrape the sides of the pot to ensure all the marshmallows are melted and incorporated. Wooden spoons can work, but they don’t scrape as effectively, and you might end up with unmelted bits. A 9×13 inch baking pan is standard, but you can use a 8×8 inch pan if you want thicker, chewier treats. Just keep in mind that the cooking time will remain the same.
A large resealable plastic bag or a bowl for mixing is helpful if you want to toss the cereal with the candy corn before mixing. This ensures even distribution. For cutting, a sharp chef’s knife works well, but a pizza cutter is often easier for clean, straight cuts without squishing the treats. If you don’t have a pizza cutter, just dip your knife in hot water between cuts to get clean edges.
Don’t forget a pair of butter knives or greased hands for pressing the mixture into the pan. Trying to use a spoon will just make a mess. Budget-friendly options include using a standard saucepan if you have a large one, or using parchment paper instead of a silicone mat for lining the pan. The key is to have everything prepped and ready before you start melting the marshmallows, as the process moves quickly.
Do I need a candy thermometer?
No, a candy thermometer is not necessary for this recipe. You are looking for the marshmallows to be fully melted and smooth, not a specific temperature. If you heat the mixture too much, it will become sticky and hard to handle. Just keep the heat on medium-low and stir frequently.
What if I don’t have a 9×13 pan?
You can use an 8×8 pan for thicker treats or a 10×15 jelly roll pan for thinner, crispier bars. Adjust the cutting size accordingly. If you use a smaller pan, the treats will be thicker and chewier, which some people prefer. Just be aware that the cooking time for the marshmallow mixture does not change.
Preparation Method
Getting the texture right is all about timing and temperature. Follow these steps carefully to ensure your treats are perfectly crispy and easy to cut.
- Prep your pan: Lightly grease a 9×13 inch baking pan with butter or non-stick cooking spray. Line it with parchment paper for easy removal later, though this is optional if you are greasing well. (Time: 2 minutes)
- Melt the butter: In a large pot over medium-low heat, add the butter. Let it melt completely, stirring occasionally. Do not let it brown. (Time: 3 minutes)
- Add marshmallows: Add the mini marshmallows to the melted butter. Stir constantly. This is the most critical step. Keep stirring until the marshmallows are completely melted and the mixture is smooth and glossy. This usually takes about 5-7 minutes. If you rush this step, you’ll have lumps. If you go too long, they’ll get sticky. (Time: 7 minutes)
- Remove from heat: As soon as the marshmallows are smooth, remove the pot from the heat. Do not add the cereal yet. Let it cool for about 30 seconds. This prevents the cereal from getting soggy. (Time: 1 minute)
- Combine cereal: Add the Rice Krispies cereal to the pot. Use a greased spatula to fold the cereal into the marshmallow mixture. Be gentle but thorough. You want every piece coated. (Time: 2 minutes)
- Add candy corn: Gently fold in the candy corn. Be careful not to crush them. You want them to remain whole for that festive look and crunch. (Time: 1 minute)
- Press into pan: Transfer the mixture to your prepared pan. Grease your hands or use a greased spatula to press the mixture down firmly. Don’t pack it too tight, but make sure it’s even. (Time: 2 minutes)
- Set and cool: Let the treats cool at room temperature for at least 1 hour. Do not refrigerate, as this can make them chewy. They need to set naturally. (Time: 60 minutes)
- Cut and serve: Once cooled, lift the treats out of the pan using the parchment paper (if used) and cut into squares. Use a sharp knife or pizza cutter for clean edges. (Time: 5 minutes)
If the mixture is too sticky to handle, wet your hands with cold water. This helps prevent the marshmallow from sticking to your skin. If the mixture is too hard to press, it means the marshmallows were overcooked. Next time, remove from heat sooner. If the cereal isn’t coating evenly, make sure the pot is large enough to allow for easy stirring.
Why is my mixture too sticky?
If the mixture is too sticky, it likely means the marshmallows were overheated. Marshmallows contain sugar, which becomes sticky when it gets too hot. To fix this, you can add a little more cereal to absorb the excess moisture, but it’s better to prevent it by keeping the heat low and stirring constantly.
Can I make this ahead of time?
Yes, these treats can be made up to 3 days in advance. Store them in an airtight container at room temperature. They will stay fresh and crispy for several days. Avoid refrigerating them, as the cold can make the marshmallows tough and chewy.
Cooking Tips & Techniques
Mastering Rice Krispie treats is about understanding the behavior of sugar and starch. One common mistake is using high heat. Always keep the heat on medium-low. High heat can burn the butter and cause the marshmallows to seize up, making them difficult to stir. If you see the mixture starting to separate or look oily, take it off the heat immediately.
Another tip is to use fresh cereal. Old cereal loses its crunch and can make the treats soggy. If you’re unsure, do a quick taste test. It should snap when you break it. If it bends, it’s too old. Also, don’t skip the butter. It adds flavor and helps bind the ingredients. If you use too little, the treats might fall apart. If you use too much, they’ll be greasy.
When folding in the cereal, work quickly but gently. You want to coat every piece without crushing the cereal. If you crush the cereal, you’ll lose that signature crunch. Also, be careful not to overmix the candy corn. You want them to remain whole for texture and visual appeal. If you crush them, you’ll just get colored sugar in your treats.
For consistent results, use a kitchen scale to measure your marshmallows. Volume measurements can vary depending on how packed they are. Weighing ensures you get the right ratio of cereal to marshmallow. If you don’t have a scale, use mini marshmallows and pack them lightly into the cup. This method is more reliable than using large marshmallows, which can vary in size.
Finally, let the treats cool completely before cutting. Cutting them while they are warm will result in messy, uneven pieces. If you’re in a hurry, you can speed up the cooling process by placing the pan in a cool room, but avoid the fridge. The cold can cause condensation, which makes the treats sticky. Patience is key to perfect, crisp treats.
What if I don’t have mini marshmallows?
You can use large marshmallows, but you’ll need to chop them finely before melting. This ensures they melt evenly. Alternatively, you can use marshmallow fluff, but you’ll need to adjust the amount. Use about 16 ounces of fluff for every 6 cups of cereal. The texture will be slightly different, but still delicious.
How do I keep the treats from sticking to the knife?
Dip your knife in hot water and wipe it dry before each cut. The heat helps the knife glide through the treats without sticking. Alternatively, use a pizza cutter, which is designed for this kind of task. Just make sure the cutter is clean and dry for the best results.
Variations & Adaptations
While the classic version is perfect, there are many ways to customize these treats to suit your tastes or dietary needs. Here are a few ideas to try.
- Gluten-Free: Swap the Rice Krispies for a certified gluten-free crispy rice cereal. Most major brands now offer gluten-free versions. Make sure to check the candy corn as well, as some brands may contain wheat starch.
- Dairy-Free: Use plant-based butter and dairy-free marshmallows. There are several brands available that mimic the texture and melt of traditional marshmallows. The flavor will be slightly different, but still enjoyable.
- Chocolate Drizzle: Melt some chocolate chips and drizzle them over the cooled treats. This adds a rich, chocolatey flavor that pairs well with the sweetness of the marshmallows. Let the chocolate set before cutting.
- Cookie Butter: Add a spoonful of Biscoff spread to the melted marshmallow mixture. This adds a spicy, caramel-like flavor that is perfect for fall. It pairs beautifully with the candy corn.
- White Chocolate: Stir in some white chocolate chips at the end for a creamier texture and a sweeter flavor. This is a great option for those who prefer a milder taste.
I once tried adding a tablespoon of pumpkin spice to the melted marshmallow mixture. It was a hit at a Halloween party, adding a subtle warmth that complemented the candy corn. You can also use colored candy corn, like purple or green, for a more spooky look. Just make sure the colors are food-safe. These variations allow you to keep the recipe fresh and exciting year after year.
Can I add nuts to the treats?
Yes, chopped pecans or walnuts can add a nice crunch and nutty flavor. Just make sure to chop them finely so they distribute evenly. This is a great option for those who want a more sophisticated taste profile.
What if I want a healthier version?
You can try using low-calorie marshmallows, but the texture will be different. They may not melt as well, so you’ll need to be careful with the heat. Another option is to use a sugar-free syrup instead of marshmallows, but this will change the flavor significantly. For a healthier option, focus on portion control and pair the treats with a piece of fruit.
Serving & Storage Suggestions
These treats are best served at room temperature. They should be stored in an airtight container to maintain their crispness. If you leave them out in the open, they will absorb moisture from the air and become chewy. An airtight container will keep them fresh for up to 3 days.
For longer storage, you can freeze the treats. Wrap them tightly in plastic wrap and then place them in a freezer-safe bag. They can be frozen for up to 2 months. Thaw them at room temperature before serving. Do not refreeze after thawing, as this can affect the texture.
These treats are great for parties, potlucks, and Halloween events. They are easy to transport and don’t require refrigeration. You can cut them into small squares for bite-sized snacks or larger rectangles for a more substantial treat. Pair them with a glass of cold milk or a hot cup of coffee for a perfect afternoon snack.
As the treats sit, the flavors will meld together, becoming even more cohesive. The candy corn softens slightly, creating a nice contrast with the crunchy cereal. If you make them a day ahead, they will be even easier to cut and serve. Just make sure to keep them in a cool, dry place.
How do I reheat leftover treats?
You don’t need to reheat these treats. They are best served at room temperature. If they have become slightly chewy, you can try warming them in the microwave for 10 seconds, but be careful not to melt the marshmallows. The best way to restore crispness is to let them sit out in a dry environment for a few hours.
Can I use these for gift giving?
Yes, these make wonderful gifts for neighbors, teachers, and friends. Package them in small cellophane bags tied with ribbon or in decorative boxes. Add a Halloween-themed tag for a personal touch. They are easy to carry and don’t require any special handling.
Nutritional Information & Benefits
These treats are a fun, festive snack, but they are high in sugar and calories. A single serving (one square) contains approximately 150 calories, with 20 grams of carbohydrates and 8 grams of sugar. They are not a health food, but they can be enjoyed in moderation as a special treat.
The rice cereal provides some energy from carbohydrates, while the marshmallows add quick sugar for a boost. The candy corn adds color and flavor but contributes little nutritional value. If you are watching your sugar intake, consider making smaller portions or sharing with others. Pairing the treats with a protein-rich snack, like a handful of nuts, can help balance the blood sugar spike.
For those with dietary restrictions, remember to check the labels of all ingredients, especially the candy corn and marshmallows, for allergens like gelatin or gluten. While this recipe is simple, it’s important to be mindful of what you are consuming. Enjoy these treats as a way to celebrate the season, not as a daily staple.
Are these treats suitable for diabetics?
No, these treats are high in sugar and carbohydrates, which can cause a rapid spike in blood sugar. Diabetics should avoid them or consult with their healthcare provider before consuming. There are sugar-free versions of marshmallows and candy corn available, but they may have a different taste and texture.
Can I make these treats lower in fat?
You can reduce the amount of butter by using 1 tablespoon instead of 3, but the treats may not bind as well. Another option is to use a non-stick cooking spray instead of butter for greasing the pan. However, the butter adds flavor and richness, so reducing it may affect the taste.
Conclusion
Making crispy Halloween Rice Krispie Treats with candy corn is a simple yet rewarding experience. It’s a recipe that brings back memories of childhood and allows you to create something special for your family and friends. The key is to pay attention to the details, from melting the marshmallows gently to pressing the mixture firmly into the pan. With a little practice, you’ll master the art of the perfect crunch.
I encourage you to try this recipe and customize it to your liking. Add your favorite candy, drizzle some chocolate, or experiment with different cereals. The possibilities are endless. Share your creations with me in the comments below. I love seeing how you adapt this recipe to your own style. Whether you stick to the classic version or try something new, I hope you enjoy the process and the delicious results.
So, next time you’re looking for a fun, easy treat, remember this recipe. It’s reliable, festive, and always a hit. Happy Halloween, and happy baking!
Frequently Asked Questions
Why are my Rice Krispie Treats too chewy?
If your treats are too chewy, it’s likely because the marshmallows were overheated. High heat causes the sugar in the marshmallows to become sticky and tough. To avoid this, keep the heat on medium-low and stir constantly until the marshmallows are just melted. Also, avoid pressing the mixture too tightly into the pan, as this can compact it and make it chewy.
Can I use homemade marshmallows?
Yes, you can use homemade marshmallows, but they may have a different moisture content than store-bought ones. You might need to adjust the amount of cereal or marshmallows to get the right consistency. Homemade marshmallows can also be stickier, so you may need to grease your hands more generously.
How do I store leftover treats?
Store leftover treats in an airtight container at room temperature. They will stay fresh for up to 3 days. Avoid refrigerating them, as the cold can make them chewy. If you need to store them for longer, you can freeze them in a freezer-safe bag for up to 2 months.
Can I add other candies to the treats?
Absolutely! You can add chopped candy bars, M&Ms, or Reese’s Pieces for extra flavor and texture. Just make sure to fold them in gently to avoid crushing them. The key is to balance the sweetness with the salty crunch of the cereal.
What is the best way to cut the treats?
Use a sharp knife or a pizza cutter for clean cuts. Dip the knife in hot water and wipe it dry between cuts to prevent sticking. For the cleanest edges, cut the treats while they are completely cool. Warm treats are softer and more likely to squish.
Pin This Recipe!

Crispy Halloween Rice Krispie Treats: 3 Ingredients

A simple, festive Halloween treat made with just a few pantry staples. This recipe ensures a shatteringly crisp exterior and light texture by using mini marshmallows and proper melting techniques, finished with candy corn for seasonal flair.
- Prep Time: 10 minutes
- Cook Time: 15 minutes
- Total Time: 1 hour 25 minutes
- Yield: 12 servings 1x
- Category: Dessert
- Cuisine: American
Ingredients
- 6 cups Rice Krispies cereal
- 10 ounces mini marshmallows (about 4 cups)
- 3 tablespoons unsalted butter
- 1 cup candy corn
- Pinch of salt (optional)
Instructions
- Lightly grease a 9×13 inch baking pan with butter or non-stick cooking spray. Line with parchment paper for easy removal.
- In a large pot over medium-low heat, melt the butter completely, stirring occasionally. Do not let it brown.
- Add the mini marshmallows to the melted butter. Stir constantly until the marshmallows are completely melted and the mixture is smooth and glossy (about 5-7 minutes).
- Remove the pot from the heat and let it cool for about 30 seconds to prevent the cereal from getting soggy.
- Add the Rice Krispies cereal to the pot. Use a greased spatula to fold the cereal into the marshmallow mixture until every piece is coated.
- Gently fold in the candy corn, being careful not to crush them.
- Transfer the mixture to the prepared pan. Grease your hands or use a greased spatula to press the mixture down firmly and evenly.
- Let the treats cool at room temperature for at least 1 hour. Do not refrigerate.
- Once cooled, lift the treats out of the pan and cut into squares using a sharp knife or pizza cutter.
Notes
Use mini marshmallows for faster, more even melting. Keep heat on medium-low to prevent burning or stickiness. Do not refrigerate as it makes the treats chewy. For gluten-free, use certified gluten-free crispy rice cereal. For dairy-free, use plant-based butter and marshmallows.
Nutrition
- Serving Size: 1 square
- Calories: 150
- Sugar: 8
- Sodium: 50
- Fat: 4
- Saturated Fat: 2
- Carbohydrates: 20
- Protein: 1
Keywords: Halloween treats, Rice Krispie treats, candy corn, crispy treats, easy dessert, kid-friendly snacks, fall baking


