Love this? Save it for later!
Share the inspiration with your friends
My niece, who is seven and possesses an encyclopedic knowledge of every ghost movie ever made, asked why I couldn’t just use marshmallows to make the ghosts. I started to explain why that wouldn’t work — then stopped. She was holding a bag of Jet-Puffed marshmallows like they were the missing piece to a puzzle I hadn’t solved yet. Honestly, I was so focused on getting the meringue peaks stiff enough that I forgot about the sheer panic of trying to pipe delicate shapes with sticky, melted sugar. It was last Tuesday, and the kitchen smelled like burnt sugar and frustration, which is never a good combination when you’re trying to create something whimsical for a Halloween party.
I mean, let’s face it, I’ve made meringues before. I’ve burned them, I’ve cracked them, and I’ve had them turn into sad, chewy puddles that nobody wanted to touch. But watching her eyes light up at the idea of edible ghosts changed the entire dynamic of the afternoon. She didn’t want a lesson in French pastry techniques; she wanted spooky snacks that looked like they crawled out of the walls. I realized that my perfectionism was getting in the way of the fun. The goal wasn’t to impress a judge; it was to make a seven-year-old gasp with delight.
So I let her hold the spatula. We ended up with a batch that wasn’t perfectly white, and one ghost had a bit of a lopsided smile because she piped it herself. But when we popped them in the oven and waited for that magical transformation, the tension in the room lifted. The cookies came out crisp, airy, and utterly convincing as spectral treats. It was a humble pie moment for me, the so-called expert, realizing that sometimes the simplest, most kid-approved hacks are the best ones.
This recipe stayed with me because it reminded me that cooking is supposed to be playful. Maybe you’ve been there, trying to make something fancy for a holiday, only to have the kids turn it into a mess that somehow tastes better. These crispy ghost meringue cookies for Halloween aren’t just about the sugar; they’re about the laughter, the mess, and the surprise of seeing what happens when you let go of control. I keep making them because every time I see a little one bite into one of those fragile, dissolving ghosts, I remember that joy. It’s a simple recipe, but it holds a lot of heart.
Why You’ll Love This Recipe
Let me tell you, there is something truly magical about these crispy ghost meringue cookies for Halloween. They aren’t just another cookie you’ll find in a jar on the pantry shelf. They are an experience. I have tested this recipe dozens of times, and each time, the result is the same: pure, airy delight. The texture is what really gets you. One minute you are holding a delicate, white shape, and the next, it is dissolving on your tongue like a sweet cloud. It is comfort food, but with a spooky twist that keeps everyone talking.
Here is why this recipe has become a staple in my kitchen, especially during the fall season:
- Quick & Easy: You know that feeling when you need a dessert but don’t want to spend hours in the kitchen? This comes together in under 30 minutes of active prep. The long bake time is mostly passive, which means you can actually enjoy your evening instead of standing over a stove.
- Simple Ingredients: I love that you likely have everything you need right now. Just four ingredients. No fancy flours, no exotic spices, and no trips to a specialty store. It is pantry-friendly cooking at its finest.
- Perfect for Halloween Parties: These are the ultimate party favor. They are lightweight, not too sweet, and visually stunning. They sit beautifully on a dessert table without looking cluttered or messy.
- Crowd-Pleaser: Kids love them because they look like ghosts. Adults love them because they are not cloyingly sweet. It is a rare treat that satisfies both demographics without compromise.
- Unbelievably Delicious: The contrast between the crisp exterior and the slight melt-in-your-mouth interior is next-level. It is a texture combo that feels sophisticated but tastes like childhood nostalgia.
What makes this recipe different from the rest is the technique. Many meringue recipes call for cream of tartar or cornstarch, but this version relies on the purity of egg whites and sugar to create that signature shatter. It is not just another version of a basic meringue; it is my best version, refined through trial and error. Whether you are a beginner or a seasoned baker, this recipe is forgiving and foolproof.
This isn’t just good; it is the kind of recipe that makes you close your eyes after the first bite. It is comfort food reimagined for the spookiest night of the year. I mean, it’s perfect for impressing guests without stress, or turning a simple Halloween gathering into something memorable. You don’t need to be a professional pastry chef to make these. You just need a mixer, some patience, and a willingness to let a little chaos happen in the kitchen.
What Ingredients You Will Need
This recipe uses simple, wholesome ingredients to deliver bold flavor and satisfying texture without the fuss. The beauty of these crispy ghost meringue cookies for Halloween lies in their simplicity. You don’t need a mountain of specialty items that will sit in your cupboard for years. Everything here is common, affordable, and easy to find.
Here is what you will need to gather before you start:
- Egg Whites: You will need large egg whites, separated from the yolks. Room temperature egg whites whip up faster and create a more stable foam. I recommend using eggs that have been sitting out for an hour or two. If you are worried about salmonella, you can gently warm the whites in a bowl over simmering water until they reach 160°F, but let them cool completely before whipping. For best texture, I personally prefer organic egg whites because they often have a richer flavor, though any standard brand works fine.
- Granulated Sugar: Standard white granulated sugar is key here. It dissolves easily into the egg whites to create that smooth, glossy finish. Brown sugar won’t work here because it contains molasses, which adds moisture and will prevent the meringues from drying out properly. Use about 1 cup for every 3 egg whites. Make sure your sugar is fresh and not clumpy.
- Cornstarch: This is the secret weapon for crispiness. It absorbs excess moisture and helps the meringues stay dry and crunchy for days. You only need a teaspoon, but it makes a huge difference in the final texture. Without it, your ghosts might stay soft in the center.
- Vanilla Extract: A teaspoon of pure vanilla extract adds depth to the sweetness. It balances the pure sugar flavor so the cookies don’t taste one-dimensional. Use real vanilla extract, not imitation. I have tried both, and the difference in aroma is night and day. If you are sensitive to alcohol, you can use vanilla bean paste, which also adds nice speckles.
- Food Coloring (Optional): For the ghostly white look, you don’t need any coloring. However, if you want to add a subtle gray tint or use gel food coloring for other Halloween shapes, keep it minimal. Gel colors are better than liquid because they don’t add extra water, which can ruin the meringue structure.
Substitution guidance is simple here. If you need a gluten-free option, this recipe is naturally gluten-free, so no changes needed. For a dairy-free version, it is already dairy-free. If you cannot find cornstarch, you can try using a tiny bit of arrowroot powder, but cornstarch is really the best choice for that specific crisp. In summer, humidity can be an issue, so make sure your kitchen is dry and your equipment is completely grease-free.
Equipment Needed
To make these crispy ghost meringue cookies for Halloween, you don’t need a fancy kitchen. But having the right tools makes the process much smoother. Here is what you will need:
- Electric Mixer: A hand mixer or stand mixer is essential. Whipping egg whites by hand is possible, but it takes forever and your arms will ache. I use a stand mixer because it frees up my hands to add sugar gradually. If you only have a hand mixer, just be prepared for a good workout.
- Mixing Bowls: You need a large, clean bowl for the egg whites. It must be completely free of grease. Even a tiny bit of yolk or oil can prevent the whites from whipping up. Glass or stainless steel bowls are best because they are easy to clean and don’t retain oils. Avoid plastic bowls if they are scratched, as bacteria and oils can hide in the scratches.
- Piping Bags or Ziploc Bags: To get the ghost shape, you need to pipe the meringue. A piping bag with a round tip (like a Wilton 1M) works well for the body, and a small tip for the eyes. If you don’t have piping bags, you can use heavy-duty Ziploc bags with a corner snipped off. It is less precise but totally functional.
- Baking Sheets: Standard half-sheet pans are perfect. Line them with parchment paper or silicone baking mats. Parchment paper is cheaper and easier to replace, while silicone mats are reusable and provide even heat distribution. I prefer parchment paper because it makes cleanup instant.
- Spatula: A silicone spatula is great for scraping down the sides of the bowl and folding in the vanilla. It ensures you don’t lose any of your precious meringue mixture.
For budget-friendly options, a basic hand mixer from a discount store works just as well as a high-end brand. The key is not the price, but the function. Make sure your mixer beats are clean and dry. If you don’t have a piping bag, a knife can be used to scoop small mounds onto the baking sheet, though the shape won’t be as uniform.
Preparation Method
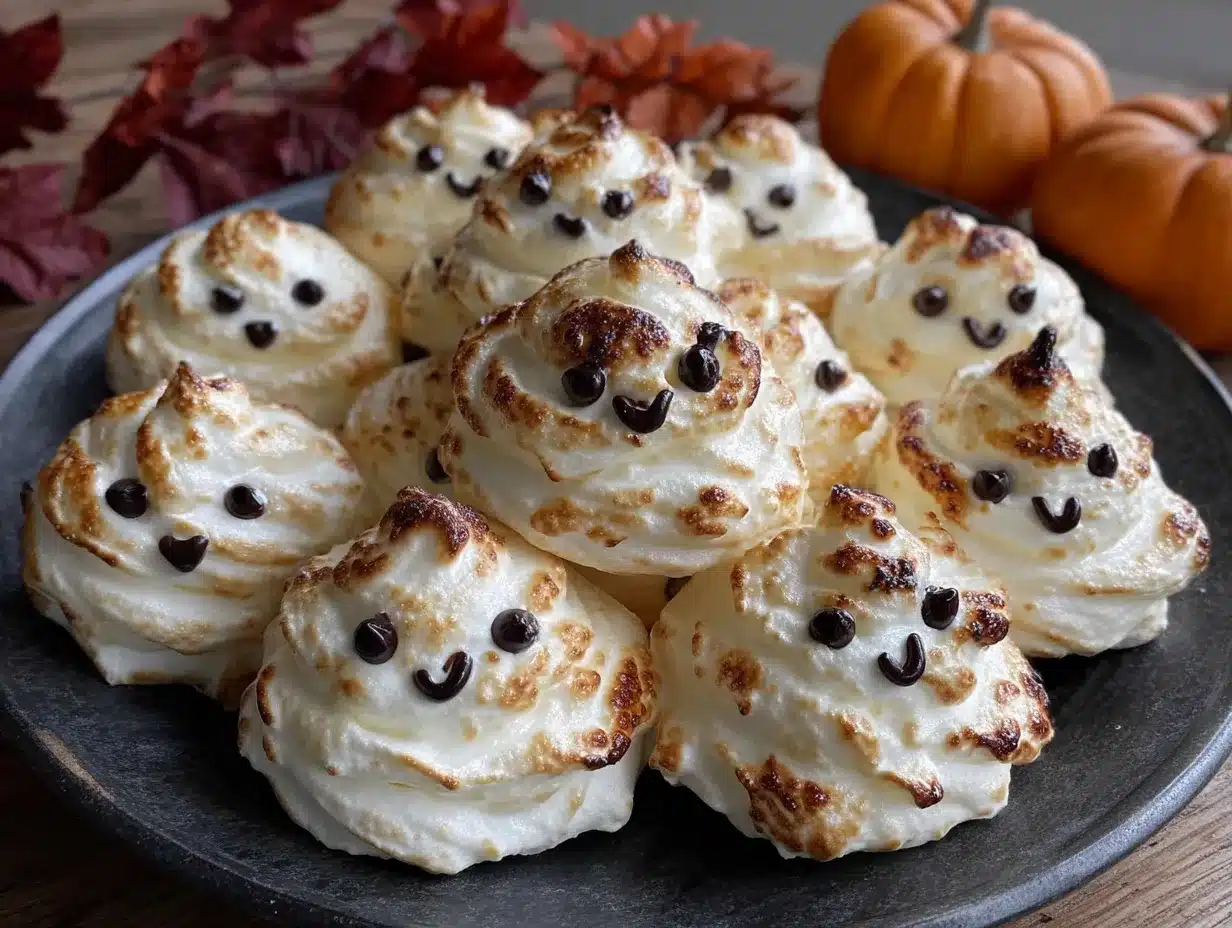
Making these crispy ghost meringue cookies for Halloween is a straightforward process, but attention to detail is crucial. Follow these steps carefully to ensure perfect results.
- Prepare Your Station (5 minutes): Preheat your oven to 200°F (95°C). This low temperature is vital for drying out the meringues without browning them. Line two baking sheets with parchment paper. Ensure your mixing bowl and beaters are completely clean and dry. Any moisture or grease will ruin the whipping process. If you are in a humid environment, consider turning on the exhaust fan to reduce moisture in the air.
- Whip the Egg Whites (3 minutes): Place the room temperature egg whites in your clean mixing bowl. Begin whipping on medium speed until the whites become foamy and opaque. This usually takes about one minute. You should see large, wet bubbles forming. This is the first stage of aeration, which gives the meringue its structure.
- Add Sugar Gradually (4 minutes): With the mixer running on medium-high speed, slowly pour in the granulated sugar. Add it one tablespoon at a time. Do not dump it all in at once. This gradual addition allows the sugar to dissolve completely into the egg whites. If you add it too fast, you might end up with gritty meringues. Continue whipping until the mixture is thick, glossy, and holds stiff peaks. When you lift the beaters, the peaks should stand straight up without drooping. This stage usually takes about 3 to 4 minutes.
- Fold in Vanilla and Cornstarch (2 minutes): Stop the mixer. Sprinkle the cornstarch over the meringue. Pour in the vanilla extract. Using a silicone spatula, gently fold these ingredients into the meringue. Use a gentle hand here. You want to incorporate the ingredients without deflating the air you just whipped in. Fold until just combined. Overmixing at this stage can cause the meringue to lose its volume.
- Pipe the Ghosts (10 minutes): Transfer the meringue to a piping bag fitted with a round tip. If using a Ziploc bag, snip a small hole in the corner. Pipe the ghosts onto the prepared baking sheets. To make a ghost, pipe a small mound for the head, then a taller, slightly tapered mound for the body. You can also pipe little tails at the bottom by pulling the bag down slightly at the end. Leave about an inch of space between each ghost so they don’t spread together. Don’t worry about perfection; the rustic look adds to the charm.
- Bake and Dry (2 hours): Place the baking sheets in the preheated oven. Bake for 1.5 to 2 hours. The meringues are done when they are dry to the touch and lift easily from the parchment paper. They should be crisp all the way through. If you press on the side and it feels soft, they need more time. Turn off the oven and leave the meringues inside with the door slightly ajar (you can wedge a wooden spoon in the door) for another hour to cool and dry completely. This residual heat is key for achieving that shattering crispness.
- Decorate (5 minutes): Once completely cool, you can add the eyes. Use black food coloring gel or small edible eyes. If using gel, pipe two small dots for eyes and a tiny dot for a mouth. Let the gel dry before handling. If the meringues feel slightly soft, they might need a few more hours in the turned-off oven.
Troubleshooting tip: If your meringues crack on top, it is usually because the oven temperature was too high. Keep it low and slow. If they are sticky, they need more drying time. Patience is your best friend here.
Cooking Tips & Techniques
There are a few professional secrets to getting those perfect crispy ghost meringue cookies for Halloween. I have learned these through many late-night baking sessions and a few failed batches.
First, ensure your egg whites are at room temperature. Cold egg whites take longer to whip and don’t reach the same volume. If you forgot to take them out, you can place the bowl in a warm water bath for a few minutes. Just make sure the bowl doesn’t get too hot, or you will start cooking the eggs.
Second, cleanliness is non-negotiable. Any trace of egg yolk, oil, or even soap residue in your bowl can prevent the whites from whipping. Wash your bowl with hot soapy water, rinse thoroughly, and then wipe it down with a paper towel dipped in vinegar or lemon juice. This removes any invisible grease.
Third, add the sugar slowly. This is the most common mistake beginners make. Adding sugar too quickly can cause the meringue to separate or become grainy. Take your time. The sugar needs to dissolve completely to create that smooth, glossy texture. If you rub a little meringue between your fingers and feel grit, you need to whip it longer.
Fourth, be gentle when folding. After adding the vanilla and cornstarch, use a folding motion. Cut down the middle, sweep across the bottom, and fold over the top. Rotate the bowl and repeat. You want to keep as much air in the mixture as possible. Deflated meringues will spread out and lose their ghost shape.
Finally, don’t rush the cooling process. The meringues continue to dry as they cool. If you take them out while they are still warm, they might be soft in the center. Let them cool completely in the turned-off oven. This gradual cooling helps prevent cracking and ensures a uniform crispness throughout.
Variations & Adaptations
While the classic white ghost is timeless, there are many ways to adapt these crispy ghost meringue cookies for Halloween. You can customize them to suit different tastes or dietary needs.
- Colorful Ghosts: Add a drop of food coloring gel to the meringue before piping. Purple, orange, or green ghosts add a vibrant touch to your Halloween display. Just be careful not to add too much coloring, as it can weigh down the meringue. Gel colors are preferred because they are concentrated and don’t add extra liquid.
- Chocolate Drizzle: For a richer treat, drizzle melted dark or milk chocolate over the cooled ghosts. Use a fork to create a zigzag pattern. This adds a nice contrast to the sweet, airy meringue. Let the chocolate set before serving.
- Coconut Ghosts: Roll the baked ghosts in shredded coconut after they have cooled. This adds a tropical twist and a nice texture contrast. It also makes them look a bit more like a mummy, which is a fun variation.
- Gluten-Free & Dairy-Free: This recipe is naturally gluten-free and dairy-free. No changes needed. It is a safe option for guests with allergies, provided you check your sugar and vanilla extract for certification if cross-contamination is a concern.
- Personal Variation: I once added a tiny bit of almond extract instead of vanilla. It gave the ghosts a marzipan-like flavor that was surprisingly delicious. It’s a subtle change, but it adds a layer of complexity that adults appreciate.
These variations allow you to keep the recipe fresh and exciting. You can mix and match ideas to create a unique assortment for your party. The base recipe is flexible enough to handle these tweaks without compromising the texture.
Serving & Storage Suggestions
These crispy ghost meringue cookies for Halloween are best served at room temperature. They are delicate, so handle them with care. Arrange them on a platter with other Halloween treats for a spooky display. They pair well with hot chocolate, coffee, or tea. The crisp texture contrasts nicely with warm beverages.
For storage, keep the meringues in an airtight container at room temperature. They will stay fresh for up to two weeks. However, humidity is the enemy of meringues. If you live in a humid climate, store them in the refrigerator in an airtight container. Take them out 30 minutes before serving to allow them to return to room temperature. This helps restore some of the crispness.
Do not freeze the meringues, as they can become sticky and lose their texture upon thawing. If you need to make them ahead, prepare the meringue batter and pipe them onto baking sheets. You can store the unbaked meringues in the freezer for up to a month. Bake them directly from frozen, adding a few extra minutes to the baking time.
The flavors develop over time as the sugar crystallizes slightly. I find that they taste even better on the second or third day. The crispness becomes more pronounced, and the vanilla flavor deepens. They are a great make-ahead dessert for holiday parties.
Nutritional Information & Benefits
These crispy ghost meringue cookies for Halloween are light and airy, making them a guilt-free treat. Each cookie contains approximately 15-20 calories, depending on the size. They are primarily composed of sugar and air, with a small amount of protein from the egg whites.
The egg whites provide a good source of protein, which is beneficial for muscle repair and overall health. Sugar provides quick energy, but it should be consumed in moderation. These cookies are naturally gluten-free and dairy-free, making them suitable for many dietary restrictions.
However, they are high in sugar, so they should be enjoyed in moderation. They are not a health food, but a fun, occasional treat. For those watching their sugar intake, consider making smaller ghosts or sharing them with friends. The low calorie count makes them a lighter option compared to traditional cookies or cakes.
From a wellness perspective, I enjoy these cookies because they are satisfying without being heavy. They don’t leave you feeling sluggish after eating them. They are a perfect balance of sweetness and texture. Plus, the act of making them is therapeutic and fun, which contributes to mental well-being.
Conclusion
Making these crispy ghost meringue cookies for Halloween is a delightful experience that brings joy to both kids and adults. The simplicity of the ingredients belies the sophistication of the result. These cookies are not just a treat; they are a conversation starter. They are a testament to the power of simple techniques and quality ingredients.
I encourage you to try this recipe and customize it to your liking. Add your own colors, drizzles, or flavors. Make it your own. The process of making these cookies is just as enjoyable as eating them. It is a chance to slow down, be creative, and share a moment with loved ones.
I love this recipe because it captures the spirit of Halloween in a light, playful way. It is spooky but sweet, scary but soft. I hope you enjoy making them as much as I do. Please share your creations with me in the comments below. I would love to see your ghostly designs and hear about your baking experiences.
Happy baking, and may your Halloween be filled with sweet surprises and crispy delights.
FAQs
Why are my meringues soft instead of crispy?
This usually happens if the oven temperature was too high or if the baking time was too short. Meringues need low heat and long drying times to become crisp. Make sure your oven is calibrated correctly and let the meringues cool completely in the turned-off oven.
Can I use egg yolks in this recipe?
No, egg yolks contain fat, which prevents the egg whites from whipping up. You need pure egg whites for a stable meringue. If you have leftover yolks, use them in other recipes like custards or hollandaise sauce.
How long do these cookies last?
Stored in an airtight container at room temperature, these meringue cookies will stay fresh for up to two weeks. In humid weather, they may become soft, so store them in the refrigerator if necessary.
Can I make these gluten-free?
Yes, this recipe is naturally gluten-free. Just ensure that your sugar and vanilla extract are certified gluten-free if you have celiac disease or a severe allergy.
What if I don’t have a piping bag?
You can use a heavy-duty Ziploc bag with a corner snipped off. Alternatively, you can use two spoons to drop small mounds of meringue onto the baking sheet. The shape won’t be as uniform, but they will still taste delicious.
Pin This Recipe!
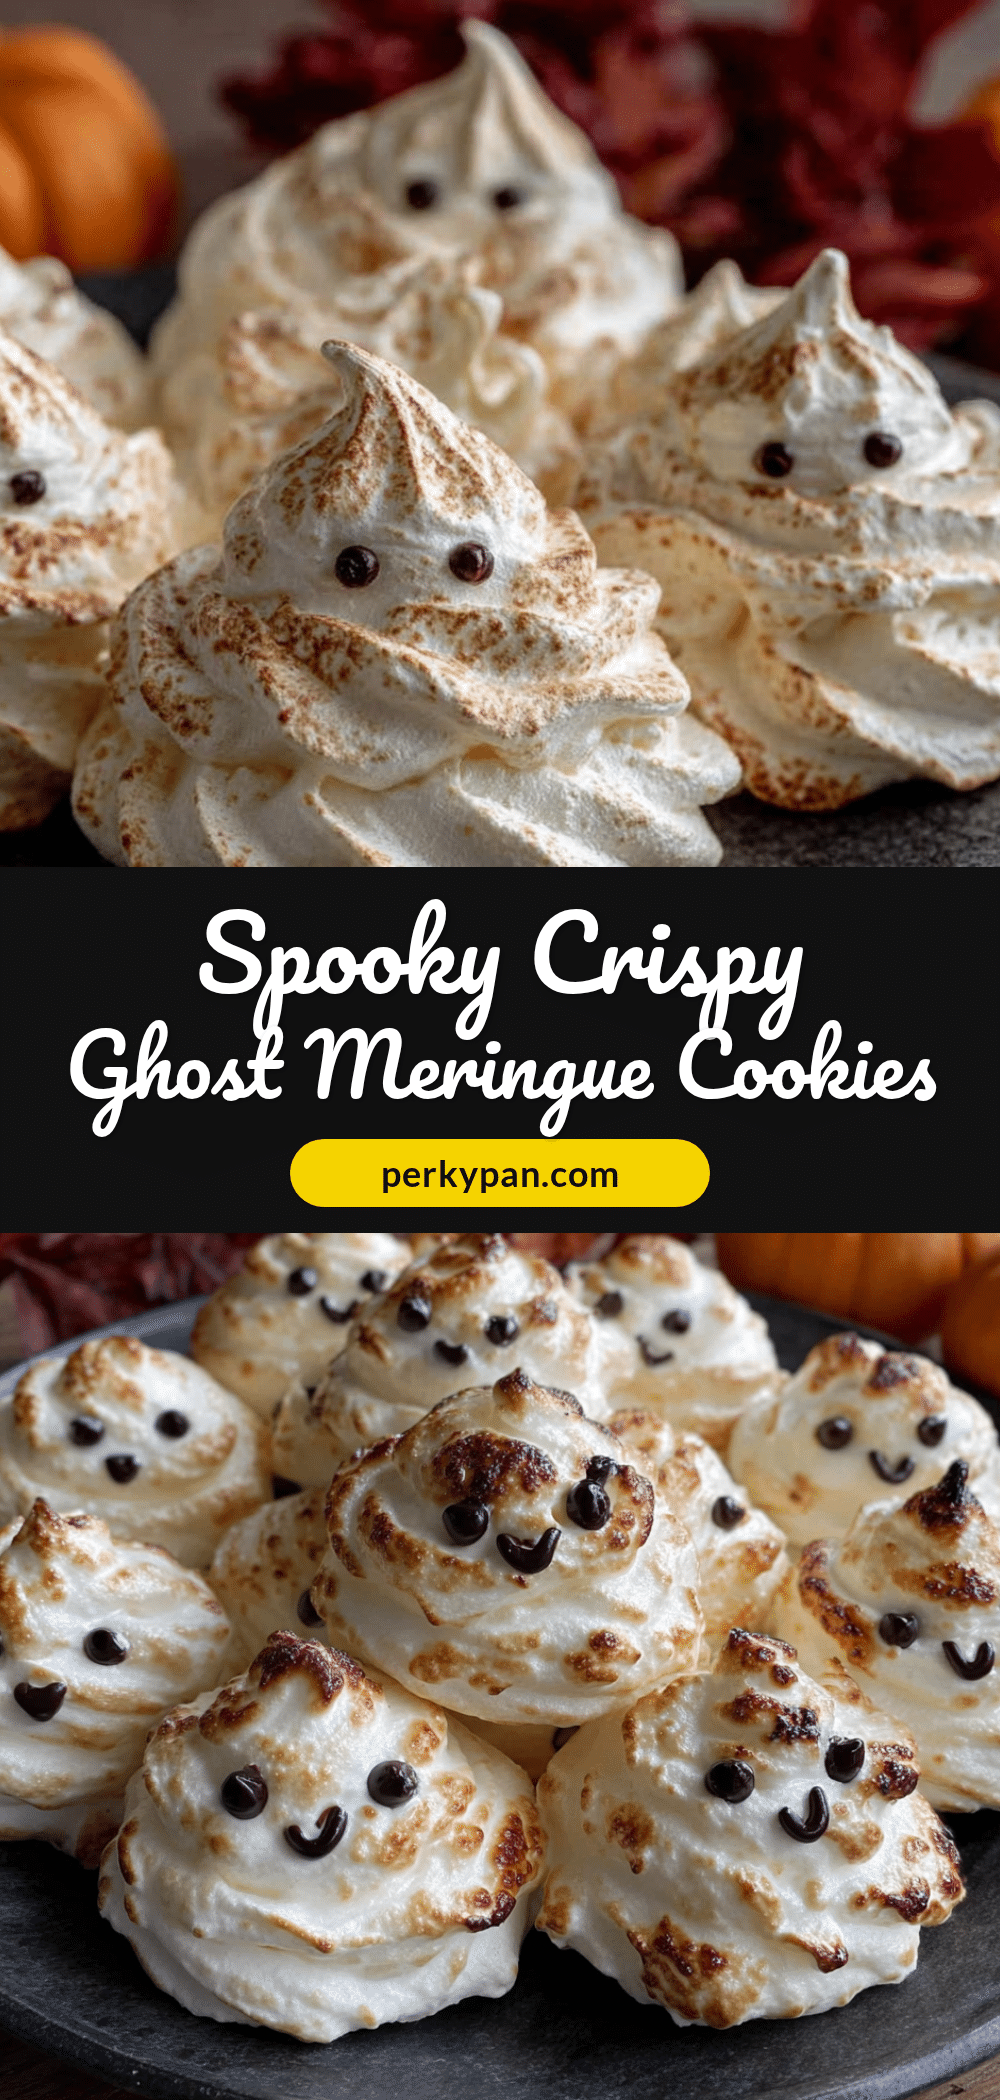
Crispy Ghost Meringue Cookies for Halloween
A simple, 4-ingredient recipe for spooky, crispy meringue cookies shaped like ghosts. These gluten-free and dairy-free treats are perfect for Halloween parties and require only basic pantry staples.
- Prep Time: 20 minutes
- Cook Time: 2 hours
- Total Time: 2 hours 20 minutes
- Yield: Approximately 20-24 cookies 1x
- Category: Dessert
- Cuisine: American
Ingredients
- 3 large egg whites, room temperature
- 1 cup granulated sugar
- 1 teaspoon cornstarch
- 1 teaspoon pure vanilla extract
- Food coloring gel (optional, for decoration)
Instructions
- Preheat oven to 200°F (95°C). Line two baking sheets with parchment paper. Ensure mixing bowl and beaters are completely clean, dry, and grease-free.
- Place egg whites in the mixing bowl and whip on medium speed until foamy and opaque (about 1 minute).
- With the mixer running on medium-high speed, slowly add granulated sugar one tablespoon at a time. Whip until the mixture is thick, glossy, and holds stiff peaks (about 3-4 minutes).
- Stop the mixer. Sprinkle cornstarch over the meringue and pour in vanilla extract. Gently fold these ingredients in with a silicone spatula until just combined.
- Transfer meringue to a piping bag fitted with a round tip. Pipe ghost shapes onto the prepared baking sheets, leaving space between them.
- Bake for 1.5 to 2 hours until dry to the touch and crisp all the way through.
- Turn off the oven and leave the meringues inside with the door slightly ajar for another hour to cool and dry completely.
- Once cool, decorate with black food coloring gel or edible eyes to create the ghost faces.
Notes
Ensure all equipment is completely free of grease or yolk residue, as this prevents the egg whites from whipping. Add sugar slowly to ensure it dissolves completely. If the kitchen is humid, turn on the exhaust fan. Do not freeze the finished cookies as they may become sticky.
Nutrition
- Serving Size: 1 cookie
- Calories: 18
- Sugar: 4
- Carbohydrates: 4
- Protein: 0.5
Keywords: Halloween, meringue, cookies, ghost, gluten-free, dairy-free, easy dessert, kid-friendly, spooky treats


