Love this? Save it for later!
Share the inspiration with your friends
My neighbor wasn’t trying to impress me. I’d stopped by to return her cat carrier—long story involving a very determined tabby named Steve—and the smell hit me before I even got past her screen door. It was sweet, but not in a bakery way. More like spun sugar and childhood and something I couldn’t quite name. She was standing at her kitchen counter, piping little white blobs onto a baking sheet, and she barely looked up. “Oh, these? They’re just ghosts. My kids love them.”
Just ghosts. Like it was nothing. But I watched her work, and honestly, I couldn’t look away. The way the meringue held its shape, the tiny peaks she coaxed into points, the way she sprinkled on miniature chocolate chips for eyes without even measuring—it was like watching someone who’d been making them for a hundred years. She told me she’d learned from her grandmother, who’d made them every Halloween without fail. “She never used a recipe,” my neighbor said, wiping her hands on her apron. “She just knew.”
I asked if she’d write it down for me, and she laughed. “There’s nothing to write. It’s egg whites, sugar, and patience.” But I knew there had to be more to it than that. So I went home, cracked three eggs, and spent the next two hours failing spectacularly. My first batch looked less like ghosts and more like sad, deflated clouds. My second batch was better, but they browned in the oven. By the third try, I was getting somewhere. And by the fourth, I had them. Perfect little ghosts, light as air, with the faintest whisper of vanilla and that satisfying crunch that melts into nothing on your tongue.
I’ve been making them every October since. And maybe you’ve been there too—standing in your kitchen, staring at a recipe that looks too simple to be good, wondering if it’s worth the effort. It is. Let me tell you, these cozy homemade ghost meringue cookies are the kind of thing that makes you feel like you’re in on a secret. And once you make them, you’ll understand why my neighbor didn’t think twice about sharing hers.
Why You’ll Love This Recipe
These ghost meringue cookies aren’t just cute—they’re genuinely foolproof once you know the tricks. I’ve tested this recipe more times than I care to admit, and I’ve worked out every potential pitfall so you don’t have to. Here’s why this version stands out from the rest:
- Quick & Easy: From start to finish, you’re looking at about 2 hours total—but most of that is hands-off baking time. The active prep takes maybe 15 minutes.
- Simple Ingredients: You need exactly four ingredients: egg whites, sugar, vanilla extract, and mini chocolate chips. That’s it. Nothing weird, nothing expensive.
- Perfect for Halloween: These are the ultimate spooky-season treat. They’re adorable on a dessert table, fun to make with kids, and they don’t contribute to the usual candy overload.
- Crowd-Pleaser: I’ve brought these to potlucks, school events, and family gatherings. Adults love the nostalgia, kids love the novelty, and everyone loves that they’re practically guilt-free.
- Unbelievably Delicious: The texture is what gets you. Crisp on the outside, airy on the inside, with just enough sweetness to satisfy without overwhelming. It’s comfort food in its purest, lightest form.
What makes this recipe different from the dozens of others out there? It’s the technique. I spent weeks perfecting the oven temperature and timing so your ghosts stay ghostly white instead of turning into toasted marshmallows. I also figured out the exact consistency your meringue needs to hold those perfect peaks without cracking. This isn’t just another version—it’s the version I wish I’d had on my first try.
There’s something deeply satisfying about making these. Maybe it’s the way the meringue transforms from liquid to cloud-like peaks. Or the quiet focus of piping each little ghost. Or the way they look when they come out of the oven—like tiny, edible works of art. Honestly, it’s the kind of recipe that makes you feel like a kitchen magician. And the best part? They taste as good as they look.
What Ingredients You Will Need
This recipe relies on a handful of simple ingredients, but each one plays a specific role. Using the right type and preparation makes all the difference between ethereal ghosts and flat, sticky failures.
- 3 large egg whites, room temperature (about ¼ cup or 90ml) — Fresh eggs separate more easily, but older eggs whip up better. If you have a choice, use eggs that have been in your fridge for about a week. The slight age helps the whites whip to a greater volume. Separate them while cold, then let them come to room temperature for about 30 minutes before whipping. Room temperature whites whip faster and hold more air.
- ¾ cup (150g) granulated sugar — Regular white sugar works perfectly. Avoid superfine sugar or powdered sugar—they dissolve too quickly and can affect the structure. I recommend C&H or Domino for consistent results. For the best texture, you can pulse the sugar in a food processor for 10 seconds to make it slightly finer, but this is optional.
- ½ teaspoon vanilla extract — Pure vanilla extract gives the best flavor, but imitation vanilla works fine too. You can also experiment with other extracts like peppermint or almond for a different twist. Avoid vanilla bean paste, as the tiny specks can make your ghosts look speckled rather than pure white.
- ¼ cup (45g) mini chocolate chips — Regular chocolate chips are too heavy and will sink into the meringue. Mini chips are essential for creating those cute ghost eyes. Look for Ghirardelli or Nestle mini morsels. Dark chocolate chips give a nice contrast against the white meringue.
- ¼ teaspoon cream of tartar (optional but recommended) — This stabilizes the egg whites and helps them hold their shape. If you don’t have it, you can substitute with ½ teaspoon lemon juice or white vinegar. Or just skip it—the recipe still works, but the meringue will be slightly less stable.
- Pinch of salt — Balances the sweetness and helps the egg whites whip up more easily. Use fine sea salt or table salt, not coarse kosher salt.
Ingredient Selection Tips: For the fluffiest, most stable meringue, use fresh eggs from a trusted source. I prefer organic, free-range eggs for their richer flavor and more vibrant yolks (which means cleaner whites). If you’re concerned about salmonella, look for pasteurized egg whites in cartons—just know they may not whip up quite as well as fresh.
Substitution Guidance: Need a dairy-free option? These are naturally dairy-free since there’s no dairy in the recipe. For a vegan version, you can try aquafaba (the liquid from a can of chickpeas) in place of egg whites. Use 3 tablespoons of aquafaba per egg white, and add an extra ¼ teaspoon cream of tartar. The result is slightly less stable but still delicious.
Equipment Needed
You don’t need a professional pastry kitchen to make these ghost meringue cookies. But having the right tools makes the process smoother and more enjoyable.
- Stand mixer or hand mixer: A stand mixer with a whisk attachment is ideal, but a hand mixer works perfectly too. Whipping meringue by hand with a balloon whisk is possible—I’ve done it—but your arm will definitely feel it. If you’re using a hand mixer, make sure the bowl is deep enough to prevent splattering.
- Large mixing bowl: Glass, stainless steel, or ceramic works best. Avoid plastic bowls—they can retain grease residue that prevents egg whites from whipping properly. Make sure your bowl is completely clean and dry before you start.
- Baking sheets: Two standard half-sheet pans (18×13 inches) work perfectly. Line them with parchment paper or silicone baking mats. Parchment paper is cheaper and works great, but silicone mats provide better heat distribution and are reusable.
- Piping bag with round tip: A disposable piping bag makes cleanup easy. Use a ½-inch round tip (like Ateco #806 or Wilton 1A). No piping bag? No problem. You can snip the corner off a ziplock bag and use that instead. The ghosts won’t look quite as polished, but they’ll still be adorable.
- Kitchen scale: Not essential, but highly recommended for consistent results. Weighing your egg whites and sugar ensures you get the right ratio every time. I use an OXO scale and love it.
- Cooling rack: Meringues need to cool completely on the baking sheet before being moved. A cooling rack helps them cool evenly and prevents condensation from forming on the bottom.
Budget-Friendly Options: If you’re just starting out, skip the fancy piping tips and use a ziplock bag. Your local dollar store often has perfectly good mixing bowls and baking sheets. The only thing I wouldn’t skimp on is the parchment paper—cheap paper can stick to your meringues and ruin them.
Preparation Method
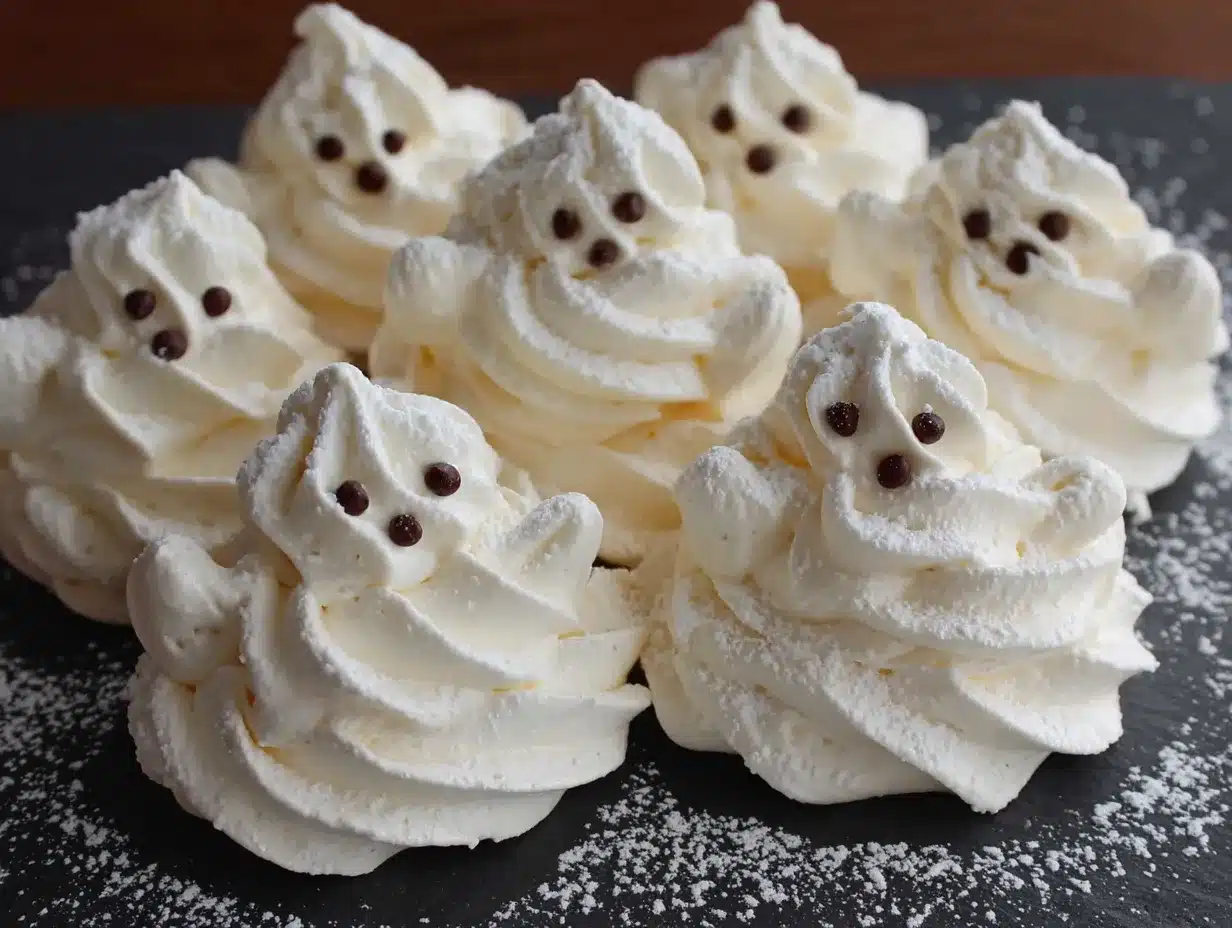
Making ghost meringue cookies requires patience and attention to detail, but the process itself is straightforward. Follow these steps carefully, and you’ll have perfect little ghosts every time.
- Preheat your oven to 200°F (95°C). This is crucial—any hotter and your ghosts will brown. If your oven runs hot, consider lowering the temperature to 190°F (88°C). Line two baking sheets with parchment paper or silicone mats. Set them aside while you prepare the meringue.
- Prepare your egg whites. Separate the eggs while they’re cold—the yolks are less likely to break. Place the whites in your mixing bowl and let them come to room temperature for 30 minutes. This step is non-negotiable. Cold egg whites don’t whip up as well, and you’ll end up with a denser, less stable meringue. While you wait, measure out your sugar and have your vanilla and cream of tartar ready.
- Add cream of tartar and salt. Once the egg whites are at room temperature, add the cream of tartar and a pinch of salt. Start whipping on medium speed. After about 2 minutes, the whites will become frothy and start to increase in volume. This is the soft foam stage—you’ll see lots of small bubbles, and the mixture will look like soapy foam.
- Gradually add the sugar. Increase the mixer speed to medium-high. With the mixer running, add the sugar one tablespoon at a time. This should take about 3-4 minutes total. Adding the sugar slowly allows it to dissolve completely, which is essential for a smooth, stable meringue. If you dump it all in at once, your meringue will be grainy and may collapse. Sensory cue: You should hear the sugar granules hitting the bowl less and less as they dissolve. When you can’t feel any grittiness when you rub a tiny bit between your fingers, the sugar is fully dissolved.
- Whip to stiff peaks. Continue whipping on medium-high speed for another 5-7 minutes. You’re looking for stiff, glossy peaks that hold their shape when you lift the whisk. The meringue should be thick enough that it doesn’t slide around in the bowl. A good test: turn the bowl upside down—if the meringue stays put, it’s ready. Warning: Don’t over-whip! If the meringue starts to look dry or curdled, you’ve gone too far. Stop immediately at the glossy stiff peak stage.
- Add vanilla. With the mixer on low speed, add the vanilla extract. Mix just until combined—about 10 seconds. Over-mixing at this stage can deflate your meringue.
- Transfer to piping bag. Fit your piping bag with the round tip. Fold the top of the bag over your hand to create a cuff, then fill the bag with meringue. Twist the top to seal. If you’re using a ziplock bag, fill it about halfway, then snip off one corner. Personal tip: Don’t overfill the bag. It’s easier to refill than to wrestle with a bulging, unwieldy bag of meringue.
- Pipe the ghosts. Hold the piping bag perpendicular to the baking sheet, about ½ inch above the surface. Pipe a small mound of meringue, about 1½ inches wide. As you reach the desired size, lift the bag straight up while continuing to apply gentle pressure. This creates a small peak on top—the ghost’s head. Space the ghosts about 1 inch apart—they don’t spread much, but they need a little breathing room. Sensory cue: The meringue should flow smoothly without any breaks or bubbles. If you see bubbles, pop them with a toothpick before baking.
- Add the eyes. Gently press two mini chocolate chips into each ghost to create eyes. Place them about halfway down the ghost’s body. Don’t press too hard or you’ll deflate the meringue. You can also add a tiny dot of meringue on top of each chip to secure it, but this isn’t necessary.
- Bake low and slow. Place the baking sheets in the preheated oven. Bake for 90 minutes at 200°F (95°C). Do not open the oven door during the first 60 minutes. After 90 minutes, turn off the oven but leave the meringues inside to cool completely. This gradual cooling prevents cracking and ensures they dry out properly. Troubleshooting tip: If your ghosts are browning, your oven is too hot. Reduce the temperature by 10-15 degrees next time.
- Cool completely. Leave the meringues in the turned-off oven for at least 2 hours, or overnight. They should be completely dry and crisp. When you lift one off the parchment, it should release easily. If it sticks, it needs more drying time. Personal note: I once pulled them out too early and they were chewy in the center. Patience is key here!
- Store properly. Once completely cool, transfer the ghosts to an airtight container. Layer them between sheets of parchment paper to prevent them from sticking together. Store at room temperature—never in the refrigerator, where humidity will ruin them.
Cooking Tips & Techniques
After dozens of batches and more than a few failures, I’ve learned some hard-won lessons about making ghost meringue cookies. Here are the tips that make the biggest difference.
The clean bowl rule is real. I once made a batch of meringue using a bowl I thought was clean, but there must have been a tiny trace of grease. The egg whites never whipped up properly. Wash your bowl and whisk attachment with hot, soapy water, then wipe them down with vinegar or lemon juice to remove any lingering fat. Even a speck of yolk in your whites will ruin the meringue—if you break a yolk while separating, start fresh.
Humidity is your enemy. Meringues are hygroscopic, meaning they absorb moisture from the air. Never make these on a rainy or humid day—they’ll end up sticky and chewy instead of crisp and light. I check the weather forecast before I start. If it’s going to be humid, I wait for a drier day. Trust me on this one.
Low and slow is non-negotiable. I know it’s tempting to crank up the oven to speed things up, but don’t do it. Meringues need gentle, prolonged heat to dry out without browning. My first few batches looked like toasted marshmallows instead of ghosts. Once I committed to the low temperature, everything changed. Set a timer and resist the urge to peek.
Multitask wisely. While the meringues are baking, you have 90 minutes of mostly hands-off time. Use it to clean up your kitchen, prep other Halloween treats, or just relax. But don’t leave the house—you need to be there when the oven turns off to let them cool inside.
Consistency comes from practice. Your first batch might not look perfect, and that’s okay. Each time you make these, you’ll get better at piping, timing, and recognizing the right consistency. My first ghosts looked like lumpy blobs. Now they have distinct heads and bodies. It’s a skill, and like any skill, it improves with repetition.
Variations & Adaptations
Once you’ve mastered the basic ghost meringue cookie, the possibilities are endless. Here are some of my favorite variations.
Flavor Variations: Swap the vanilla extract for peppermint, almond, or coconut extract. Peppermint ghosts are perfect for Christmas, while coconut pairs beautifully with a tropical theme. For a more sophisticated flavor, add ½ teaspoon of rose water or orange blossom water. Start with less—these extracts are potent, and you can always add more.
Colorful Ghosts: Add a few drops of gel food coloring to the meringue before piping. Pastel colors work best—think soft pink, lavender, or pale blue. For Halloween, try a subtle orange or green. Avoid liquid food coloring, which can deflate the meringue. Gel colors are concentrated and won’t affect the texture.
Dietary Adaptations: For a vegan version, use aquafaba (the liquid from a can of chickpeas) instead of egg whites. Whip it the same way, but expect a slightly softer, less stable meringue. For a sugar-free option, use monk fruit sweetener or erythritol in place of granulated sugar. Note that the texture will be different—sugar-free meringues tend to be less crisp.
Different Shapes: Don’t limit yourself to ghosts! Pipe the meringue into pumpkins (use orange food coloring and a green M&M for the stem), bats (pipe two small wings), or spiders (pipe a round body and add eight chocolate chip legs). For Christmas, pipe trees or snowflakes. The technique is the same—only the shape changes.
Personal Variation: My favorite twist is adding a pinch of cinnamon and nutmeg to the meringue. It gives the ghosts a warm, spicy flavor that’s perfect for fall. I stumbled on this by accident when I was making pumpkin pie and had spices on the counter. Now it’s my go-to version for cozy autumn evenings.
Serving & Storage Suggestions
These ghost meringue cookies are as versatile as they are adorable. Here’s how to serve and store them for maximum enjoyment.
Serving Temperature: Serve at room temperature. They’re best within 24 hours of baking, when they’re at peak crispness. Arrange them on a platter with a sprinkle of powdered sugar for a snowy effect, or nestle them among other Halloween treats like candy corn or chocolate spiders.
Presentation Ideas: For a Halloween party, arrange the ghosts on a bed of crushed chocolate cookies (to look like dirt) or on a mirror with dry ice for a spooky fog effect. For a more casual gathering, simply pile them in a bowl and let guests help themselves. Kids love them on cupcakes—just place a ghost on top of a frosted cupcake for an instant Halloween decoration.
Complementary Dishes: These pair beautifully with hot chocolate, coffee, or a glass of cold milk. For a dessert spread, serve them alongside pumpkin pie, apple cider donuts, or caramel apples. They also make a lovely, light finish to a heavy Halloween meal—think of them as the palate cleanser of the dessert table.
Storage Instructions: Store in an airtight container at room temperature for up to 2 weeks. Layer them between sheets of parchment or wax paper to prevent sticking. Do not refrigerate—the humidity will make them soft and sticky. If they do lose their crispness, you can re-crisp them in a 200°F (95°C) oven for 15-20 minutes. Let them cool completely before storing again.
Freezing: You can freeze baked meringues for up to 3 months. Place them in a single layer in a freezer-safe container, separated by parchment paper. Thaw at room temperature for about 30 minutes before serving. They may lose a bit of their crispness, but they’ll still be delicious.
Flavor Development: Unlike many baked goods, meringues don’t improve with age. They’re at their best within the first 2-3 days. That said, they’re still perfectly edible for weeks—they just won’t be as crisp. Plan to make them no more than a day or two before you plan to serve them for the best texture.
Nutritional Information & Benefits
These ghost meringue cookies are a relatively guilt-free treat, especially compared to traditional Halloween candies and baked goods. Here’s what you need to know.
Estimated Nutritional Values (per ghost):
- Calories: 25-30
- Fat: 0.5g
- Carbohydrates: 6g
- Sugar: 5g
- Protein: 0.5g
Health Benefits: Meringues are naturally low in fat and calories, making them a lighter alternative to cookies, brownies, or candy bars. Egg whites are a good source of protein, though the amount per cookie is small. They’re also gluten-free, dairy-free, and nut-free, making them accessible to many people with dietary restrictions.
Dietary Considerations: This recipe is naturally gluten-free and dairy-free. For a vegan version, use aquafaba. For a sugar-free version, use a sugar substitute like monk fruit or erythritol. Note that sugar-free meringues may have a different texture and may not hold their shape as well.
Potential Allergens: The main allergen is eggs. If you’re serving these at a party or event, clearly label them so guests with egg allergies know to avoid them. The chocolate chips may contain milk or soy, depending on the brand. Use allergen-free chocolate chips if needed.
Personal Wellness Perspective: I love that these ghosts let me enjoy a sweet treat without the heavy feeling that comes from butter-laden cookies or rich chocolate desserts. They satisfy my sweet tooth without derailing my healthy eating habits. Plus, the process of making them is almost meditative—there’s something calming about piping those little ghosts. It’s a form of kitchen therapy, honestly.
Conclusion
These cozy homemade ghost meringue cookies have become an October tradition in my kitchen, and I have a feeling they’ll become one in yours too. They’re proof that the simplest recipes often bring the most joy. Four ingredients, a little patience, and you’ve got something that looks like it came from a fancy bakery—but tastes like pure, unpretentious comfort.
I love that this recipe is forgiving enough for beginners yet satisfying enough for experienced bakers. It’s the kind of thing you can make with your kids on a rainy Saturday, or whip up solo while listening to your favorite podcast. And when you see those little ghosts cooling on the counter, all lined up in their ghostly rows, you’ll feel a quiet sense of accomplishment. You made that. With your own two hands.
So go ahead—crack those eggs, heat up that oven, and give it a try. Don’t worry if your first batch isn’t perfect. Mine wasn’t either. But with each batch, you’ll get better, and you’ll find your own rhythm. Maybe you’ll add a pinch of cinnamon like I do, or maybe you’ll discover a flavor combination I haven’t tried yet. That’s the beauty of cooking—it’s always evolving.
I’d love to hear how your ghosts turn out. Did you try a variation? Did your kids help? Did you discover a trick I didn’t mention? Drop a comment below and share your experience. And if you snap a photo, tag me—I want to see your ghost army. Happy Halloween, and happy baking!
Frequently Asked Questions
Why did my meringue turn out sticky?
Sticky meringue is usually a sign of under-baking or high humidity. Make sure you bake the ghosts for the full 90 minutes and let them cool completely in the turned-off oven. If the weather is humid, the meringues will absorb moisture from the air and become sticky. Try making them on a dry day, or store them with a silica gel packet in the container.
Can I use liquid egg whites from a carton?
You can, but the results won’t be as good. Carton egg whites are pasteurized, which affects their ability to whip up properly. They’ll still work, but your meringue may not be as stable or voluminous. If you use carton egg whites, add an extra ¼ teaspoon of cream of tartar to help stabilize them.
How do I know when the meringue is whipped enough?
The meringue is ready when it forms stiff, glossy peaks that hold their shape. Lift the whisk attachment—the meringue should stand up in a peak without drooping. You can also rub a tiny bit between your fingers; if it feels smooth and not grainy, the sugar is fully dissolved. Turn the bowl upside down—if the meringue doesn’t slide out, it’s ready.
Can I make these without a piping bag?
Absolutely! Snip the corner off a ziplock bag and use that instead. The ghosts won’t look as polished, but they’ll still be adorable. You can also use two spoons to drop dollops of meringue onto the baking sheet and shape them with the back of a spoon. The texture and taste will be the same—only the appearance changes.
How long do these ghost meringue cookies last?
Stored in an airtight container at room temperature, they’ll stay crisp for up to 2 weeks. After that, they may start to soften. If they lose their crispness, you can re-crisp them in a 200°F (95°C) oven for 15-20 minutes. Do not refrigerate them, as the humidity will ruin the texture.
Pin This Recipe!
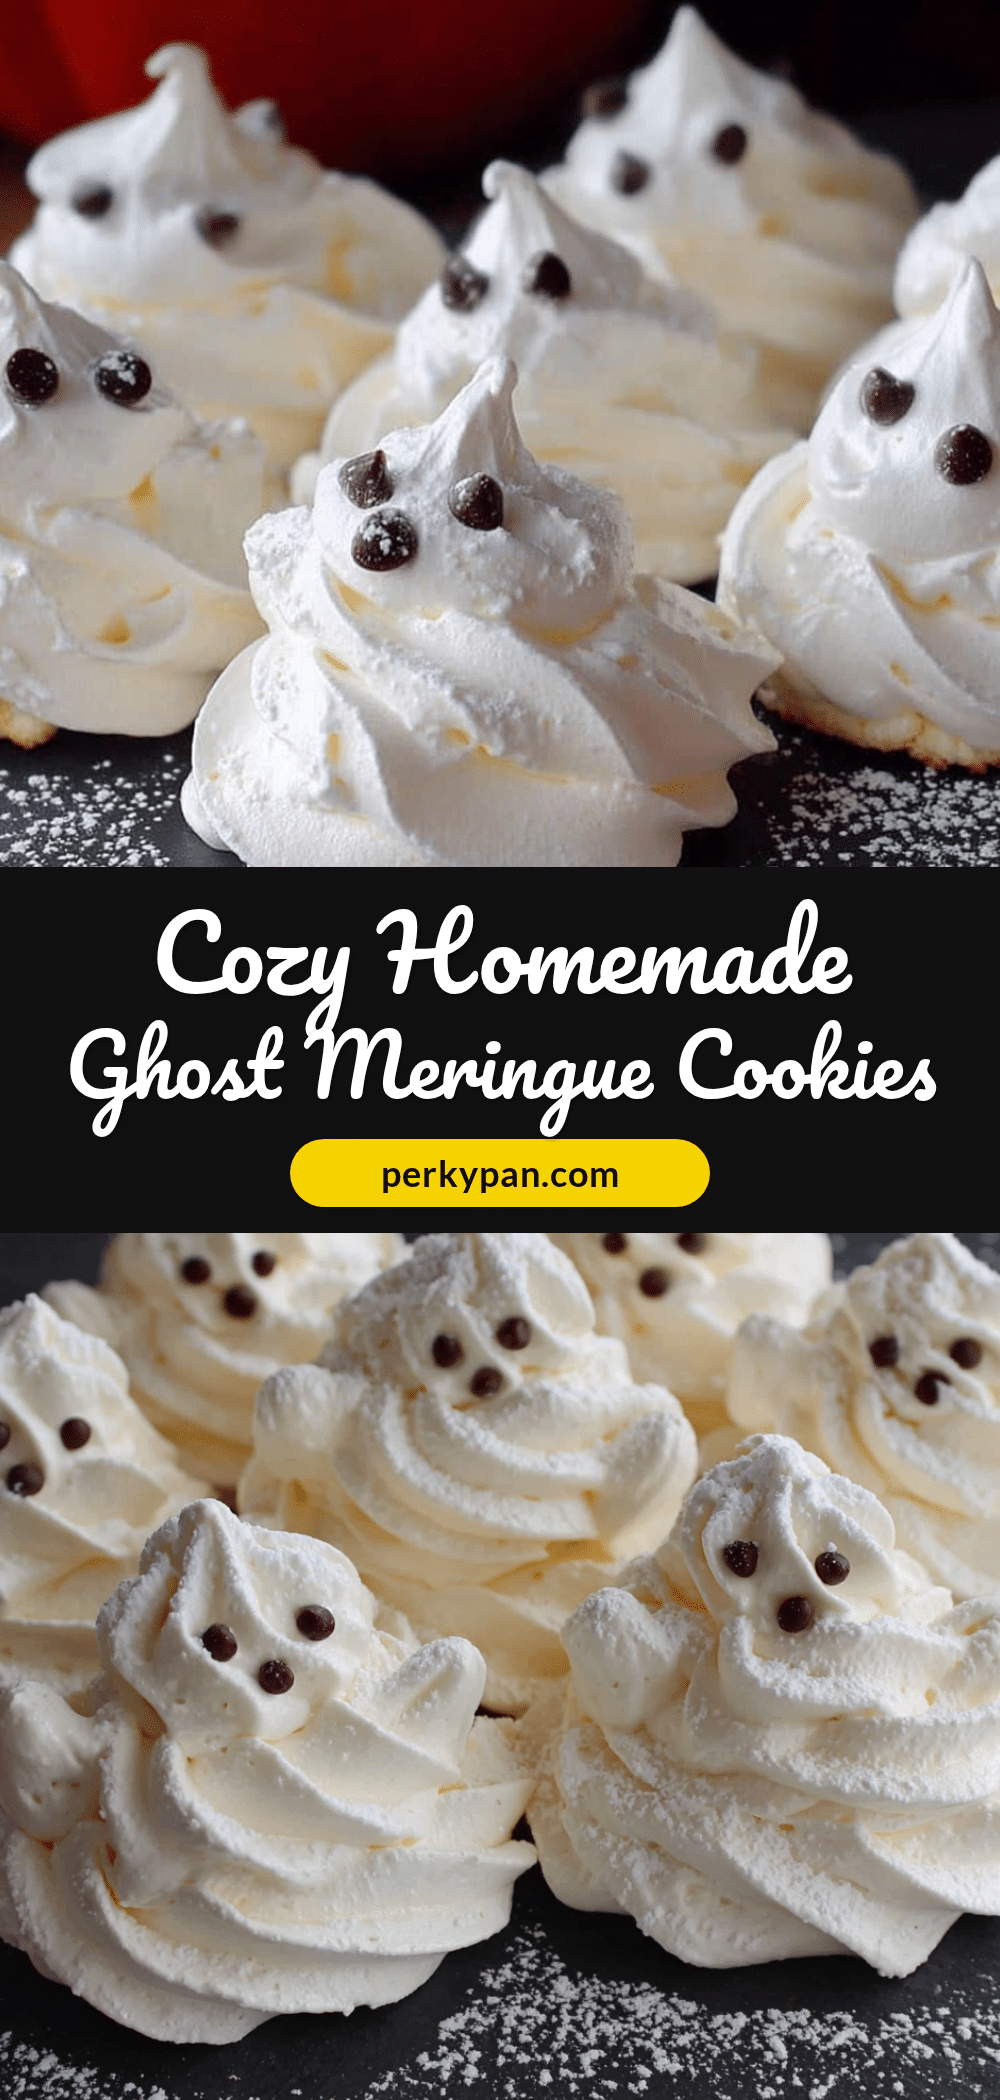
Cozy Homemade Ghost Meringue Cookies: Best Easy Recipe
These ghost meringue cookies are light, airy, and perfectly spooky for Halloween. Made with just four simple ingredients, they’re crisp on the outside, melt-in-your-mouth on the inside, and guaranteed to be a crowd-pleaser.
- Prep Time: 15 minutes
- Cook Time: 90 minutes
- Total Time: 2 hours 45 minutes (including cooling)
- Yield: 24 servings 1x
- Category: Dessert
- Cuisine: American
Ingredients
- 3 large egg whites, room temperature (about 1/4 cup or 90ml)
- 3/4 cup (150g) granulated sugar
- 1/2 teaspoon vanilla extract
- 1/4 cup (45g) mini chocolate chips
- 1/4 teaspoon cream of tartar (optional but recommended)
- Pinch of salt
Instructions
- Preheat your oven to 200°F (95°C). Line two baking sheets with parchment paper or silicone mats.
- Separate the eggs while cold, then let the whites come to room temperature for 30 minutes.
- Add cream of tartar and a pinch of salt to the egg whites. Start whipping on medium speed until frothy (about 2 minutes).
- Increase mixer speed to medium-high. Gradually add sugar one tablespoon at a time over 3-4 minutes, until fully dissolved.
- Continue whipping on medium-high for 5-7 minutes until stiff, glossy peaks form. The meringue should hold its shape when the whisk is lifted.
- Add vanilla extract on low speed, mixing just until combined (about 10 seconds).
- Transfer meringue to a piping bag fitted with a 1/2-inch round tip (or a ziplock bag with the corner snipped).
- Pipe small mounds (about 1.5 inches wide) onto the prepared baking sheets, lifting the bag straight up to create a peak. Space ghosts about 1 inch apart.
- Gently press two mini chocolate chips into each ghost for eyes.
- Bake for 90 minutes at 200°F (95°C). Do not open the oven door during the first 60 minutes.
- Turn off the oven and leave the meringues inside to cool completely (at least 2 hours or overnight).
- Once completely cool, store in an airtight container at room temperature, layered between parchment paper.
Notes
For best results, use room temperature egg whites and ensure all equipment is completely clean and grease-free. Avoid making meringues on humid days. If ghosts brown, reduce oven temperature by 10-15 degrees. For vegan version, use aquafaba (3 tablespoons per egg white) with extra cream of tartar.
Nutrition
- Serving Size: 1 ghost
- Calories: 2530
- Sugar: 5
- Sodium: 10
- Fat: 0.5
- Carbohydrates: 6
- Protein: 0.5
Keywords: ghost meringue cookies, Halloween cookies, meringue cookies, easy meringue recipe, spooky treats, gluten-free cookies, dairy-free cookies


