Love this? Save it for later!
Share the inspiration with your friends
My neighbor wasn’t making a big deal of it. I’d stopped by to return her garden shears—the ones I’d borrowed three weeks earlier and honestly forgotten about—and the smell hit me before I even got to her front door. Something was happening in that kitchen. Something with butter and vanilla and something else I couldn’t quite place. She opened the door wiping her hands on her apron, and there they were on the counter. A tray of little ghost faces staring back at me, each one topped with a cloud of marshmallow that had been kissed by fire.
“Oh, those,” she said when she caught me staring. “Just messing around.”
Just messing around. She said it like it was nothing. Like she hadn’t just created the most adorable, most delicious-looking thing I’d ever seen in October. I mean, I’ve made my share of Halloween treats—the usual witches’ fingers and spiderweb cookies. But these cozy ghost cupcakes with toasted marshmallow frosting? They were something else entirely. They were whimsical without being fussy. Cute without being complicated. And the way that marshmallow browned under the broiler? Let me tell you, I stood in her kitchen for twenty minutes watching her make another batch, and I didn’t even feel bad about it.
Maybe you’ve been there—that moment when you see a recipe and you just know it’s going to become part of your fall rotation. That’s what these ghost cupcakes were for me. She handed me one still warm, the marshmallow frosting stretching as I pulled it away from the tray. I took a bite and honestly, I closed my eyes. The cake was tender, the marshmallow was gooey, and the little chocolate chip eyes stared up at me like they knew they’d won me over.
I’ve been making them every October since. And every time I pull that tray out of the oven, I think about her standing there in her flour-dusted apron, acting like she’d just thrown something together. That’s the kind of recipe this is—the kind that looks like you spent hours on it but comes together so easily you’ll be making them on a Tuesday night for no reason at all.
Why You’ll Love This Recipe
These cozy ghost cupcakes aren’t just adorable—they’re genuinely delicious. I’ve tested this recipe more times than I care to admit, tweaking the cake and the frosting until everything worked perfectly together. Here’s why I think you’ll fall for them too:
- Quick & Easy: From start to finish, you’re looking at about 45 minutes. The cake bakes in 18 minutes flat, and the marshmallow frosting comes together in under 10. Perfect for those evenings when you need a Halloween treat but don’t want to spend all night in the kitchen.
- Simple Ingredients: You probably have most of this stuff already. Flour, sugar, butter, eggs, vanilla—nothing weird or hard to find. The marshmallow frosting uses marshmallows and egg whites, which is way simpler than you’d think.
- Perfect for Halloween Parties: These things are showstoppers. I brought them to a neighborhood potluck last year and they were gone before the cupcakes I’d spent six hours decorating. People love the toasted marshmallow look, and the ghost faces make everyone smile.
- Crowd-Pleaser: Kids think they’re fun, adults think they’re nostalgic. That toasted marshmallow flavor hits something deep in all of us—it’s campfire memories in cupcake form.
- Unbelievably Delicious: The cake is moist and tender with a hint of vanilla. The marshmallow frosting is light and fluffy, and when you toast it? That caramelized sugar flavor takes everything to another level. The chocolate chips add little pockets of richness that balance the sweetness perfectly.
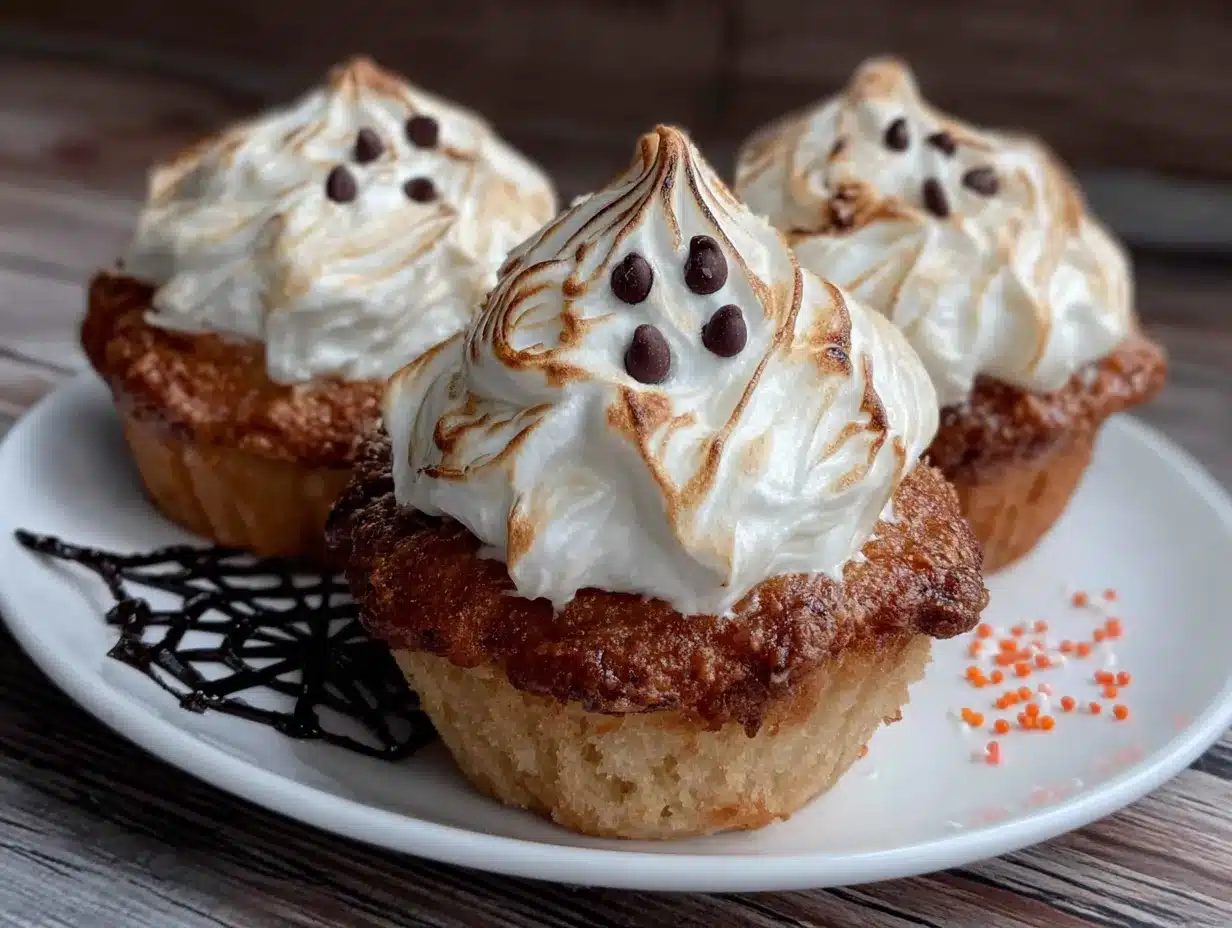
What makes these different from other Halloween cupcakes is the texture. Most ghost cupcakes use buttercream that gets piped into ghost shapes—cute, sure, but you’re basically eating frosting. This version uses real marshmallow frosting that gets torched or broiled until it’s golden and slightly crispy on the outside, soft and pillowy on the inside. It’s not just a decoration—it’s an experience.
These are the kind of cupcakes that make you close your eyes after the first bite. They’re comfort food with a Halloween twist—cozy, nostalgic, and just a little bit magical. Perfect for making a gloomy October evening feel special.
What Ingredients You Will Need
This recipe uses simple, pantry-friendly ingredients to create something that tastes anything but ordinary. The cake is a classic vanilla base—nothing fancy, just reliable, tender results every time. The marshmallow frosting is where things get interesting, but I promise it’s easier than you’d expect.
For the Cupcakes
- 1 ½ cups all-purpose flour (spooned and leveled—don’t scoop straight from the bag or you’ll end up with dense cupcakes)
- 1 ½ teaspoons baking powder
- ¼ teaspoon salt
- ½ cup unsalted butter, softened (I use Land O’Lakes—consistent quality every time)
- 1 cup granulated sugar
- 2 large eggs, room temperature (cold eggs won’t emulsify properly)
- 2 teaspoons vanilla extract (pure, not imitation—it makes a real difference)
- ½ cup whole milk, room temperature (you can use 2% if that’s what you have)
For the Toasted Marshmallow Frosting
- 4 large egg whites, room temperature (pasteurized egg whites from a carton work fine if you’re nervous about raw eggs)
- 1 cup granulated sugar
- ¼ teaspoon cream of tartar (helps stabilize the meringue)
- 1 teaspoon vanilla extract
- 1 ½ cups mini marshmallows (Jet-Puffed holds up well, but store brands work too)
For the Ghost Decorations
- ¼ cup mini chocolate chips (for the eyes—I like Ghirardelli for their size and shape)
- Optional: 2 tablespoons powdered sugar (for dusting—gives them a spooky, ethereal look)
A few notes on ingredients before we move on. The room temperature thing matters more than you might think. If your eggs and milk are cold, they’ll seize up the butter when you mix them in, and your cupcakes won’t rise as nicely. I know it’s tempting to skip this step, but trust me—pull everything out of the fridge an hour before you start.
For the marshmallows in the frosting, go with mini marshmallows rather than the big ones. They melt more evenly and incorporate into the meringue without leaving weird lumps. If you only have large marshmallows, give them a rough chop first.
And about the chocolate chips for the eyes—you want mini chips, not regular-sized. Regular chips look too big on a cupcake-sized ghost face, and they tend to fall off. Mini chips sit perfectly and stay put once the frosting sets slightly.
Equipment Needed
You don’t need a lot of fancy equipment for these, which is part of why I love this recipe. Here’s what you’ll want to have on hand:
- Muffin pan with 12 cups (standard size, not jumbo)
- Paper cupcake liners (white or Halloween-themed—I’ve used both and they work fine)
- Mixing bowls (at least two—one for dry ingredients, one for wet)
- Hand mixer or stand mixer (you can whisk by hand for the cake batter, but the marshmallow frosting really needs a mixer)
- Rubber spatula (for scraping down the bowl)
- Wire cooling rack (for cooling the cupcakes completely before frosting)
- Kitchen torch (this is the easiest way to toast the marshmallow frosting—I use a Bernzomatic torch and it works beautifully)
- Piping bag with round tip (or a zip-top bag with the corner snipped off—I’ve done both)
If you don’t have a kitchen torch, you can use your oven’s broiler instead. Just keep a very close eye on it—marshmallow goes from toasted to burnt in about 15 seconds. I learned this the hard way my first time, and let me tell you, charred marshmallow does not smell like campfire. It smells like regret.
For the piping bag, I’ve used everything from actual piping bags to sandwich bags to just spooning the frosting on and shaping it with a spatula. The ghost shape is forgiving—even if it’s not perfect, it’ll still look cute. That’s the beauty of ghosts, honestly. They’re supposed to look a little messy.
Preparation Method
Step 1: Preheat and Prep
Preheat your oven to 350°F (175°C). Line your muffin pan with 12 paper liners. I like to set them all out first so I’m not scrambling when the batter’s ready. Trust me, batter waits for no one.
Step 2: Mix the Dry Ingredients
In a medium bowl, whisk together the flour, baking powder, and salt. Just a few turns of the whisk—you want everything evenly distributed. Set this aside for now.
Step 3: Cream the Butter and Sugar
In a large bowl, beat the softened butter and granulated sugar together until light and fluffy. This takes about 3-4 minutes with a hand mixer on medium speed. You’re looking for a pale, creamy texture that’s almost doubled in volume. Scrape down the sides of the bowl halfway through—butter loves to cling to the edges.
Step 4: Add the Eggs and Vanilla
Add the eggs one at a time, beating well after each addition. The batter might look a little curdled at this point—that’s normal, don’t panic. Add the vanilla extract and beat until combined.
Step 5: Alternate Dry and Wet Ingredients
With the mixer on low speed, add the flour mixture in three additions, alternating with the milk. Start and end with the flour. So: flour, milk, flour, milk, flour. Mix just until combined after each addition. Overmixing at this stage will give you tough cupcakes, and nobody wants that. Stop the mixer when you see the last streak of flour disappear.
Step 6: Fill the Liners
Divide the batter evenly among the 12 liners. I use a cookie scoop for this—it keeps things consistent and less messy. Each liner should be about two-thirds full. If you fill them too high, they’ll mushroom over the top and you won’t have a nice flat surface for your ghost faces.
Step 7: Bake
Bake for 18-20 minutes, or until a toothpick inserted in the center comes out clean or with just a few moist crumbs. The tops should be lightly golden and spring back when you touch them. Let them cool in the pan for 5 minutes, then transfer to a wire rack to cool completely. Do not—I repeat, do not—try to frost these while they’re still warm. The marshmallow frosting will slide right off. I learned this the hard way.
Step 8: Make the Marshmallow Frosting
While the cupcakes are cooling, make the frosting. In a clean, dry bowl (make sure there’s no grease—it’ll ruin the meringue), combine the egg whites, sugar, and cream of tartar. Set the bowl over a pot of simmering water, making sure the bottom of the bowl doesn’t touch the water. Whisk constantly until the sugar dissolves and the mixture reaches 160°F (71°C). This takes about 3-4 minutes. If you don’t have a thermometer, rub a little between your fingers—it should feel smooth, not grainy.
Step 9: Whip the Meringue
Remove the bowl from the heat and beat on medium-high speed until stiff, glossy peaks form. This takes about 5-7 minutes. The mixture should be thick and shiny, and when you lift the beaters, the peaks should stand up straight without drooping. Add the vanilla extract and beat for another 30 seconds.
Step 10: Fold in the Marshmallows
Gently fold in the mini marshmallows with a rubber spatula. Don’t overmix—you want some little pockets of marshmallow throughout the frosting. They’ll melt slightly when you toast them, creating that gooey, campfire texture.
Step 11: Frost the Cupcakes
Transfer the frosting to a piping bag fitted with a round tip. Pipe a generous swirl on each cooled cupcake, building it up into a ghost-like shape—taller in the middle, tapering at the top. Don’t worry if it looks a little messy; the toasting step will hide imperfections.
Step 12: Add the Ghost Faces
Press two mini chocolate chips into each frosted cupcake for the eyes. Space them about an inch apart, slightly above the center. If you want, you can add a tiny third chip for a mouth, but I prefer just the eyes—it keeps the ghost face simple and cute.
Step 13: Toast the Marshmallow
Using a kitchen torch, toast the marshmallow frosting until it’s golden brown in spots. Move the torch in a circular motion, keeping it about 2-3 inches away from the frosting. You’re looking for caramelized color, not black—though a few dark spots add character. If you’re using the broiler, place the cupcakes on a baking sheet and broil on high for 30-60 seconds. Watch them like a hawk.
Step 14: Optional Dusting
If you want an extra-spooky look, dust the finished cupcakes with a light sprinkle of powdered sugar. It gives them a ghostly, ethereal glow that photographs beautifully.
Cooking Tips & Techniques
I’ve made these cozy ghost cupcakes more times than I can count, and I’ve made just about every mistake in the book. Here’s what I’ve learned so you don’t have to learn the hard way.
Don’t skip the cream of tartar. I know it seems like a fussy ingredient, but it stabilizes the egg whites and helps the meringue hold its shape. Without it, your frosting might deflate or weep. If you don’t have cream of tartar, you can substitute a teaspoon of lemon juice or white vinegar—same stabilizing effect, slightly different flavor.
The sugar needs to fully dissolve. When you’re heating the egg whites and sugar over the double boiler, keep whisking. If you stop, the sugar can crystallize on the sides of the bowl, and you’ll end up with grainy frosting. Rub a little between your fingers—if it feels smooth, you’re good. If it feels gritty, keep whisking.
Room temperature matters more than you think. I know I’ve said this already, but it’s worth repeating. Cold eggs and milk will make your batter curdle and your cupcakes dense. Set everything out an hour before you start. If you forget (and I have, many times), place the eggs in a bowl of warm water for 5 minutes and microwave the milk for 15 seconds.
Toast in batches. Don’t try to toast all 12 cupcakes at once with the torch. The frosting will start to melt and slide off before you get to the last one. Work in groups of 3-4, and let the toasted ones sit while you finish the rest. The frosting sets slightly as it cools, which helps the ghost eyes stay in place.
If the frosting is too soft to pipe. Pop it in the fridge for 10-15 minutes. It’ll firm up enough to hold its shape. Just don’t leave it too long, or it’ll become stiff and difficult to work with.
If the cupcakes dome too much. Use a serrated knife to level them off before frosting. A flat surface makes it easier to create a nice ghost shape. Save the scraps for snacking—you’ve earned it.
Variations & Adaptations
One of the best things about this recipe is how adaptable it is. Here are some variations I’ve tried and loved:
Gluten-Free Version
Swap the all-purpose flour with a 1:1 gluten-free baking flour blend. I’ve used Bob’s Red Mill and King Arthur Measure for Measure with great results. The texture is slightly more tender, but nobody will notice once they’re frosted and toasted.
Dairy-Free Version
Use plant-based butter (I like Miyoko’s) and substitute the milk with oat milk or almond milk. The cupcakes come out a little less rich, but the marshmallow frosting is naturally dairy-free, so you’re only adjusting the cake portion.
Pumpkin Spice Ghost Cupcakes
Add 1 teaspoon of pumpkin pie spice and ½ cup of pumpkin puree to the cake batter. Reduce the milk to ¼ cup since the pumpkin adds moisture. These are perfect for November when you want something cozy but still cute.
Chocolate Ghost Cupcakes
Replace ¼ cup of the flour with ¼ cup of unsweetened cocoa powder. The dark cake against the white marshmallow frosting creates a striking contrast. Add a pinch of cinnamon to the batter for a Mexican hot chocolate vibe.
Different Ghost Expressions
Play around with the chocolate chip placement. Angled eyes look surprised. Close-together eyes look mischievous. Add a tiny dot of frosting for a mouth if you want. I’ve made entire batches where each ghost has a different expression—it’s a fun way to personalize them.
Serving & Storage Suggestions
These cozy ghost cupcakes are best served the day you make them, especially if you’ve toasted the marshmallow frosting. The toasted exterior stays crispy for about 4-6 hours before it starts to soften. If you’re serving them at a party, I recommend toasting them just before guests arrive.
For presentation, arrange them on a white platter or cake stand. The contrast between the white frosting and the plate makes the ghost faces pop. If you’re feeling extra festive, scatter some candy corn or mini pumpkins around the base of the platter.
These pair beautifully with a hot drink—coffee, hot chocolate, or apple cider. Something about the toasted marshmallow flavor with a warm beverage just feels right on a cool October evening.
Storage: Keep unfrosted cupcakes in an airtight container at room temperature for up to 3 days. The frosted cupcakes should be stored in the refrigerator, but bring them to room temperature before serving for the best texture. The marshmallow frosting will soften as it warms up.
Freezing: You can freeze the unfrosted cupcakes for up to 3 months. Wrap them individually in plastic wrap, then place them in a freezer bag. When you’re ready to use them, thaw at room temperature for about an hour, then make the frosting fresh. The frosting doesn’t freeze well—it tends to deflate and separate.
Reheating: If you want to re-toast the marshmallow frosting after refrigeration, use a torch for just a few seconds. The oven or microwave will make the frosting melt and slide off.
Nutritional Information & Benefits
Let’s be honest—these are a treat, not a health food. But here’s the estimated nutritional breakdown per cupcake (based on 12 servings):
| Nutrient | Amount |
|---|---|
| Calories | 285 |
| Total Fat | 10g |
| Saturated Fat | 6g |
| Cholesterol | 55mg |
| Sodium | 180mg |
| Total Carbohydrates | 45g |
| Dietary Fiber | 0.5g |
| Sugars | 32g |
| Protein | 4g |
The egg whites in the frosting provide a small amount of protein, and the butter in the cake offers a little vitamin A. The mini chocolate chips contain antioxidants from cocoa—though let’s be real, we’re not eating these for the health benefits.
Dietary Considerations: This recipe contains dairy (butter, milk), eggs, and gluten (flour). For allergen-friendly versions, see the variations section above. The marshmallow frosting is naturally dairy-free and can be made with pasteurized egg whites if you’re concerned about raw eggs.
FAQs
Can I use store-bought marshmallow fluff instead of making the frosting from scratch?
You can, but the texture won’t be the same. Homemade marshmallow frosting is lighter and fluffier, and it toasts more evenly. Store-bought fluff is denser and tends to melt rather than toast. If you’re in a pinch, though, it’ll work—just know it won’t have that same campfire-quality texture.
Why did my marshmallow frosting deflate?
This usually happens if the egg whites weren’t whipped enough, or if the sugar wasn’t fully dissolved before whipping. Make sure you heat the mixture to 160°F (71°C) and whip until stiff, glossy peaks form. Also, make sure your bowl is completely clean and grease-free—any fat will prevent the egg whites from whipping properly.
Can I make these ahead of time for a party?
Absolutely. Bake the cupcakes up to 2 days in advance and store them unfrosted in an airtight container. Make the frosting and frost them the day of your party, then toast them just before serving. The frosting takes about 10 minutes to make, so it’s easy to do at the last minute.
My cupcakes came out dense and dry. What went wrong?
Most likely, you overmixed the batter or your ingredients were too cold. Overmixing develops the gluten in the flour, which makes cupcakes tough. Cold ingredients don’t emulsify properly, which leads to a dry texture. Next time, mix just until the flour disappears, and make sure everything is at room temperature.
Can I use a different type of chocolate for the eyes?
Sure. Mini chocolate chips are my go-to because they’re the perfect size and shape, but you can use regular chocolate chips cut in half, chocolate sprinkles, or even black icing dots. If you’re using candy eyes (the kind with the white center), they’ll work too, but they won’t stay in place as well once the marshmallow is toasted.
Conclusion
These cozy ghost cupcakes with toasted marshmallow frosting have become my most-requested Halloween recipe, and I think they’ll become yours too. They’re the perfect blend of whimsical and delicious—the kind of treat that makes people smile before they even take a bite.
What I love most about this recipe is how it brings people together. There’s something about the toasted marshmallow that triggers those warm, fuzzy feelings of sitting around a campfire, telling stories, and feeling completely at ease. That’s the magic of these cupcakes. They’re not just a dessert—they’re a moment.
I hope you’ll try them and make them your own. Add a little extra vanilla, swap in pumpkin spice, or give your ghosts different expressions. That’s the beauty of baking—there’s always room for your personal touch.
If you make these cozy ghost cupcakes, I’d love to hear about it. Drop a comment below and tell me how they turned out, or share a photo of your ghost faces. And if you come up with a variation I haven’t tried, definitely let me know—I’m always looking for new ideas.
Happy baking, and here’s to cozy October nights and cupcakes that feel like a hug.
Pin This Recipe!
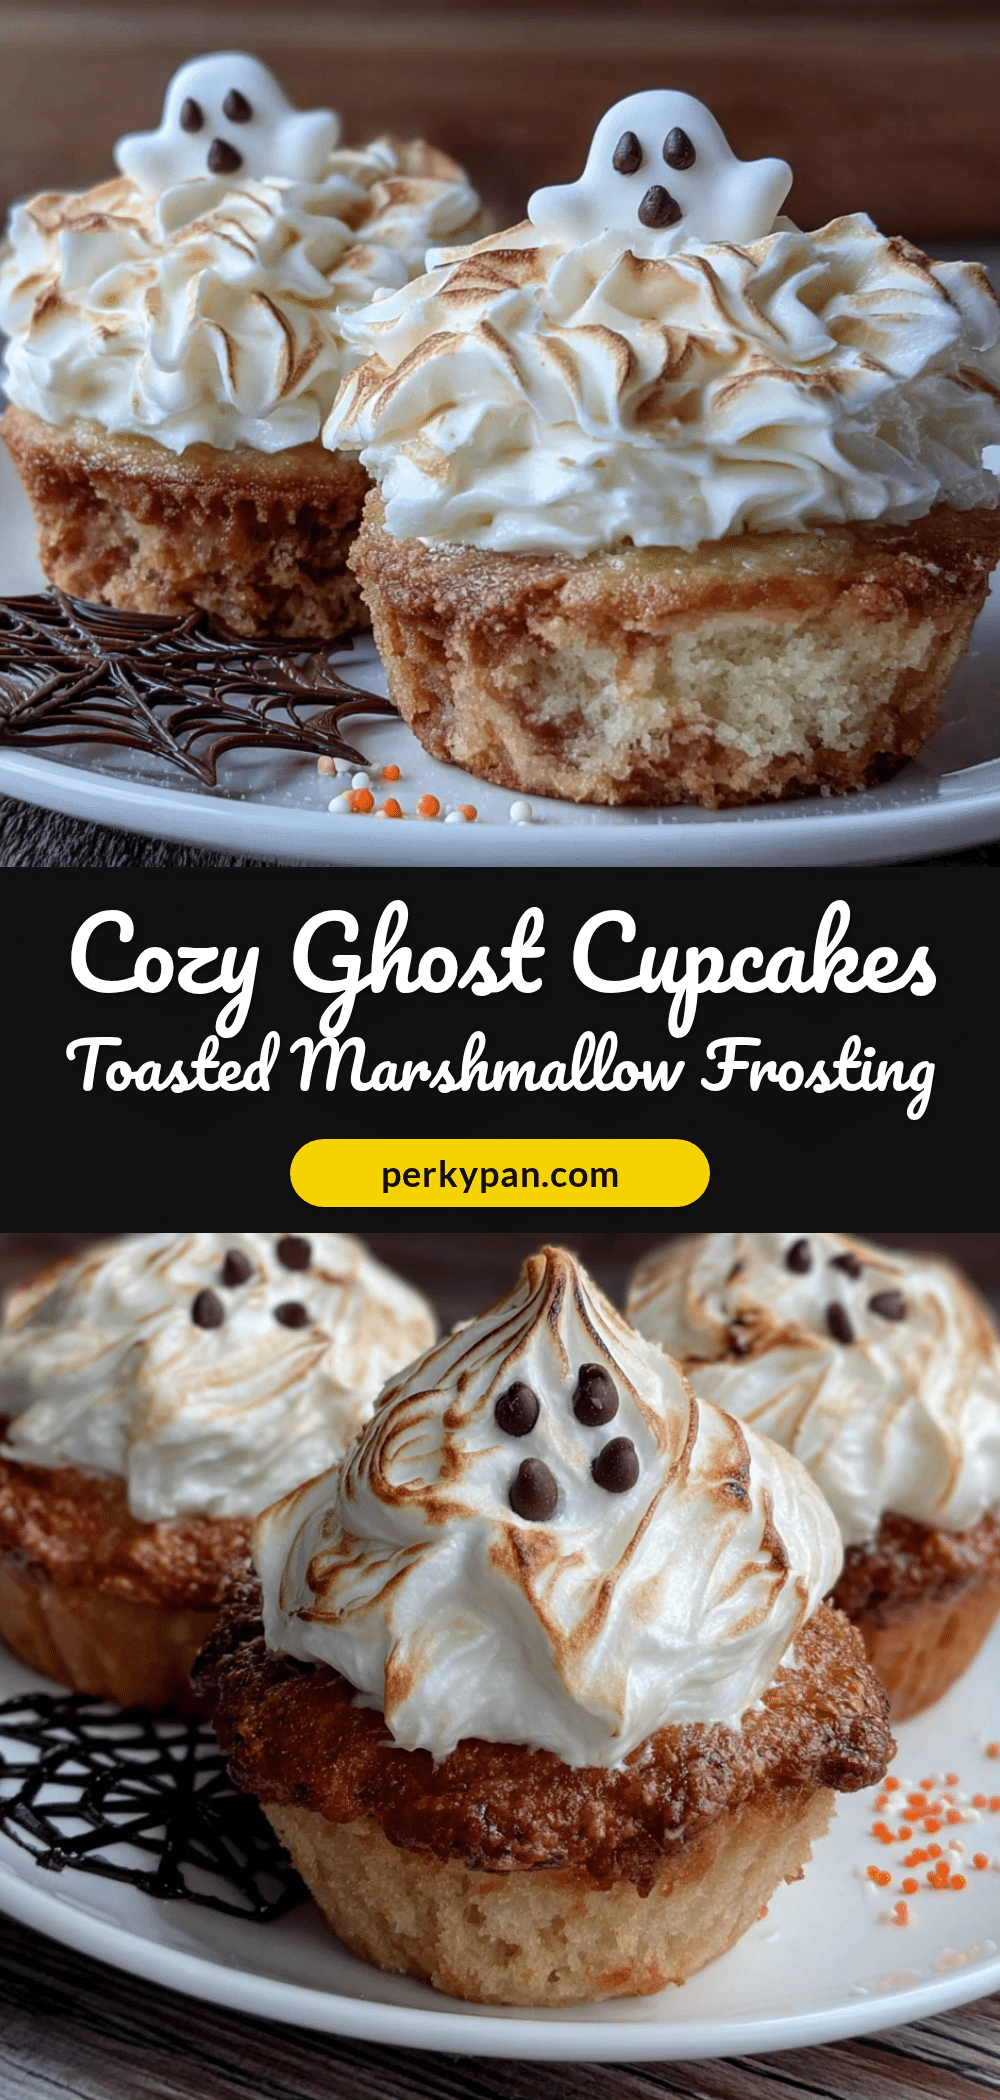
Cozy Ghost Cupcakes: Easy Toasted Marshmallow Frosting
These adorable ghost cupcakes feature a tender vanilla cake topped with homemade toasted marshmallow frosting and chocolate chip eyes. They’re whimsical, easy to make, and perfect for Halloween parties or cozy fall evenings.
- Prep Time: 15 minutes
- Cook Time: 18 minutes
- Total Time: 45 minutes
- Yield: 12 cupcakes 1x
- Category: Dessert
- Cuisine: American
Ingredients
- 1 ½ cups all-purpose flour (spooned and leveled)
- 1 ½ teaspoons baking powder
- ¼ teaspoon salt
- ½ cup unsalted butter, softened
- 1 cup granulated sugar
- 2 large eggs, room temperature
- 2 teaspoons vanilla extract (pure)
- ½ cup whole milk, room temperature
- 4 large egg whites, room temperature
- 1 cup granulated sugar (for frosting)
- ¼ teaspoon cream of tartar
- 1 teaspoon vanilla extract (for frosting)
- 1 ½ cups mini marshmallows
- ¼ cup mini chocolate chips
- Optional: 2 tablespoons powdered sugar (for dusting)
Instructions
- Preheat oven to 350°F (175°C). Line a muffin pan with 12 paper liners.
- In a medium bowl, whisk together flour, baking powder, and salt.
- In a large bowl, beat softened butter and 1 cup granulated sugar until light and fluffy (3-4 minutes).
- Add eggs one at a time, beating well after each. Add 2 teaspoons vanilla extract and beat until combined.
- With mixer on low, add flour mixture in three additions, alternating with milk, starting and ending with flour. Mix just until combined.
- Divide batter evenly among liners, filling each about two-thirds full.
- Bake for 18-20 minutes, until a toothpick inserted in the center comes out clean. Cool in pan 5 minutes, then transfer to a wire rack to cool completely.
- For frosting: In a clean, dry bowl, combine egg whites, 1 cup sugar, and cream of tartar. Set over a pot of simmering water (bowl not touching water). Whisk constantly until sugar dissolves and mixture reaches 160°F (71°C), about 3-4 minutes.
- Remove from heat and beat on medium-high speed until stiff, glossy peaks form (5-7 minutes). Add 1 teaspoon vanilla and beat 30 seconds.
- Gently fold in mini marshmallows with a rubber spatula.
- Transfer frosting to a piping bag fitted with a round tip. Pipe a generous swirl on each cooled cupcake, building it into a ghost-like shape.
- Press two mini chocolate chips into each frosted cupcake for eyes, spaced about an inch apart.
- Using a kitchen torch, toast the marshmallow frosting until golden brown in spots, moving the torch in a circular motion 2-3 inches away. Alternatively, broil on high for 30-60 seconds, watching closely.
- Optional: Dust with powdered sugar for a spooky look.
Notes
Room temperature ingredients are crucial for best texture. Don’t overmix the batter. For the frosting, ensure the bowl is completely clean and grease-free. Toast in batches of 3-4 to prevent frosting from melting. Unfrosted cupcakes can be stored at room temperature for up to 3 days; frosted cupcakes should be refrigerated but brought to room temperature before serving. Freeze unfrosted cupcakes for up to 3 months.
Nutrition
- Serving Size: 1 cupcake
- Calories: 285
- Sugar: 32
- Sodium: 180
- Fat: 10
- Saturated Fat: 6
- Carbohydrates: 45
- Fiber: 0.5
- Protein: 4
Keywords: ghost cupcakes, Halloween cupcakes, toasted marshmallow frosting, vanilla cupcakes, easy Halloween dessert


