Love this? Save it for later!
Share the inspiration with your friends
There used to be a tiny, slightly crooked diner on the corner of Maple and 3rd called “The Lunch Counter” that made the most ridiculous Halloween specials. I’m not talking about fancy pumpkin lattes or spiced cookies. I’m talking about Mummy Hot Dogs. They were the star of their October menu—simple, silly, and absolutely perfect. When the diner closed two years ago (the owner retired to Florida, can you blame him?), I was genuinely bummed. My kids asked for “the bandage hot dogs” every single week, and I had no answer. After seven tries—some where the dough slid right off, others where the hot dogs looked more like sad slugs—I finally cracked the code. This is it.
Honestly, I’m not usually one to get hung up on a single recipe, but these little guys have a hold on me. There’s something about the way the crescent dough puffs up and browns, wrapping around the hot dog like a cozy little blanket. The first time I got it right, my youngest looked up with ketchup on his chin and said, “Mom, these are better than the diner’s.” I mean, what more can you ask for? If you’ve ever tried to make a fun Halloween dinner that doesn’t feel like a total disaster, you know the struggle. Let me tell you, this recipe is the one that finally worked for us.
Why You’ll Love This Recipe
Let’s be real for a second—getting dinner on the table during a busy weeknight is hard enough. Throw in a holiday like Halloween, and suddenly you’re expected to be Martha Stewart with a side of spooky magic. That’s where these Mummy Hot Dogs come in. They’re the ultimate shortcut to a memorable meal without the meltdown.
- Quick & Easy: From start to finish, this recipe takes about 20 minutes. No marinating, no complicated steps—just roll, wrap, and bake. Perfect for those nights when the kids are already hyped up on candy.
- Simple Ingredients: You only need three things: hot dogs, crescent roll dough, and a little mustard or ketchup for the “eyes.” Chances are, you already have these in your kitchen right now.
- Perfect for Halloween: Whether it’s a school party, a family dinner, or a spooky movie night, these little mummies are the star of the show. They’re fun, festive, and way less messy than carving a pumpkin.
- Crowd-Pleaser: I’ve served these to kids, grandparents, and even picky neighbors. Everyone thinks they’re adorable, and they disappear faster than you’d expect.
- Unbelievably Delicious: The crescent dough gets golden and flaky, while the hot dog stays juicy inside. It’s comfort food at its simplest, and honestly, it just works.
What makes this recipe different from the rest? It’s the technique. Instead of wrapping the dough too tight (which makes it slide off), I use a slightly looser wrap and pinch the ends gently. This keeps the “bandages” in place and gives the mummies that perfectly imperfect look. Plus, I’ve tested it with all kinds of hot dog brands—go with an all-beef option for the best flavor. Trust me, it’s the little things.
This isn’t just a recipe; it’s the kind that makes you feel like a kitchen hero. Your kids will think you’re a magician, and you’ll only have spent 20 minutes and a few bucks. That’s a win in my book.
What Ingredients You Will Need
This recipe uses simple, everyday ingredients to create something that feels special. No fancy grocery trips or obscure spices—just the basics, done right. Here’s what you’ll need:
- Hot dogs: 8 standard-sized hot dogs (I recommend all-beef for better flavor, like Nathan’s or Hebrew National). You can use turkey or chicken hot dogs if you prefer a lighter option.
- Crescent roll dough: 1 can (8 ounces) of refrigerated crescent roll dough (Pillsbury is my go-to brand for consistent results). Look for the sheet-style dough if you want to skip the perforated lines.
- Mustard or ketchup: For the “eyes” and the “wraps.” Yellow mustard gives a more traditional look, but ketchup works great for kids who aren’t fans of mustard.
- Optional: Cheese slices: You can cut small strips of cheddar or American cheese to wrap around the hot dogs before the dough. It adds a gooey, delicious surprise inside.
- Optional: Cooking spray or butter: A light spray on the baking sheet or a brush of melted butter on top of the dough helps achieve that golden-brown finish.
When it comes to the crescent dough, I’ve tried a few different brands over the years. Pillsbury is the most reliable—it puffs up nicely and doesn’t tear easily. If you’re using a store-brand version, just be gentle when unrolling it, as some cheaper doughs can be a bit more fragile. Oh, and one more thing: make sure your hot dogs are at room temperature before you start. Cold hot dogs can make the dough shrink back while baking, which leads to uneven wrapping.
For substitutions, you’ve got options. If you’re gluten-free, look for a gluten-free crescent dough (it exists, though it behaves a little differently). For a vegetarian version, use veggie dogs—just be aware they can be a bit softer, so handle them gently. And if you’re out of crescent dough entirely, puff pastry sheets work in a pinch, though they’ll be flakier and a little less “bandage-like.”
Equipment Needed
You don’t need a professional kitchen to pull these off. Here’s what I use every time:
- Baking sheet: A standard half-sheet pan works perfectly. Line it with parchment paper for easy cleanup.
- Sharp knife or pizza cutter: For cutting the crescent dough into thin strips. A pizza cutter makes this super quick.
- Pastry brush (optional): If you’re brushing the dough with butter or egg wash, a small pastry brush helps.
- Small bowl: For the mustard or ketchup “eyes.” You can pipe them on with a toothpick or a squeeze bottle.
- Cooling rack: Not strictly necessary, but it helps the mummies cool evenly without getting soggy on the bottom.
If you don’t have a pizza cutter, a regular knife works fine—just make sure it’s sharp so you don’t tear the dough. I’ve also used kitchen shears in a pinch, and they work surprisingly well. As for the baking sheet, any rimmed pan will do; just avoid dark non-stick pans, as they can brown the bottoms too quickly. And honestly, if you’re in a rush, you can skip the parchment paper and just spray the pan lightly with cooking spray. It’s not the end of the world, but cleanup is a bit messier.
Preparation Method
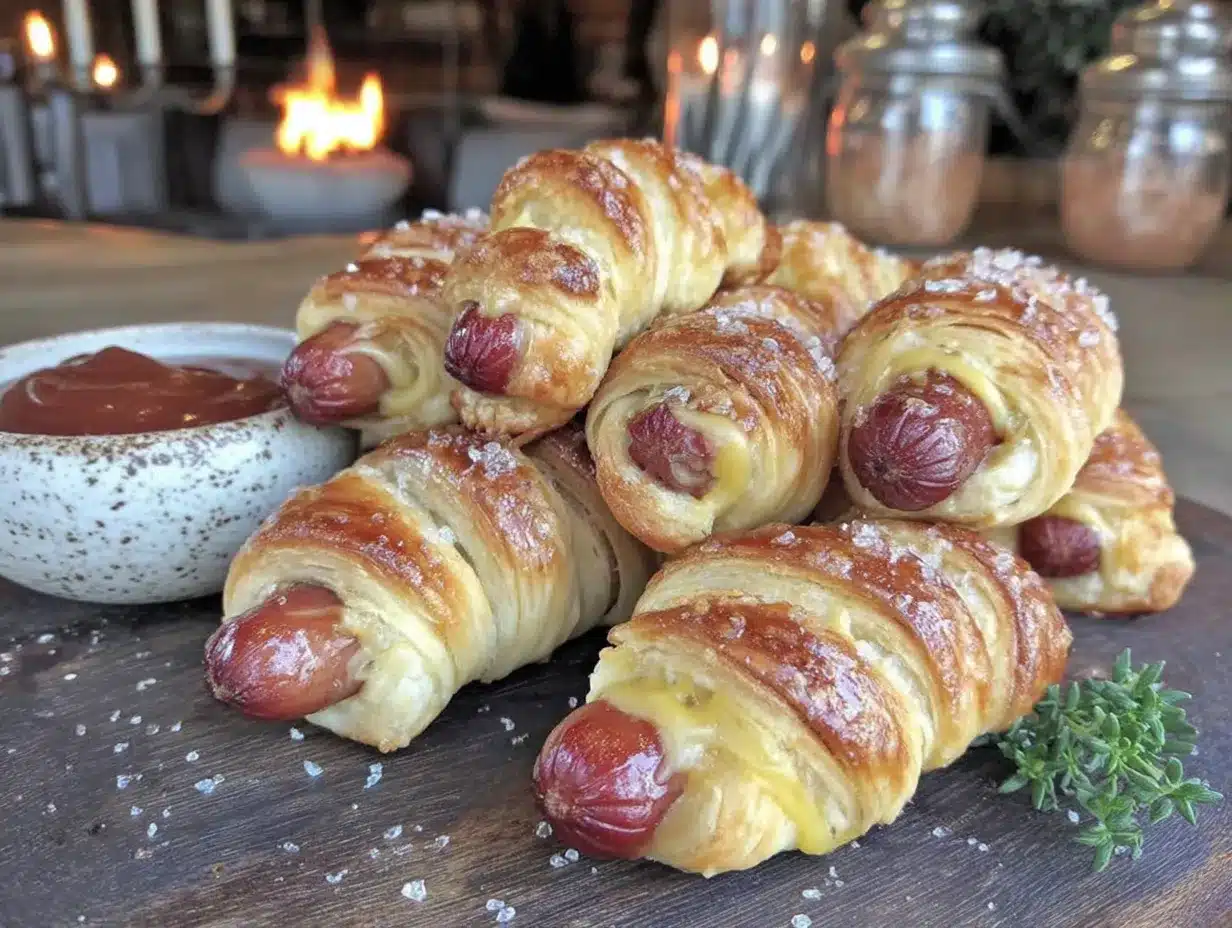
Alright, let’s get to the fun part. Here’s how to make these Mummy Hot Dogs step by step. I’ve tested this method more times than I care to admit, so trust the process.
- Preheat your oven to 375°F (190°C). Line a baking sheet with parchment paper. This is a good time to take your hot dogs out of the fridge so they come to room temperature.
- Unroll the crescent dough carefully. If you’re using the perforated kind, pinch the seams together to create a solid sheet. If you have the sheet-style dough, you’re good to go. Place the dough on a clean cutting board.
- Cut the dough into thin strips. Using a sharp knife or pizza cutter, slice the dough lengthwise into strips about 1/4 to 1/2 inch wide. You’ll get about 8-10 strips per can. Don’t worry if they’re not perfectly even—imperfect mummies look more authentic anyway.
- Wrap the hot dogs. Take one hot dog and start wrapping a strip of dough around it at an angle, leaving a small gap at the top for the “face.” Overlap the dough slightly as you go down, just like you’re wrapping a bandage. Leave about 1/2 inch of the hot dog exposed at the top for the eyes. Press the end of the dough gently to seal it against the wrap.
- Place the wrapped hot dogs on the baking sheet. Space them about 2 inches apart—they’ll puff up a bit, so give them room. If you’re adding cheese, wrap a thin strip of cheese around the hot dog before the dough.
- Brush with butter (optional). For a golden, shiny finish, brush the tops of the dough with a little melted butter or an egg wash (one egg beaten with a tablespoon of water). This step isn’t required, but it makes them look bakery-fresh.
- Bake for 10-12 minutes. Keep an eye on them around the 10-minute mark. The dough should be golden brown and puffed, and the hot dogs should be heated through. If you like a darker “bandage,” leave them in for an extra minute or two.
- Add the eyes. Once the mummies are out of the oven, let them cool for 2-3 minutes. Then, use a toothpick to dab small dots of mustard or ketchup on the exposed hot dog for the eyes. You can also use small dots of sriracha for a spicier version.
- Serve immediately. These are best eaten warm, while the dough is still flaky. Set them out on a platter and watch them disappear.
A few notes from my kitchen: If the dough tears while you’re wrapping, don’t panic. Just press it back together with your fingers—it’ll fuse during baking. Also, if your hot dogs are extra long, you can cut them in half to make mini mummies. Just adjust the baking time to 8-10 minutes. And here’s a sensory cue: when the dough is done, it should feel firm to the touch and smell like warm, buttery bread. If it still feels soft, give it another minute.
Cooking Tips & Techniques
I’ve made plenty of mistakes with these little guys, so let me save you the trouble. Here are the tips I wish someone had told me from the start.
Don’t wrap too tightly. The first few times I made these, I wrapped the dough as tight as I could, thinking it would stay put. Big mistake. The dough expanded during baking and just slid right off the hot dog. The trick is to wrap it loosely—leave a tiny bit of space between the dough and the hot dog. This gives the dough room to puff up without losing its grip.
Use room-temperature hot dogs. Cold hot dogs straight from the fridge can cause the dough to shrink back or cook unevenly. Let them sit on the counter for about 10 minutes before you start wrapping. It makes a noticeable difference.
Mind the spacing. I once crammed 12 mummies onto a single baking sheet, thinking they’d be fine. They baked into one giant, doughy blob. Give them at least 2 inches of space so the hot air can circulate and crisp up the dough evenly.
Watch the oven like a hawk. Ovens vary wildly—mine runs a little hot, so I check at 9 minutes. If the dough is browning too quickly on the bottom, slide another baking sheet underneath to insulate them. If they’re not browning enough, move the rack up a notch.
Multitask like a pro. While the mummies are baking, set up a little “eye station” with your mustard or ketchup in a small bowl. You can also prep a dipping sauce—ketchup, ranch, or even a little sriracha mayo. That way, when the timer goes off, you’re ready to serve in seconds.
One last thing: if you’re making these for a party, you can prep the wrapped hot dogs a few hours ahead and keep them in the fridge. Just add a minute or two to the baking time since they’ll be cold. I’ve done this for school events, and it’s a lifesaver.
Variations & Adaptations
One of the best things about this recipe is how easy it is to tweak. Here are a few ways I’ve changed it up over the years:
- Cheesy Mummies: Before wrapping the dough, wrap a thin strip of cheddar or mozzarella cheese around the hot dog. As it bakes, the cheese melts and oozes out slightly, making it extra indulgent. My kids go crazy for this version.
- Spicy Mummies: Swap the regular hot dogs for spicy jalapeño or chipotle-flavored ones. You can also add a tiny dab of sriracha to the “eyes” for a little kick. This is my personal favorite for grown-up gatherings.
- Mini Mummies: Cut the hot dogs into thirds and use smaller strips of dough. These are perfect for appetizers or lunchboxes. Bake for about 8 minutes instead of 10-12.
- Gluten-Free Mummies: Use gluten-free crescent dough (I’ve had good luck with the brand “Against the Grain”). The dough is a bit more delicate, so handle it gently and don’t overwork it.
- Veggie Mummies: Swap the hot dogs for vegetarian or vegan sausages. I’ve tried this with field roast sausages, and they work beautifully. Just note that they can be softer, so wrap the dough a little more loosely.
I once made a batch with leftover pizza dough instead of crescent rolls—it was a total experiment, and honestly, it turned out amazing. The dough was chewier and a little denser, but the kids didn’t complain. So if you’re feeling adventurous, give it a try. The beauty of this recipe is that it’s forgiving. You can mess with it and still end up with something delicious.
Serving & Storage Suggestions
These Mummy Hot Dogs are best served warm, right out of the oven. I like to arrange them on a large platter with a little bowl of ketchup or ranch dressing for dipping. For a full Halloween spread, pair them with creepy crawler veggie tray and some orange punch. They also go great with a side of easy Halloween pizza dippers if you’re feeding a crowd.
If you have leftovers (which is rare in my house, but it happens), store them in an airtight container in the fridge for up to 3 days. The dough will soften a bit, but they’re still tasty. To reheat, pop them in a 350°F (175°C) oven for about 5 minutes—this helps crisp the dough back up. Avoid the microwave, as it makes the dough soggy and sad.
For freezing, wrap the baked and cooled mummies individually in plastic wrap, then place them in a freezer bag. They’ll keep for up to a month. When you’re ready to eat, thaw them in the fridge overnight and reheat in the oven. I’ve done this for last-minute Halloween parties, and it works like a charm. The flavor actually holds up surprisingly well, though the dough loses a tiny bit of its flakiness.
One thing I’ve noticed: the “eyes” can smudge a bit if you stack them in a container. To avoid this, let the mustard or ketchup dry completely before storing, or add the eyes fresh after reheating. It’s a small step that makes a big difference in presentation.
Nutritional Information & Benefits
Let’s be honest—these aren’t health food, but they’re not meant to be. They’re a fun, occasional treat that brings a lot of joy for very little effort. That said, here’s a rough estimate per serving (one mummy hot dog):
| Nutrient | Amount |
|---|---|
| Calories | 210 |
| Total Fat | 14g |
| Saturated Fat | 5g |
| Cholesterol | 30mg |
| Sodium | 680mg |
| Total Carbohydrates | 16g |
| Dietary Fiber | 0g |
| Sugars | 3g |
| Protein | 7g |
The hot dogs provide a decent amount of protein, which helps keep little bellies full. The crescent dough adds carbohydrates for quick energy—perfect for a night of trick-or-treating. If you’re watching your sodium intake, look for low-sodium hot dogs or turkey dogs. And if you have any dietary concerns, the gluten-free and vegetarian variations above are great alternatives.
Personally, I love that this recipe gets my kids excited about dinner without a huge time commitment. It’s not about being healthy every single meal—it’s about making memories. And honestly, a few mummy hot dogs now and then isn’t going to hurt anyone.
Conclusion
So there you have it—the recipe that finally brought back the magic of The Lunch Counter’s Halloween specials. These Mummy Hot Dogs are quick, fun, and guaranteed to make your kids smile. Whether you’re making them for a Halloween party, a school lunch, or just a random Tuesday that needs a little spooky flair, they deliver every single time.
I love this recipe because it’s proof that you don’t need fancy ingredients or hours in the kitchen to create something special. It’s just hot dogs, dough, and a little bit of love. And honestly, that’s the kind of cooking I live for. So go ahead—grab a can of crescent rolls, raid the fridge for hot dogs, and get wrapping. Don’t forget to add the eyes at the end—it’s the best part.
If you try these, I’d love to hear about it. Leave a comment below and tell me how your little monsters liked them. Did you add cheese? Did you make them spicy? Did your kids try to steal them before they were done? Share your stories—I’m all ears. And if you have a variation I haven’t tried, let me know. Happy Halloween, and happy cooking!
Frequently Asked Questions
Can I make these ahead of time?
Absolutely. You can wrap the hot dogs up to 4 hours ahead and keep them in the fridge. Just add a minute or two to the baking time since they’ll be cold. You can also freeze them after baking—just reheat in the oven for best results.
Can I use puff pastry instead of crescent dough?
Yes, puff pastry works in a pinch. It will be flakier and less “bandage-like,” but it still tastes great. Just cut it into thin strips and follow the same wrapping instructions. Note that puff pastry may puff up more, so leave a little extra space on the baking sheet.
How do I keep the dough from sliding off?
The key is to wrap the dough loosely and press the end gently to seal it. Don’t stretch the dough tight—it needs room to expand. Also, make sure your hot dogs are at room temperature before wrapping. Cold hot dogs can cause the dough to shrink back.
Can I make these in an air fryer?
Yes! Preheat your air fryer to 350°F (175°C) and cook the mummies for 6-8 minutes, flipping halfway through. Keep an eye on them, as air fryers cook faster than ovens. The dough should be golden and crispy.
What dipping sauces go best with these?
Ketchup and mustard are the classics, but ranch dressing, honey mustard, and sriracha mayo are also fantastic. For a fun twist, try a cheese sauce or even a little barbecue sauce. Let your kids pick their favorite—it’s part of the fun.
Pin This Recipe!

Best Kid-Approved Mummy Hot Dogs: Easy 20-Minute Recipe

These Mummy Hot Dogs are a quick, fun, and festive Halloween dinner that kids love. Made with just hot dogs and crescent roll dough, they come together in 20 minutes and are perfect for parties or weeknight meals.
- Prep Time: 10 minutes
- Cook Time: 12 minutes
- Total Time: 22 minutes
- Yield: 8 servings 1x
- Category: Main Course
- Cuisine: American
Ingredients
- 8 standard-sized hot dogs (all-beef recommended, like Nathan’s or Hebrew National)
- 1 can (8 ounces) refrigerated crescent roll dough (Pillsbury recommended)
- Mustard or ketchup (for eyes)
- Optional: Cheese slices (cheddar or American, cut into thin strips)
- Optional: Cooking spray or melted butter (for brushing)
Instructions
- Preheat oven to 375°F (190°C). Line a baking sheet with parchment paper. Let hot dogs come to room temperature.
- Unroll crescent dough carefully. If using perforated dough, pinch seams together to form a solid sheet.
- Cut dough lengthwise into thin strips, about 1/4 to 1/2 inch wide (8-10 strips per can).
- Wrap each hot dog with a dough strip at an angle, leaving about 1/2 inch exposed at the top for the face. Overlap dough slightly and press end gently to seal.
- Place wrapped hot dogs on prepared baking sheet, spacing about 2 inches apart. If using cheese, wrap a thin strip around hot dog before dough.
- Optional: Brush tops with melted butter or egg wash (1 egg beaten with 1 tablespoon water) for golden finish.
- Bake for 10-12 minutes, until dough is golden brown and puffed, and hot dogs are heated through.
- Let cool for 2-3 minutes. Use a toothpick to dab small dots of mustard or ketchup on exposed hot dog for eyes.
- Serve immediately.
Notes
Wrap dough loosely to prevent sliding. Use room-temperature hot dogs. For mini mummies, cut hot dogs into thirds and bake 8-10 minutes. Can be prepped ahead and refrigerated for up to 4 hours before baking. For air fryer, cook at 350°F for 6-8 minutes, flipping halfway.
Nutrition
- Serving Size: 1 mummy hot dog
- Calories: 210
- Sugar: 3
- Sodium: 680
- Fat: 14
- Saturated Fat: 5
- Carbohydrates: 16
- Protein: 7
Keywords: mummy hot dogs, Halloween recipe, kid-friendly, easy dinner, crescent roll hot dogs, spooky food


