Love this? Save it for later!
Share the inspiration with your friends
It was 11:47 PM on a random Thursday in early October, and I had a ridiculous craving for something warm, sweet, and just a little bit indulgent. The problem? I didn’t have the energy for a full-blown baking project, and honestly, my kitchen was a disaster zone from dinner. I didn’t have a proper cake pan clean, but I had a muffin tin, a single overripe banana, and half a can of pumpkin puree staring at me from the fridge. That’s when the idea hit me — what if I just threw everything into one bowl and baked it in a muffin pan? No mixer, no fuss, just pure late-night impulse.
I mean, let me tell you, there’s something about the quiet hours that makes you try things you’d never attempt in broad daylight. You know that feeling when the usual rules just… loosen up a bit? That’s exactly what happened here. I grabbed some oats, a handful of chocolate chips I was supposed to save for cookies, and the pumpkin. I figured if it was a disaster, at least I’d have a funny story for the morning. But honestly? It was the opposite of a disaster.
The smell alone was worth it — cinnamon and pumpkin filling up my tiny apartment at midnight. But when I pulled those little oatmeal cups out of the oven, golden and puffed up with melty chocolate peeking through, I knew I’d stumbled onto something special. They weren’t too sweet, not too heavy, and somehow exactly what I needed at that hour. I ate one standing over the counter, burned my tongue a little, and didn’t even care. These cozy baked pumpkin chocolate chip oatmeal cups have been on repeat ever since, and I have a feeling you’re going to love them just as much.
Why You’ll Love These Easy Oatmeal Cups
Let me be real with you — I’ve tested this recipe at least eight times to get it just right. The first batch was too dry. The second was too sweet. But by batch number four, I hit that perfect balance where the oats are tender, the pumpkin keeps everything moist, and the chocolate chips melt into little pockets of happiness. Here’s why these oatmeal cups are about to become your new favorite breakfast or snack:
- Quick & Easy: From bowl to oven in under 10 minutes. No mixer, no complicated steps, no dirtying every dish in your kitchen.
- Simple Ingredients: You probably already have most of these in your pantry right now. Oats, pumpkin puree, eggs, chocolate chips — nothing fancy required.
- Perfect for Fall Mornings: These were made for crisp October and November days when you want something warm and cozy but don’t have time for a sit-down breakfast.
- Crowd-Pleaser: My picky nephew ate three of these in one sitting. Three. He usually won’t touch anything orange.
- Unbelievably Delicious: The texture is what gets me every time — soft and tender on the inside with slightly crispy edges and those gooey chocolate pockets.
What makes these different from every other pumpkin oatmeal recipe out there? It’s the ratio, honestly. I spent way too long figuring out the perfect amount of pumpkin to oats so they’re not mushy or dry. Plus, the chocolate chips aren’t just an afterthought — they’re folded in generously so every single cup gets its fair share. This isn’t just another healthy breakfast recipe. It’s the kind that makes you look forward to waking up.
What Ingredients You Will Need
This recipe uses simple, wholesome ingredients to deliver that cozy fall flavor without any fuss. Most of these are pantry staples, which makes these oatmeal cups perfect for spontaneous baking sessions. Let me walk you through each one and why it matters.
For the Oatmeal Cups
- Rolled oats, 2 cups (180g) — I prefer old-fashioned rolled oats here. They give the best texture — chewy but tender. Quick oats will work in a pinch, but the texture will be softer and less satisfying. I use Bob’s Red Mill or Quaker.
- Pumpkin puree, 1 cup (245g) — Make sure you’re using 100% pure pumpkin puree, not pumpkin pie filling. The filling has added sugar and spices that’ll throw off the balance. Libby’s is my go-to brand.
- Milk, 1 cup (240ml) — Any milk works here. I usually use whole milk for richness, but almond milk, oat milk, or 2% all work great. If you’re using a thinner milk like unsweetened almond, the cups might be slightly less tender.
- Large eggs, 2 — Eggs help bind everything together and add structure. If you need an egg-free version, try using flax eggs (2 tablespoons ground flaxseed mixed with 6 tablespoons water, let sit for 5 minutes).
- Maple syrup, 1/3 cup (80ml) — This adds sweetness and moisture. You can substitute honey or agave, but maple syrup really complements the pumpkin flavor beautifully. Plus, it’s less processed than refined sugar.
- Coconut oil or butter, 3 tablespoons (45g), melted — Either works. Coconut oil gives a subtle tropical note that pairs nicely with the pumpkin, while butter makes them richer. I’ve used both and honestly can’t pick a favorite.
- Vanilla extract, 1 teaspoon — Pure vanilla extract is worth the splurge here. It enhances all the warm spices and makes the chocolate taste even better.
- Pumpkin pie spice, 2 teaspoons — You can use store-bought or make your own (1 teaspoon cinnamon, 1/2 teaspoon ginger, 1/4 teaspoon nutmeg, 1/4 teaspoon allspice). I make my own because I like controlling the cinnamon-to-nutmeg ratio.
- Cinnamon, 1 teaspoon — Extra cinnamon because, honestly, can you ever have too much? Not in my kitchen.
- Baking powder, 1 teaspoon — This gives the cups a little lift so they’re not dense hockey pucks.
- Salt, 1/4 teaspoon — Don’t skip this. Salt makes everything taste more like itself, especially the chocolate and pumpkin.
- Chocolate chips, 1/2 cup (90g) — Semi-sweet is my favorite because it balances the pumpkin’s earthiness. Dark chocolate works too if you want less sweetness. I’ve also used white chocolate chips for a totally different vibe — highly recommend.
Optional Toppings
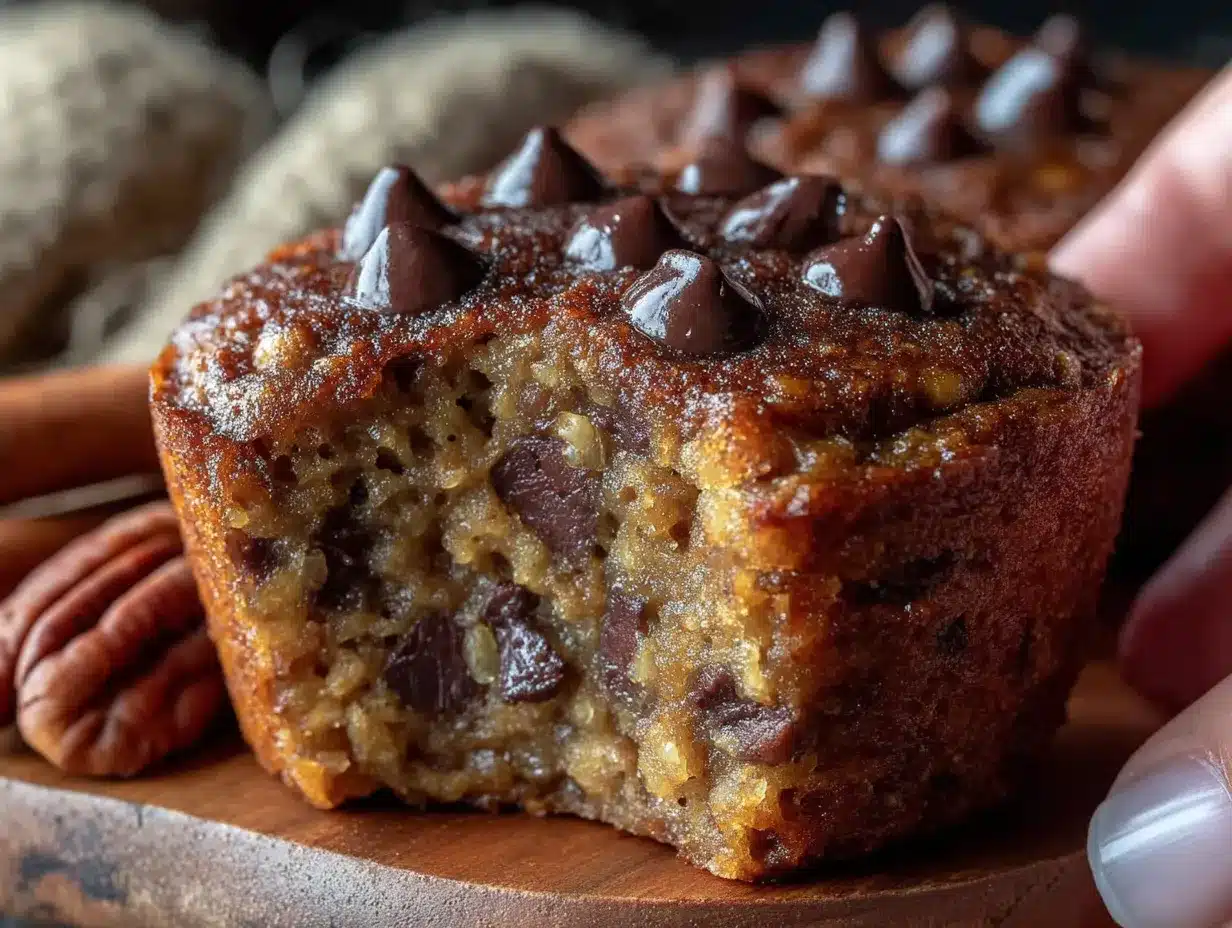
- Extra chocolate chips, 2 tablespoons — Sprinkle these on top before baking for a prettier presentation.
- Pepitas or chopped pecans, 2 tablespoons — Adds crunch if you’re into that. I sometimes add these for texture contrast.
- A pinch of flaky sea salt — Trust me on this one. A tiny sprinkle on top right when they come out of the oven is life-changing.
Equipment Needed
You don’t need a fancy kitchen to make these oatmeal cups. Here’s what you’ll need:
- Standard 12-cup muffin tin — This is non-negotiable. A mini muffin tin works too, but you’ll need to adjust the baking time to about 12-15 minutes.
- Muffin liners (paper or silicone) — I prefer parchment paper liners because nothing sticks to them. Silicone works great too. If you’re out of liners, grease the tin well with butter or cooking spray.
- Large mixing bowl — Any bowl works. I use my grandmother’s old ceramic mixing bowl because it makes me feel like a real baker.
- Whisk — For mixing the wet ingredients. A fork works in a pinch.
- Rubber spatula — For folding everything together and scraping the bowl clean. I’ve broken too many wooden spoons on thick oatmeal batter.
- Measuring cups and spoons — Accurate measurements matter here, especially for the oats and pumpkin.
- Cooling rack — Optional but helpful. If you don’t have one, just let them cool in the pan for 5 minutes, then transfer to a plate.
- Ice cream scoop or cookie scoop — This makes portioning the batter into the muffin cups so much easier and less messy. Totally optional but worth mentioning.
Preparation Method
Alright, let’s get to the good part. I’ve tested this method multiple times to make sure it’s foolproof. Follow these steps, and you’ll have perfect oatmeal cups every single time.
- Preheat your oven to 375°F (190°C). Line your muffin tin with paper liners or grease it well. I like to do this first so the oven is ready when the batter is done. Pro tip: if you’re using paper liners, give them a quick spray of cooking spray so the oats don’t stick.
- In a large bowl, whisk together the wet ingredients. Add the pumpkin puree, milk, eggs, maple syrup, melted coconut oil (or butter), and vanilla extract. Whisk until everything is smooth and well combined. Don’t worry if the mixture looks a little separated — that’s normal. The eggs and pumpkin don’t always want to play nice at first.
- Add the dry ingredients directly to the same bowl. No need to dirty another bowl — just toss in the rolled oats, pumpkin pie spice, cinnamon, baking powder, and salt. Stir with a rubber spatula until everything is evenly mixed. The batter will look thick and almost like a loose cookie dough. That’s exactly what you want.
- Fold in the chocolate chips. Gently stir them in until they’re distributed throughout the batter. If you want pretty tops with visible chocolate, reserve about 2 tablespoons to sprinkle on top later. I always forget to do this and end up with chocolate buried inside, which is fine too.
- Let the batter rest for 5 minutes. This is a step I learned the hard way. Letting the oats sit for a few minutes allows them to absorb some of the liquid, which gives you a better texture. The first time I made these, I baked them immediately and they were a bit dry on top. The resting time makes a real difference.
- Divide the batter evenly among the 12 muffin cups. Use an ice cream scoop or a spoon to fill each cup almost to the top — these don’t rise much, so you want them full. If you reserved extra chocolate chips, sprinkle them on top now. I usually get exactly 12 cups, but sometimes 11 if I’m generous with the portions.
- Bake for 18-22 minutes. The oatmeal cups are done when the edges are golden brown and the tops are set and spring back slightly when touched. A toothpick inserted in the center should come out clean or with just a few moist crumbs. My oven runs hot, so I check at 18 minutes and go from there.
- Let them cool in the pan for 5 minutes. This is crucial — if you try to take them out immediately, they might fall apart. After 5 minutes, transfer them to a cooling rack. Or, let’s be honest, just eat one while it’s still warm. The chocolate will be melty and absolutely perfect.
Cooking Tips & Techniques
After making these oatmeal cups more times than I care to admit, I’ve picked up a few tricks that make a real difference. Here’s what I wish someone had told me before my first attempt:
Don’t overmix the batter. I know it’s tempting to keep stirring until everything looks perfectly smooth, but stop as soon as the dry ingredients are incorporated. Overmixing can make the oatmeal cups tough and dense instead of tender. I learned this the hard way when my first batch came out like rubbery hockey pucks.
Use room temperature ingredients. Cold eggs and cold milk can cause the coconut oil to solidify into little chunks when you mix everything together. If you forget to take them out ahead of time (which I do constantly), just place the eggs in a bowl of warm water for 5 minutes and microwave the milk for 15 seconds. Problem solved.
Toast your oats first for extra flavor. This is optional but amazing. Spread the rolled oats on a baking sheet and toast them at 350°F for 8-10 minutes until they’re fragrant and lightly golden. Let them cool before using. It adds a nutty depth that takes these oatmeal cups to another level. I do this when I’m feeling extra fancy.
Watch the baking time carefully. Every oven is different. My friend’s oven takes a full 24 minutes, while mine is done at 19. Start checking at the 18-minute mark. The edges should be golden and the tops should look set, not wet. If you’re unsure, err on the side of underbaking — they’ll continue to set as they cool.
Let them cool completely before storing. I know it’s hard to wait, but if you put warm oatmeal cups in an airtight container, the steam will make them soggy. Let them cool completely on a wire rack first. Trust me, I’ve made this mistake more than once.
Variations & Adaptations
One of the best things about this recipe is how flexible it is. Here are some ways to make it your own:
Gluten-Free Version: Use certified gluten-free rolled oats. That’s literally the only change you need to make. The recipe works exactly the same way. I’ve tested this with Bob’s Red Mill gluten-free oats and couldn’t tell the difference.
Dairy-Free Version: Use almond milk, oat milk, or coconut milk instead of regular milk, and swap the butter for coconut oil or a plant-based butter. The texture might be slightly less tender, but still delicious. I’ve made this version for a friend with dairy allergies and she loved them.
Lower Sugar Option: Reduce the maple syrup to 1/4 cup and add an extra mashed banana for sweetness. You can also use sugar-free chocolate chips or just omit them entirely. The oatmeal cups will be less sweet but still satisfying, especially if you add extra cinnamon and vanilla.
Add Some Crunch: Fold in 1/4 cup of chopped pecans, walnuts, or pepitas along with the chocolate chips. The nuts add a lovely crunch that contrasts with the soft oatmeal texture. I did this once with toasted pecans and it was incredible.
Pumpkin-Free Version: If you’re out of pumpkin puree (or it’s not fall), substitute with mashed sweet potato or butternut squash puree. The flavor will be slightly different, but still delicious. I’ve also used mashed banana in a pinch — just reduce the maple syrup to 2 tablespoons since bananas are sweeter.
Spice It Up: Add 1/4 teaspoon of cardamom or cloves along with the pumpkin pie spice for a more complex flavor profile. I tried this with cardamom once and it gave the oatmeal cups a slightly exotic, chai-like flavor that was absolutely lovely.
Serving & Storage Suggestions
These oatmeal cups are incredibly versatile when it comes to serving. Here’s how I like to enjoy them:
Serving Temperature: They’re absolutely delicious warm, right out of the oven, when the chocolate chips are still melty and gooey. But honestly, they’re just as good at room temperature. I’ve even eaten them cold straight from the fridge on busy mornings and they’re still fantastic.
How to Serve: I love these with a dollop of Greek yogurt on top for extra protein and creaminess. A drizzle of warm maple syrup or a sprinkle of cinnamon sugar takes them over the top. Sometimes I crumble one over a bowl of vanilla ice cream for a quick dessert that feels way more indulgent than it is.
What to Pair Them With: These oatmeal cups are perfect with a hot cup of coffee or chai tea in the morning. For a heartier breakfast, serve them alongside scrambled eggs or a fruit salad. They also make a great afternoon snack with a glass of cold milk — honestly, it’s the perfect combo.
Storage Instructions: Store leftover oatmeal cups in an airtight container at room temperature for up to 3 days. If your kitchen is warm or humid, keep them in the refrigerator instead — they’ll last up to a week. I usually keep mine on the counter and they disappear within two days.
Freezing Instructions: These freeze beautifully! Let them cool completely, then place them in a single layer on a baking sheet and freeze for 1 hour. Transfer to a freezer-safe bag or container. They’ll keep for up to 3 months. To reheat, microwave one for 30-45 seconds or pop it in a 350°F oven for 10 minutes. The texture comes back almost perfectly.
Flavor Development: Here’s something interesting — the flavors actually deepen and meld together after a day or two. The pumpkin and spices become more pronounced, and the oatmeal texture softens slightly. I honestly think they’re even better on day two. So don’t be afraid to make a batch ahead of time.
Nutritional Information & Benefits
Let’s talk about what’s actually in these little cups of goodness. Here’s the estimated nutrition per oatmeal cup (based on 12 servings):
| Nutrient | Amount per Serving |
|---|---|
| Calories | 195 |
| Total Fat | 8g |
| Saturated Fat | 4.5g |
| Cholesterol | 35mg |
| Sodium | 115mg |
| Total Carbohydrates | 28g |
| Dietary Fiber | 3.5g |
| Sugars | 12g |
| Protein | 5g |
| Vitamin A | 80% DV |
These oatmeal cups are packed with nutritional benefits. The pumpkin puree is loaded with vitamin A, which is great for eye health and immune function. Oats provide soluble fiber that helps lower cholesterol and keeps you feeling full. The eggs add high-quality protein, and the maple syrup is a more natural sweetener than refined sugar. Plus, dark chocolate contains antioxidants — so yes, you can feel good about eating chocolate for breakfast.
If you’re watching your sugar intake, you can easily reduce the maple syrup or use sugar-free chocolate chips. For a higher protein version, add a scoop of vanilla protein powder and reduce the oats by 1/4 cup. These are also naturally vegetarian and can be made gluten-free and dairy-free with simple swaps.
Frequently Asked Questions
Can I use quick oats instead of rolled oats?
Yes, you can! The texture will be softer and less chewy since quick oats absorb liquid faster. The baking time might be slightly shorter, so start checking at 15 minutes. I prefer rolled oats for the best texture, but quick oats work in a pinch.
Can I make these ahead of time for meal prep?
Absolutely! These are perfect for meal prep. Make a batch on Sunday and enjoy them throughout the week. Store them in an airtight container in the refrigerator for up to 5 days, or freeze them for up to 3 months. Just reheat in the microwave for 30 seconds and you’re good to go.
Why did my oatmeal cups turn out dry?
This usually happens if you overbake them or use too many oats. Make sure you’re measuring the oats correctly (spoon them into the measuring cup and level off, don’t pack them down). Also, check your oven temperature — an oven that runs hot can dry them out quickly. Try reducing the baking time by 2-3 minutes next time.
Can I add protein powder to this recipe?
Yes! Add 1 scoop (about 30g) of vanilla or unflavored protein powder. Reduce the oats by 1/4 cup to keep the texture balanced. You might also need to add an extra 2-3 tablespoons of milk since protein powder absorbs liquid. I’ve done this with vanilla whey protein and it worked great.
Can I make these without eggs?
Yes, use a flax egg instead. Mix 2 tablespoons of ground flaxseed with 6 tablespoons of water and let it sit for 5 minutes until it forms a gel. The texture will be slightly denser, but still delicious. I’ve tested this and the flax egg works surprisingly well here.
Conclusion
These cozy baked pumpkin chocolate chip oatmeal cups are everything I love about fall baking — simple, forgiving, and absolutely delicious. They came from a late-night impulse and a willingness to try something different, and now they’re a staple in my kitchen every autumn. The best part? They’re forgiving enough for beginners but satisfying enough for experienced bakers who just want something easy and good.
I hope you’ll give them a try and make them your own. Add extra chocolate if that’s your thing. Throw in some nuts. Drizzle them with maple syrup. The beauty of this recipe is that it works with whatever you have and whatever you’re craving. And honestly, that’s exactly what a good recipe should do.
If you make these oatmeal cups, I’d love to hear about it! Leave a comment below and tell me how they turned out, what variations you tried, or if you made them at 11 PM like I did. Don’t forget to share this recipe with a friend who needs a little fall comfort in their life. Happy baking, friends!
Pin This Recipe!
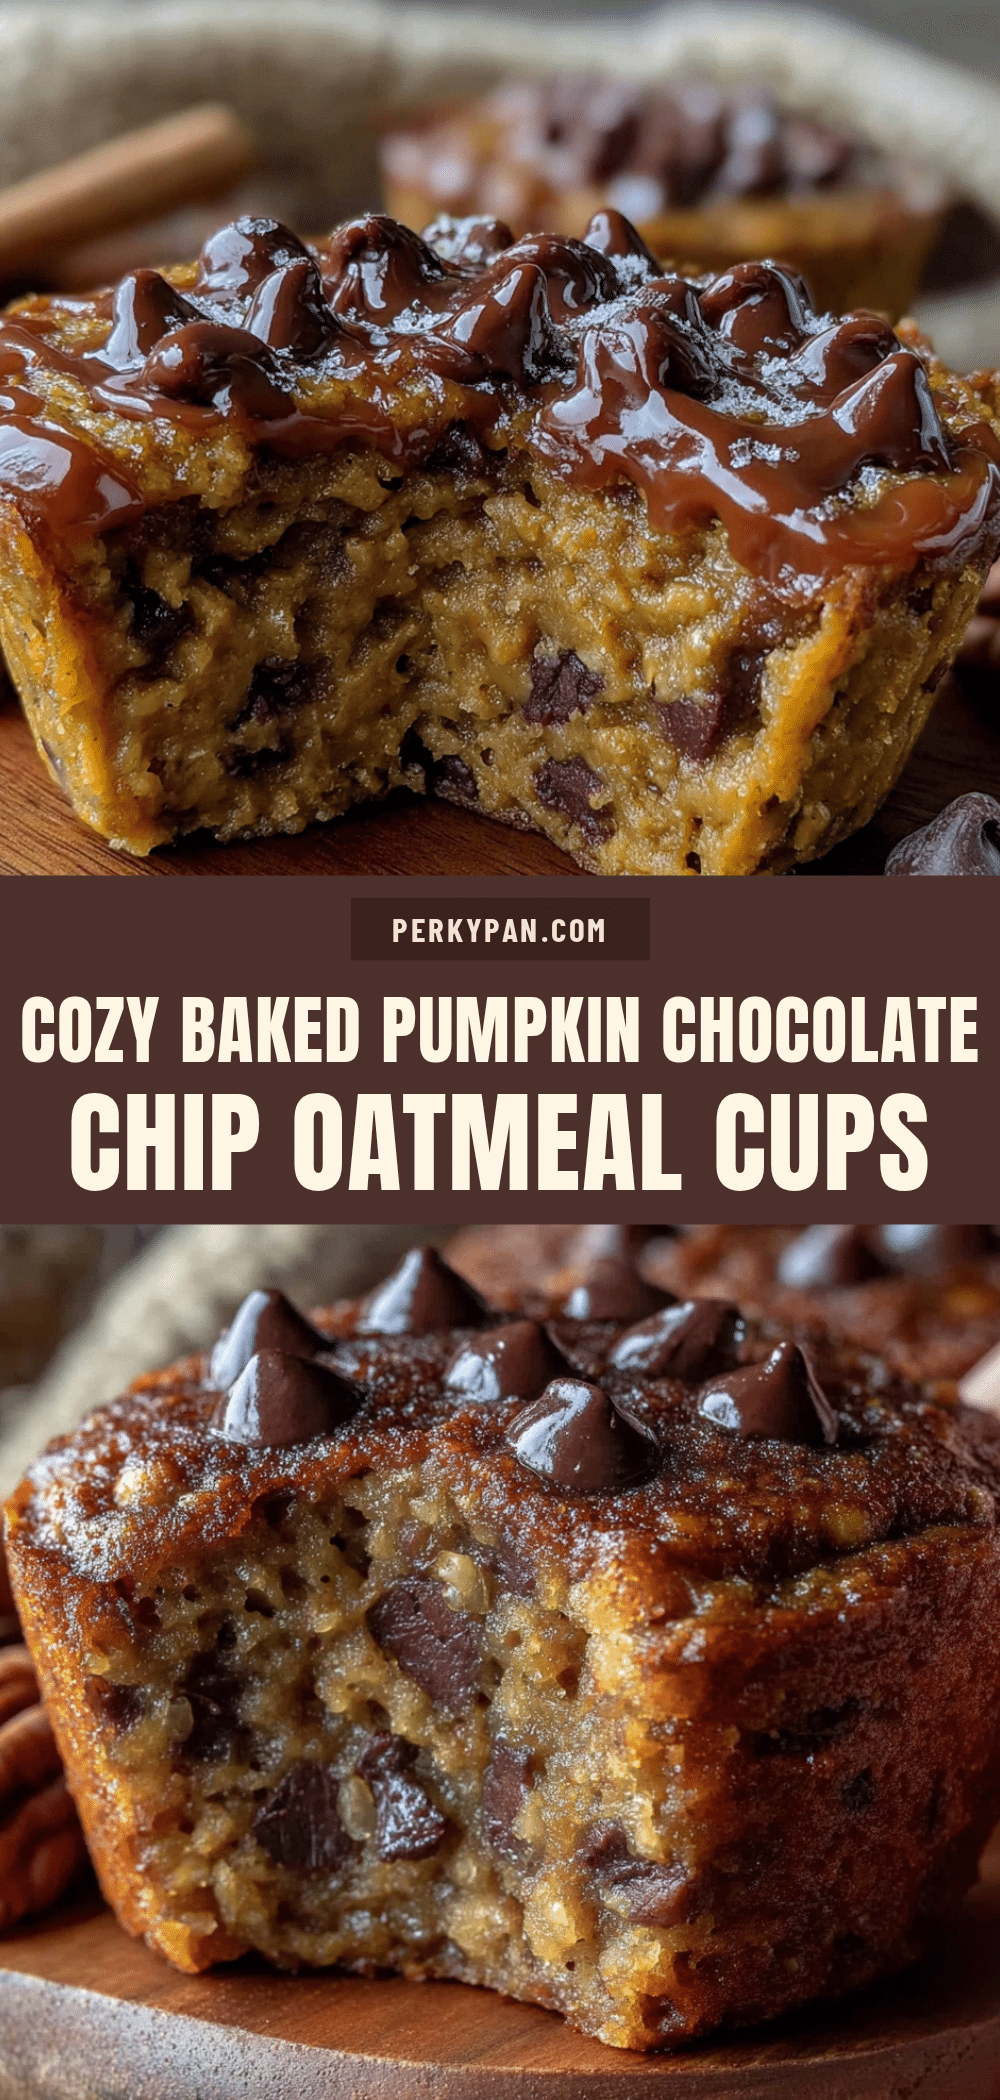
Best Easy Baked Pumpkin Chocolate Chip Oatmeal Cups
These cozy baked pumpkin chocolate chip oatmeal cups are quick, easy, and perfect for fall mornings. Made with simple pantry ingredients, they’re tender, moist, and packed with melty chocolate in every bite.
- Prep Time: 10 minutes
- Cook Time: 20 minutes
- Total Time: 30 minutes
- Yield: 12 servings 1x
- Category: Breakfast
- Cuisine: American
Ingredients
- 2 cups (180g) rolled oats
- 1 cup (245g) pumpkin puree
- 1 cup (240ml) milk (any kind)
- 2 large eggs
- 1/3 cup (80ml) maple syrup
- 3 tablespoons (45g) coconut oil or butter, melted
- 1 teaspoon vanilla extract
- 2 teaspoons pumpkin pie spice
- 1 teaspoon cinnamon
- 1 teaspoon baking powder
- 1/4 teaspoon salt
- 1/2 cup (90g) chocolate chips (semi-sweet recommended)
- 2 tablespoons extra chocolate chips for topping (optional)
- 2 tablespoons pepitas or chopped pecans for topping (optional)
- Flaky sea salt for topping (optional)
Instructions
- Preheat your oven to 375°F (190°C). Line a 12-cup muffin tin with paper liners or grease well.
- In a large bowl, whisk together pumpkin puree, milk, eggs, maple syrup, melted coconut oil or butter, and vanilla extract until smooth.
- Add rolled oats, pumpkin pie spice, cinnamon, baking powder, and salt to the same bowl. Stir with a rubber spatula until evenly mixed. Batter will be thick like loose cookie dough.
- Fold in chocolate chips until distributed. Reserve 2 tablespoons for topping if desired.
- Let batter rest for 5 minutes to allow oats to absorb liquid.
- Divide batter evenly among 12 muffin cups, filling almost to the top. Sprinkle reserved chocolate chips or optional toppings on top if using.
- Bake for 18-22 minutes, until edges are golden brown and tops spring back when touched. A toothpick inserted in center should come out clean or with moist crumbs.
- Cool in pan for 5 minutes, then transfer to a cooling rack. Serve warm or at room temperature.
Notes
For best texture, let batter rest 5 minutes before baking. Oatmeal cups can be stored in an airtight container at room temperature for up to 3 days, or refrigerated for up to a week. Freeze for up to 3 months. Reheat in microwave for 30-45 seconds or in a 350°F oven for 10 minutes. To make gluten-free, use certified gluten-free oats. For dairy-free, use plant-based milk and coconut oil. For lower sugar, reduce maple syrup to 1/4 cup and add an extra mashed banana.
Nutrition
- Serving Size: 1 oatmeal cup
- Calories: 195
- Sugar: 12
- Sodium: 115
- Fat: 8
- Saturated Fat: 4.5
- Carbohydrates: 28
- Fiber: 3.5
- Protein: 5
Keywords: pumpkin oatmeal cups, baked oatmeal cups, pumpkin chocolate chip oatmeal, easy breakfast, fall breakfast, healthy oatmeal cups


