Love this? Save it for later!
Share the inspiration with your friends
Lisa wasn’t trying to impress anyone. I’d stopped by to drop off a book she’d lent me, and the smell of garlic and herbs hit me before I even got to her screen door. It was one of those late April afternoons where the light is doing that golden thing, and I was already hungry just from the walk over. She was in her kitchen, barefoot, wearing an old apron, flipping something in a cast iron skillet that made the most ridiculous sizzling sound.
“Oh, that’s just chicken,” she said when I asked what smelled so incredible. Just chicken. She said it like it was no big deal, like she wasn’t standing there creating something that smelled better than most restaurant kitchens I’ve been in. I watched her for a few minutes—she wasn’t following a recipe, wasn’t measuring anything, just working on instinct. A pat of butter here, a sprinkle of herbs there. She caught me staring and laughed. “Want to stay for dinner?”
Honestly, I would’ve canceled plans for this chicken. And I did, kind of. I texted my husband that I’d be late and sat at her kitchen counter while she finished, drinking iced tea and watching her work. The chicken came out with this impossibly crispy skin, golden brown and speckled with herbs, and the butter had melted into this sauce that pooled around it on the plate. I took one bite and closed my eyes. “You have to teach me this,” I said. She shrugged. “There’s nothing to it.”
Maybe you’ve been there—watching someone make something that seems magical, and they act like it’s the most ordinary thing in the world. That’s this recipe. It’s the kind of dish that looks like you spent hours fussing, but really, it’s just a few smart moves and good ingredients. I’ve made it at least a dozen times since that afternoon, and every time I do, I think of Lisa’s bare feet and her nonchalant shrug. This is the perfect spring dinner because it’s simple enough for a Tuesday but special enough to feel like a celebration. And honestly, that golden, herby, buttery crust? It’s the kind of thing that stays with you.
Why You’ll Love This Recipe
I’ve tested this crispy herb butter chicken more times than I can count—tweaking the herb blend, adjusting the cooking time, figuring out the exact moment to flip it for maximum crispiness. After all that trial and error, I can tell you with confidence: this is the version you want. Here’s why it works:
- Quick & Easy : Comes together in about 35 minutes, start to finish. Perfect for those spring evenings when you want something satisfying without spending all night in the kitchen.
- Simple Ingredients : You probably already have most of this in your kitchen right now. No specialty items, no hard-to-find spices. Just good butter, fresh herbs, and chicken.
- Perfect for Spring : Light enough for warmer weather but still hearty enough to feel like a real meal. Serve it with fresh asparagus or a simple salad, and you’ve got a dinner that screams “spring is here.”
- Crowd-Pleaser : I’ve served this for picky kids, foodie friends, and my mother-in-law (who is notoriously hard to impress). Everyone goes back for seconds.
- Unbelievably Delicious : That crispy herb butter crust is next-level. The outside gets shatteringly crisp while the inside stays juicy and tender. It’s the kind of texture contrast that makes you wonder why you ever made chicken any other way.
What makes this different from every other herb chicken recipe out there? It’s the technique. Instead of just seasoning the outside, you’re creating a compound butter that melts into the chicken as it cooks, infusing every bite with flavor while the skin gets that perfect golden crust. It’s not just another chicken recipe—it’s your new favorite way to cook chicken.
This is the kind of meal that makes you close your eyes after the first bite. It’s comfort food that feels fresh and seasonal, satisfying without being heavy. Perfect for impressing guests without breaking a sweat, or turning a simple Wednesday dinner into something you’ll actually look forward to.
What Ingredients You Will Need
This recipe uses simple, wholesome ingredients to create something truly special. The magic is in the combination—good butter, fresh herbs, and quality chicken come together to deliver bold flavor and that irresistible crispy texture. Most of these are pantry staples, especially if you keep fresh herbs on hand during spring.
For the Herb Butter
- 4 tablespoons unsalted butter, softened (I prefer Kerrygold for its rich flavor, but any good-quality butter works)
- 2 cloves garlic, minced (fresh only—please don’t use the jarred stuff here, it makes a difference)
- 1 tablespoon fresh parsley, finely chopped
- 1 tablespoon fresh chives, finely chopped
- 1 teaspoon fresh thyme leaves (or ½ teaspoon dried if that’s what you have)
- ½ teaspoon lemon zest (adds brightness and cuts through the richness)
- ¼ teaspoon salt
- ⅛ teaspoon black pepper
For the Chicken
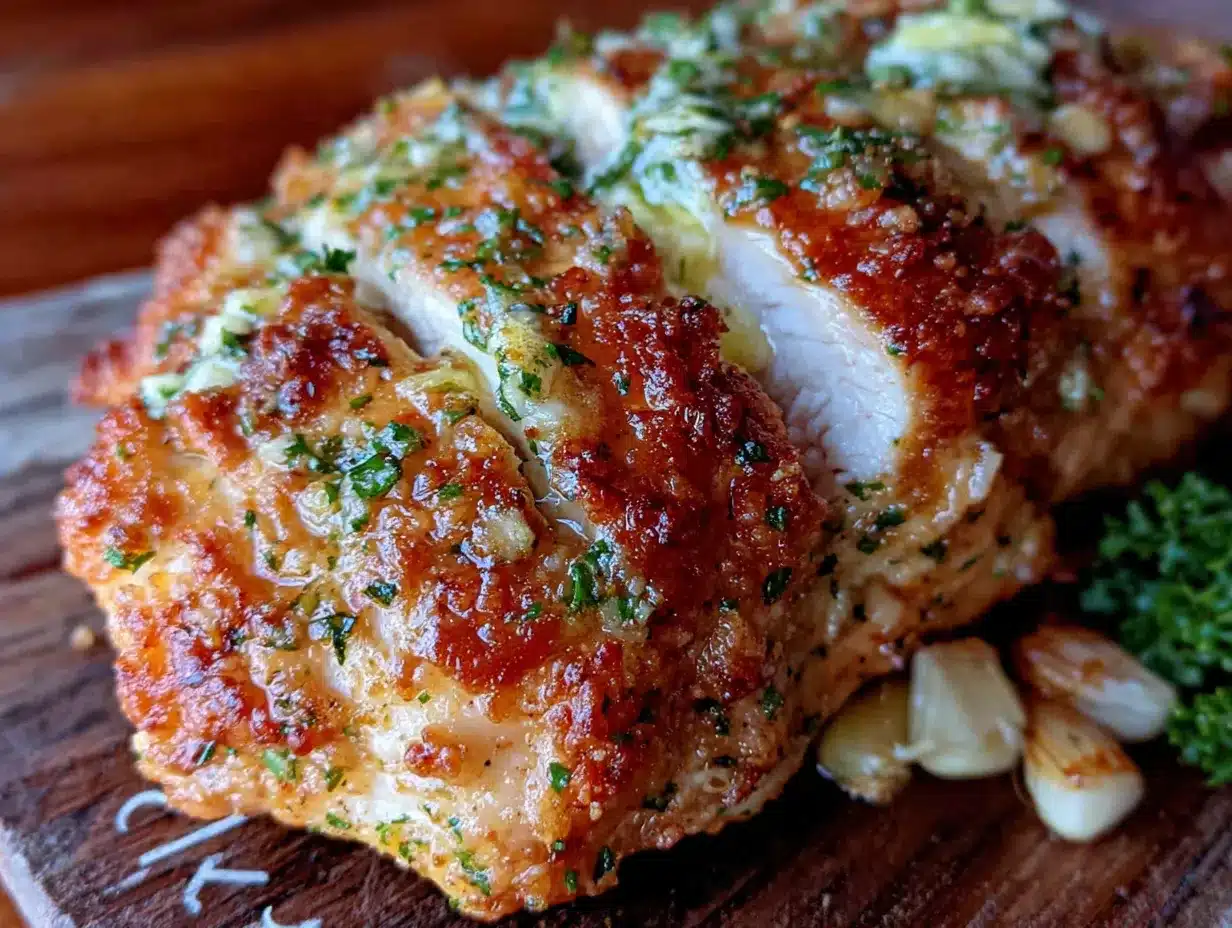
- 4 boneless, skin-on chicken breasts (about 6 ounces/170g each) — the skin is crucial for that crispy texture, so don’t skip it
- 1 tablespoon olive oil
- ½ teaspoon salt
- ¼ teaspoon black pepper
- ¼ cup chicken broth (for deglazing and making a quick pan sauce)
- 1 tablespoon fresh lemon juice
A few notes on ingredients: Look for chicken breasts that are similar in thickness so they cook evenly. If some are thicker than others, you can pound them gently between two pieces of plastic wrap until they’re about ¾ inch thick. For the herbs, I’ve made this with all dried herbs in a pinch, and it’s still good—but fresh really does take it to another level. In spring, when herbs are popping up everywhere, it’s the perfect time to use them.
If you’re dairy-free, you can substitute the butter with a high-quality vegan butter or ghee (which is technically dairy but often tolerated by those with mild sensitivities). For a lower-fat option, you can use less butter, but honestly, that crispy crust is where the magic happens.
Equipment Needed
You don’t need much for this recipe, which is part of why I love it. Here’s what you’ll want to have on hand:
- Large cast iron skillet (12-inch is ideal) — this is my go-to for getting that perfect crispy skin. The even heat distribution and heat retention are unmatched. If you don’t have cast iron, a heavy-bottomed stainless steel skillet works great too.
- Small bowl for mixing the herb butter
- Chef’s knife and cutting board for prepping herbs and garlic
- Tongs for flipping the chicken — trust me, don’t try to use a fork, you’ll tear the skin
- Meat thermometer (instant-read is best) — this takes the guesswork out of knowing when the chicken is done
- Paper towels for patting the chicken dry (this is crucial for crispy skin)
If you don’t own a cast iron skillet, no worries. I’ve made this in a regular non-stick pan and it still came out great—just be careful not to get the pan too hot since non-stick can’t handle the same high heat. A stainless steel skillet is actually my second choice after cast iron because it gives you that nice fond (the browned bits on the bottom) that makes the pan sauce so good.
One tip: if your skillet is on the smaller side, cook the chicken in batches. Crowding the pan will steam the chicken instead of searing it, and you’ll lose that crispy skin you’re working so hard for.
Preparation Method
Alright, let’s get cooking. This comes together faster than you’d think, so have everything ready before you start.
- Make the herb butter (5 minutes): In a small bowl, combine the softened butter, minced garlic, parsley, chives, thyme, lemon zest, salt, and pepper. Mash it all together with a fork until everything is evenly distributed. Set aside at room temperature—you want it soft and spreadable, not cold and hard.
- Prep the chicken (5 minutes): Pat the chicken breasts dry with paper towels. This is non-negotiable—wet skin won’t crisp up. Season both sides generously with salt and pepper. Let them sit at room temperature for about 10 minutes while you heat the pan. This helps them cook more evenly.
- Heat the skillet (2 minutes): Place your cast iron skillet over medium-high heat and add the olive oil. Let it heat until the oil shimmers—you should see it moving like water almost. A drop of water flicked in should sizzle immediately.
- Sear the chicken (6-8 minutes): Place the chicken breasts skin-side down in the hot skillet. Listen for that satisfying sizzle. Let them cook undisturbed for 5-6 minutes—I know it’s tempting to peek, but leave them alone. The skin needs that uninterrupted contact to get golden and crispy. After 5 minutes, check the skin. It should be deep golden brown and release easily from the pan. If it sticks, give it another minute.
- Flip and add the butter (8-10 minutes): Flip the chicken carefully with tongs. Reduce the heat to medium. Divide the herb butter evenly among the chicken breasts, placing a pat on each one. It’ll start melting immediately into the pan. Cook for another 6-8 minutes, basting occasionally with the melted butter from the pan. The chicken is done when it reaches 165°F (74°C) in the thickest part.
- Make the pan sauce (3 minutes): Remove the chicken to a plate and tent loosely with foil. Pour off most of the fat from the pan, leaving about a tablespoon. Place the pan back over medium heat and add the chicken broth. Scrape up all those browned bits from the bottom—that’s pure flavor. Let it simmer for 2 minutes until slightly reduced. Stir in the lemon juice. Taste and adjust seasoning.
- Serve: Pour the pan sauce over the chicken and serve immediately. The skin should be audibly crispy when you cut into it.
A few things to watch for: If the butter starts browning too quickly, lower the heat. You want it to melt and baste the chicken, not burn. And if you’re cooking in batches, keep the first batch warm in a 200°F (93°C) oven while you finish the rest.
Cooking Tips & Techniques
After making this crispy herb butter chicken more times than I can count, I’ve learned a few things the hard way. Here’s what I wish someone had told me:
Patience is everything. The biggest mistake I made the first time? Moving the chicken too soon. I flipped it after 3 minutes because I was curious, and the skin tore right off. That beautiful crispy crust was gone. Now I set a timer for 5 minutes and don’t touch the pan. The chicken will tell you when it’s ready—the skin will release easily from the pan when it’s properly seared.
Room temperature butter matters. I once tried to make the herb butter straight from the fridge, and it was a disaster. Cold butter doesn’t spread evenly, and it melts too slowly in the pan. Let it sit out for at least 30 minutes before you start. If you’re in a hurry, you can microwave it for 5-10 seconds, but watch it carefully—you want softened, not melted.
Don’t skip the patting dry step. I know it seems fussy, but moisture is the enemy of crispy skin. I use three or four paper towels and really press them into the skin to absorb any hidden moisture. It makes a noticeable difference.
Use a meat thermometer. I used to cut into chicken to check if it was done, which released all those precious juices. An instant-read thermometer changed my life. 165°F (74°C) is the magic number. And remember, the chicken will continue cooking for a minute or two after you remove it from the pan, so you can pull it at 160°F (71°C) if you’re nervous about overcooking.
Baste, baste, baste. After you add the herb butter, tilt the pan slightly and use a spoon to scoop the melted butter over the chicken. This keeps the meat moist and builds that incredible flavor. I do this about every 2 minutes while the second side cooks.
Variations & Adaptations
One of the best things about this recipe is how flexible it is. Here are some ways to make it your own:
Herb Swap: The herb combination I’ve given is my favorite, but feel free to use what you have. Rosemary and sage work beautifully for a more earthy flavor. Tarragon adds a lovely anise note that’s perfect with chicken. In summer, I sometimes use basil and oregano for a more Mediterranean vibe. The ratio stays the same—about 2 tablespoons total of fresh herbs.
Spice It Up: Add a pinch of red pepper flakes to the herb butter for a subtle heat. Or try a teaspoon of Dijon mustard mixed in—it adds a tangy depth that’s really nice.
Dairy-Free Version: Substitute the butter with a good-quality vegan butter or use olive oil mixed with a tablespoon of nutritional yeast for a cheesy flavor. The texture won’t be quite the same, but it’s still delicious.
Thighs Instead of Breasts: Boneless, skin-on chicken thighs work beautifully here. They’re more forgiving and stay juicy even if you cook them a minute too long. Cook them the same way, but expect the second side to take about 8-10 minutes since thighs are thicker.
Oven-Finished Method: If you’re cooking for a crowd, sear the chicken in the skillet as directed, then transfer the whole pan to a 400°F (200°C) oven for 10-12 minutes to finish cooking. This frees up your stovetop and ensures even cooking.
I once made this with a lemon-thyme variation when I had a bunch of thyme that needed using up. I added extra lemon zest and a squeeze of lemon juice to the butter, and it was honestly one of the best versions I’ve made. Don’t be afraid to experiment—that’s how the best recipes are born.
Serving & Storage Suggestions
This chicken is best served immediately, while the skin is still crispy and the pan sauce is warm. Here’s how to make it a complete meal:
Serving Temperature: Serve hot, straight from the pan. Let it rest for 5 minutes after cooking to allow the juices to redistribute, but don’t let it sit too long or the skin will soften.
What to Serve With It: In spring, I love this with roasted asparagus and new potatoes. The bright, grassy flavor of asparagus pairs perfectly with the herb butter. A simple arugula salad with lemon vinaigrette is another great option—the peppery greens cut through the richness. For something heartier, try it with creamy mashed potatoes or a wild rice pilaf to soak up all that pan sauce.
Storage: Leftover chicken keeps in the refrigerator for up to 3 days in an airtight container. The skin will lose its crispiness, but the flavor will still be great. I like to slice the leftover chicken and use it in salads or sandwiches the next day.
Reheating: The best way to reheat is in a skillet over medium heat with a splash of chicken broth. This helps restore some moisture without drying out the chicken. The microwave works in a pinch, but it will make the skin soggy. If you have an air fryer, that’s actually a great option—4 minutes at 350°F (175°C) will get the skin crispy again.
Freezer-Friendly: You can freeze the cooked chicken for up to 2 months. Wrap each piece individually in plastic wrap, then place in a freezer bag. Thaw in the refrigerator overnight and reheat as directed above.
One thing I’ve noticed: the flavors actually meld together even more after a day in the fridge. The herb butter infuses the meat, and the pan sauce gets more concentrated. It’s different from the fresh version, but really good in its own way.
Nutritional Information & Benefits
While I don’t claim to be a nutritionist, here’s a rough estimate of what’s in one serving (one chicken breast with about 1 tablespoon of pan sauce):
- Calories: Approximately 380-420
- Protein: 38-42g
- Fat: 22-26g (including 10-12g saturated fat)
- Carbohydrates: 1-2g
- Fiber: 0g
- Sugar: 0g
- Sodium: 500-600mg
This recipe is naturally low-carb and gluten-free, making it suitable for a variety of dietary preferences. Chicken breast is an excellent source of lean protein, which supports muscle health and keeps you feeling full and satisfied. The herbs aren’t just for flavor—parsley is rich in vitamins A, C, and K, while thyme has antimicrobial properties and is a good source of vitamin C.
Is this a health food? Not exactly, but it’s a balanced meal that fits into a healthy lifestyle. The butter adds richness and helps with the absorption of fat-soluble vitamins from any vegetables you serve alongside. If you’re watching your saturated fat intake, you can use half the butter or substitute with olive oil, though you’ll lose some of that signature crispy texture.
As with most things, moderation is key. This isn’t an everyday meal for me, but it’s a wonderful treat that feels indulgent without being over-the-top.
Conclusion
This crispy herb butter chicken has become my go-to spring dinner for good reason. It’s the kind of recipe that looks impressive but is secretly simple—the best kind of cooking secret to have in your back pocket. Whether you’re making it for a quiet weeknight meal or serving it to guests who think you spent hours in the kitchen, it delivers every single time.
I love that this recipe reminds me of Lisa’s kitchen that afternoon—the casual confidence of someone who knows their way around a skillet. You don’t need to be a professional chef to make this. You just need good ingredients, a hot pan, and a little patience. The rest takes care of itself.
I’d love to hear how yours turns out. Did you try a different herb combination? Serve it with something unexpected? Leave a comment below and let me know—I read every single one. And if you share it on social media, tag me so I can see your beautiful crispy chicken. Happy spring cooking!
Frequently Asked Questions
Can I use boneless, skinless chicken breasts for this recipe?
You can, but you’ll miss out on that crispy skin that makes this recipe so special. If you do use skinless breasts, reduce the cooking time by a few minutes and consider adding an extra tablespoon of butter to keep them moist. The pan sauce will still be delicious.
How do I know when the chicken is fully cooked without a meat thermometer?
If you don’t have a thermometer, pierce the thickest part of the chicken with a knife. The juices should run clear, not pink. You can also check that the meat is firm to the touch and springs back slightly when pressed. But honestly, a $10 instant-read thermometer takes all the guesswork out—I highly recommend getting one.
Can I make the herb butter ahead of time?
Absolutely! The herb butter can be made up to 3 days in advance and stored in the refrigerator. Just let it come to room temperature before using so it spreads easily. You can also roll it into a log in plastic wrap and freeze it for up to 3 months—just slice off what you need.
What if I don’t have fresh herbs?
Dried herbs work in a pinch, but use about one-third of the amount since dried herbs are more concentrated. So instead of 1 tablespoon fresh parsley, use 1 teaspoon dried. The flavor won’t be quite as bright, but it’s still good. I’ve made this with dried thyme and dried parsley in winter when fresh herbs were hard to find.
Can I double this recipe?
Yes, but cook the chicken in batches. Crowding the pan will steam the chicken instead of searing it, and you won’t get that crispy skin. Keep the first batch warm in a 200°F (93°C) oven while you cook the second batch. The pan sauce can be made all at once at the end.
PrintBest Crispy Herb Butter Chicken Recipe for Spring Dinner

This crispy herb butter chicken features a shatteringly crisp skin and juicy meat, all infused with a flavorful compound butter. It’s a simple yet impressive spring dinner that comes together in about 35 minutes.
- Prep Time: 10 minutes
- Cook Time: 25 minutes
- Total Time: 35 minutes
- Yield: 4 servings 1x
- Category: Main Course
- Cuisine: American
Ingredients
- 4 tablespoons unsalted butter, softened
- 2 cloves garlic, minced
- 1 tablespoon fresh parsley, finely chopped
- 1 tablespoon fresh chives, finely chopped
- 1 teaspoon fresh thyme leaves (or ½ teaspoon dried)
- ½ teaspoon lemon zest
- ¼ teaspoon salt
- ⅛ teaspoon black pepper
- 4 boneless, skin-on chicken breasts (about 6 ounces/170g each)
- 1 tablespoon olive oil
- ½ teaspoon salt
- ¼ teaspoon black pepper
- ¼ cup chicken broth
- 1 tablespoon fresh lemon juice
Instructions
- Make the herb butter: In a small bowl, combine the softened butter, minced garlic, parsley, chives, thyme, lemon zest, salt, and pepper. Mash together with a fork until evenly distributed. Set aside at room temperature.
- Prep the chicken: Pat the chicken breasts dry with paper towels. Season both sides generously with salt and pepper. Let them sit at room temperature for about 10 minutes.
- Heat the skillet: Place a large cast iron skillet over medium-high heat and add the olive oil. Heat until the oil shimmers.
- Sear the chicken: Place the chicken breasts skin-side down in the hot skillet. Cook undisturbed for 5-6 minutes until the skin is deep golden brown and releases easily.
- Flip and add the butter: Flip the chicken carefully with tongs. Reduce heat to medium. Divide the herb butter evenly among the chicken breasts, placing a pat on each one. Cook for another 6-8 minutes, basting occasionally with the melted butter. Chicken is done when it reaches 165°F (74°C) in the thickest part.
- Make the pan sauce: Remove the chicken to a plate and tent loosely with foil. Pour off most of the fat from the pan, leaving about a tablespoon. Place the pan back over medium heat and add the chicken broth. Scrape up the browned bits from the bottom. Let simmer for 2 minutes until slightly reduced. Stir in the lemon juice. Taste and adjust seasoning.
- Serve: Pour the pan sauce over the chicken and serve immediately.
Notes
Pat the chicken dry thoroughly for crispy skin. Let the herb butter come to room temperature before using. Use a meat thermometer to avoid overcooking. Baste the chicken frequently after adding the butter. If cooking in batches, keep the first batch warm in a 200°F (93°C) oven.
Nutrition
- Serving Size: 1 chicken breast wit
- Calories: 400
- Sodium: 550
- Fat: 24
- Saturated Fat: 11
- Carbohydrates: 1.5
- Protein: 40
Keywords: crispy herb butter chicken, spring dinner, chicken recipe, herb butter, cast iron skillet, easy chicken dinner