Love this? Save it for later!
Share the inspiration with your friends
There used to be a tiny, hole-in-the-wall café tucked behind a used bookstore on Elm Street that made the most incredible peanut butter oat energy bites. When they suddenly closed their doors two summers ago—a “for lease” sign appearing overnight—I honestly felt a little lost. That grab-and-go snack had become my Tuesday afternoon ritual, the thing that got me through the post-lunch slump without reaching for something from the vending machine. After twelve tries—some crumbly disasters, a few that were way too sticky—I finally cracked the code.
I mean, it sounds dramatic, right? Getting worked up over a no-bake snack. But these weren’t just any energy bites. They had this perfect texture—not too dry, not too sticky—with just the right balance of salty and sweet. The first batch I made at home tasted like sawdust mixed with regret. The second batch was basically peanut butter soup. But batch number seven? That’s when things got interesting. I realized the secret wasn’t in some fancy ingredient—it was in how long you let the oats soak up the moisture.
You know that feeling when you take a bite of something and it instantly transports you back to a specific moment? That’s what these easy no-bake peanut butter oat energy bites do for me. They’re not just a snack; they’re a little piece of that cozy café memory I can carry in my lunch bag. Maybe you’ve been there too—chasing a recipe that feels just out of reach, tweaking and adjusting until it finally clicks. Let me tell you, when it does, it’s worth every messy batch along the way.
Why You’ll Love This Recipe
These easy no-bake peanut butter oat energy bites have become my most-requested recipe, and for good reason. They solve the eternal snack problem: something that’s quick to make, actually satisfying, and doesn’t require turning on the oven.
- Ready in 5 Minutes: No kidding. If you can stir, you can make these. Perfect for those days when hunger strikes and you need something now.
- Simple Ingredients: You probably have everything in your pantry right now. No weird health food store finds or expensive superfood powders.
- Perfect for Meal Prep: Make a batch on Sunday and grab them all week. They’re the ultimate “I don’t want to cook but need fuel” solution.
- Crowd-Pleaser: Kids devour them. Adults pretend they’re just being healthy but secretly eat three. I’ve seen it happen.
- Unbelievably Satisfying: The combination of peanut butter, oats, and a touch of honey hits that sweet-salty spot that keeps you coming back for more.
What makes these energy bites different from the hundreds of other recipes out there? It’s the texture. I spent months perfecting the ratio of wet to dry ingredients so you get a bite that holds together without being dense or greasy. The oats stay slightly chewy, the peanut butter coats everything evenly, and the mini chocolate chips add little pockets of sweetness that make each bite interesting.
Honestly, this recipe is the kind that makes you close your eyes after the first bite. It’s comfort food disguised as a healthy snack—nutritious enough to fuel your afternoon, but delicious enough to feel like a treat. Whether you’re packing lunches for the kids, need a pre-workout boost, or just want something to get you through the 3 PM slump, these energy bites deliver every time.
What Ingredients You Will Need
This recipe relies on simple, wholesome ingredients that work together to create the perfect texture and flavor. No fancy trips to specialty stores required—everything here is a pantry staple.
- Old-Fashioned Rolled Oats (1 ½ cups / 135g): Don’t use quick oats here—they turn mushy. Old-fashioned oats give these energy bites their signature chewy texture. I prefer Bob’s Red Mill or Quaker Old-Fashioned for consistent results.
- Creamy Peanut Butter (½ cup / 130g): Natural peanut butter works, but you’ll need to stir it well and might need a touch more honey. I use Skippy Natural—it has the right consistency without separating too much. Avoid the “no-stir” varieties with added sugar and hydrogenated oils if you can.
- Honey (⅓ cup / 110g): This is your binder and sweetener. Raw honey adds more flavor complexity, but any liquid honey works. If you’re vegan, maple syrup is a perfect substitute—just note the mixture will be slightly stickier.
- Mini Chocolate Chips (⅓ cup / 60g): Mini chips distribute more evenly than regular-sized ones. I use Enjoy Life mini chips for a dairy-free option, but any brand works. Dark chocolate chips add a nice bitterness that balances the sweetness.
- Ground Flaxseed (2 tablespoons / 14g): This is my secret ingredient for better texture and a nutritional boost. It helps bind everything together and adds omega-3s. You can skip it or substitute chia seeds, but the texture will be slightly different.
- Vanilla Extract (1 teaspoon): Pure vanilla extract makes a noticeable difference. Imitation works in a pinch, but trust me—splurge on the real stuff for this one.
- Pinch of Salt (¼ teaspoon): If your peanut butter is salted, you can reduce this. But that tiny pinch of salt is what makes the flavors pop. Don’t skip it.
For the best results, make sure your peanut butter is at room temperature. Cold peanut butter doesn’t mix evenly and leaves you with streaks of dry oats. Also, if your honey is crystallized, warm it slightly in the microwave (about 10 seconds) to make it easier to stir.
Equipment Needed
The beauty of these easy no-bake peanut butter oat energy bites is that you don’t need much. Here’s what you’ll need to have on hand:
- Large Mixing Bowl: Any medium-to-large bowl works. I use a glass Pyrex bowl because it doesn’t slide around on the counter.
- Wooden Spoon or Rubber Spatula: A sturdy spoon is best for mixing the thick dough. I’ve broken a few flimsy plastic spatulas on this recipe—learn from my mistakes.
- Measuring Cups and Spoons: For accurate measurements. The peanut butter is the most important one to get right.
- Baking Sheet or Large Plate: To hold the formed energy bites while they chill. Line it with parchment paper for easy cleanup.
- Parchment Paper: Optional but helpful for preventing sticking. Wax paper works too.
- Cookie Scoop or Tablespoon: For uniform-sized bites. I use a 1-tablespoon cookie scoop—it makes the process so much faster and gives you evenly sized portions.
- Refrigerator: The most important piece of equipment! These need at least 30 minutes to set up properly.
If you don’t have a cookie scoop, just use your hands—lightly wet them first to prevent sticking. A melon baller also works in a pinch. Honestly, the only non-negotiable tool here is the mixing bowl and a spoon. This is truly a no-fuss recipe.
Preparation Method
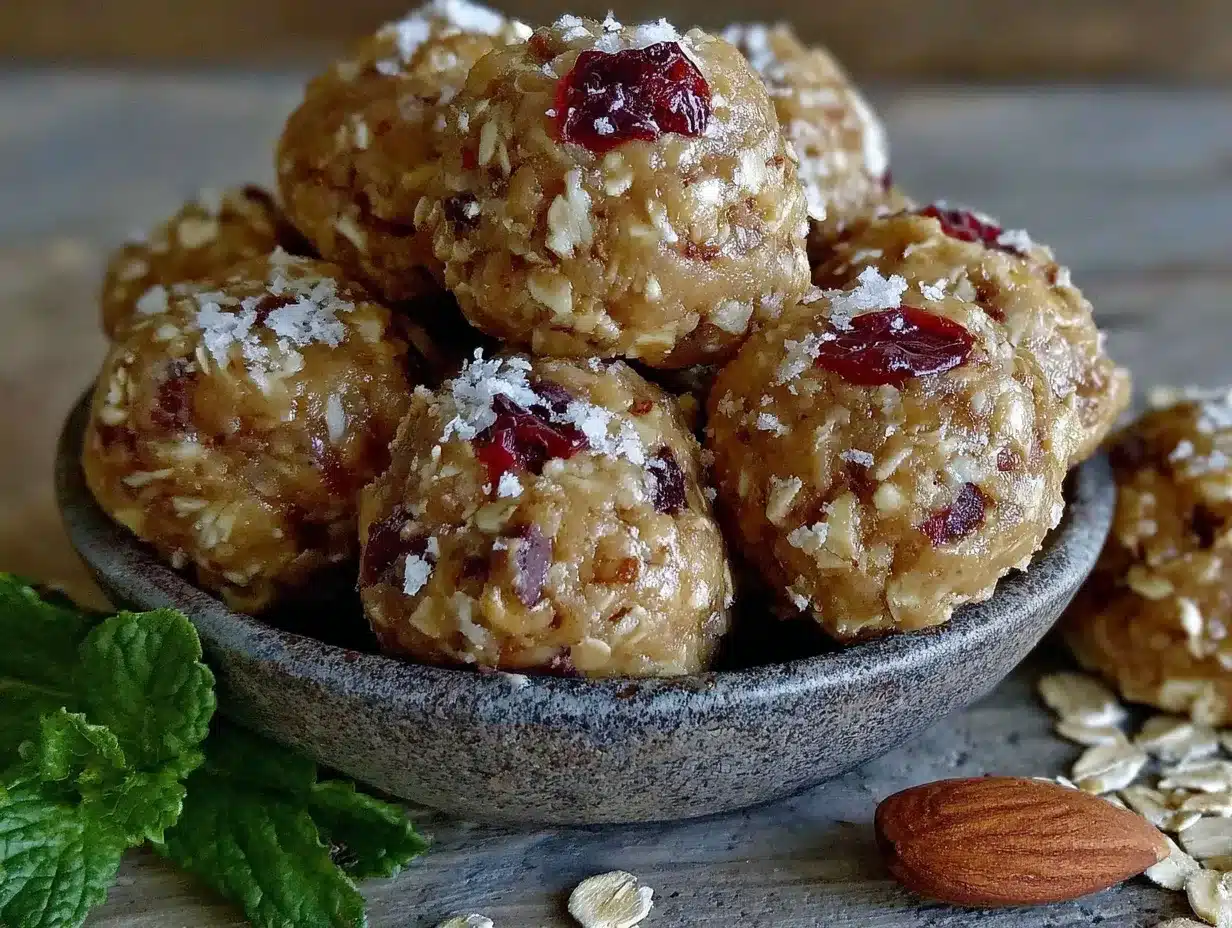
- Combine the dry ingredients. In a large mixing bowl, add the rolled oats, ground flaxseed, and salt. Give them a quick stir with your spoon to distribute everything evenly. This step takes about 30 seconds but ensures you don’t get a pocket of straight flaxseed in one bite.
- Add the wet ingredients. Spoon in the peanut butter, drizzle in the honey, and add the vanilla extract. Don’t add the chocolate chips yet—they’ll get crushed if you mix them in too early. Trust me, I learned this the hard way.
- Mix until combined. Stir everything together with your wooden spoon or spatula. At first, it’ll look like a dry, crumbly mess. Keep going. The peanut butter and honey will gradually coat the oats, and the mixture will come together. This takes about 1-2 minutes of vigorous stirring. You’re looking for a texture where everything is evenly moistened and holds together when pressed between your fingers.
- Let the mixture rest. Here’s the trick that took me multiple batches to figure out—let the mixture sit for 5 minutes. This allows the oats to absorb some of the moisture from the peanut butter and honey. The mixture will look slightly drier after resting, but it’ll hold together much better. I usually set a timer and wash a few dishes while I wait.
- Fold in the chocolate chips. After the rest period, add the mini chocolate chips and fold them in gently. Make sure they’re evenly distributed throughout the mixture. If the dough feels too dry to hold together, add a teaspoon of honey or peanut butter. If it feels too sticky, add a tablespoon of oats.
- Chill the mixture (optional but recommended). Pop the bowl in the refrigerator for 10-15 minutes. This firms up the peanut butter and makes the dough much easier to handle. If you’re in a hurry, you can skip this step, but your hands will get messy.
- Form the energy bites. Using a cookie scoop or your hands, portion out about 1 tablespoon of the mixture. Roll it between your palms to form a smooth ball. Place each ball on the parchment-lined baking sheet. If the mixture sticks to your hands, lightly wet your palms with water. You should get about 18-20 energy bites from this recipe.
- Chill to set. Refrigerate the formed energy bites for at least 30 minutes. This allows them to firm up completely. They’ll be soft but hold their shape when you pick them up. If you can wait an hour, they’ll be perfect.
Your kitchen will smell amazing at this point—like peanut butter and honey with a hint of vanilla. The hardest part is waiting for them to chill.
Cooking Tips & Techniques
After making these energy bites more times than I can count, I’ve picked up a few tricks that make a real difference. Let me save you some trial and error.
The moisture test is everything. Before you form all the balls, take a small amount of the mixture and press it together. If it crumbles apart, you need more liquid—add a teaspoon of honey or peanut butter. If it feels greasy or won’t hold a shape, add a tablespoon of oats. This two-second test saves you from ending up with a tray of sad, falling-apart bites.
Temperature matters more than you think. If your kitchen is warm (above 75°F), the peanut butter will be softer and the mixture will be stickier. In that case, definitely chill the mixture before rolling. On cooler days, you can skip the pre-chill and go straight to rolling. I learned this the hard way when I made a batch during a summer heatwave and ended up with peanut butter all over my hands.
Don’t overmix. Once the oats are evenly coated, stop stirring. Overmixing can break down the oats and give you a gummy texture. You want the oats to remain intact so each bite has that satisfying chew.
Use a cookie scoop for consistency. I know I mentioned this earlier, but it’s worth repeating. Using a 1-tablespoon scoop gives you evenly sized bites that all chill at the same rate. Plus, it makes portion control easy if you’re tracking calories or macros.
One mistake I still make sometimes: Forgetting to scrape the bottom of the bowl. The peanut butter and honey tend to settle at the bottom, so make sure you’re mixing all the way through. A rubber spatula is great for this final scrape.
Variations & Adaptations
The beauty of these easy no-bake peanut butter oat energy bites is how customizable they are. Here are some variations I’ve tried and loved:
Chocolate Peanut Butter Dream: Swap the mini chocolate chips for chopped dark chocolate and add a tablespoon of cocoa powder to the dry ingredients. You’ll need an extra teaspoon of honey to balance the bitterness. This version tastes like a healthier version of a peanut butter cup.
Tropical Twist: Replace the chocolate chips with dried pineapple or mango, chopped small. Add ¼ cup of shredded coconut to the mixture. The sweetness of the dried fruit pairs surprisingly well with the peanut butter. My sister-in-law is obsessed with this version.
Crunchy Nut Butter Swap: Use crunchy peanut butter instead of creamy for added texture. You can also try almond butter or sunflower seed butter for a different flavor profile. If using sunflower seed butter, note that it reacts with baking soda (not relevant here, but good to know for other recipes) and can turn green—it’s harmless but looks weird.
Vegan Version: Substitute the honey with maple syrup or agave nectar. Use dairy-free chocolate chips. The texture will be slightly different—maple syrup is thinner than honey—so you might need an extra tablespoon of oats to compensate.
Protein-Packed Bites: Add 2 tablespoons of vanilla or chocolate protein powder. Reduce the oats by 2 tablespoons to keep the moisture balance. This version is great post-workout and keeps you full longer.
Spiced Apple Cinnamon: Replace the chocolate chips with ¼ cup of dried apples (chopped small) and add ½ teaspoon of cinnamon and a pinch of nutmeg. This fall-inspired version is incredible with a cup of hot tea.
Serving & Storage Suggestions
These energy bites are best served cold or at room temperature. I prefer them straight from the fridge—they’re firmer and the chocolate chips have a satisfying snap. If you’re packing them for lunch, they’ll soften slightly by the time you eat them, which is also delicious.
Storage: Place the energy bites in an airtight container, layered between sheets of parchment paper if stacking. They’ll keep in the refrigerator for up to 2 weeks. In my house, they never last that long, but theoretically, they’re good for two weeks.
Freezer Instructions: These freeze beautifully. Arrange the bites on a baking sheet and freeze until solid (about 1 hour), then transfer to a freezer-safe bag or container. They’ll keep for up to 3 months. You can eat them frozen—they’re like little peanut butter ice cream bites—or let them thaw for 10 minutes at room temperature.
Packing for On-the-Go: For lunchboxes or hiking snacks, I wrap individual bites in small pieces of parchment paper or place them in a small container. They’re sturdy enough to survive being tossed in a bag, unlike some other no-bake snacks that get mushy.
Flavor Development: Here’s something interesting—these energy bites actually taste better after a day or two in the fridge. The flavors meld together, and the oats soften just enough to create a more cohesive texture. So if you can resist eating them all on day one, you’re in for a treat on day two.
Serving Suggestions: Pair these with a glass of cold milk, a cup of coffee, or a smoothie for a complete snack. They’re also great crumbled over yogurt or oatmeal for added texture and flavor.
Nutritional Information & Benefits
Per serving (1 energy bite, based on 20 bites total):
| Nutrient | Amount |
|---|---|
| Calories | ~120 kcal |
| Total Fat | 6g |
| Saturated Fat | 1.5g |
| Carbohydrates | 14g |
| Fiber | 2g |
| Sugar | 8g |
| Protein | 4g |
These energy bites pack a surprising nutritional punch. The oats provide complex carbohydrates for sustained energy, while the peanut butter adds protein and healthy fats that keep you full. The flaxseed contributes omega-3 fatty acids and extra fiber—great for digestion and heart health.
This recipe is naturally vegetarian and can easily be made vegan with the substitutions mentioned above. It’s also gluten-free if you use certified gluten-free oats. The main allergen to be aware of is peanuts, but swapping in sunflower seed butter or soy nut butter makes them school-safe for nut-free zones.
I love that these energy bites feel like a treat but actually fuel my body. They’re my go-to afternoon snack when I need something that won’t cause a sugar crash later. The protein and fiber combo keeps my energy steady, which is something I really appreciate on long writing days.
Conclusion
These easy no-bake peanut butter oat energy bites are proof that the best snacks don’t require complicated techniques or fancy ingredients. They’re simple, honest, and deeply satisfying—the kind of recipe that becomes a staple in your rotation because it just works.
I love that I can make a batch in the time it takes to brew a pot of coffee, and then have snacks ready for the whole week. Whether you’re packing lunchboxes, fueling a hike, or just need something to get you through the afternoon slump, these energy bites deliver every single time.
Don’t be afraid to play around with the add-ins and make this recipe your own. Swap the chocolate chips for dried cranberries, add a tablespoon of chia seeds, or throw in some chopped nuts. The base recipe is forgiving and welcomes experimentation.
I’d love to hear how your batch turns out! Drop a comment below and let me know what variations you tried. Did you add coconut? Use almond butter? Make them for your kids’ lunchboxes? Share your experience—your twist might inspire someone else’s next batch. Happy snacking!
Frequently Asked Questions
Can I use quick oats instead of old-fashioned rolled oats?
You can, but the texture will be different. Quick oats are more finely chopped and will absorb moisture faster, resulting in a softer, less chewy bite. If that’s what you prefer, go for it—just reduce the rest time to 2-3 minutes instead of 5.
My mixture is too dry. What did I do wrong?
This usually happens if your peanut butter is too thick or if you measured the oats generously. Add a tablespoon of honey or peanut butter at a time until the mixture holds together when pressed. You can also add a teaspoon of melted coconut oil for extra moisture.
How long do these energy bites last at room temperature?
They’re best refrigerated, but they’ll be fine at room temperature for up to 24 hours. If you’re packing them for a day trip or lunch, they’ll hold up without refrigeration. Just don’t leave them in a hot car—the chocolate chips will melt and the texture will suffer.
Can I make these without chocolate chips?
Absolutely! The chocolate chips are optional. You can replace them with dried fruit (raisins, cranberries, chopped dates), seeds (sunflower, pumpkin), or chopped nuts. The recipe is very flexible, so feel free to use whatever you have on hand.
Why did my energy bites turn out greasy?
This usually means your peanut butter is too oily. Natural peanut butters separate, and if you don’t stir them well before measuring, you end up with mostly oil. Next time, stir your peanut butter thoroughly before measuring. If your batch is already greasy, add a tablespoon of oats or flaxseed to absorb the excess oil.
Pin This Recipe!
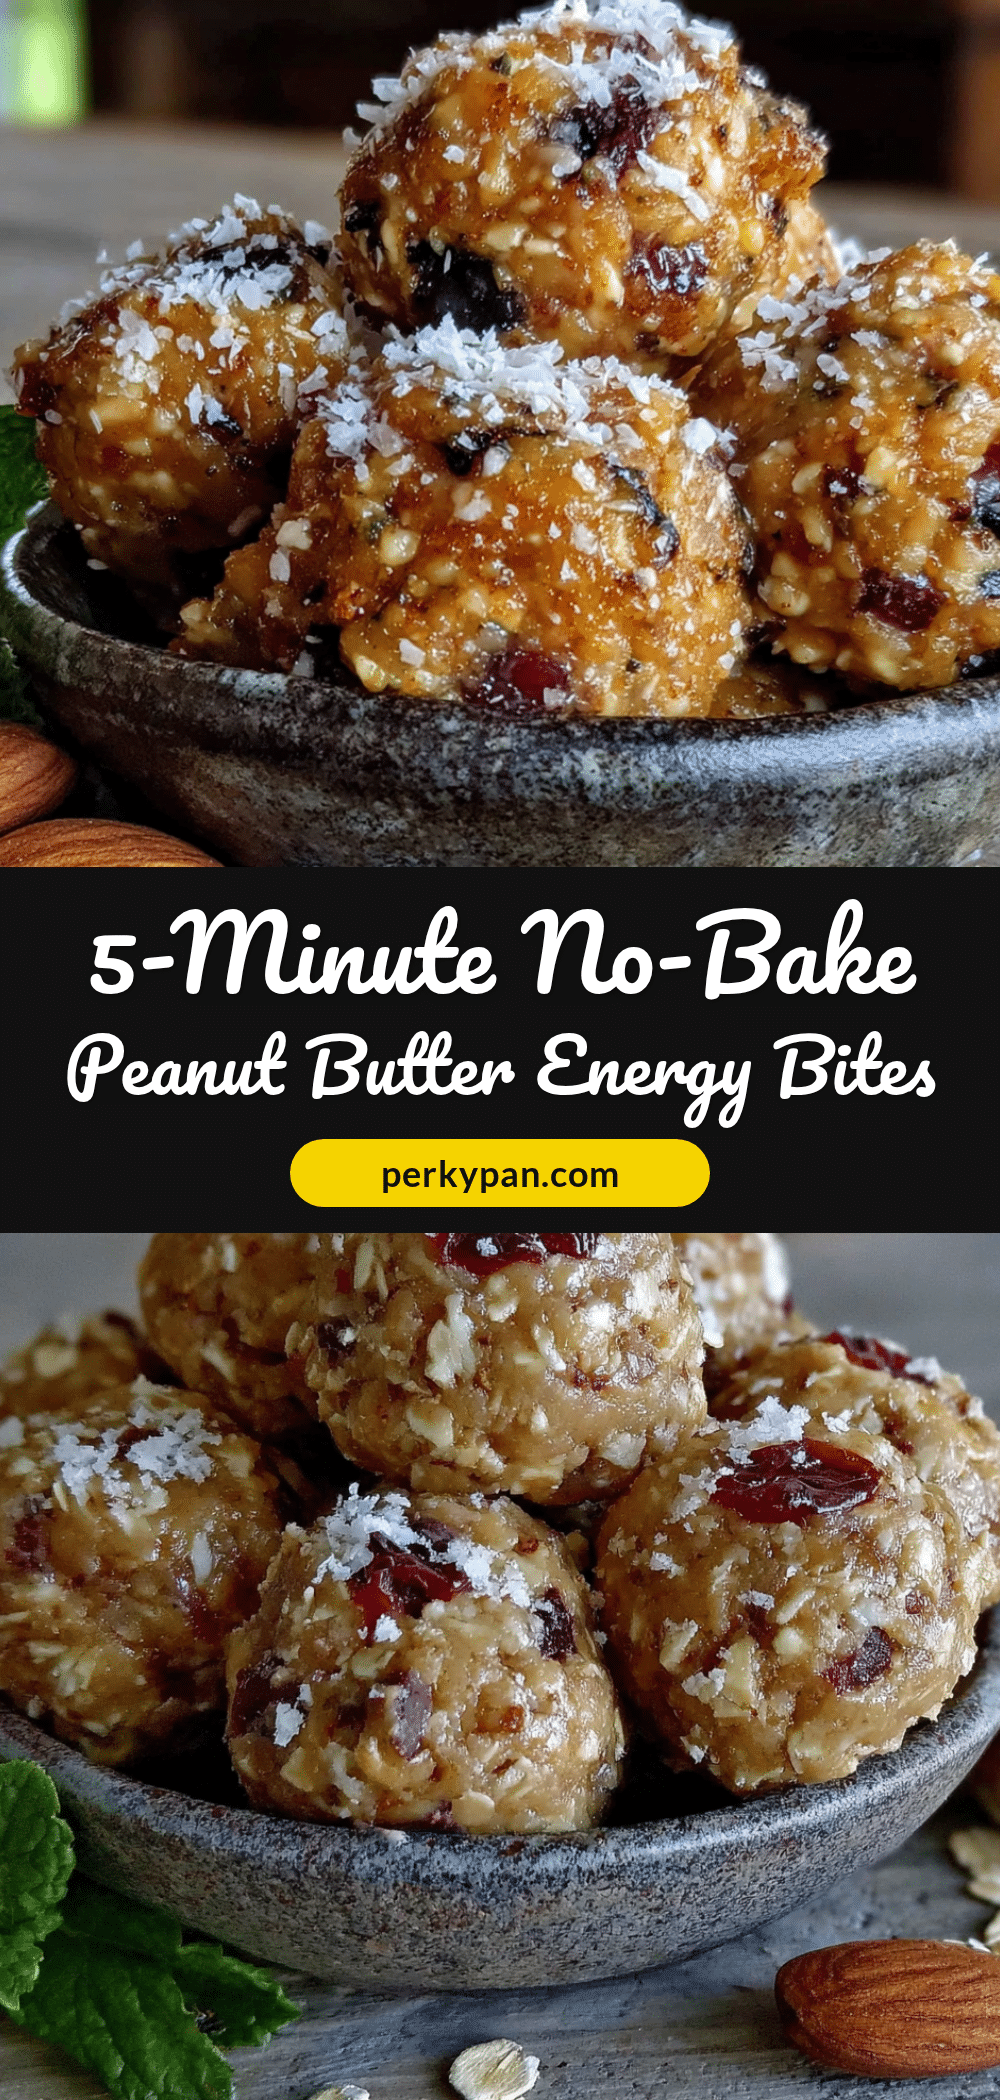
Easy No-Bake Peanut Butter Oat Energy Bites: Best 5-Minute Snack

These easy no-bake peanut butter oat energy bites are the perfect 5-minute snack, combining simple pantry ingredients for a satisfying, chewy texture. They’re ideal for meal prep, lunchboxes, or a quick energy boost.
- Prep Time: 5 minutes
- Cook Time: 0 minutes
- Total Time: 35 minutes (includes chilling)
- Yield: 18-20 servings 1x
- Category: Snack
- Cuisine: American
Ingredients
- 1 ½ cups (135g) old-fashioned rolled oats
- ½ cup (130g) creamy peanut butter
- ⅓ cup (110g) honey
- ⅓ cup (60g) mini chocolate chips
- 2 tablespoons (14g) ground flaxseed
- 1 teaspoon vanilla extract
- ¼ teaspoon salt
Instructions
- Combine the dry ingredients: In a large mixing bowl, add the rolled oats, ground flaxseed, and salt. Stir to distribute evenly.
- Add the wet ingredients: Spoon in the peanut butter, drizzle in the honey, and add the vanilla extract. Do not add chocolate chips yet.
- Mix until combined: Stir vigorously for 1-2 minutes until the mixture is evenly moistened and holds together when pressed.
- Let the mixture rest: Allow the mixture to sit for 5 minutes so the oats absorb moisture.
- Fold in the chocolate chips: After resting, gently fold in the mini chocolate chips until evenly distributed. If too dry, add a teaspoon of honey or peanut butter; if too sticky, add a tablespoon of oats.
- Chill the mixture (optional but recommended): Refrigerate the bowl for 10-15 minutes to firm up the dough.
- Form the energy bites: Using a cookie scoop or your hands, portion about 1 tablespoon of mixture and roll into smooth balls. Place on a parchment-lined baking sheet. You should get about 18-20 bites.
- Chill to set: Refrigerate the formed bites for at least 30 minutes to firm up completely.
Notes
For best texture, use old-fashioned rolled oats, not quick oats. Let the mixture rest for 5 minutes before adding chocolate chips. Chill the mixture before rolling if your kitchen is warm. These energy bites taste even better after a day in the fridge.
Nutrition
- Serving Size: 1 energy bite
- Calories: 120
- Sugar: 8
- Sodium: 50
- Fat: 6
- Saturated Fat: 1.5
- Carbohydrates: 14
- Fiber: 2
- Protein: 4
Keywords: no-bake energy bites, peanut butter oat bites, healthy snack, 5-minute snack, meal prep snack, no-bake snack, energy balls


