Love this? Save it for later!
Share the inspiration with your friends
My neighbor wasn’t trying to impress anyone. I’d stopped by to borrow a ladder—our gutters were clogged and I was convinced I could handle it myself—and the smell hit me before I even got to her front door. It was warm, nutty, and sweet in a way that made my stomach actually growl. Embarrassing, honestly. She opened the door holding a cooling rack stacked with little cookies topped with dark chocolate kisses, and she just shrugged when I asked what they were. “Oh, those? Just some peanut butter blossoms. My kids go through them like crazy.” Just some peanut butter blossoms. Like it was nothing. But let me tell you, I stood there holding that ladder for twenty minutes while she wrapped up a plate for me to take home. That’s how good they were. I’ve been making my own version ever since, and I think I’ve finally nailed it—especially swapping in dark chocolate kisses, because honestly, that little bitter edge makes the sweet peanut butter cookie sing. Maybe you’ve been there, standing in someone else’s kitchen, realizing you’re about to ask for a recipe you didn’t even know you needed. That’s exactly what happened to me. And now, every time I bake these, I think of that afternoon and my neighbor’s casual genius in the kitchen.
Why You’ll Love This Recipe
Let’s be real—finding a cookie that pleases everyone at the table, from the picky preschooler to the health-conscious spouse, feels like a small miracle. These dark chocolate peanut butter blossom cookies are that miracle. I’ve tested this recipe at least a dozen times, tweaking the flour ratio and the chill time until it was just right. Here’s why I think you’ll fall for them too:
- Quick & Easy: From mixing bowl to cooling rack in under 45 minutes. No complicated techniques, no stand mixer required. Your hand mixer or even a sturdy wooden spoon will do the job.
- Simple Ingredients: You probably have most of these in your pantry right now. Butter, sugar, peanut butter, flour, eggs—the usual suspects. The only special item is the dark chocolate kisses, and those are easy to find at any grocery store.
- Perfect for Family Baking: This is the kind of recipe you can make with little hands helping. Rolling dough balls? Kids love that part. Pressing the chocolate kisses in at the end? That’s the grand finale they’ll fight over.
- Crowd-Pleaser: I’ve brought these to school bake sales, potlucks, and holiday cookie swaps. They disappear fast. Adults love the dark chocolate twist, and kids just love the cookie.
- Unbelievably Delicious: The combination of soft, chewy peanut butter cookie with that smooth, slightly bitter dark chocolate kiss is pure comfort. It’s the kind of cookie that makes you close your eyes after the first bite—I’m not kidding.
What makes this version different? It’s the dark chocolate. Most recipes call for milk chocolate kisses, which are sweet on sweet. By using dark chocolate, you get this beautiful balance—the salty-sweet peanut butter cookie meets a rich, less sugary chocolate. It’s a small swap that makes a big difference. Plus, I’ve fine-tuned the dough to stay soft in the center while getting just a little crisp around the edges. Trust me, this isn’t just another peanut butter blossom recipe. It’s the one you’ll keep coming back to.
What Ingredients You Will Need
This recipe uses simple, honest ingredients that come together to create something truly special. Most of these are pantry staples, which makes these cookies perfect for those after-school baking cravings or last-minute holiday treats.
For the Cookie Dough
- 1/2 cup (113g) unsalted butter, softened — I like using Land O’Lakes or Kerrygold for the best flavor. Make sure it’s truly softened to room temperature, not melted.
- 1/2 cup (100g) granulated sugar — This adds sweetness and helps the cookies spread just the right amount.
- 1/2 cup (110g) packed light brown sugar — The brown sugar adds moisture and a subtle molasses flavor that pairs beautifully with peanut butter.
- 1/2 cup (130g) creamy peanut butter — Use a standard brand like Jif or Skippy for best results. Natural peanut butter that separates can make the cookies greasy and crumbly. I learned that the hard way.
- 1 large egg, room temperature — Cold eggs can seize the butter, so let yours sit out for 20 minutes before starting.
- 1 teaspoon vanilla extract — Pure vanilla extract makes a difference. Imitation works in a pinch, but the real stuff is worth it here.
- 1 1/2 cups (190g) all-purpose flour — Spoon and level your flour. Scooping directly from the bag packs it down and gives you too much, which makes dry cookies.
- 1 teaspoon baking soda — This helps the cookies puff up and get that nice, soft texture.
- 1/2 teaspoon salt — Salt balances the sweetness and enhances the peanut butter flavor. If you use salted butter, reduce this to 1/4 teaspoon.
For the Topping
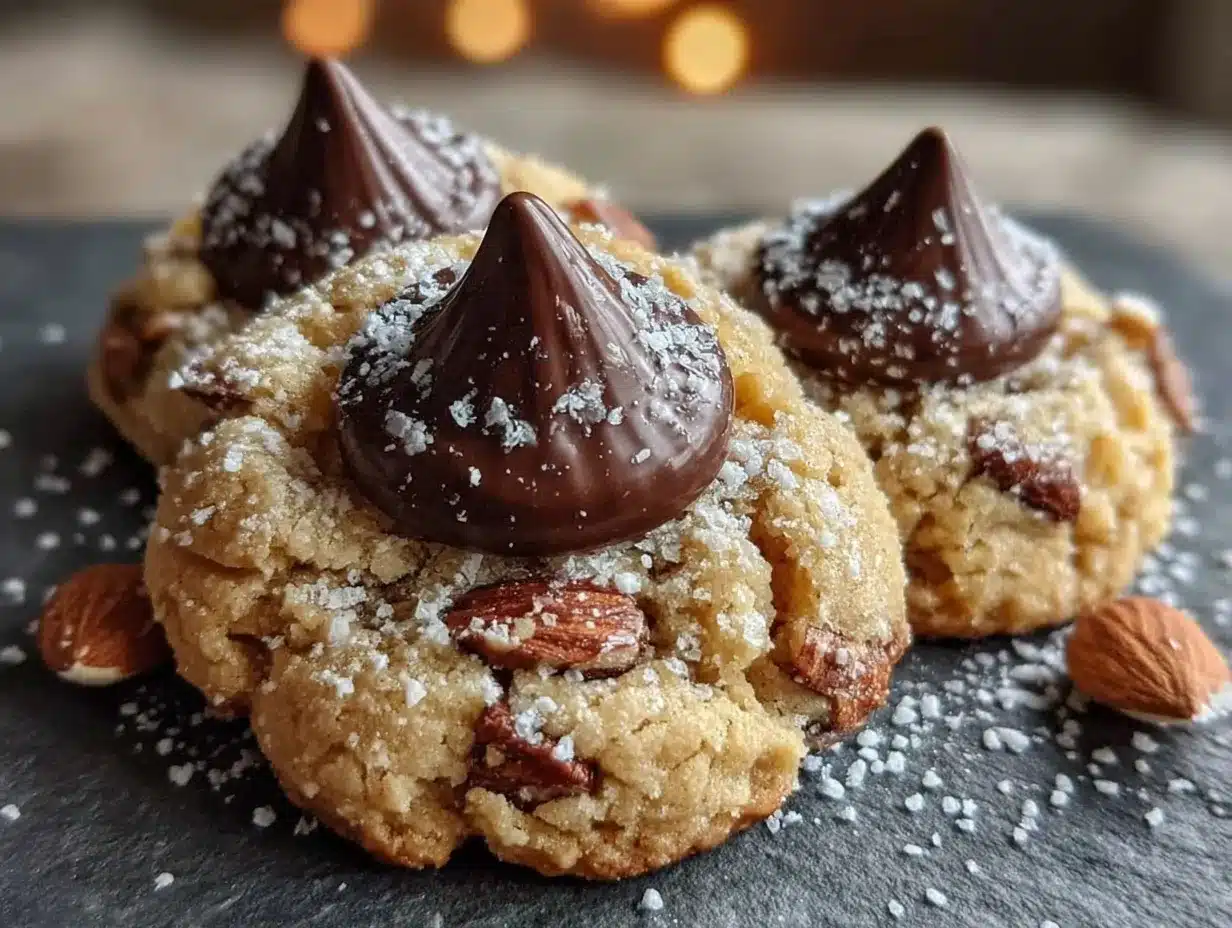
- 36-40 dark chocolate kisses, unwrapped — Hershey’s Dark Chocolate Kisses are my go-to. You can also use milk chocolate or white chocolate kisses if that’s what your family prefers. The dark chocolate just gives that grown-up edge.
- 1/4 cup (50g) granulated sugar, for rolling — This gives the cookies that classic sparkly exterior and a little crunch.
Ingredient Selection Tips: For the best texture, use a peanut butter that’s creamy and doesn’t have added oil on top. I’ve tried this with crunchy peanut butter too, and it works—just expect little bits of peanut in every bite. If you’re using natural peanut butter, stir it really well and add an extra tablespoon of flour to compensate for the extra oil.
Substitution Guidance: Need a dairy-free option? Use vegan butter sticks (like Country Crock Plant Butter) in place of regular butter. For a gluten-free version, swap the all-purpose flour with a 1:1 gluten-free baking flour blend. I’ve tested both, and they work surprisingly well.
Equipment Needed
You don’t need a fancy kitchen to make these cookies. Here’s what you’ll need:
- Large mixing bowl — Any bowl will do, but a wide one makes mixing easier.
- Electric hand mixer or stand mixer — A hand mixer is perfect. You can also mix by hand with a wooden spoon, but it takes a bit more elbow grease.
- Measuring cups and spoons — Accurate measurements matter in baking. Use dry measuring cups for flour and sugar.
- Baking sheets — I use two rimmed baking sheets. If you only have one, let it cool completely between batches.
- Parchment paper or silicone baking mats — These prevent sticking and make cleanup a breeze. I prefer parchment because it’s cheap and disposable.
- Cooling rack — Essential for letting the cookies cool evenly. If you don’t have one, a clean kitchen towel works in a pinch.
- Small bowl — For the rolling sugar.
- Cookie scoop (about 1.5 tablespoons) — Not required, but it makes uniform cookies. I use a #40 scoop.
Budget-Friendly Options: Don’t have a cookie scoop? Use two spoons to portion the dough. No parchment paper? Grease the baking sheet lightly with butter or cooking spray. The cookies might spread a tiny bit more, but they’ll still taste great.
Preparation Method
Let’s get baking. This recipe makes about 36 cookies, give or take a few depending on how big you roll them.
- Preheat your oven to 375°F (190°C). Line two baking sheets with parchment paper or silicone mats. This is your first step—getting the oven hot means it’s ready when your dough is.
- Cream the butter and sugars. In a large mixing bowl, beat the softened butter, granulated sugar, and brown sugar together until light and fluffy. This takes about 2-3 minutes with a hand mixer on medium speed. You’ll see the mixture turn pale and increase in volume. Don’t rush this step—proper creaming creates air pockets that make cookies tender.
- Add the peanut butter, egg, and vanilla. Beat in the peanut butter until smooth, then add the egg and vanilla extract. Mix until just combined. Scrape down the sides of the bowl with a spatula. The mixture should look thick, creamy, and smell amazing already.
- Whisk the dry ingredients. In a separate small bowl, whisk together the flour, baking soda, and salt. This ensures the baking soda is evenly distributed so your cookies rise uniformly.
- Combine wet and dry. Gradually add the flour mixture to the wet ingredients, mixing on low speed. Stop as soon as the flour disappears—overmixing develops gluten and makes tough cookies. The dough will be soft and slightly sticky. That’s perfect.
- Chill the dough (optional but helpful). If your kitchen is warm or the dough feels too sticky to handle, pop it in the fridge for 20 minutes. This makes rolling easier and prevents the cookies from spreading too much. I usually skip this step in winter and do it in summer.
- Shape the cookies. Scoop about 1.5 tablespoons of dough (roughly the size of a walnut) and roll it into a smooth ball between your palms. Roll each ball in the bowl of granulated sugar until coated. Place the sugar-coated balls on the prepared baking sheets, spacing them about 2 inches apart. They will spread, so give them room.
- Bake the cookies. Slide one sheet into the oven and bake for 10-12 minutes. The cookies should look puffed, lightly golden around the edges, and slightly cracked on top. They will look underdone in the center—that’s exactly what you want. Overbaking makes them dry.
- Add the chocolate kisses immediately. This part requires speed. As soon as the cookies come out of the oven, gently press one dark chocolate kiss into the center of each cookie. Press until the cookie cracks slightly around the edges. The heat from the cookie will soften the chocolate just enough to hold it in place. Work quickly while the cookies are hot.
- Cool completely. Let the cookies sit on the baking sheet for 5 minutes—this allows them to set up. Then transfer them to a cooling rack to cool completely. The chocolate will firm up as they cool. If you try to move them too soon, the kisses might slide off.
Personal Tip: I always bake one sheet at a time on the middle rack. Baking two sheets at once can lead to uneven browning. While one batch bakes, I roll the next batch of dough balls. It keeps the workflow smooth.
Cooking Tips & Techniques
After making these dark chocolate peanut butter blossom cookies more times than I can count, I’ve picked up a few tricks that make a real difference.
Don’t overbake. This is the number one mistake I see. Peanut butter cookies can go from perfectly soft to dry and crumbly in about 60 seconds. Pull them out when they look puffed and just barely golden on the edges. The centers should still look soft and a little underdone. They’ll continue baking on the hot sheet while the kisses go on.
Use room temperature ingredients. Cold butter doesn’t cream properly, and cold egg can make the batter seize. I’ve made this recipe with cold butter out of desperation, and the cookies were flat and greasy. Let your butter and egg sit out for 30 minutes before starting. It’s worth the wait.
Press the kisses in gently but firmly. You want the chocolate to sit snugly in the cookie, but if you press too hard, the cookie will crack into pieces. I press until I feel the cookie give slightly, then stop. The heat does the rest of the work.
Unwrap kisses while the cookies bake. This is a time-saver I wish I’d thought of sooner. While your first batch is in the oven, unwrap all the kisses. Nothing is more stressful than fumbling with foil wrappers while hot cookies are waiting. I set up a little assembly line of unwrapped kisses on a plate.
Chill if needed. If your dough feels sticky or your kitchen is warm, chill the dough for 20 minutes. This prevents the cookies from spreading into flat disks. I learned this after a summer baking session where my cookies turned into peanut butter pancakes. Still delicious, but not pretty.
Use a cookie scoop for uniform size. Uniform cookies bake evenly. If you have bigger and smaller cookies on the same sheet, some will be overdone while others are underdone. A simple cookie scoop solves this problem.
Variations & Adaptations
One of the best things about this recipe is how easy it is to tweak. Here are some variations I’ve tried and loved:
Dietary Variations
- Gluten-Free: Substitute the all-purpose flour with a 1:1 gluten-free baking flour blend. I’ve used Bob’s Red Mill and King Arthur brands with great results. The cookies might be slightly more delicate, so handle them gently.
- Dairy-Free: Use vegan butter sticks and dairy-free chocolate kisses. Enjoy Life makes good dairy-free chocolate options. The cookies turn out a tiny bit softer, but the flavor is still spot-on.
- Lower Sugar: Reduce the granulated sugar to 1/4 cup and the brown sugar to 1/3 cup. The cookies will be less sweet, which lets the peanut butter and dark chocolate shine. They’re still plenty tasty for a lunchbox treat.
Flavor Twists
- Chocolate Peanut Butter Blossoms: Add 1/4 cup cocoa powder to the flour mixture. You’ll get a double-chocolate-peanut butter situation that’s absolutely decadent.
- Spiced Peanut Butter Cookies: Add 1/2 teaspoon cinnamon and a pinch of nutmeg to the dry ingredients. It gives the cookies a cozy, almost snickerdoodle-like warmth.
- Sea Salt Finish: Sprinkle a tiny pinch of flaky sea salt on top of each chocolate kiss after pressing it in. The salt enhances both the chocolate and the peanut butter. This is my personal favorite variation.
Different Kisses
Don’t limit yourself to dark chocolate. Milk chocolate kisses are the classic choice, and white chocolate kisses make these cookies look beautiful on a holiday platter. I’ve even used caramel-filled kisses for a gooey surprise in the middle. Just keep in mind that different chocolates melt at different rates, so work quickly.
Serving & Storage Suggestions
These cookies are best served at room temperature, when the peanut butter cookie is soft and chewy and the dark chocolate kiss has firmed up just enough to hold its shape but still melts on your tongue. I like to arrange them on a simple white platter—the contrast between the golden cookie and the dark chocolate is so pretty.
What to Serve With Them: A cold glass of milk is the classic pairing, and for good reason. The milk balances the richness of the cookie. For adults, these cookies are wonderful with a cup of hot coffee or a glass of cold brew. The bitterness of the coffee plays off the sweet cookie beautifully.
Storage Instructions: Store these cookies in an airtight container at room temperature for up to 5 days. I layer them with parchment paper between the layers to prevent the chocolate from sticking together. They stay soft and delicious for days—if they last that long.
Freezer Instructions: These cookies freeze beautifully. Place the cooled cookies in a single layer on a baking sheet and freeze until solid, about 1 hour. Then transfer them to a freezer-safe bag or container. They’ll keep for up to 3 months. To thaw, just let them sit at room temperature for about 20 minutes. The chocolate might get a little condensation on it, but the flavor is still perfect.
Reheating Tips: If you like your cookies warm, pop one in the microwave for about 10 seconds. The cookie softens and the chocolate gets slightly melty. It’s a dangerous habit, honestly—I can’t eat just one this way.
Flavor Development: These cookies actually taste even better the day after baking. The flavors meld together, and the cookie softens slightly. If you can resist eating them all on day one, you’ll be rewarded on day two.
Nutritional Information & Benefits
Let’s be honest—cookies are a treat, and these are meant to be enjoyed in moderation. But there are a few bright spots worth mentioning.
Estimated Nutritional Values (per cookie): Approximately 130 calories, 7g fat, 16g carbohydrates, 3g protein, 9g sugar. These numbers are estimates and will vary based on specific brands and ingredient substitutions.
Health Benefits of Key Ingredients: Peanut butter provides protein and healthy fats that help keep you full. Dark chocolate contains antioxidants and has less sugar than milk chocolate. The butter and eggs add a small amount of vitamin A and B vitamins. Is this a health food? No. But it’s a cookie made with real ingredients, and there’s something to be said for that.
Dietary Considerations: This recipe contains peanuts, wheat (gluten), dairy, and eggs. For those with allergies, see the variations section above for suitable substitutions. This recipe can be made gluten-free and dairy-free with simple swaps.
Personal Wellness Perspective: I believe in the joy of baking and sharing food. One cookie with your afternoon tea or coffee is a small pleasure that makes life a little sweeter. Balance is key—enjoy these cookies, share them with people you love, and don’t feel guilty about it.
Conclusion
These dark chocolate peanut butter blossom cookies have become a staple in my kitchen, and I think they’ll become one in yours too. They’re simple enough for a Tuesday afternoon bake with the kids, yet special enough for a holiday cookie tray. The combination of soft, chewy peanut butter cookie with that rich, dark chocolate kiss is honestly irresistible. I’ve shared this recipe with friends, neighbors, and my sister (who now makes them for every family gathering), and the feedback is always the same: “These are the best peanut butter blossoms I’ve ever had.”
I hope you give this recipe a try. Don’t be afraid to make it your own—swap the chocolate, add some cinnamon, or go crazy with the sea salt. That’s the beauty of baking. And when you make them, I’d love to hear how they turned out. Drop a comment below and let me know if your family loved them as much as mine does. Did you try a fun variation? Did the kids help roll the dough balls? Share your story—I read every comment and I love hearing from you.
Happy baking, friends. Here’s to cookies that bring people together.
Frequently Asked Questions
Can I use natural peanut butter in this recipe?
You can, but it might change the texture. Natural peanut butter has more oil, which can make the cookies greasy and cause them to spread more. If you use natural peanut butter, stir it really well and consider adding an extra tablespoon of flour. For best results, stick with a standard creamy peanut butter like Jif or Skippy.
Why did my cookies spread too much?
This usually happens for one of three reasons: the butter was too soft or melted, the dough wasn’t chilled, or the baking sheet was too warm. Make sure your butter is softened but not melted, chill the dough for 20 minutes if your kitchen is warm, and let your baking sheet cool completely between batches.
Can I freeze the cookie dough instead of baked cookies?
Absolutely! Roll the dough into balls, roll them in sugar, and place them on a baking sheet in the freezer until solid. Transfer the frozen dough balls to a freezer bag. When you’re ready to bake, place them on a baking sheet and add 1-2 minutes to the baking time. No need to thaw first.
How do I keep the chocolate kisses from melting completely?
The key is pressing the kisses in immediately after baking, not while the cookies are still in the oven. The residual heat from the cookie is enough to soften the chocolate and make it stick, but not enough to melt it into a puddle. Let the cookies cool on the baking sheet for 5 minutes before moving them to a cooling rack.
Can I make these cookies ahead of time for a party?
Yes, and I actually recommend it. These cookies taste even better the next day. Bake them up to two days in advance and store them in an airtight container at room temperature. You can also freeze them for up to three months. Just thaw at room temperature before serving.
Pin This Recipe!
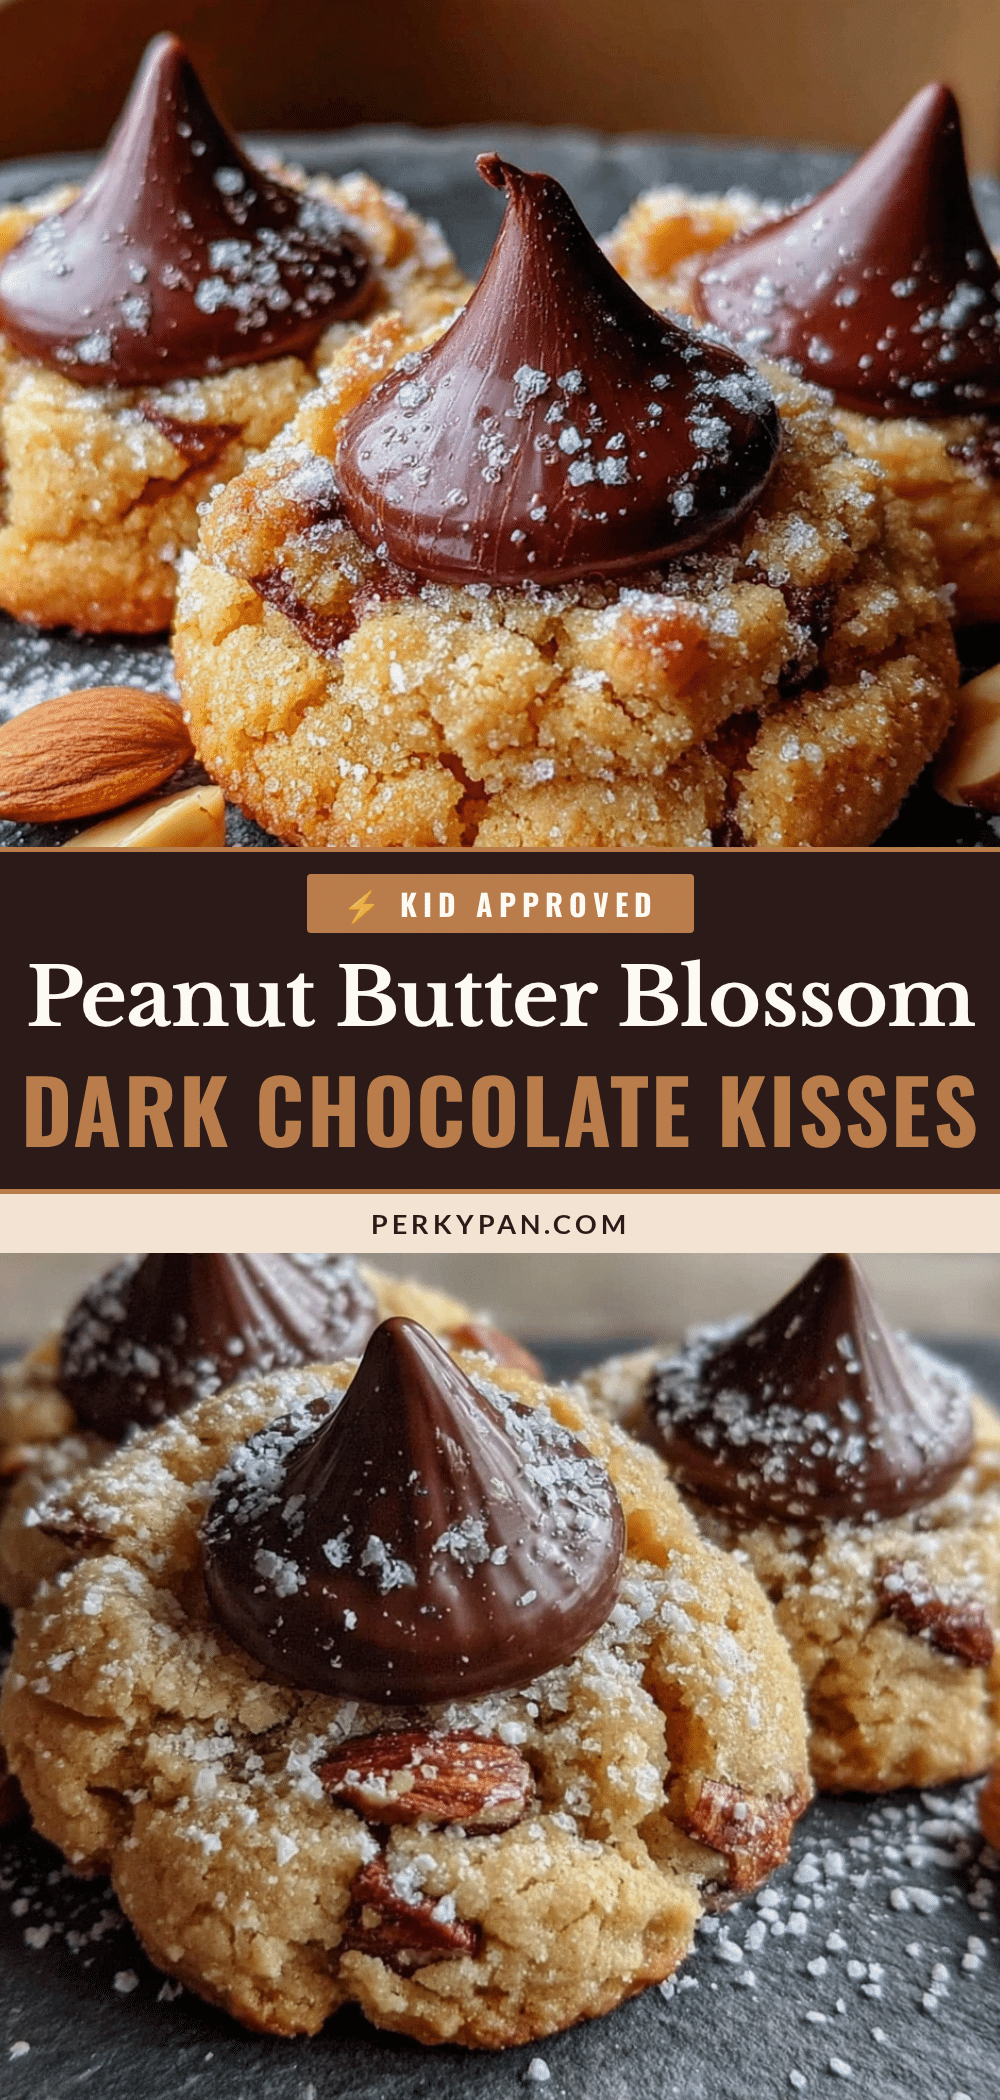
Best Dark Chocolate Peanut Butter Blossom Cookies – Easy Recipe
These dark chocolate peanut butter blossom cookies are soft, chewy, and topped with a rich dark chocolate kiss. They’re quick to make with simple ingredients and perfect for family baking, potlucks, or holiday cookie swaps.
- Prep Time: 15 minutes
- Cook Time: 12 minutes
- Total Time: 45 minutes
- Yield: 36 cookies 1x
- Category: Dessert
- Cuisine: American
Ingredients
- 1/2 cup (113g) unsalted butter, softened
- 1/2 cup (100g) granulated sugar
- 1/2 cup (110g) packed light brown sugar
- 1/2 cup (130g) creamy peanut butter (e.g., Jif or Skippy)
- 1 large egg, room temperature
- 1 teaspoon vanilla extract
- 1 1/2 cups (190g) all-purpose flour
- 1 teaspoon baking soda
- 1/2 teaspoon salt
- 36–40 dark chocolate kisses, unwrapped (e.g., Hershey’s Dark Chocolate Kisses)
- 1/4 cup (50g) granulated sugar, for rolling
Instructions
- Preheat your oven to 375°F (190°C). Line two baking sheets with parchment paper or silicone mats.
- In a large mixing bowl, beat the softened butter, granulated sugar, and brown sugar together until light and fluffy, about 2-3 minutes with a hand mixer on medium speed.
- Beat in the peanut butter until smooth, then add the egg and vanilla extract. Mix until just combined. Scrape down the sides of the bowl.
- In a separate small bowl, whisk together the flour, baking soda, and salt.
- Gradually add the flour mixture to the wet ingredients, mixing on low speed until just combined. The dough will be soft and slightly sticky.
- If the dough feels too sticky, chill it in the fridge for 20 minutes.
- Scoop about 1.5 tablespoons of dough and roll into a smooth ball. Roll each ball in the bowl of granulated sugar until coated. Place on prepared baking sheets, spacing them about 2 inches apart.
- Bake one sheet at a time on the middle rack for 10-12 minutes, until puffed and lightly golden around the edges. The centers should look soft and slightly underdone.
- Immediately after removing from the oven, gently press one dark chocolate kiss into the center of each cookie until the cookie cracks slightly around the edges.
- Let the cookies sit on the baking sheet for 5 minutes, then transfer to a cooling rack to cool completely.
Notes
For best results, use creamy peanut butter like Jif or Skippy. Natural peanut butter may cause greasier cookies. If using natural peanut butter, stir well and add an extra tablespoon of flour. Chill dough if kitchen is warm to prevent spreading. Unwrap kisses while cookies bake to save time. Bake one sheet at a time for even browning. Cookies taste even better the next day.
Nutrition
- Serving Size: 1 cookie
- Calories: 130
- Sugar: 9
- Sodium: 85
- Fat: 7
- Saturated Fat: 3
- Carbohydrates: 16
- Fiber: 1
- Protein: 3
Keywords: peanut butter blossoms, dark chocolate cookies, easy cookie recipe, peanut butter cookies, chocolate kiss cookies, holiday cookies, bake sale cookies


