Love this? Save it for later!
Share the inspiration with your friends
My husband swore he hated candy corn. For years. Like, a solid decade of wrinkling his nose every time a little orange-and-yellow triangle appeared near Halloween. He’d launch into this whole speech about how it tasted like sweetened wax, how it had no business being in a dessert, and how only children with questionable taste buds actually enjoyed it. Honestly, I believed him. I mean, candy corn isn’t exactly gourmet chocolate, right? I’d buy a bag every October mostly for decoration, not for eating.
Then last Tuesday happened. I was in a rush—like, one of those weeknights where you’re staring into the pantry hoping something edible materializes. I had a bag of white melting wafers left over from a baking project, a bag of candy corn I’d hidden from the kids, and a sudden, desperate need for a treat that didn’t require turning on the oven. I threw them together on a whim. Just melted the wafers, stirred in the candy corn, and spread it out to set. No plan. No expectations.
I walked away to help with homework, and when I came back ten minutes later, there he was. Standing at the counter, breaking off a piece of the bark. Not tentatively. Not with a “let me just try a tiny bite” expression. He was going in for a second piece. “What is this?” he asked, mouth half-full. And that was it. The man who’d spent years trash-talking candy corn was caught red-handed, eating my accidental creation with zero shame. Maybe you’ve been there—watching someone eat their words, literally. This bark is why I keep making it. It’s fast, it’s stupidly simple, and it has the power to make a grown adult admit they were wrong about a candy.
Why You’ll Love This Recipe
Let’s be real for a second. Weeknights are chaos. You’re tired, the kids are hungry, and the last thing you want is a complicated dessert that requires a mixer, three bowls, and a trip to the store for obscure ingredients. This candy corn bark solves all of that. It’s the kind of recipe you make when you need something sweet, fast, and honestly, a little fun. Here’s why it works so well:
- Quick & Easy: This comes together in under 15 minutes. No baking, no fuss, no waiting around. It’s perfect for those evenings when you need dessert on the table (or the couch) immediately.
- Simple Ingredients: You only need three things: white melting chocolate or almond bark, candy corn, and a little bit of vegetable oil or shortening to help the chocolate melt smoothly. That’s it. You probably have everything already.
- Perfect for Halloween or Fall Treats: This bark screams autumn. It’s great for Halloween parties, classroom treats, or just a cozy night in with a movie. It looks festive without any effort.
- Crowd-Pleaser: Even candy corn skeptics (like my husband) end up loving this. The combination of creamy white chocolate and chewy, sweet candy corn is surprisingly addictive. Kids go nuts for it, too.
- Unbelievably Delicious: The texture is what gets you. The white chocolate is smooth and melts in your mouth, while the candy corn adds a little chew. It’s a weirdly perfect pairing that just works.
What makes this different from other candy bark recipes? It’s the ratio. I don’t overload it with candy corn. I use just enough to get that signature orange, yellow, and white color, so every bite has a balanced mix of creamy and chewy. It’s not just another version of candy bark—it’s the one you’ll actually want to make again. And again. This isn’t just good; it’s the kind of dessert that makes you close your eyes after the first bite because it’s way better than it has any right to be. It’s comfort food, reimagined for a busy weeknight.
What Ingredients You Will Need
This recipe is practically built on pantry staples. Seriously, you might already have everything sitting in your cupboard. The beauty of this bark is that it doesn’t require any fancy shopping trips. Here’s what you’ll need and why each ingredient matters.
- White Melting Wafers or Almond Bark (12 ounces): This is your base. I prefer white melting wafers because they melt smoothly without needing to be tempered. Almond bark works great, too. Look for a brand like Ghirardelli or Wilton for the creamiest texture. If you use white chocolate chips, you’ll need to add a little shortening to help them melt properly, as they can seize up. (Speaking from experience—it’s a mess.)
- Candy Corn (1 cup): The star of the show. You can use classic candy corn or the autumn blend with the little pumpkins. I’ve tried both, and honestly, the classic tri-color works best for that iconic look. Don’t use stale candy corn—it gets hard and chewy in a bad way. Fresh, soft candy corn is key. If your bag has been open for a month, just buy a new one. Trust me.
- Vegetable Oil or Shortening (1 teaspoon): This is optional but highly recommended. Adding a tiny bit of oil to your melting chocolate helps it stay smooth and glossy. It also makes the bark easier to cut later. You can skip it, but your bark might be a little more brittle. Coconut oil works, too, if that’s what you have on hand.
- Optional Toppings (for flair): A sprinkle of flaky sea salt or a drizzle of dark chocolate takes this bark to another level. I sometimes add a pinch of cinnamon or pumpkin pie spice for a fall twist. But honestly, the three-ingredient version is perfect on its own.
Ingredient Selection Tips: When buying candy corn, look for a bag that’s soft and pliable. If you squeeze a piece and it cracks, it’s too old. For the white chocolate, avoid “white coating” or “confectionery coating” that has artificial flavors—stick with real cocoa butter if you can find it. It makes a difference in taste. For a dairy-free option, use vegan white chocolate chips and a splash of coconut oil. The texture will be slightly different, but still delicious.
Equipment Needed
You don’t need a fancy kitchen to pull this off. In fact, you probably have everything already. Here’s the short list of tools that make this recipe a breeze.
- Microwave-Safe Bowl: A medium-sized glass or ceramic bowl works best for melting the chocolate. Avoid plastic, as it can retain odors and doesn’t heat evenly.
- Spatula or Wooden Spoon: For stirring the chocolate and candy corn together. A silicone spatula is my go-to because it scrapes the bowl clean.
- Baking Sheet or Large Plate: Line it with parchment paper or a silicone baking mat. This is where you’ll spread the bark to set. A rimmed baking sheet works best to contain the melted chocolate.
- Parchment Paper or Silicone Mat: Essential for easy removal. Without it, the bark will stick to your pan, and you’ll be picking pieces off with a fork. Not fun.
- Knife for Cutting: Once the bark is set, a sharp chef’s knife or a pizza cutter works great for breaking it into pieces. A pizza cutter gives you cleaner edges, but a knife is fine.
Budget-Friendly Alternatives: Don’t have a microwave? You can melt the chocolate in a double boiler on the stove. Just put a heatproof bowl over a pot of simmering water, making sure the bowl doesn’t touch the water. It takes a few extra minutes but works perfectly. No parchment paper? Use aluminum foil lightly greased with butter or oil. It’s not as non-stick, but it’ll do in a pinch.
Preparation Method
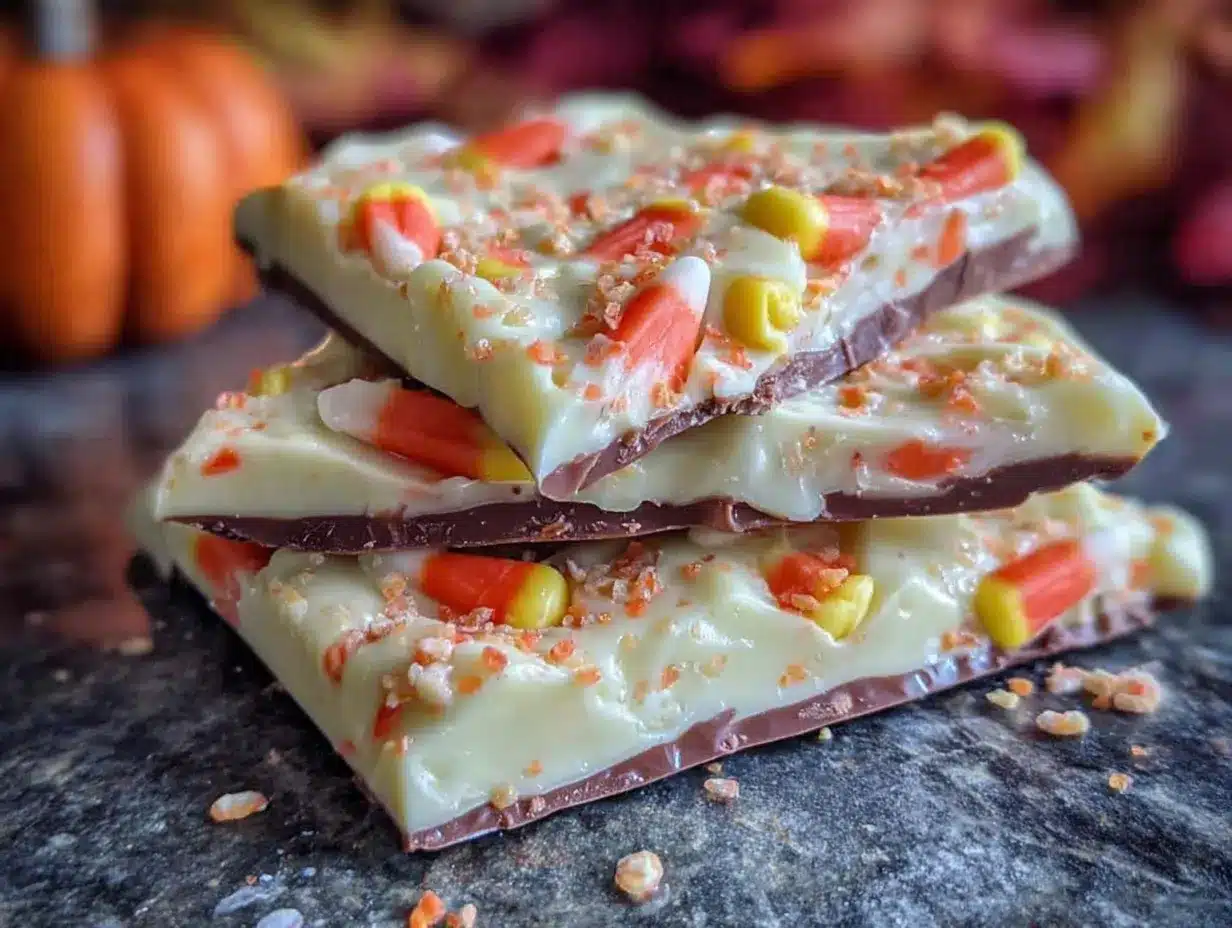
Alright, let’s get to the good part. This is where the magic happens. Follow these steps, and you’ll have beautiful, delicious candy corn bark in no time. I’ve included all the little tricks I’ve learned from making this more times than I care to admit.
- Prep Your Pan: Line a small baking sheet or large plate with parchment paper. Make sure the paper is flat and extends slightly over the edges—this gives you handles to lift the bark later. Set it aside.
- Melt the White Chocolate: Place the white melting wafers (12 ounces) in a microwave-safe bowl. Add 1 teaspoon of vegetable oil or shortening. Microwave in 30-second intervals, stirring well after each interval. Do not skip the stirring! White chocolate can burn easily. It usually takes about 1.5 to 2 minutes total. Stop when the chocolate is mostly melted with a few small lumps—the residual heat will finish the job as you stir. (I learned this the hard way after scorching a batch. It smelled like burnt toast for days.)
- Stir in the Candy Corn: Once the chocolate is smooth and glossy, gently fold in 1 cup of candy corn. Stir just until the candy corn is evenly distributed. Don’t overmix, or the colors from the candy corn might bleed into the white chocolate, turning it a weird pastel orange. You want distinct white and orange pieces.
- Spread the Mixture: Pour the mixture onto your prepared baking sheet. Use a spatula to spread it into an even layer, about 1/4-inch thick. Don’t worry if it’s not perfectly square—rustic looks better anyway. If you want thinner bark, spread it out more. Thicker bark is chewier. Your call.
- Add Optional Toppings: If you’re using flaky sea salt, a drizzle of dark chocolate, or a sprinkle of cinnamon, now is the time. Add them while the chocolate is still wet so they stick. I like to press a few extra pieces of candy corn on top for looks.
- Set the Bark: Let the bark set at room temperature for about 30-45 minutes. If you’re in a hurry, pop it in the refrigerator for 15-20 minutes. Don’t leave it in the fridge too long, though, or the chocolate can develop condensation. You’ll know it’s ready when the surface is firm to the touch and the bark lifts easily off the parchment.
- Break into Pieces: Once set, lift the bark off the parchment using the edges. Place it on a cutting board. Use a sharp knife or pizza cutter to cut it into irregular pieces, or just break it with your hands. I prefer breaking it—it feels more authentic, and the jagged edges look prettier.
Pro Tip: If your chocolate seizes (turns thick and grainy), you probably got a drop of water in it. There’s no saving it—you have to start over. Always make sure your bowl and spatula are completely dry. I once used a damp spatula and ended up with a chunky, unusable mess. Learn from my mistake.
Cooking Tips & Techniques
Over the years, I’ve made this bark more times than I can count. Some batches were gorgeous. Others… well, let’s just say they were learning experiences. Here are the tips I wish someone had told me from the start.
- Don’t Overheat the Chocolate: White chocolate is finicky. It burns at a lower temperature than dark or milk chocolate. Always use low power in the microwave and stir frequently. If you see any brown spots, you’ve gone too far. Toss it and start fresh—burnt chocolate tastes bitter and ruins the whole batch.
- Use Room Temperature Candy Corn: If your candy corn is cold (straight from the fridge), it can cause the melted chocolate to seize. Let it sit on the counter for 15 minutes before mixing. Same goes for any add-ins like nuts or pretzels.
- Work Quickly: Once the chocolate is melted, you have a small window before it starts to set. Have your pan lined and your candy corn measured out before you start melting. This makes the process go smoothly and prevents panic.
- Timing and Multitasking: This is a great recipe to make while you’re waiting for something else to cook. I often make it while dinner is in the oven. By the time we finish eating, the bark is set and ready for dessert. Efficiency at its finest.
- Consistency is Key: If you want perfectly even pieces, use a ruler to guide your knife. But honestly, I prefer the rustic look. The imperfections make it look homemade and inviting. No one’s judging your bark-cutting skills.
Common Mistake to Avoid: Adding too much candy corn. I know it’s tempting to dump the whole bag in, but too much candy corn makes the bark difficult to cut and overwhelms the chocolate flavor. Stick to 1 cup for the perfect balance. Less is more, I promise.
Variations & Adaptations
One of the best things about this recipe is how easy it is to customize. Once you’ve mastered the basic version, feel free to play around. Here are some variations I’ve tried and loved.
- Chocolate Lover’s Version: Swap the white chocolate for dark or milk chocolate. The bitterness of dark chocolate pairs beautifully with the sweet candy corn. Use the same melting method. This is my husband’s favorite variation now—ironic, right?
- Salty-Sweet Twist: Sprinkle flaky sea salt over the top before the bark sets. The salt cuts through the sweetness and makes each bite more complex. I use Maldon sea salt, but any coarse salt works. It’s a game-changer.
- Add Some Crunch: Stir in 1/2 cup of crushed pretzels or salted peanuts along with the candy corn. The crunch adds texture and balances the chewiness. This is great for fall parties where you want something a little more substantial.
- Seasonal Swap: Use seasonal M&Ms or Reese’s Pieces instead of candy corn. The same method works for any candy. For Christmas, try red and green M&Ms. For Easter, pastel-colored candy melts. This recipe is endlessly adaptable.
- Dairy-Free Adaptation: Use dairy-free white chocolate chips and a tablespoon of coconut oil. The texture will be slightly softer, but it’s still delicious. Just keep the bark in the fridge until serving to prevent it from getting too soft.
Personal Variation: I once made a batch with crushed ginger snaps mixed in. The spicy-sweet combo was incredible. It’s not for everyone, but if you like a little heat, give it a try. Sometimes my best experiments come from a “what if” moment in the kitchen.
Serving & Storage Suggestions
This bark is best served at room temperature. The chocolate is creamy, and the candy corn is perfectly chewy. If you’ve refrigerated it, let it sit out for 5-10 minutes before serving. It makes a huge difference in texture.
Presentation Ideas: Arrange the pieces on a pretty plate or in a mason jar for a festive look. I like to layer them in a clear cellophane bag tied with a ribbon for a quick hostess gift. It’s also great for Halloween parties—just pile it on a platter and watch it disappear.
Complementary Dishes: This bark pairs wonderfully with a hot cup of apple cider or a pumpkin spice latte. For a dessert board, serve it alongside caramel apples, popcorn, and other fall treats. It’s a sweet addition to any spread.
Storage Instructions: Store the bark in an airtight container at room temperature for up to 1 week. If your kitchen is warm, you can store it in the refrigerator, but let it come to room temperature before eating. Do not freeze this bark—the texture of the candy corn changes and becomes unpleasantly hard.
Flavor Development: Honestly, this bark tastes best within the first 2-3 days. After that, the candy corn starts to dry out a little. It’s still good, but not as fresh. So make it close to when you plan to serve it. That said, I’ve never had leftovers last longer than a day in my house.
Nutritional Information & Benefits
Let’s be honest: this is a treat, not a health food. But if you’re going to indulge, you might as well know what you’re getting into. Here’s a rough estimate per serving (about 2 ounces of bark).
- Calories: Approximately 180-200 calories per serving
- Fat: 8-10 grams (mostly from the white chocolate)
- Sugar: 22-25 grams (yes, it’s sweet)
- Carbohydrates: 28-30 grams
- Protein: 1-2 grams
Health Highlights: White chocolate does contain some calcium and a small amount of antioxidants from cocoa butter. Candy corn is basically sugar and corn syrup, so there’s not much nutritional value there. But hey, sometimes you need a little joy in your day. This bark is about pleasure, not perfection.
Dietary Considerations: This recipe is naturally vegetarian. For a gluten-free option, double-check that your white chocolate is certified gluten-free (most are). It’s not suitable for vegans unless you use dairy-free chocolate. It contains dairy and may contain traces of nuts depending on the brand of chocolate you use. Always read labels if you’re serving someone with allergies.
My personal take? Life is short. Eat the bark. Just maybe don’t eat the whole batch in one sitting. (I speak from experience.)
Conclusion
This quick 3-ingredient candy corn bark is proof that you don’t need a lot of time, effort, or fancy ingredients to make something special. It’s the kind of recipe that saves you on a busy weeknight when you’re craving something sweet but don’t want to deal with a mess. It’s fun, it’s festive, and honestly, it’s a little bit magical watching someone who claims to hate candy corn go back for seconds.
I hope you give this a try and make it your own. Maybe you’ll add a sprinkle of sea salt. Maybe you’ll swap in dark chocolate. Maybe you’ll double the batch because one pan isn’t enough (I won’t judge). Whatever you do, just remember that cooking should be fun—and this recipe is all about that. So go ahead, melt some chocolate, stir in some candy corn, and enjoy the simple things.
I’d love to hear how it turns out! Drop a comment below and tell me if your family loved it, or if you tried a fun variation. Sharing is caring, after all. Happy baking (or, you know, melting)!
Frequently Asked Questions
Can I use white chocolate chips instead of melting wafers?
Yes, you can. White chocolate chips are a bit thicker and may require a teaspoon of shortening or coconut oil to melt smoothly. They also take a little longer to melt. Just be careful not to overheat them, as they can seize up easily.
How do I prevent the candy corn from bleeding into the chocolate?
The key is to stir gently and not overmix. Fold the candy corn in just until it’s distributed. If you stir too vigorously, the colors from the candy corn can start to dissolve into the white chocolate, giving it a pinkish-orange tint. A light hand is all you need.
Can I make this bark ahead of time for a party?
Absolutely. You can make it up to 3 days in advance. Store it in an airtight container at room temperature. If you’re making it more than a day ahead, keep it in the fridge and let it come to room temperature for about 10 minutes before serving. The texture is best when it’s not too cold.
My chocolate seized and turned grainy. What went wrong?
This usually happens when a tiny bit of water gets into the chocolate. Make sure your bowl and spatula are completely dry. Also, avoid melting chocolate over high heat. If it seizes, unfortunately, there’s no fixing it. You’ll need to start over with fresh chocolate. It happens to the best of us!
Can I add other mix-ins like nuts or pretzels?
Definitely! This recipe is very forgiving. You can add up to 1/2 cup of crushed pretzels, chopped nuts, or even dried cranberries. Just fold them in along with the candy corn. Keep in mind that adding too many extras might make the bark harder to cut, so don’t go overboard.
Pin This Recipe!
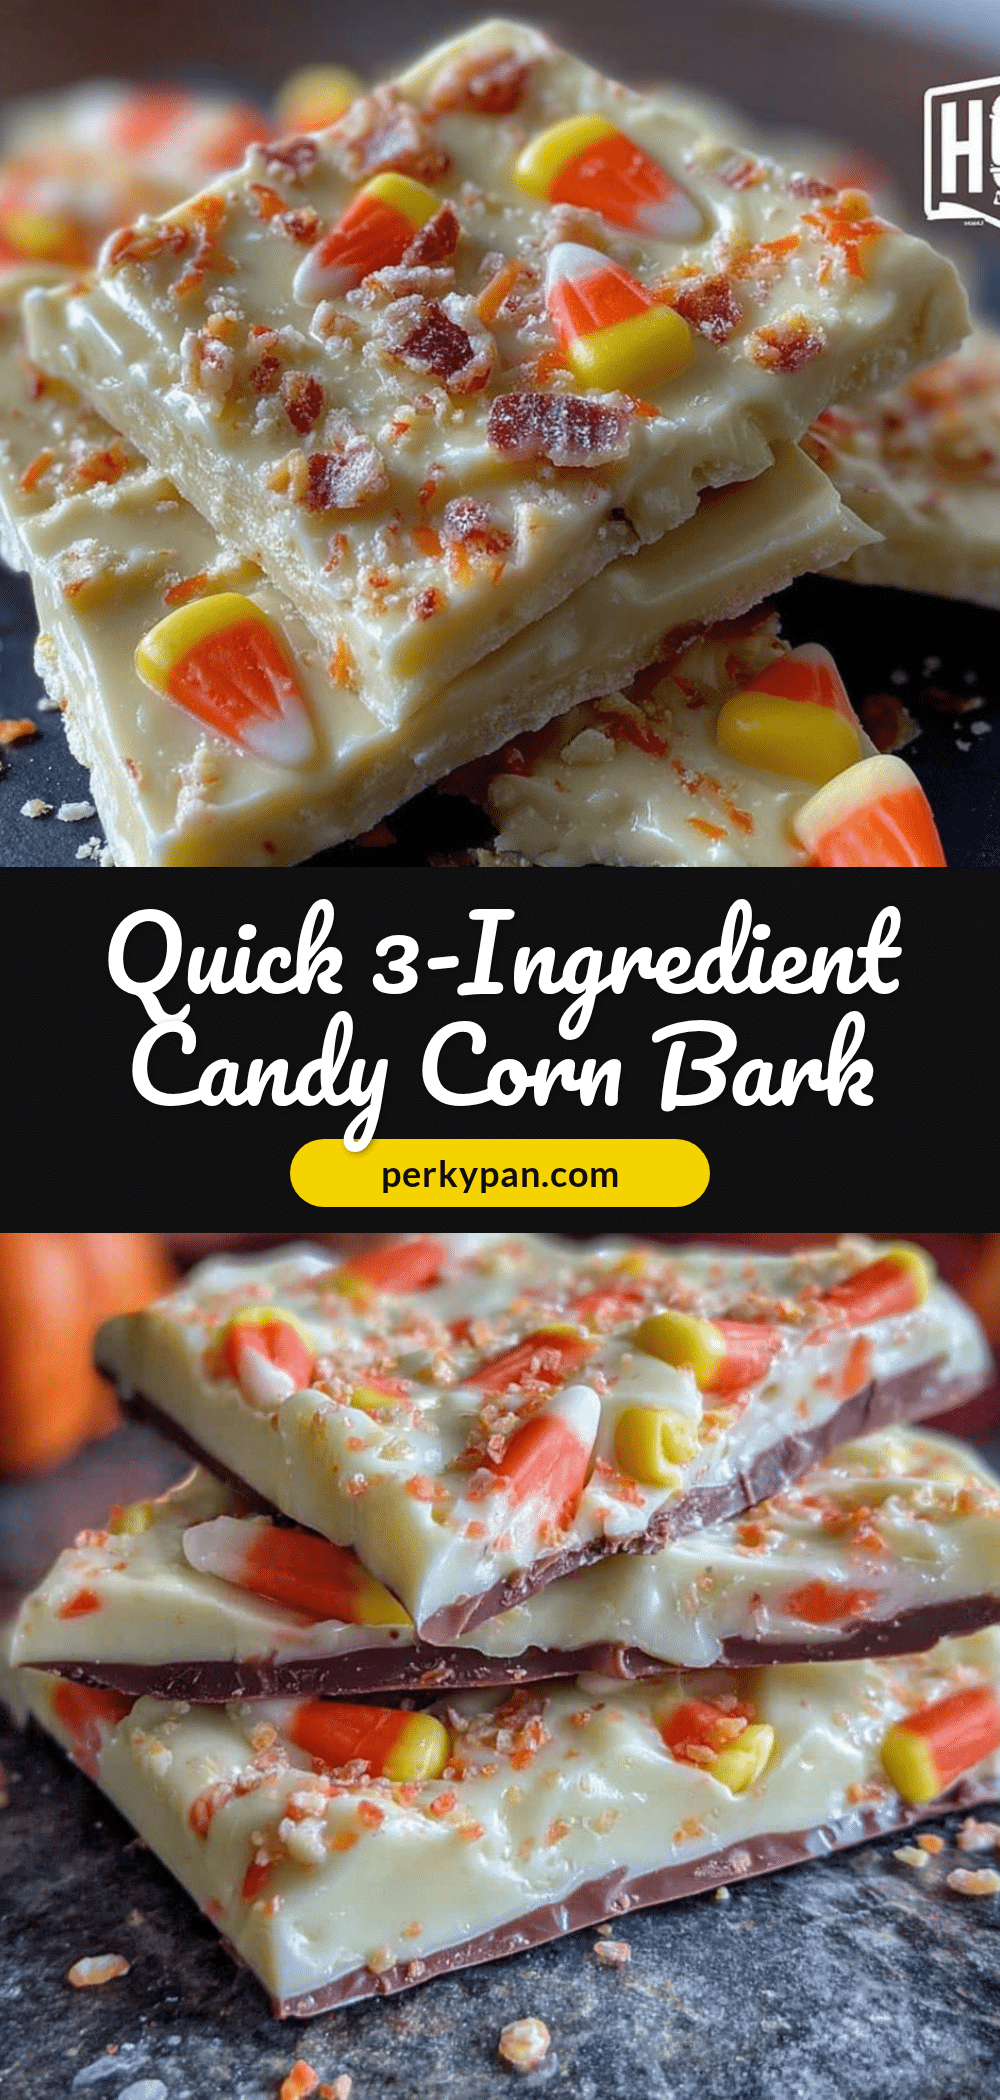
Best Easy 3-Ingredient Candy Corn Bark Recipe

This quick and easy candy corn bark requires only three ingredients and comes together in under 15 minutes. It’s the perfect Halloween or fall treat that even candy corn skeptics will love, featuring creamy white chocolate and chewy candy corn in every bite.
- Prep Time: 10 minutes
- Cook Time: 2 minutes
- Total Time: 12 minutes
- Yield: 8 servings 1x
- Category: Dessert
- Cuisine: American
Ingredients
- 12 ounces white melting wafers or almond bark
- 1 cup candy corn
- 1 teaspoon vegetable oil or shortening
- Optional: flaky sea salt, dark chocolate drizzle, or cinnamon for topping
Instructions
- Line a small baking sheet or large plate with parchment paper, letting it extend slightly over the edges for easy removal.
- Place the white melting wafers (12 ounces) in a microwave-safe bowl. Add 1 teaspoon of vegetable oil or shortening.
- Microwave in 30-second intervals, stirring well after each interval, until mostly melted with a few small lumps (about 1.5 to 2 minutes total). Stir until smooth.
- Gently fold in 1 cup of candy corn until evenly distributed. Do not overmix to prevent color bleeding.
- Pour the mixture onto the prepared baking sheet and spread into an even layer about 1/4-inch thick using a spatula.
- If desired, add optional toppings like flaky sea salt, dark chocolate drizzle, or extra candy corn pieces while the chocolate is still wet.
- Let the bark set at room temperature for 30-45 minutes, or refrigerate for 15-20 minutes until firm.
- Once set, lift the bark off the parchment and break into irregular pieces using your hands or cut with a sharp knife or pizza cutter.
Notes
Use fresh, soft candy corn for best texture. Avoid overheating white chocolate as it burns easily. If chocolate seizes (turns grainy), start over with dry equipment. For dairy-free, use vegan white chocolate chips and coconut oil. Store in an airtight container at room temperature for up to 1 week. Do not freeze.
Nutrition
- Serving Size: 2 ounces
- Calories: 190
- Sugar: 24
- Sodium: 35
- Fat: 9
- Saturated Fat: 5
- Carbohydrates: 29
- Protein: 1
Keywords: candy corn bark, Halloween dessert, 3-ingredient recipe, white chocolate bark, easy fall treat, no-bake dessert