Love this? Save it for later!
Share the inspiration with your friends
My accountant, of all people, changed the way I pack lunch for my kids. I was sitting in his office last spring, stressing over quarterly numbers, when he pulled out this bento-style box from his bag. Not for himself—for his six-year-old’s lunch. “It’s a charcuterie box,” he said, shrugging like it was the most obvious thing in the world. I mean, here was a guy who spends his days buried in spreadsheets, and he’d figured out the secret to a lunch my own kids would actually finish. Honestly, I felt a little outdone by a man named Gary.
He showed me the compartments: cheese cubes, salami roses (yes, he made roses), cucumber slices, berries, and a little handful of pretzels. No bread, no sandwich, no stress. The idea was so simple it almost made me mad I hadn’t thought of it myself. I went home that night and threw together a version for my own kids the next morning. They devoured it. My daughter, who usually picks apart her sandwich and leaves a sad pile of bread crusts, actually ate everything. Let me tell you, that doesn’t happen often.
That’s how the easy cold lunch charcuterie box for kids became a regular thing in our house. It’s not fancy. It’s not complicated. But it solved a problem I’d been wrestling with for years—how to pack a lunch that’s balanced, fun, and actually gets eaten. Maybe you’ve been there too, staring into the fridge at 7 a.m., wondering what you can throw together that won’t come back home in a crumpled napkin. This is that answer. And it came from a tax accountant. Go figure.
Why You’ll Love This Recipe
I have tested this easy cold lunch charcuterie box for kids at least fifty times over the past year, and I can tell you without hesitation—it works. Every single time. Here is why this approach stands out from every other lunch idea you have tried.
- Quick and Easy: You can assemble one of these boxes in under ten minutes. Seriously, I time myself. While the coffee brews, the lunch gets done. No cooking, no heating, no mess.
- Simple Ingredients: No fancy grocery trips needed. You probably already have cheese sticks, crackers, fruit, and lunch meat in your fridge right now. If not, a quick stop at any store covers everything.
- Perfect for Busy Mornings: This is the ultimate school lunch, daycare snack, or weekend picnic option. When you are running late—and let’s face it, when are we not—this saves the day.
- Crowd-Pleaser: My kids fight over who gets which box. Even the pickiest eaters in their friend group have asked for “the lunch with the little compartments.” It gets rave reviews from kids and parents alike.
- Unbelievably Delicious: There is something about eating food in small, separate portions that makes everything taste better. The crunch of the crackers, the creaminess of the cheese, the sweetness of the fruit—it is next-level comfort food in lunch form.
What makes this different from just throwing snacks in a bag? The presentation. When you arrange everything neatly in a divided container, it feels like a treat. Kids respond to that. I have seen my own children go from ignoring their lunch to proudly showing their friends what’s inside. It is not just another version of lunch—it is the best version.
This recipe is the kind that makes you feel like a good parent without actually doing much work. It is healthier than a cafeteria tray, faster than making a sandwich, and it has the same soul-soothing satisfaction of knowing your kid is eating something real. Perfect for impressing your child’s teacher during lunch duty or turning a rushed morning into something manageable.
What Ingredients You Will Need
This easy cold lunch charcuterie box for kids uses simple, wholesome ingredients to deliver bold flavor and satisfying texture without any fuss. Everything here is a pantry staple or a quick grab from the grocery store. You can mix and match based on what your kids love most.
- Protein:
- Turkey slices (deli-style, rolled into pinwheels)
- Cheese cubes or cheese sticks (cut into bite-sized pieces)
- Hard-boiled eggs (peeled and halved)
- Pepperoni or salami (optional, for older kids)
- Fruit:
- Grapes (halved lengthwise for safety)
- Apple slices (tossed in lemon juice to prevent browning)
- Berries (strawberries, blueberries, or raspberries)
- Mandarin orange segments (canned in juice, drained)
- Vegetables:
- Cucumber slices (peeled or unpeeled, depending on preference)
- Cherry tomatoes (halved)
- Baby carrots or carrot sticks
- Bell pepper strips (red or yellow for sweetness)
- Carbohydrates:
- Whole wheat crackers or pretzel twists
- Pita chips or tortilla chips
- Breadstick halves or mini bagel chips
- Rice cakes (plain or lightly salted)
- Extras:
- Hummus or yogurt dip (in a small container or compartment)
- Nut-free seed butter (sunflower seed butter works great)
- Olives (pitted and halved, for adventurous eaters)
- Dried fruit (raisins, apricots, or mango slices)
Ingredient Selection Tips: I recommend using organic fruit when possible, especially for berries and apples, since kids eat the skin. For cheese, look for blocks you can cut yourself rather than pre-shredded options—they taste fresher and hold up better in the box. If your child has a nut allergy, always check labels on crackers and dips. I personally prefer the brand Annie’s for crackers and Sabra for hummus, but store brands work just as well.
Substitution Guidance: Swap turkey for chicken slices or leftover rotisserie chicken. Use dairy-free cheese if needed. For a gluten-free option, choose rice cakes or gluten-free crackers. In summer, swap in fresh peaches or nectarines instead of apples. The beauty of this lunch is that it adapts to whatever you have on hand.
Equipment Needed
You do not need much to put together an easy cold lunch charcuterie box for kids. Here is what I use and what I have learned along the way.
- Divided Lunch Container: A bento-style box with 3 to 5 compartments is ideal. I use the Bentgo Kids box, which has been dropped more times than I can count and still works perfectly. If you don’t have one, any container with separate sections or even silicone muffin cups inside a regular lunch box works fine.
- Small Dip Container: A tiny leakproof container for hummus, yogurt, or dressing. I bought a set of four on Amazon for under ten dollars, and they have saved me from countless spills.
- Cookie Cutters: Optional but fun. Star-shaped cheese or heart-shaped cucumber slices make the lunch feel special. I found a set of mini cookie cutters at a dollar store, and my kids love them.
- Sharp Knife and Cutting Board: For slicing fruit, cheese, and vegetables. Nothing fancy needed—just something that cuts cleanly.
- Ice Pack: To keep everything cold until lunchtime. I use reusable gel packs that I keep in the freezer.
Budget-Friendly Options: You can use a regular plastic container with dividers made from folded parchment paper. I have done this on mornings when the dishwasher was running, and it worked perfectly. No need to spend money on specialty gear if you are just starting out.
Preparation Method
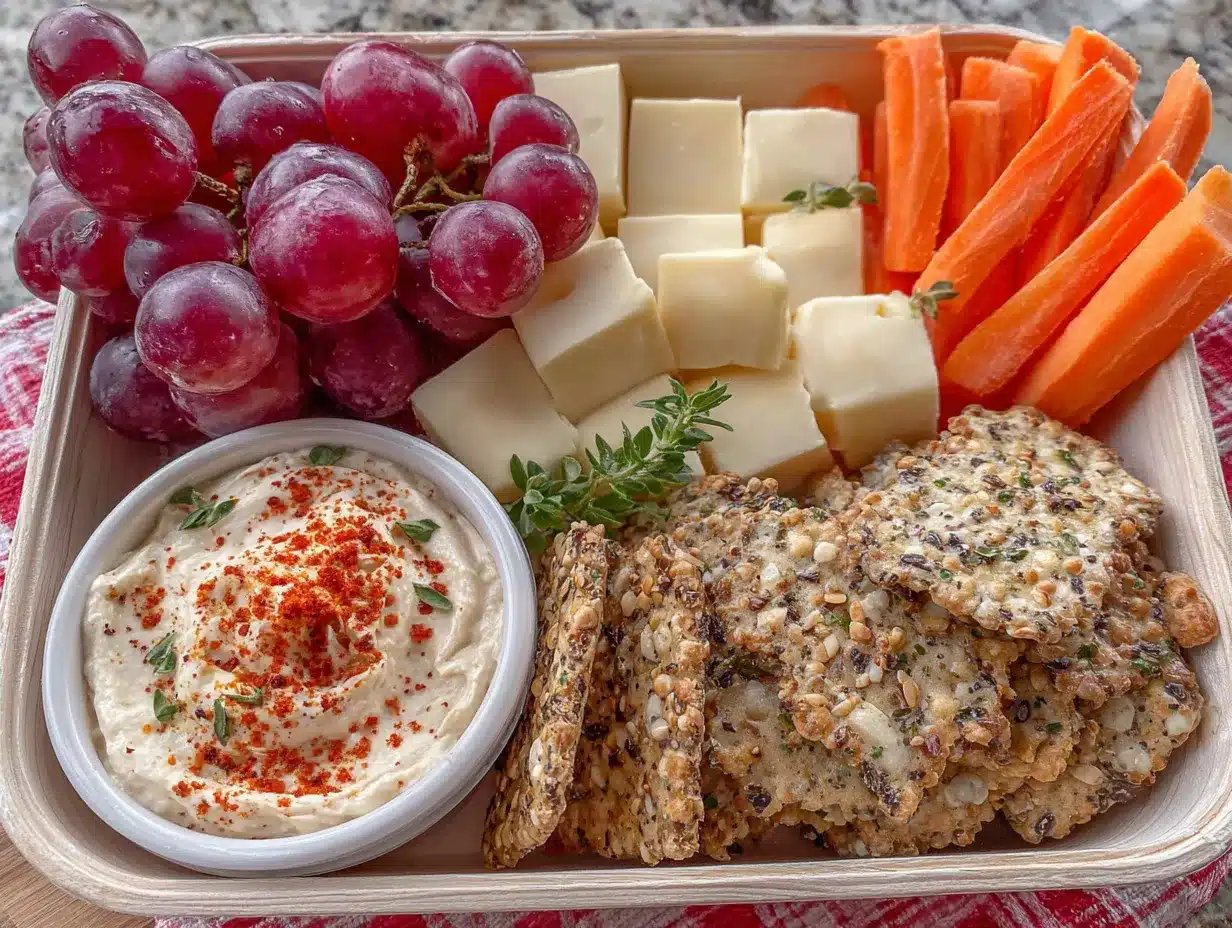
Follow these steps to assemble your easy cold lunch charcuterie box for kids. Each step includes my personal tips for efficiency and better results.
- Wash and Prep Produce: Start by washing all fruit and vegetables under cold water. Pat them dry with a clean towel—wet ingredients make crackers soggy. Slice apples and toss them with a little lemon juice to keep them from turning brown. Halve grapes lengthwise for younger children. Cut cucumber into rounds or half-moons. Set everything aside in separate bowls.
- Prepare the Protein: If using hard-boiled eggs, peel them and slice in half lengthwise. For turkey or ham slices, lay them flat, then roll them up tightly into pinwheels. You can also fold them into small triangles. Cut cheese into cubes about half an inch thick—small enough for little fingers to pick up easily. I usually make extra cheese cubes because they disappear first.
- Arrange the Container: Open your divided lunch box and start placing items in each compartment. Put heavier items like cheese cubes and hard-boiled eggs in the larger sections. Place crackers or pretzels in a dry compartment so they stay crunchy. Arrange fruit and vegetables in separate sections to keep flavors from mixing. This takes about two minutes once you get the hang of it.
- Add Dips and Extras: Spoon hummus or yogurt dip into a small container and place it in one of the compartments. If your box doesn’t have a dedicated dip spot, use a silicone muffin cup as a divider. Add any extras like olives or dried fruit in the remaining spaces. The key is to fill every section so nothing shifts around during transport.
- Check for Balance: Take a quick look at the final arrangement. You want a mix of colors and textures—something crunchy, something creamy, something sweet, something savory. If everything looks beige, add a handful of berries or a few cucumber slices. If it feels too heavy, swap out one protein for extra vegetables. I always ask myself: would I eat this? If the answer is yes, it’s ready.
- Seal and Chill: Close the lid tightly and place the box in the refrigerator until morning. If you are packing it the night before, add crackers and dried fruit just before leaving to keep them from getting soft. Place an ice pack on top of the box in the lunch bag to keep everything cool until lunchtime.
Sensory Cues: The cheese should feel firm, not sticky. The crackers should sound crisp when you break one. The fruit should look bright and fresh, not bruised or brown. If anything looks off, trust your instincts and replace it.
Troubleshooting Tip: If your child complains that the crackers are soggy, pack them separately in a small zip-top bag and let them add the crackers themselves at lunchtime. This gives them a sense of control and keeps everything crunchy.
Cooking Tips & Techniques
Over the past year, I have made plenty of mistakes with this easy cold lunch charcuterie box for kids. Here is what I learned so you don’t have to repeat my failures.
Don’t Overstuff the Box: I used to cram as much food as possible into every compartment, thinking more is better. Turns out, kids get overwhelmed by too many options. Stick to one protein, one fruit, one vegetable, one carb, and one dip. That’s plenty. My daughter once told me her lunch was “too busy,” and she was right.
Prep Ingredients in Bulk: On Sunday afternoons, I wash and slice all the fruit and vegetables for the week. I store them in separate containers in the fridge. Then, every morning, I just grab and assemble. This cuts my lunch-packing time from ten minutes to three. Honestly, it changed my life.
Use the Freezer for Backup: I keep a stash of frozen grapes, frozen berries, and frozen cheese cubes in the freezer. They thaw by lunchtime and act as an extra ice pack. This trick saved me on mornings when I forgot to buy fresh fruit.
Let Kids Help: My four-year-old loves arranging the compartments herself. She puts the cheese in one spot, the crackers in another, and feels proud of her work. She is also more likely to eat something she helped prepare. Give them a little ownership, and they will surprise you.
Rotate Ingredients Weekly: If you serve the same thing every day, kids get bored. I rotate through three different protein options, four fruits, and five vegetables. This keeps the lunch exciting without requiring extra effort. I keep a list on my fridge so I don’t forget what I used last week.
Variations & Adaptations
One of the best things about this easy cold lunch charcuterie box for kids is how easily it adapts. Here are some variations I have tried and loved.
Vegetarian Version: Skip the meat and double up on cheese, hard-boiled eggs, and hummus. Add edamame or chickpeas for extra protein. My vegetarian friend makes this for her son, and he never misses the turkey.
Seasonal Summer Box: Replace apples and oranges with fresh peach slices, watermelon cubes, and cherry tomatoes. Use mozzarella balls instead of cheddar. Add a small container of balsamic glaze for dipping—surprisingly popular with kids who like bold flavors.
Breakfast-for-Lunch Box: Swap the crackers for mini pancakes or waffle pieces. Use yogurt dip instead of hummus. Add scrambled egg bites and fresh berries. My kids request this version at least once a week, and I don’t argue.
Allergen-Friendly Box: For nut-free schools, use sunflower seed butter instead of peanut butter. Choose dairy-free cheese and gluten-free crackers. I have made this for classroom parties, and it works perfectly. Just double-check every label to be safe.
Personal Variation I Love: I once added a small handful of dark chocolate chips to the box as a surprise. My kids thought I was the coolest parent alive. Now I add a tiny treat every Friday as a reward for finishing the week. It is a small thing, but it makes them smile.
Serving & Storage Suggestions
Serve this easy cold lunch charcuterie box for kids straight from the refrigerator. The cold temperature keeps everything fresh and crisp. If you are packing it for a school lunch, add an ice pack to the lunch bag and keep it in a cool place until lunchtime.
Presentation Tips: Arrange the food in rainbow order—red berries, orange cheese, yellow peppers, green cucumber, blue berries, purple grapes. Kids love color, and a visually appealing box is more likely to get eaten. I also add a silly note or a sticker on the lid sometimes. It makes them smile.
Complementary Dishes: Serve this box with a small carton of milk or a water bottle. If you are packing for a picnic, add a juice box and a napkin. For older kids, a small thermos of soup or yogurt smoothie rounds out the meal nicely.
Storage Instructions: Assemble the box the night before and store it in the refrigerator for up to 24 hours. Keep crackers and dried fruit separate until just before serving to maintain crunch. Do not freeze assembled boxes—the texture of fresh produce suffers. Leftover components can be stored individually for up to three days.
Reheating Notes: This lunch is meant to be served cold. Do not microwave anything except the hard-boiled eggs, and even then, only if your child prefers them warm. I have never reheated a charcuterie box, and I don’t plan to start.
Flavor Development: The flavors actually meld nicely after a few hours in the fridge. The cheese absorbs a little of the fruit’s sweetness, and the crackers take on a subtle aroma from the hummus. It is a good thing—everything tastes more cohesive by lunchtime.
Nutritional Information & Benefits
This easy cold lunch charcuterie box for kids provides a balanced mix of protein, healthy fats, complex carbohydrates, and vitamins. Here is an estimated breakdown for a typical box containing turkey, cheese, grapes, cucumber, and whole wheat crackers.
- Calories: Approximately 350-450 per box
- Protein: 18-22 grams (from turkey and cheese)
- Carbohydrates: 35-40 grams (from fruit and crackers)
- Fat: 15-20 grams (from cheese and dip)
- Fiber: 5-7 grams (from vegetables and whole grains)
- Vitamin C: 30% of daily value (from fruit)
- Calcium: 25% of daily value (from cheese)
Health Benefits: The protein keeps kids full and focused through the afternoon. The fiber supports healthy digestion. The fruit provides natural energy without added sugar. The vegetables add essential vitamins and hydration. This lunch is naturally low in processed ingredients and high in whole foods.
Dietary Considerations: This recipe is easily adapted for gluten-free, dairy-free, nut-free, and vegetarian diets. Always check labels for hidden allergens. I personally love that this lunch gives my kids the energy they need without the sugar crash that comes from packaged snacks.
FAQs
Can I make this lunch the night before?
Yes, absolutely. Assemble the box the night before and store it in the refrigerator. Add crackers and any crunchy items in the morning to keep them from getting soft. I do this all the time when I know the morning will be hectic.
How do I keep the food cold until lunchtime?
Use an ice pack in the lunch bag. Place it directly on top of the box. If your child’s school has a refrigerator, ask if they can store lunches there. Frozen grapes or berries also help keep everything cool while they thaw.
What if my child doesn’t like certain ingredients?
Swap them out. The beauty of this lunch is its flexibility. If your child hates cucumbers, use bell peppers instead. If they don’t like cheese, add extra protein. Let them help choose the ingredients, and they will be more likely to eat what is inside.
How long does the assembled box stay fresh?
Up to 24 hours in the refrigerator. After that, the texture of the fruit and vegetables starts to decline. I recommend making it fresh each day or prepping components separately and assembling in the morning.
Can I use this for adults too?
Absolutely. I make a larger version for my own lunch all the time. Just increase the portion sizes and add a few adult-friendly extras like olives, nuts, or dark chocolate. It is the perfect no-cook lunch for busy workdays.
Conclusion
This easy cold lunch charcuterie box for kids came from the most unexpected source—a tax accountant named Gary. But honestly, I am grateful every single time I pack one. It solves the morning rush, satisfies picky eaters, and makes me feel like I have my act together even when I don’t.
I hope you try this approach and make it your own. Swap in your kids’ favorite foods, experiment with different combinations, and don’t stress about perfection. The goal is a lunch that gets eaten, not a masterpiece. If your child smiles when they open their box, you have already won.
I would love to hear what combinations your family loves. Drop a comment below and share your favorite charcuterie box ideas. Tag me in your photos—I always love seeing how other families make this work. Until next time, happy packing, and may your mornings be a little less chaotic.
Pin This Recipe!

5 Easy Cold Lunch Charcuterie Box Ideas for Kids

A simple, no-cook lunch solution featuring a balanced mix of protein, fruit, vegetables, and carbs arranged in a divided container. Perfect for busy mornings and picky eaters, this charcuterie-style box is fun, healthy, and actually gets eaten.
- Prep Time: 10 minutes
- Cook Time: 0 minutes
- Total Time: 10 minutes
- Yield: 1 serving
- Category: Lunch
- Cuisine: American
Ingredients
- Turkey slices (deli-style, rolled into pinwheels)
- Cheese cubes or cheese sticks (cut into bite-sized pieces)
- Hard-boiled eggs (peeled and halved)
- Pepperoni or salami (optional, for older kids)
- Grapes (halved lengthwise for safety)
- Apple slices (tossed in lemon juice to prevent browning)
- Berries (strawberries, blueberries, or raspberries)
- Mandarin orange segments (canned in juice, drained)
- Cucumber slices (peeled or unpeeled, depending on preference)
- Cherry tomatoes (halved)
- Baby carrots or carrot sticks
- Bell pepper strips (red or yellow for sweetness)
- Whole wheat crackers or pretzel twists
- Pita chips or tortilla chips
- Breadstick halves or mini bagel chips
- Rice cakes (plain or lightly salted)
- Hummus or yogurt dip (in a small container or compartment)
- Nut-free seed butter (sunflower seed butter works great)
- Olives (pitted and halved, for adventurous eaters)
- Dried fruit (raisins, apricots, or mango slices)
Instructions
- Wash and Prep Produce: Wash all fruit and vegetables under cold water. Pat dry with a clean towel. Slice apples and toss with lemon juice to prevent browning. Halve grapes lengthwise for younger children. Cut cucumber into rounds or half-moons. Set aside in separate bowls.
- Prepare the Protein: Peel hard-boiled eggs and slice in half lengthwise. For turkey or ham slices, lay flat, then roll tightly into pinwheels or fold into small triangles. Cut cheese into cubes about half an inch thick.
- Arrange the Container: Open divided lunch box and place items in each compartment. Put heavier items like cheese cubes and hard-boiled eggs in larger sections. Place crackers or pretzels in a dry compartment. Arrange fruit and vegetables in separate sections.
- Add Dips and Extras: Spoon hummus or yogurt dip into a small container and place in one compartment. Use a silicone muffin cup as a divider if needed. Add olives or dried fruit in remaining spaces. Fill every section to prevent shifting.
- Check for Balance: Ensure a mix of colors and textures—crunchy, creamy, sweet, savory. Add berries or cucumber if everything looks beige. Swap protein for extra vegetables if too heavy.
- Seal and Chill: Close lid tightly and refrigerate until morning. If packing night before, add crackers and dried fruit just before leaving. Place an ice pack on top in the lunch bag to keep cool.
Notes
Prep ingredients in bulk on Sunday to cut assembly time to 3 minutes. Keep frozen grapes and berries as backup ice packs. Let kids help arrange compartments to encourage eating. Rotate ingredients weekly to prevent boredom. For soggy crackers, pack separately and let kids add at lunchtime.
Nutrition
- Serving Size: 1 box
- Calories: 350450
- Sugar: 1520
- Sodium: 400600
- Fat: 1520
- Saturated Fat: 68
- Carbohydrates: 3540
- Fiber: 57
- Protein: 1822
Keywords: cold lunch, charcuterie box, kids lunch, bento box, no-cook lunch, school lunch, easy lunch ideas, picky eater lunch


