Love this? Save it for later!
Share the inspiration with your friends
When they closed last spring, I honestly felt a little pang of grief. It sounds silly, I know—getting emotional over a vegetable platter. But this wasn’t just any veggie tray. It was the one my kids actually fought over. No whining. No negotiating. Just tiny hands grabbing celery sticks and bell pepper strips like they were candy. I spent the whole summer trying to recreate it. I tried different dips, different arrangements, different vegetable cuts. Nothing clicked. Then, last October, I was standing in my kitchen staring at a bag of baby carrots and a block of cream cheese, and it hit me—it was never about the vegetables. It was about the presentation and that creamy, tangy ranch dip. After five failed attempts—one where the dip was so thin it pooled everywhere—I finally got it. This spider web veggie tray is the exact replica of that café’s magic, and honestly, it’s even better now because I make it with my kids on a sensible budget. Maybe you’ve been there—staring at a party platter from a store, wondering why your homemade version never feels the same. Let me tell you, this recipe changes everything.
Why You’ll Love This Recipe
I’ve tested this recipe with my own three kids, my picky neighbor’s twins, and a whole classroom of second graders. It passed every test with flying colors. Here’s why this spider web veggie tray stands out from every other veggie platter you’ve made:
- Quick & Easy : Comes together in under 20 minutes, perfect for last-minute school parties or Halloween gatherings.
- Simple Ingredients : No fancy grocery trips needed—you likely already have cream cheese, sour cream, and ranch seasoning in your kitchen.
- Perfect for Halloween & Fall Parties : Great for classroom celebrations, potlucks, or spooky movie nights.
- Crowd-Pleaser : Always gets rave reviews from kids and adults alike—even the veggie skeptics go back for seconds.
- Unbelievably Delicious : The homemade ranch dip is so creamy and tangy, it’s nothing like the store-bought stuff.
What makes this recipe different from the rest is the technique of blending the cream cheese and sour cream together before adding the seasoning—it creates an ultra-smooth, velvety dip that clings perfectly to every vegetable. I’ve tried making it with Greek yogurt, but honestly, the full-fat cream cheese is what makes it taste like that café version I was chasing. This isn’t just another veggie tray—it’s the one that makes kids forget they’re eating vegetables. It’s comfort food disguised as a party platter, and it fits any budget without sacrificing flavor.
What Ingredients You Will Need
This recipe uses simple, wholesome ingredients to deliver bold flavor and satisfying crunch without the fuss. Most of these items are pantry staples, and you can easily swap based on what’s on sale at your grocery store.
For the Homemade Ranch Dip
- 8 oz cream cheese, softened (I recommend Philadelphia for the creamiest texture—adds richness)
- 1/2 cup sour cream (use full-fat for best results; low-fat works but makes a thinner dip)
- 1 packet ranch seasoning mix (Hidden Valley is my go-to, but store brands work fine)
- 1/4 cup milk (adds smoothness; use whole milk for extra creaminess)
- 1 teaspoon garlic powder (optional, but I never skip it—adds depth)
- Fresh chives or parsley for garnish (optional, but makes it look fancy)
For the Spider Web Veggie Tray
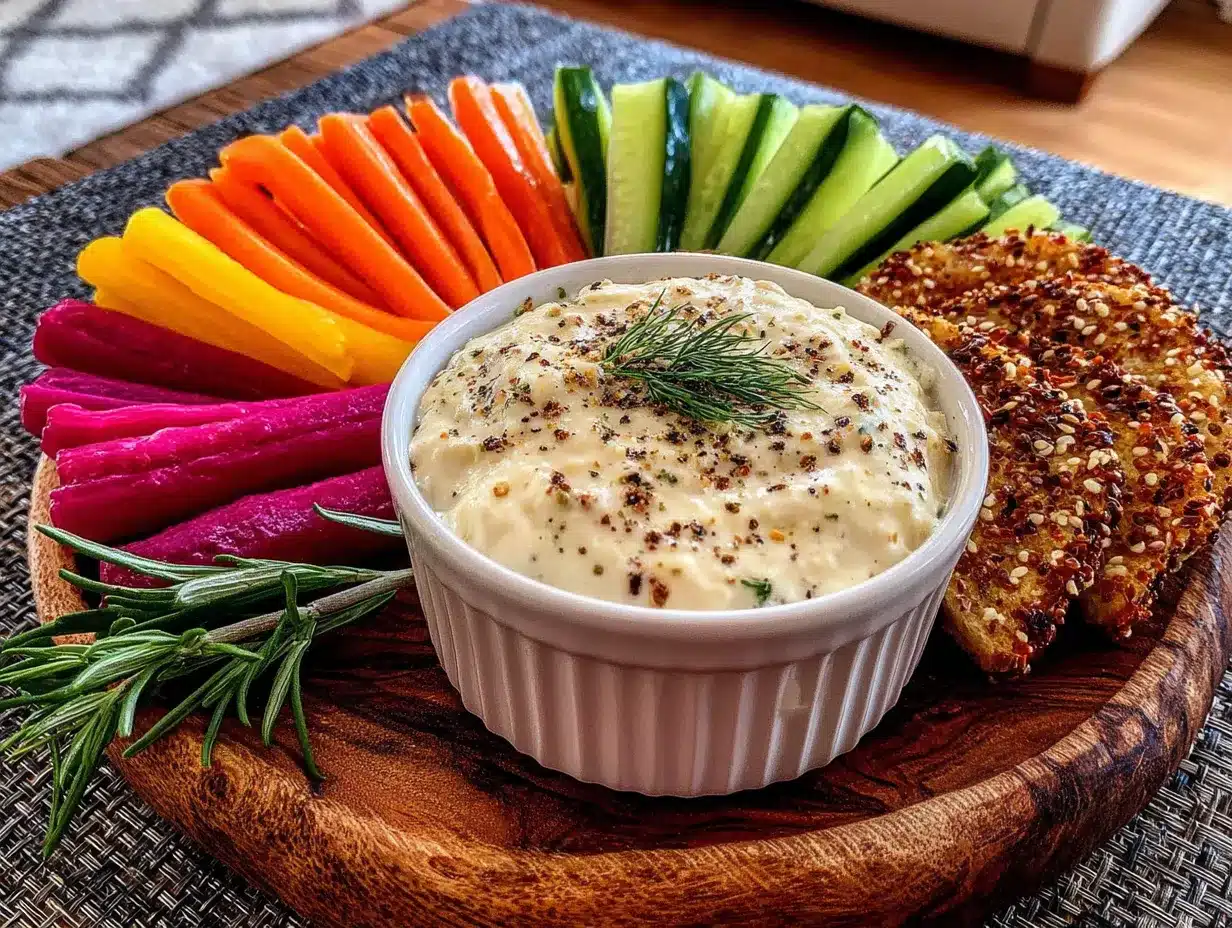
- 1 large round platter or pizza pan (12-14 inches works best)
- 1 cup baby carrots (look for firm, bright orange ones)
- 1 cup celery sticks (cut into 3-inch pieces)
- 1 cup bell pepper strips (red, yellow, or orange—green can be bitter for kids)
- 1 cup cucumber rounds (slice about 1/4 inch thick)
- 1 cup cherry tomatoes (halved if serving very young kids)
- 1/2 cup black olives (for making the spider—use whole olives)
- 1 small zucchini (cut into thin strips for spider legs)
Substitution guidance : If you’re dairy-free, use vegan cream cheese and coconut yogurt instead of sour cream. For a gluten-free option, check your ranch seasoning packet—most are gluten-free, but always read the label. In summer, swap in fresh snap peas or sugar snap peas for extra crunch. I’ve even used broccoli florets when I had them on hand, and my kids didn’t complain.
Equipment Needed
You don’t need fancy kitchen gadgets for this recipe, which is perfect for home cooks on a budget. Here’s what you’ll need:
- Large round platter or pizza pan (12-14 inches)—I found mine at a thrift store for $3, and it works perfectly
- Electric hand mixer or stand mixer (a whisk works too, but your arm will get tired—I learned that the hard way)
- Mixing bowl (medium size)
- Spatula (for spreading the dip into the web pattern)
- Cutting board and sharp knife (a dull knife makes ragged veggie cuts)
- Piping bag or zip-top bag (for creating the spider web design—I just use a sandwich bag with the corner snipped)
- Small offset spatula or butter knife (for smoothing the dip)
If you don’t have a round platter, a large rectangular baking sheet works fine—just arrange the veggies in a rectangular pattern. I’ve even used a clean pizza box lined with parchment paper for a school party. No one cares about the platter shape when the dip is this good.
Preparation Method
Let me walk you through this step by step. I’ve made this recipe at least a dozen times, so I know exactly where things can go wrong—and how to fix them.
Step 1: Soften the cream cheese
Take the cream cheese out of the fridge 30 minutes before you start. If you forget (I forget every single time), microwave it in 10-second bursts until it’s soft but not melted. You want it room temperature so the dip comes out smooth. If it’s too cold, you’ll end up with lumpy dip—trust me, I’ve been there.
Step 2: Make the ranch dip
In a medium mixing bowl, combine the softened cream cheese and sour cream. Beat with an electric hand mixer on medium speed until smooth and fluffy—about 2 minutes. Add the ranch seasoning packet and garlic powder, then beat again until fully incorporated. Slowly add the milk while mixing on low speed until the dip reaches a thick, spreadable consistency. It should look like thick frosting. If it’s too runny, add a little more cream cheese. If it’s too thick, add milk one tablespoon at a time. Taste it and adjust seasoning—I always add a pinch of black pepper.
Step 3: Prepare the spider web design
Scoop the ranch dip into a piping bag or a zip-top bag with the corner snipped off. On your round platter, pipe a large circle of dip in the center—about 4 inches across. Then pipe concentric circles around it, spacing them about 1.5 inches apart. Using a toothpick or the tip of a butter knife, drag lines from the center outward to create the web pattern. Wipe the toothpick clean between each line for a clean look. This takes maybe 2 minutes, and it’s the part my kids fight over helping with.
Step 4: Arrange the vegetables
Starting from the outer edge of the platter, arrange your vegetables in neat rows or circles. I like to group colors together—carrots in one section, bell peppers in another, cucumbers in another. Place the cherry tomatoes and black olives near the center for contrast. Leave the center web visible—that’s the star of the show. Press the veggies gently into the dip so they stay put during transport.
Step 5: Make the spider
Take two whole black olives and place them side by side on top of the dip in the center of the web. Cut the zucchini into thin strips—about 2 inches long—and arrange them around the olives to look like spider legs. You can use 8 legs for a realistic look, or 6 for a cartoonish spider. My kids insist on 10 legs because “spiders are scary with more legs.” I don’t argue with that logic.
Step 6: Garnish and serve
Sprinkle fresh chives or parsley over the dip for a pop of green. Cover the platter with plastic wrap and refrigerate for at least 30 minutes before serving—this lets the flavors meld together. The dip gets even better after an hour in the fridge. Serve chilled or at room temperature.
Cooking Tips & Techniques
I’ve made every mistake in the book with this recipe, so you don’t have to. Here are the lessons I learned the hard way:
- Don’t overmix the dip : If you beat the cream cheese too long, it becomes thin and watery. Stop as soon as it’s smooth and fluffy.
- Use room-temperature ingredients : Cold cream cheese creates lumps that never fully smooth out. Set it out 30 minutes ahead, or microwave it gently.
- Cut vegetables uniformly : Kids notice uneven pieces—and they’ll complain about it. Aim for 3-inch sticks and 1/4-inch rounds for consistency.
- Layer the flavors : Let the dip sit in the fridge for at least 30 minutes before serving. The ranch seasoning needs time to bloom. I once served it immediately and it tasted flat—never again.
- Multitask wisely : While the cream cheese softens, wash and cut all your vegetables. This saves about 10 minutes and keeps your kitchen clean.
- Keep it cold : If you’re taking this to a party, transport it on an ice pack or in a cooler. Warm dip separates and gets runny. I learned this at a Halloween potluck where my dip turned into soup—embarrassing.
Variations & Adaptations
This recipe is incredibly flexible. Here are some ways I’ve adapted it for different needs and tastes:
- Dairy-Free Version : Use vegan cream cheese and coconut yogurt in place of sour cream. The texture is slightly different, but the flavor is still amazing. My dairy-sensitive niece devoured it last Thanksgiving.
- Gluten-Free Option : Most ranch seasoning packets are gluten-free, but double-check the label. Serve with gluten-free crackers or veggie sticks.
- Spicy Twist : Add 1/4 teaspoon cayenne pepper or a dash of hot sauce to the dip. My husband loves this version, and it keeps the adults coming back for more.
- Seasonal Vegetable Swap : In spring, use sugar snap peas and radishes. In summer, swap in cherry tomatoes and bell peppers. In fall, add roasted pumpkin seeds on top for crunch.
- Kid-Friendly Customization : Let your kids arrange the vegetables themselves. My youngest loves making a “rainbow pattern” with the bell peppers, and it keeps them engaged with healthy eating.
- Bite-Sized Version : Instead of a platter, serve the dip in individual cups with veggie sticks poking out. Perfect for school lunchboxes or party favors.
Serving & Storage Suggestions
This veggie tray is best served chilled or at room temperature. I recommend taking it out of the fridge 10 minutes before serving so the dip softens slightly—it makes scooping easier. For presentation, arrange the vegetables in concentric circles around the spider web dip, with the spider sitting proudly in the center. Add a few fake spider rings around the platter for extra Halloween fun—my kids love this touch.
Complementary dishes : Serve alongside a bowl of tortilla chips, pretzel sticks, or pita triangles for dipping. It also pairs beautifully with a warm bowl of chili or a tray of mini sliders for a complete party spread.
Storage instructions : Leftover dip keeps in an airtight container in the refrigerator for up to 4 days. The cut vegetables will last 2-3 days in a sealed bag with a paper towel to absorb moisture. Do not freeze the dip—cream cheese becomes grainy when thawed.
Reheating tips : This dip is meant to be served cold, but if you prefer it at room temperature, let it sit out for 15-20 minutes. Do not microwave it—the texture will change completely.
Flavor development : The dip actually tastes better on day two. The ranch seasoning has more time to meld with the cream cheese and sour cream. I sometimes make the dip a day ahead and assemble the tray right before serving.
Nutritional Information & Benefits
Here’s an estimated breakdown per serving (based on 8 servings with vegetables):
| Nutrient | Amount per Serving |
|---|---|
| Calories | 185 |
| Total Fat | 14g |
| Saturated Fat | 8g |
| Cholesterol | 40mg |
| Sodium | 420mg |
| Total Carbohydrates | 12g |
| Dietary Fiber | 3g |
| Sugars | 5g |
| Protein | 4g |
| Vitamin A | 85% DV |
| Vitamin C | 60% DV |
| Calcium | 6% DV |
| Iron | 4% DV |
Health benefits : This recipe packs a surprising nutritional punch. Carrots provide beta-carotene for eye health, bell peppers are loaded with vitamin C, and the cream cheese offers calcium for strong bones. The ranch dip, when made from scratch, has fewer preservatives than store-bought versions. It’s a great way to sneak extra vegetables into picky eaters’ diets—my kids eat twice as many veggies when they’re arranged in a fun pattern.
Dietary considerations : This recipe is vegetarian and can be made gluten-free and dairy-free with substitutions. It contains dairy and may contain gluten depending on the ranch seasoning brand used. Always check labels for allergens.
Conclusion
This spider web veggie tray with homemade ranch dip is worth every minute you spend arranging those vegetables. It’s the recipe that finally helped me recreate that café magic, and now it’s become a staple in our home for Halloween parties, school events, and even regular Tuesday dinners when I need something fun on the table. The best part? You can customize it based on what your family loves—swap in their favorite veggies, adjust the dip to your taste, or let them help build the spider web. I’d love to hear how this recipe turns out for you. Drop a comment below with your favorite vegetable combination, or tag me in your photos if you make it for your next party. Happy cooking, and remember—sometimes the best recipes come from chasing a memory with a block of cream cheese and a whole lot of determination.
Frequently Asked Questions
Can I make this veggie tray ahead of time?
Absolutely. You can prepare the dip up to 2 days in advance and store it in an airtight container in the fridge. Cut the vegetables a day ahead and keep them in sealed bags with a damp paper towel to maintain freshness. Assemble the tray no more than 4 hours before serving for the best texture.
How do I keep the vegetables from sliding off the dip?
Press the vegetables gently into the dip—the cream cheese base acts like glue. For extra stability, arrange the veggies in tight rows so they support each other. If you’re transporting the tray, cover it with plastic wrap and keep it level during travel.
Can I use store-bought ranch dip instead of making it from scratch?
You can, but the homemade version is what makes this recipe special. Store-bought ranch dips are often thinner and don’t hold the spider web pattern as well. If you’re short on time, use a thick Greek yogurt-based ranch dip and follow the same piping instructions.
What other shapes can I make with the dip besides a spider web?
Get creative! For Christmas, pipe the dip into a wreath shape and add red bell pepper “berries.” For a birthday party, make a smiley face or a star. For a sports-themed party, pipe a football or soccer ball pattern. The technique works with any shape—just adjust your piping lines accordingly.
How do I get the spider web lines to look clean and even?
The key is wiping your toothpick or knife clean between each drag line. Start from the center and pull outward in straight lines, spacing them evenly around the circle. If a line smudges, don’t worry—just smooth it over with a clean finger and try again. Practice makes perfect, and kids love the imperfect webs best.
PrintKid-Friendly Spider Web Veggie Tray with Easy Ranch Dip

A fun and festive Halloween veggie tray featuring a creamy homemade ranch dip piped into a spider web pattern, surrounded by colorful vegetables and topped with an olive spider. Perfect for parties, school events, or getting kids excited about eating their veggies.
- Prep Time: 20 minutes
- Cook Time: 0 minutes
- Total Time: 20 minutes
- Yield: 8 servings 1x
- Category: Appetizer
- Cuisine: American
Ingredients
- 8 oz cream cheese, softened
- 1/2 cup sour cream
- 1 packet ranch seasoning mix
- 1/4 cup milk
- 1 teaspoon garlic powder (optional)
- Fresh chives or parsley for garnish (optional)
- 1 cup baby carrots
- 1 cup celery sticks (cut into 3-inch pieces)
- 1 cup bell pepper strips (red, yellow, or orange)
- 1 cup cucumber rounds (1/4 inch thick)
- 1 cup cherry tomatoes (halved if serving young kids)
- 1/2 cup black olives (whole)
- 1 small zucchini (cut into thin strips for spider legs)
Instructions
- Soften the cream cheese: Take the cream cheese out of the fridge 30 minutes before starting. If forgotten, microwave in 10-second bursts until soft but not melted.
- Make the ranch dip: In a medium mixing bowl, combine softened cream cheese and sour cream. Beat with an electric hand mixer on medium speed until smooth and fluffy, about 2 minutes. Add ranch seasoning packet and garlic powder, then beat until fully incorporated. Slowly add milk while mixing on low speed until the dip reaches a thick, spreadable consistency.
- Prepare the spider web design: Scoop the ranch dip into a piping bag or zip-top bag with the corner snipped off. On a large round platter, pipe a large circle of dip in the center (about 4 inches across). Pipe concentric circles around it, spacing them about 1.5 inches apart. Using a toothpick or butter knife, drag lines from the center outward to create the web pattern. Wipe the toothpick clean between each line.
- Arrange the vegetables: Starting from the outer edge of the platter, arrange vegetables in neat rows or circles. Group colors together. Place cherry tomatoes and black olives near the center. Press veggies gently into the dip.
- Make the spider: Place two whole black olives side by side on top of the dip in the center of the web. Cut zucchini into thin strips (about 2 inches long) and arrange them around the olives to look like spider legs (8-10 legs).
- Garnish and serve: Sprinkle fresh chives or parsley over the dip. Cover with plastic wrap and refrigerate for at least 30 minutes before serving. Serve chilled or at room temperature.
Notes
For best results, use room-temperature cream cheese to avoid lumps. Let the dip sit in the fridge for at least 30 minutes before serving to allow flavors to meld. If transporting, keep the tray on an ice pack to prevent the dip from becoming runny. The dip can be made up to 2 days in advance; vegetables can be cut a day ahead. Leftover dip keeps in an airtight container in the refrigerator for up to 4 days.
Nutrition
- Serving Size: 1 serving (about 1 c
- Calories: 185
- Sugar: 5
- Sodium: 420
- Fat: 14
- Saturated Fat: 8
- Carbohydrates: 12
- Fiber: 3
- Protein: 4
Keywords: Halloween, veggie tray, ranch dip, spider web, kid-friendly, party appetizer, healthy snack


