Love this? Save it for later!
Share the inspiration with your friends
My neighbor asked why I couldn’t just pile everything inside a hollowed-out pumpkin instead of arranging it all on a boring board. I started to explain why that wouldn’t work—then stopped. She had a point.
Honestly, I was about to launch into a whole speech about presentation logistics and how the pumpkin walls would get soggy. But the more I thought about it, the more I realized my objections were just habits, not real problems. So I grabbed a pumpkin, scraped out the seeds, and gave it a shot.
Let me tell you, the first attempt was a mess. I filled it too full, and everything slid around like it was on a slip-n-slide. But the second time? Pure magic. The pumpkin acted like a natural bowl, keeping everything contained and looking incredibly festive. Plus, the cold ingredients stayed chilled against the pumpkin flesh, and the whole thing became a centerpiece that people actually fought over.
I mean, who knew that a simple Halloween decoration could double as the best party appetizer holder? The best part is that when the party’s over, you just toss the pumpkin. No messy board to scrub, no weird cheese stains on your favorite wooden platter. Maybe you’ve been there—staring at a sticky board at midnight, regretting every life choice that led to that moment.
Now this Easy Halloween Pumpkin Charcuterie Board is my go-to for every fall gathering. It’s the kind of recipe that makes you look like a party-planning genius with almost zero effort. And honestly, I’m glad my neighbor didn’t listen to me.
Why You’ll Love This Recipe
This isn’t just another charcuterie board—it’s a conversation starter, a centerpiece, and a crowd-pleaser all rolled into one edible pumpkin. I’ve tested this at everything from casual Halloween movie nights to full-blown costume parties, and it never fails to impress.
- Zero Cooking Required : No oven, no stove, no microwave. Just chop, arrange, and serve. Perfect for busy hosts or last-minute gatherings.
- Naturally Portion-Controlled : The pumpkin dictates the size, so you won’t overfill or underwhelm. It’s self-regulating!
- Minimal Cleanup : When the party’s over, compost the pumpkin and wash the knife. That’s it. No greasy boards or stained platters.
- Customizable for Any Diet : Gluten-free, keto, vegetarian, or vegan—this board adapts to your crowd without missing a beat.
- Visually Stunning : The orange pumpkin creates a dramatic contrast against dark crackers, green herbs, and colorful fruits. Instagram-worthy without trying.
What makes this different from every other charcuterie board out there is the built-in wow factor. People expect a wooden board. They don’t expect a pumpkin that’s literally stuffed with cheese, meat, and snacks. It’s the kind of thing that makes guests pull out their phones before they even grab a cracker.
I’ve served this at three different Halloween parties this season, and each time, someone asked for the recipe before they’d even finished their first bite. It’s comfort food reimagined—faster, easier, but with the same soul-soothing satisfaction of sharing good food with good people.
What Ingredients You Will Need
This recipe uses simple, grab-and-go ingredients that you can find at any grocery store. The beauty is in the contrast—colors, textures, and flavors all working together inside that pumpkin shell.
For the Pumpkin Base
- 1 medium sugar pumpkin (about 4-5 pounds) — Look for one that’s round and stable. Carving pumpkins work too, but sugar pumpkins have thicker walls and hold up better.
- 1 tablespoon olive oil (for rubbing the outside if you want a glossy look)
For the Savory Layer
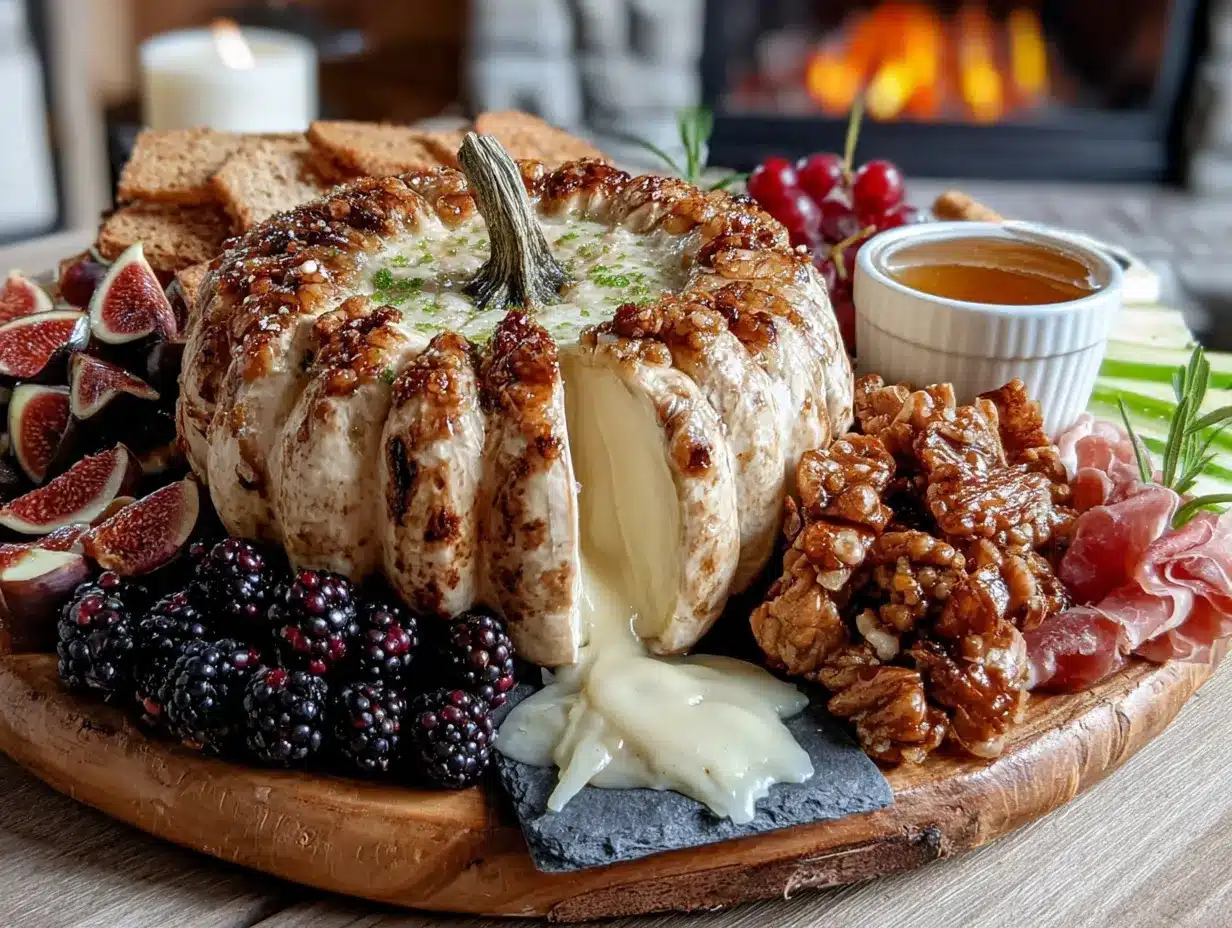
- 8 ounces sharp cheddar cheese, cubed — I prefer Cabot or Tillamook for that extra tang.
- 8 ounces Gouda or smoked cheese, sliced into thin wedges — The smoky flavor pairs beautifully with the pumpkin.
- 6 ounces salami or prosciutto, rolled or folded — Genoa salami holds up well and doesn’t get greasy.
- 4 ounces pepperoni slices (optional, but great for kids)
For the Crunchy Layer
- 1 cup assorted crackers — Use a mix of shapes and sizes. I love Rain Coast Rosemary Crackers for their herby crunch.
- 1/2 cup pretzel sticks — They add height and texture.
- 1/4 cup pumpkin seeds (pepitas) — Toasted and salted, for that extra Halloween vibe.
For the Fresh & Sweet Elements
- 1 cup red and green grapes, washed and separated into small clusters
- 1 apple, thinly sliced and tossed in lemon juice (to prevent browning)
- 1/4 cup dried cranberries or cherries — Adds a pop of color and sweetness.
- Fresh rosemary or sage sprigs — For garnish and that earthy fall aroma.
For Dipping (Optional but Recommended)
- 1/2 cup honey or fig jam — A small bowl set right into the pumpkin adds sweetness.
- 1/4 cup whole-grain mustard — Balances the richness of the cheese.
Feel free to swap based on what you have. Use brie instead of Gouda, or swap prosciutto for turkey slices. The pumpkin is forgiving—it just wants to be full of delicious things.
Equipment Needed
You don’t need anything fancy for this recipe. In fact, you probably already have everything in your kitchen right now.
- Sharp chef’s knife — A good 8-inch knife makes cutting the pumpkin top clean and safe. Dull knives slip, so sharpen yours first.
- Large metal spoon — For scooping out seeds and stringy pulp. An ice cream scoop works too, but a spoon gives you more control.
- Cutting board — Use a sturdy one that won’t slide around. Place a damp paper towel underneath to keep it steady.
- Small bowl or ramekin — To hold dips inside the pumpkin. Make sure it’s oven-safe if you plan to bake the pumpkin later.
- Paper towels — For drying the inside of the pumpkin. Moisture is the enemy of crispy crackers.
- Tongs or small serving spoons — For arranging ingredients without touching everything.
If you’re feeling fancy, a melon baller helps create uniform cheese cubes, but honestly, I just cut mine into rough chunks. Imperfect shapes look more rustic and inviting anyway.
Preparation Method
- Prepare the pumpkin. Wash the outside of the pumpkin thoroughly with warm water and a scrub brush. Dry it completely. Using your sharp knife, cut a circle around the stem about 4 inches in diameter, angling the knife inward so the lid doesn’t fall inside. Lift off the top and set it aside.
- Scoop out the insides. Use your metal spoon to scrape out all the seeds and stringy pulp. Be thorough—any leftover pulp will make the inside soggy and unappealing. Discard the pulp but save the seeds for roasting later (they make a great snack!).
- Dry the interior. Take a clean paper towel and wipe the inside of the pumpkin until it feels dry to the touch. This step is crucial. Moisture will turn your crackers into sad, limp wafers within an hour. Let the pumpkin sit open-side-down on a paper towel for 10 minutes if you have time.
- Create a stable base. If your pumpkin wobbles, slice a thin, even layer off the bottom to create a flat surface. Don’t cut too much—you don’t want to hit the cavity. Test it on your serving surface before you start filling.
- Layer the heavy ingredients first. Start with the cheese cubes and salami rolls at the bottom of the pumpkin. Press them gently against the walls to create a stable foundation. This prevents lighter items from sinking later.
- Add the crackers and pretzels. Stand crackers upright between the cheese pieces, wedging them in for stability. Pretzel sticks can be inserted like little spikes, pointing upward for visual interest.
- Tuck in the fresh elements. Place grape clusters in the gaps, letting some hang over the edge of the pumpkin for a cascading effect. Add apple slices in a fan pattern against one side.
- Add the finishing touches. Sprinkle dried cranberries and pumpkin seeds over the top. Insert rosemary sprigs between ingredients for that pop of green. If using honey or jam, place your small bowl in the center, pressing it down gently so it sits level.
- Replace the lid (optional). For a dramatic reveal, prop the pumpkin lid at a jaunty angle using a toothpick. Guests will lift it to grab snacks, and the surprise factor is delightful.
- Serve immediately or refrigerate. This board holds well for about 2 hours at room temperature. If you’re making it ahead, cover the entire pumpkin with plastic wrap and refrigerate for up to 4 hours. Let it sit at room temperature for 15 minutes before serving.
Cooking Tips & Techniques
I’ve made this board at least a dozen times, and I’ve learned a few things the hard way. Here are my best tips so you don’t make the same mistakes.
Don’t overfill the pumpkin. I know it’s tempting to cram in as much as possible, but an overstuffed pumpkin becomes a mess. Leave about an inch of space at the top so guests can easily reach in without knocking everything over.
Use a sugar pumpkin, not a carving pumpkin. Carving pumpkins are bred for size and thin walls, not flavor or structure. Sugar pumpkins (also called pie pumpkins) have thicker, firmer flesh that holds up better and tastes sweeter if someone accidentally eats a bit of the wall.
Keep crackers away from the bottom. Crackers that touch the pumpkin floor will absorb moisture and get soft within 30 minutes. Elevate them by wedging them between cheese pieces or standing them upright against the sides.
Balance your flavors. A good charcuterie board has salty, sweet, tangy, and creamy elements. If you’re using sharp cheddar and salami (salty), balance with grapes and honey (sweet). If you’re using brie (creamy), add cornichons or mustard (tangy).
Prep everything before you start assembling. Chop all your cheese, slice your apple, wash your grapes, and arrange your crackers on a tray. Once you start filling the pumpkin, you won’t want to stop and wash a cutting board mid-process.
Don’t skip the drying step. I learned this the hard way at a Halloween party when my crackers turned into mush within 20 minutes. A dry pumpkin interior is non-negotiable for crispy snacks.
Variations & Adaptations
One of the best things about this recipe is how flexible it is. Here are some variations I’ve tried and loved.
Healthy Harvest Board
Swap the cheese for hummus and veggies like carrot sticks, cucumber rounds, and bell pepper strips. Use whole-grain crackers and add roasted chickpeas for crunch. This version is lighter but still feels indulgent because of the pumpkin presentation.
Keto-Friendly Board
Skip the crackers and pretzels entirely. Load up on cheese, cured meats, nuts, and olives. Add celery sticks and cucumber slices for crunch. The pumpkin itself is low-carb, so you’re golden.
Sweet Tooth Board
Turn it into a dessert board! Fill the pumpkin with chocolate-covered pretzels, mini marshmallows, caramel dip, apple slices, and strawberries. Add a small bowl of melted chocolate for dipping. This is a huge hit with kids.
Spicy Fiesta Board
Use pepper jack cheese, chorizo slices, jalapeño-stuffed olives, and spicy crackers. Add a small bowl of salsa or queso dip. The pumpkin’s sweetness balances the heat beautifully.
Vegan Harvest Board
Use vegan cheese alternatives (I like Miyoko’s smoked farmhouse), marinated artichoke hearts, roasted red peppers, and a variety of nuts. Add a bowl of balsamic glaze for dipping. No one will miss the dairy.
Serving & Storage Suggestions
This Easy Halloween Pumpkin Charcuterie Board is best served at room temperature, so let it sit out for about 15 minutes after assembling. The cheese softens slightly, and the flavors meld together beautifully.
For presentation, place the pumpkin on a large wooden board or a slate tile to catch any stray crumbs. Surround it with extra crackers, a few whole apples, and some fall leaves for that Pinterest-worthy look.
If you’re serving this at a party, set it out at the beginning and let guests graze. It will hold up well for about 2 hours at room temperature. After that, the crackers may start to soften, and the cheese might sweat a little.
Storage: If you have leftovers (unlikely, but possible), remove all the ingredients from the pumpkin and store them separately in airtight containers. The pumpkin itself should be composted or discarded—it won’t keep well once cut and filled. Refrigerate the cheese and meats for up to 3 days.
Reheating: You can roast the hollowed pumpkin after the party! Cut it into wedges, brush with olive oil, and roast at 400°F for 25 minutes. Sprinkle with salt and serve as a side dish. The flavors develop beautifully overnight.
Nutritional Information & Benefits
While this is definitely a treat-yourself appetizer, there are some surprising nutritional perks hidden in that pumpkin.
Pumpkin itself is rich in vitamin A, fiber, and antioxidants. The orange flesh supports eye health and immune function. Plus, the seeds (if you roast them) are packed with magnesium, zinc, and healthy fats.
Cheese provides calcium and protein, while nuts and seeds add heart-healthy fats. Grapes and apples contribute vitamin C and natural sweetness without refined sugar.
For a rough estimate per serving (assuming 8 servings):
- Calories: 350-400
- Protein: 15-18g
- Fat: 22-26g
- Carbohydrates: 25-30g
- Fiber: 3-4g
If you’re watching your sodium, choose low-sodium cheeses and meats, and skip the pretzels. The pumpkin itself is naturally sodium-free.
This board is naturally gluten-free if you choose gluten-free crackers. It’s also easy to make vegetarian by omitting the meat and adding extra cheese or marinated vegetables.
Conclusion
This Easy Halloween Pumpkin Charcuterie Board has become my signature fall appetizer, and I’m honestly a little proud of it. It’s the kind of recipe that makes people stop and say, “Wait, you made this?” and then you get to shrug and say, “It’s actually really simple.”
The best part is that you can customize it to fit your crowd, your budget, and your dietary needs. Whether you’re hosting a costume party, a family movie night, or just want to feel festive on a random Tuesday, this board delivers.
I’d love to hear how yours turns out! Drop a comment below with your favorite fillings or any creative twists you tried. Did you use a different cheese? Add a dip I didn’t mention? Share your photos and tag me—I’m always looking for new inspiration.
Until next time, happy snacking and happy Halloween!
Frequently Asked Questions
Can I use a carving pumpkin instead of a sugar pumpkin?
You can, but I don’t recommend it. Carving pumpkins have thinner walls and more water content, which means they get soggy faster and may collapse under the weight of the ingredients. Sugar pumpkins are sturdier and taste better if someone accidentally eats a piece.
How far in advance can I make this board?
You can assemble the board up to 4 hours ahead of time. Just cover the entire pumpkin with plastic wrap and refrigerate. Let it sit at room temperature for 15 minutes before serving to let the cheese soften.
What if I don’t have a pumpkin that sits flat?
Slice a thin, even layer off the bottom with a sharp knife. Test it on your counter before filling. If it still wobbles, trim a little more. Just be careful not to cut into the cavity.
Can I bake the pumpkin after using it as a board?
Absolutely! After the party, cut the pumpkin into wedges, brush with olive oil, and roast at 400°F for 25 minutes. Sprinkle with salt and serve as a side dish. The roasted pumpkin is delicious and reduces food waste.
What are the best cheeses for this board?
Sharp cheddar and smoked Gouda are my go-to choices because they contrast well with the pumpkin’s sweetness. Brie, aged gouda, and manchego also work beautifully. Avoid soft, spreadable cheeses as they can get messy inside the pumpkin.
PrintEasy Halloween Pumpkin Charcuterie Board (Best Party Appetizer)
A festive and effortless appetizer that turns a hollowed-out pumpkin into a stunning charcuterie board. Perfect for Halloween parties, this no-cook recipe is customizable, visually impressive, and requires minimal cleanup.
- Prep Time: 20 minutes
- Cook Time: 0 minutes
- Total Time: 20 minutes
- Yield: 8 servings 1x
- Category: Appetizer
- Cuisine: American
Ingredients
- 1 medium sugar pumpkin (about 4–5 pounds)
- 1 tablespoon olive oil (for rubbing the outside if you want a glossy look)
- 8 ounces sharp cheddar cheese, cubed
- 8 ounces Gouda or smoked cheese, sliced into thin wedges
- 6 ounces salami or prosciutto, rolled or folded
- 4 ounces pepperoni slices (optional)
- 1 cup assorted crackers
- 1/2 cup pretzel sticks
- 1/4 cup pumpkin seeds (pepitas), toasted and salted
- 1 cup red and green grapes, washed and separated into small clusters
- 1 apple, thinly sliced and tossed in lemon juice
- 1/4 cup dried cranberries or cherries
- Fresh rosemary or sage sprigs for garnish
- 1/2 cup honey or fig jam (optional)
- 1/4 cup whole-grain mustard (optional)
Instructions
- Prepare the pumpkin: Wash the outside thoroughly with warm water and a scrub brush. Dry completely. Using a sharp knife, cut a circle around the stem about 4 inches in diameter, angling the knife inward so the lid doesn’t fall inside. Lift off the top and set aside.
- Scoop out the insides: Use a metal spoon to scrape out all the seeds and stringy pulp. Discard the pulp but save the seeds for roasting.
- Dry the interior: Wipe the inside of the pumpkin with a clean paper towel until dry. Let the pumpkin sit open-side-down on a paper towel for 10 minutes if possible.
- Create a stable base: If the pumpkin wobbles, slice a thin, even layer off the bottom to create a flat surface. Test on your serving surface before filling.
- Layer the heavy ingredients first: Start with cheese cubes and salami rolls at the bottom of the pumpkin, pressing them gently against the walls.
- Add the crackers and pretzels: Stand crackers upright between the cheese pieces. Insert pretzel sticks like little spikes pointing upward.
- Tuck in the fresh elements: Place grape clusters in the gaps, letting some hang over the edge. Add apple slices in a fan pattern against one side.
- Add the finishing touches: Sprinkle dried cranberries and pumpkin seeds over the top. Insert rosemary sprigs between ingredients. If using honey or jam, place a small bowl in the center.
- Replace the lid (optional): Prop the pumpkin lid at a jaunty angle using a toothpick for a dramatic reveal.
- Serve immediately or refrigerate: This board holds well for about 2 hours at room temperature. If making ahead, cover with plastic wrap and refrigerate for up to 4 hours. Let sit at room temperature for 15 minutes before serving.
Notes
Use a sugar pumpkin (not a carving pumpkin) for thicker walls and better structure. Dry the interior thoroughly to prevent soggy crackers. Don’t overfill—leave about an inch of space at the top. For a keto-friendly version, skip crackers and pretzels and load up on cheese, meats, nuts, and olives.
Nutrition
- Serving Size: 1 serving (approxima
- Calories: 375
- Sugar: 15
- Sodium: 800
- Fat: 24
- Saturated Fat: 10
- Carbohydrates: 28
- Fiber: 3.5
- Protein: 16
Keywords: Halloween, pumpkin, charcuterie board, party appetizer, fall, no-cook, easy, festive


