Love this? Save it for later!
Share the inspiration with your friends
Last October, my neighbor Carla watched me fumbling with a pastry bag on my front porch, trying to pipe frosting onto cookies that were clearly too warm. She didn’t say anything at first. Then she just shook her head, walked over to her garden, and came back with a handful of fresh sage she’d just picked. “Forget the fancy bag,” she said. “Come inside. I’ll show you something better.”
I followed her into her tiny kitchen, where the counters were cluttered with cookbooks and dried herbs hanging from a string. She pulled out a worn recipe card, the edges soft and stained. “Pumpkin snickerdoodles,” she said. “My grandmother used to make them with canned pumpkin because that’s what she had. No fussing.” She showed me how she mixes the dough in one bowl—no electric mixer, just a wooden spoon and some elbow grease. Honestly, I was skeptical. I mean, I’d made snickerdoodles before, and they always required creaming butter and sugar for what felt like forever. But Carla’s method was different. It was faster. It was simpler. And the cookies? Let me tell you, they were incredible.
I’ve adapted her recipe over the past year, adding a quick icing because, well, sometimes you just want that extra sweetness. These quick iced pumpkin snickerdoodle cookies have become my go-to for weeknight baking emergencies. You know that feeling when you need something homemade but you’re short on time and energy? These cookies are the answer. They come together in under 30 minutes, use pantry staples, and taste like fall in cookie form. Carla’s grandmother would approve.
Why You’ll Love This Recipe
Let me be honest with you. I’ve tested a lot of pumpkin cookie recipes over the years, and most of them fall into one of two categories: either they’re dry and crumbly, or they’re too cakey and fall apart in your hand. These quick iced pumpkin snickerdoodle cookies are different. They have that perfect chewy center with slightly crisp edges, just like a classic snickerdoodle, but with a warm pumpkin flavor that doesn’t overpower.
- Quick & Easy: From start to finish, these cookies are ready in about 25 minutes. No chilling required. No stand mixer needed. Just one bowl and a spoon.
- Simple Ingredients: You probably have most of these in your pantry right now. Canned pumpkin, butter, sugar, flour, cinnamon, and cream of tartar. That’s it.
- Perfect for Weeknights: When you’re tired after a long day but still want something homemade, these cookies deliver. They’re also great for last-minute bake sales or when you realize you need a dessert for tomorrow’s potluck.
- Crowd-Pleaser: I’ve brought these to work, to family gatherings, and to neighbor meetups. They disappear fast. Kids love the icing, and adults appreciate the subtle spice.
- Unbelievably Delicious: The combination of pumpkin, cinnamon, and cream of tartar creates a tangy-sweet flavor that’s totally addictive. The icing adds just enough sweetness without making them cloying.
What makes these cookies stand out from other pumpkin recipes is the texture. By using melted butter instead of softened, and by skipping the chilling step, the cookies spread just enough to create those delightful crinkly tops. Plus, the cream of tartar gives them that signature snickerdoodle tang that pairs beautifully with the pumpkin. Trust me, this isn’t just another pumpkin cookie recipe. It’s the one you’ll keep coming back to.
What Ingredients You Will Need
This recipe uses simple, wholesome ingredients to deliver bold flavor and satisfying texture without the fuss. Most of these are pantry staples, which makes these cookies perfect for spontaneous baking sessions.
- All-purpose flour (1 ¾ cups / 220g) – Regular all-purpose flour works best here. I’ve tried it with bread flour, and the cookies came out too dense. Stick with AP flour for that perfect tender crumb.
- Granulated sugar (1 cup / 200g) – Regular white sugar gives the cookies their structure and sweetness. Don’t substitute with brown sugar here; it’ll change the texture too much.
- Pumpkin puree (½ cup / 120g) – Make sure you’re using pure pumpkin puree, not pumpkin pie filling. I prefer Libby’s brand for its consistent texture, but any canned pumpkin will work. If you’re feeling ambitious, you can use homemade pumpkin puree—just make sure it’s well-drained so the cookies aren’t too wet.
- Unsalted butter (½ cup / 113g, melted) – Melting the butter is key to the quick method. It helps the cookies spread nicely and creates that chewy texture. If you only have salted butter, reduce the added salt by half.
- Large egg (1) – Room temperature is best, but if you forget to take it out ahead of time, just place it in a bowl of warm water for 5 minutes.
- Vanilla extract (1 teaspoon) – Pure vanilla extract adds depth, but imitation vanilla works fine in a pinch.
- Cream of tartar (1 teaspoon) – This is the secret ingredient that gives snickerdoodles their signature tang. Don’t skip it! If you don’t have cream of tartar, you can substitute with 1 teaspoon of lemon juice or white vinegar, but the texture might be slightly different.
- Baking soda (½ teaspoon) – Helps the cookies rise just a bit.
- Ground cinnamon (1 teaspoon for dough, plus 2 tablespoons for coating) – I recommend using Ceylon cinnamon if you can find it; it’s milder and sweeter than the standard Cassia cinnamon. But honestly, whatever you have in your spice cabinet will work.
- Ground nutmeg (¼ teaspoon) – Freshly grated nutmeg is amazing here, but pre-ground is perfectly fine.
- Ground cloves (⅛ teaspoon) – Just a tiny pinch for warmth. Go easy—cloves can overpower quickly.
- Salt (½ teaspoon) – Balances the sweetness and enhances all the flavors.
- Powdered sugar (1 cup / 120g, for icing) – Sift it if you can; it makes the icing smoother.
- Milk (2-3 tablespoons, for icing) – Whole milk gives the richest icing, but any milk works, including non-dairy options like almond or oat milk.
- Vanilla extract (½ teaspoon, for icing) – Adds a little extra flavor to the glaze.
Equipment Needed
You don’t need fancy equipment for these cookies, which is part of their charm. Here’s what you’ll need:
- Large mixing bowl – Any bowl will do, but a wide, shallow bowl makes mixing easier.
- Wooden spoon or rubber spatula – For mixing the dough. A sturdy spatula is my go-to.
- Measuring cups and spoons – Accurate measurements matter, especially for the flour and pumpkin.
- Baking sheets – Two standard baking sheets work well. If you only have one, just bake in batches.
- Parchment paper or silicone baking mat – Parchment paper makes cleanup a breeze and prevents sticking. Silicone mats are reusable and work great too.
- Small bowl – For the cinnamon-sugar coating.
- Cooling rack – Essential for letting the cookies cool properly before icing. If you don’t have one, you can use a clean kitchen towel laid flat.
- Whisk – For making the icing. A fork works in a pinch.
I’ve made these cookies in a tiny apartment kitchen with minimal tools, and they turned out perfectly. Don’t let a lack of fancy equipment stop you.
Preparation Method
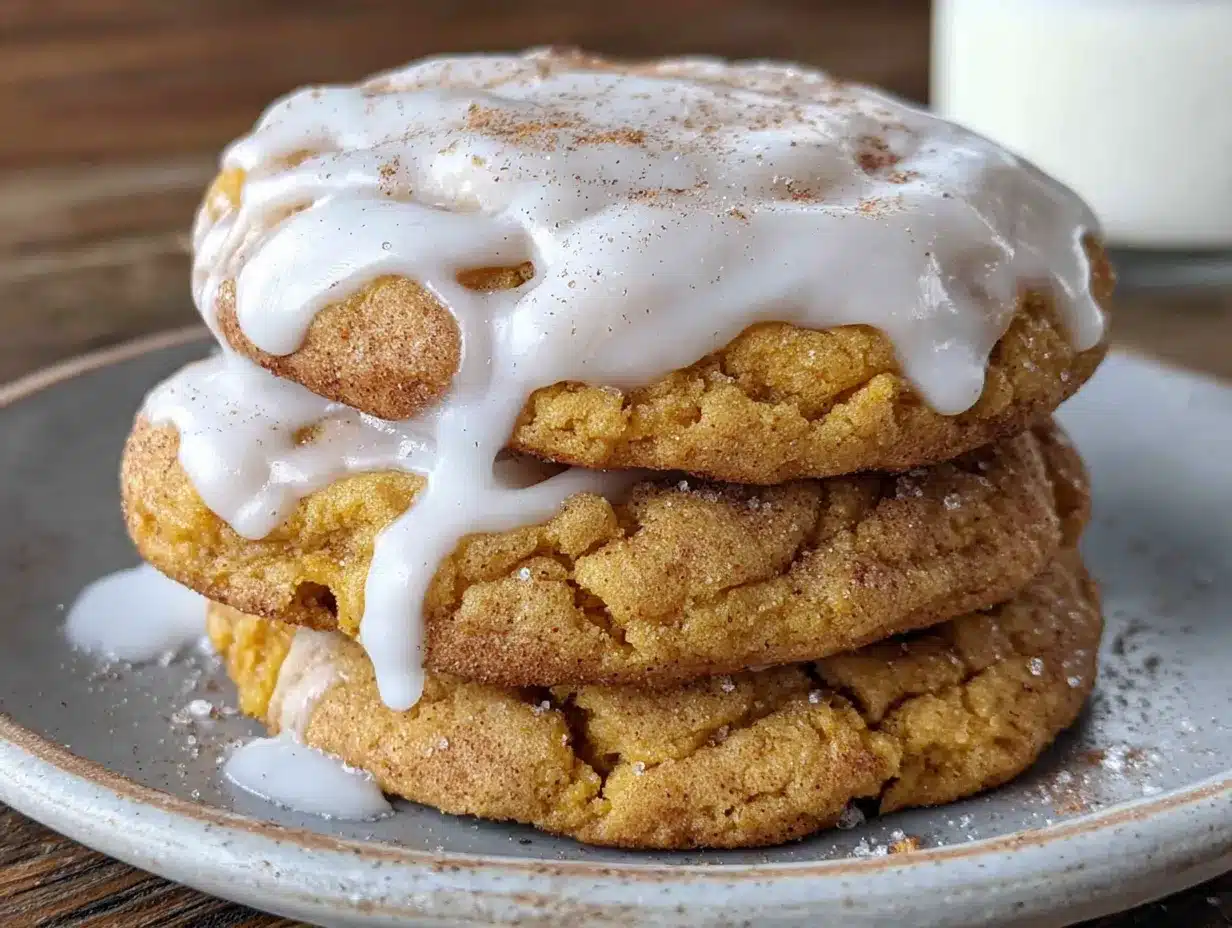
Let’s get baking! This process is straightforward, but I’ve included some tips I’ve learned from making these cookies dozens of times.
- Preheat your oven to 350°F (175°C). Line two baking sheets with parchment paper. This is important—don’t skip the parchment, or the cookies might stick.
- Melt the butter. In a large microwave-safe bowl, melt the butter in 20-second intervals until fully liquid. Alternatively, melt it in a small saucepan on the stove. Let it cool for a minute or two—you don’t want it hot enough to cook the egg.
- Mix the wet ingredients. Add the granulated sugar, pumpkin puree, egg, and vanilla extract to the melted butter. Stir until everything is well combined. The mixture will look slightly thick and glossy. Don’t worry if it seems a bit separated; that’s normal.
- Whisk the dry ingredients. In a separate small bowl (or just on top of the wet ingredients if you’re feeling bold), whisk together the flour, cream of tartar, baking soda, 1 teaspoon cinnamon, nutmeg, cloves, and salt. I like to give the dry ingredients a quick stir to make sure the leavening agents are evenly distributed.
- Combine wet and dry. Add the dry ingredients to the wet mixture. Stir with your wooden spoon or spatula until just combined. Stop as soon as you don’t see any more streaks of flour. Overmixing will make the cookies tough, and nobody wants tough cookies.
- Make the cinnamon coating. In a small bowl, mix together the remaining 2 tablespoons of cinnamon with 2 tablespoons of granulated sugar. This will be your coating mixture.
- Shape the cookies. Scoop about 1.5 tablespoons of dough (I use a small cookie scoop for consistency) and roll it into a ball. Then roll the ball in the cinnamon-sugar mixture until fully coated. Place the coated balls on the prepared baking sheets, spacing them about 2 inches apart. They’ll spread a bit, so give them room.
- Bake. Bake for 10-12 minutes, or until the edges are set and the tops look slightly crackled. The centers might still look a tiny bit soft, but that’s okay—they’ll continue to set as they cool. For softer, chewier cookies, bake for 10 minutes. For crisper edges, go for 12 minutes.
- Cool. Let the cookies cool on the baking sheet for 5 minutes. This step is crucial! If you try to move them too soon, they’ll fall apart. After 5 minutes, transfer them to a cooling rack to cool completely.
- Make the icing. While the cookies are cooling, whisk together the powdered sugar, milk, and ½ teaspoon vanilla extract in a small bowl. Start with 2 tablespoons of milk and add more if needed. You’re looking for a consistency that’s thick but still drizzle-able. It should fall off the whisk in a smooth ribbon.
- Ice the cookies. Once the cookies are completely cool, drizzle the icing over the tops. You can use a spoon, a whisk, or even a zip-top bag with a tiny corner snipped off. I like to let the icing drip naturally for that rustic look.
- Let the icing set. Allow the icing to firm up for about 15-20 minutes before serving. If you can’t wait that long (I get it), you can eat them right away—the icing will just be a bit messy.
Cooking Tips & Techniques
After making these cookies more times than I care to count, I’ve picked up a few tricks that make the process smoother and the results better.
Don’t overmix the dough. This is the number one mistake I see people make. Mix until the flour just disappears. A few streaks are fine. Overmixing develops the gluten, which leads to tough, dense cookies instead of tender, chewy ones.
Use a cookie scoop for even sizing. I learned this one the hard way after making a batch where some cookies were tiny and others were monster-sized. A small cookie scoop gives you consistent balls that bake evenly. If you don’t have one, use two spoons to portion the dough.
Chill the dough if you have time. I know I said no chilling required, and that’s true. But if you have an extra 30 minutes, chilling the dough balls before baking will result in thicker, puffier cookies. The cookies will spread less and have a more pronounced dome. Both versions are delicious, so it’s really a matter of preference.
Watch the baking time closely. Every oven runs a little differently. My oven tends to run hot, so I always check at the 9-minute mark. The cookies are done when the edges are lightly golden and the tops look set but soft. They’ll continue to cook on the hot baking sheet after you pull them out.
Let them cool completely before icing. I made the mistake of icing warm cookies once, and the icing just melted into a puddle. Patience is key here. If you’re in a rush, you can skip the icing altogether—the cookies are still amazing on their own.
Double the recipe if you’re feeding a crowd. These cookies disappear fast. I’ve learned to make a double batch whenever I bring them anywhere. They also freeze beautifully, so you can stash some away for later.
Variations & Adaptations
One of the best things about this recipe is how flexible it is. Here are some variations I’ve tried and loved.
Gluten-Free Version: Substitute the all-purpose flour with a 1:1 gluten-free baking flour blend. I’ve used Bob’s Red Mill and King Arthur brands with great success. The texture will be slightly more delicate, but the flavor is still spot-on.
Vegan Version: Replace the butter with melted coconut oil or vegan butter. Use a flax egg (1 tablespoon ground flaxseed mixed with 3 tablespoons water, let sit for 5 minutes) instead of the regular egg. For the icing, use plant-based milk. The cookies will be a bit less tender, but still delicious.
Spice It Up: If you love warm spices, add ¼ teaspoon of ground ginger and a pinch of cardamom to the dough. This gives the cookies a chai-like flavor that’s perfect for fall.
Pumpkin Seed Topping: Before baking, press a few pumpkin seeds (pepitas) into the top of each cookie dough ball. They add a nice crunch and make the cookies look extra special.
Maple Icing: Swap the vanilla extract in the icing for maple extract, or use 2 tablespoons of real maple syrup in place of some of the milk. The maple-pumpkin combination is absolutely heavenly.
Air Fryer Method: I tried this out of curiosity, and it works! Preheat your air fryer to 320°F (160°C). Place the cookie dough balls in the basket, leaving space between them. Cook for 6-8 minutes, checking at the 6-minute mark. The cookies will be slightly smaller but just as tasty.
Serving & Storage Suggestions
These cookies are best served at room temperature, with the icing fully set. I love them with a cold glass of milk or a hot cup of coffee. They’re also fantastic crumbled over vanilla ice cream for an impromptu dessert.
For storage, place the cookies in an airtight container at room temperature. They’ll stay fresh for up to 5 days, though honestly, they rarely last that long in my house. If you stack them, place a piece of parchment paper between layers to prevent the icing from sticking.
You can also freeze these cookies, with or without the icing. To freeze, place the cooled, un-iced cookies in a single layer on a baking sheet and freeze until solid (about 2 hours). Then transfer them to a freezer-safe bag or container. They’ll keep for up to 3 months. When you’re ready to enjoy them, thaw at room temperature and add the icing fresh. The texture remains remarkably good.
If you’re planning to make these ahead for an event, I recommend baking the cookies and freezing them un-iced. Then, on the day of your event, thaw them and whip up a fresh batch of icing. The cookies will taste like you just baked them.
Nutritional Information & Benefits
Here’s the estimated nutritional breakdown for one cookie (based on a batch of 24 cookies):
- Calories: 145
- Total Fat: 6g
- Saturated Fat: 3.5g
- Cholesterol: 20mg
- Sodium: 95mg
- Total Carbohydrates: 22g
- Dietary Fiber: 1g
- Sugars: 14g
- Protein: 2g
These cookies aren’t health food, but they do offer some nutritional benefits thanks to the pumpkin. Pumpkin is rich in vitamin A (beta-carotene), which supports eye health and immune function. It also provides fiber and antioxidants. Plus, the cinnamon in the coating has anti-inflammatory properties.
If you’re watching your sugar intake, you can reduce the sugar in the dough by ¼ cup without significantly affecting the texture. The icing can also be made with a sugar substitute like Swerve, though the consistency will be slightly different.
These cookies contain gluten, dairy, and eggs. For allergen-friendly options, check the variations section above.
Conclusion
These quick iced pumpkin snickerdoodle cookies have become a staple in my kitchen, and I think they’ll become one in yours too. They’re fast enough for a weeknight craving, special enough for holiday cookie exchanges, and simple enough that even beginner bakers can nail them on the first try.
What I love most about this recipe is how it honors Carla’s grandmother’s philosophy: good food doesn’t have to be complicated. With just a few pantry staples and a little bit of time, you can create something that tastes like a warm hug. The pumpkin adds a subtle earthiness, the cinnamon-sugar coating gives that classic snickerdoodle crunch, and the icing? Well, the icing is just pure joy.
I’d love to hear how these turn out for you. Did you try any variations? Did you double the batch? Did your family devour them in record time? Drop a comment below and let me know. And if you share a photo on Pinterest, tag me—I always love seeing your creations. Happy baking, friends!
Frequently Asked Questions
Can I use fresh pumpkin instead of canned?
Yes, you can use fresh pumpkin puree. Just make sure it’s well-drained. Fresh pumpkin tends to have more water content than canned, which can make the cookies spread too much. To fix this, place the puree in a fine-mesh strainer lined with cheesecloth and let it drain for about 30 minutes before using.
Why are my cookies spreading too much?
This usually happens for one of three reasons: the dough is too warm, there’s too much pumpkin, or the butter was too hot when you mixed it. Try chilling the dough balls for 15-20 minutes before baking. Also, make sure your pumpkin puree isn’t too watery—if it seems runny, drain it a bit.
Can I make the dough ahead of time?
Absolutely! You can prepare the dough, roll it into balls, and refrigerate them for up to 48 hours. You can even freeze the dough balls for up to 3 months. When you’re ready to bake, just roll them in the cinnamon-sugar coating and bake straight from the freezer, adding an extra minute or two to the baking time.
My cookies came out dry. What went wrong?
Dry cookies usually mean they were overbaked or overmixed. Next time, check the cookies at the 9-minute mark and pull them out when the edges are just set. Also, be gentle when mixing the dough—stop as soon as the flour is incorporated. If your oven runs hot, consider reducing the temperature by 25°F.
Can I skip the icing?
Of course! These cookies are delicious without the icing. The cinnamon-sugar coating gives them plenty of sweetness and flavor. If you skip the icing, you can enjoy them warm from the oven, which is honestly a wonderful experience in itself.
PrintBest Quick Iced Pumpkin Snickerdoodle Cookies

These quick iced pumpkin snickerdoodle cookies come together in under 30 minutes with no chilling required. They have a perfect chewy center with slightly crisp edges, warm pumpkin flavor, and a simple icing that adds just the right amount of sweetness.
- Prep Time: 15 minutes
- Cook Time: 10-12 minutes
- Total Time: 25-27 minutes
- Yield: 24 cookies 1x
- Category: Dessert
- Cuisine: American
Ingredients
- 1 ¾ cups (220g) all-purpose flour
- 1 cup (200g) granulated sugar
- ½ cup (120g) pumpkin puree (not pumpkin pie filling)
- ½ cup (113g) unsalted butter, melted
- 1 large egg, room temperature
- 1 teaspoon vanilla extract
- 1 teaspoon cream of tartar
- ½ teaspoon baking soda
- 1 teaspoon ground cinnamon (for dough)
- 2 tablespoons ground cinnamon (for coating)
- ¼ teaspoon ground nutmeg
- ⅛ teaspoon ground cloves
- ½ teaspoon salt
- 2 tablespoons granulated sugar (for coating)
- 1 cup (120g) powdered sugar (for icing)
- 2–3 tablespoons milk (for icing)
- ½ teaspoon vanilla extract (for icing)
Instructions
- Preheat your oven to 350°F (175°C). Line two baking sheets with parchment paper.
- In a large microwave-safe bowl, melt the butter in 20-second intervals until fully liquid. Let it cool for a minute or two.
- Add the granulated sugar, pumpkin puree, egg, and vanilla extract to the melted butter. Stir until well combined.
- In a separate small bowl, whisk together the flour, cream of tartar, baking soda, 1 teaspoon cinnamon, nutmeg, cloves, and salt.
- Add the dry ingredients to the wet mixture. Stir with a wooden spoon or rubber spatula until just combined. Do not overmix.
- In a small bowl, mix together the remaining 2 tablespoons of cinnamon with 2 tablespoons of granulated sugar for the coating.
- Scoop about 1.5 tablespoons of dough and roll into a ball. Roll the ball in the cinnamon-sugar mixture until fully coated. Place on prepared baking sheets, spacing them about 2 inches apart.
- Bake for 10-12 minutes, or until edges are set and tops look slightly crackled. For softer cookies, bake 10 minutes; for crisper edges, bake 12 minutes.
- Let cookies cool on the baking sheet for 5 minutes, then transfer to a cooling rack to cool completely.
- While cookies cool, whisk together powdered sugar, 2 tablespoons milk, and ½ teaspoon vanilla extract. Add more milk if needed to reach a thick but drizzle-able consistency.
- Once cookies are completely cool, drizzle icing over the tops. Let icing set for 15-20 minutes before serving.
Notes
For thicker, puffier cookies, chill the dough balls for 30 minutes before baking. If using salted butter, reduce added salt by half. For gluten-free version, use 1:1 gluten-free baking flour blend. For vegan version, use melted coconut oil or vegan butter, a flax egg, and plant-based milk. Cookies can be stored in an airtight container at room temperature for up to 5 days, or frozen for up to 3 months.
Nutrition
- Serving Size: 1 cookie
- Calories: 145
- Sugar: 14
- Sodium: 95
- Fat: 6
- Saturated Fat: 3.5
- Carbohydrates: 22
- Fiber: 1
- Protein: 2
Keywords: pumpkin snickerdoodle cookies, quick pumpkin cookies, iced pumpkin cookies, fall cookies, easy cookie recipe


