Love this? Save it for later!
Share the inspiration with your friends
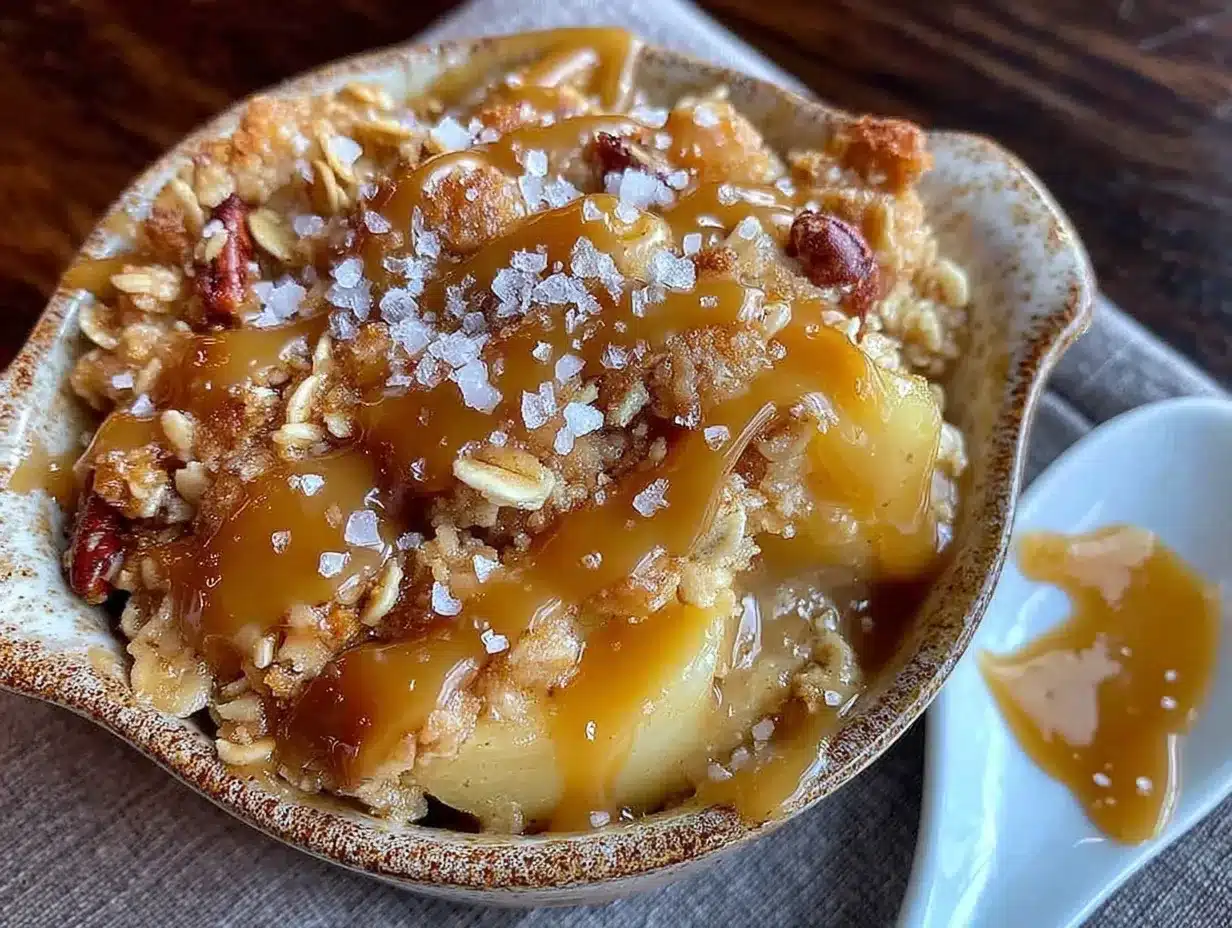
My brother-in-law, Mark, had claimed for years that he “didn’t do dessert.” A bold statement from a man who would sneak spoonfuls of my brown sugar straight from the bag when he thought no one was looking. Then I caught him, standing at my kitchen counter last Thanksgiving, pulling a second helping of this salted caramel apple crisp from the dish with his bare fingers. “This doesn’t count,” he said, mouth full. “It has fruit in it.” And honestly? That was the best compliment I’ve ever gotten. This isn’t just another apple crisp. It’s the one that turns skeptics into sneaky spoonful-takers. Maybe you’ve got a Mark in your life, someone who swears they’re “not a dessert person.” This is the recipe that proves them wrong, one buttery, caramel-drenched bite at a time.
Why You’ll Love This Recipe
Let me tell you, I’ve tested more apple crisp recipes than I care to count. This one won the dinner party vote every single time. It’s the dessert that makes you look like you spent hours in the kitchen when you really just tossed everything together and let the oven do the heavy lifting.
- Perfectly Portioned for Two: No more leftover crisp sitting in the fridge for a week. This is made for date night, a small gathering, or just treating yourself without the guilt of a full 9×13 dish.
- Simple Pantry Ingredients: You probably have most of these on hand right now. Apples, oats, butter, brown sugar—no fancy grocery runs required.
- Show-Stopping for Guests: The salted caramel drizzle makes this look like a bakery creation. Your friends will think you spent all afternoon on it.
- Unbelievably Easy: No peeling required (yes, really), no complicated techniques. Just slice, mix, and bake.
- Crowd-Pleaser Guaranteed: I’ve served this to picky eaters, health-conscious friends, and serious dessert lovers. It disappears every single time.
This recipe is different because of the salted caramel factor. It’s not just a topping—it’s baked right in, creating pockets of gooey sweetness that make every bite feel special. Honestly, it’s the kind of dessert that makes you close your eyes after the first forkful.
What Ingredients You Will Need
This recipe uses simple, wholesome ingredients that come together to create something truly special. Most of these are pantry staples, but a few key players make all the difference.
For the Apple Filling
- 2 medium apples (I recommend Honeycrisp or Granny Smith for the best balance of sweet and tart)
- 2 tablespoons granulated sugar (adds sweetness and helps create that syrupy sauce)
- 1 tablespoon all-purpose flour (thickens the juices so you don’t end up with soup)
- 1 teaspoon ground cinnamon (the warm spice that makes apple desserts feel like home)
- Pinch of nutmeg (optional but highly recommended for depth)
- 1 tablespoon lemon juice (keeps the apples from browning and brightens the flavor)
- 1/4 cup store-bought or homemade salted caramel sauce (I love using Trader Joe’s or making my own—both work beautifully)
For the Crisp Topping
- 1/3 cup old-fashioned rolled oats (don’t use quick oats here—they get mushy)
- 1/3 cup all-purpose flour (for that crumbly texture)
- 1/3 cup packed light brown sugar (this is where the deep, molasses-like sweetness comes from)
- 1/4 teaspoon salt (balances the sweetness and makes the caramel pop)
- 1/4 cup unsalted butter, cold and cubed (cold butter is the secret to a crispy, not greasy, topping)
- 1/2 teaspoon vanilla extract (adds warmth and rounds out the flavors)
For the Finish
- Extra salted caramel sauce for drizzling (don’t be shy here)
- Flaky sea salt, like Maldon (this is non-negotiable—it makes the dish)
- Vanilla ice cream or whipped cream for serving (because crisp without ice cream is just sad)
Ingredient Tips: If you can’t find Honeycrisp apples, Fuji or Braeburn work great too. For a dairy-free version, use vegan butter and coconut cream instead of ice cream. I’ve tested this with both, and honestly, the coconut cream adds a lovely tropical note that pairs surprisingly well with the caramel.
Equipment Needed
You don’t need a fancy kitchen to make this work. Here’s what you’ll need:
- Two 8-ounce ramekins or a small baking dish (I use these classic white ramekins from Crate & Barrel—they make the portions look perfect)
- Medium mixing bowl (for the topping)
- Small mixing bowl (for the apple filling)
- Sharp knife and cutting board (no need for a fancy apple corer—just slice around the core)
- Pastry cutter or two forks (for cutting the butter into the oat mixture)
- Measuring cups and spoons
- Baking sheet (place the ramekins on this to catch any bubbly overflow)
If you don’t have ramekins, a small 6-inch cast iron skillet works beautifully. I’ve also used a small casserole dish in a pinch. Just adjust the baking time slightly if the dish is wider.
Preparation Method
Alright, let’s get to the good stuff. This is where the magic happens.
- Preheat your oven to 350°F (175°C). Place a baking sheet on the middle rack to catch any drips later.
- Prepare the apples. Wash your apples thoroughly. No need to peel them—the skin adds texture and holds everything together. Cut them in half, remove the core, and slice into 1/4-inch thick pieces. You should end up with about 2 cups of sliced apples.
- Make the apple filling. In a small bowl, toss the apple slices with granulated sugar, flour, cinnamon, nutmeg, and lemon juice. Stir until every slice is coated. Let this sit for 5 minutes while you make the topping—this helps the apples release their juices.
- Make the crisp topping. In a medium bowl, combine the rolled oats, flour, brown sugar, and salt. Add the cold, cubed butter and vanilla extract. Use a pastry cutter or two forks to cut the butter into the dry ingredients until the mixture resembles coarse crumbs with some pea-sized butter pieces remaining. Don’t overmix—those butter chunks create the crispy bits we all fight over.
- Assemble the ramekins. Divide the apple mixture evenly between your two ramekins. Drizzle 2 tablespoons of salted caramel sauce over each ramekin of apples. Don’t stir it in—let it sink down as it bakes.
- Add the topping. Sprinkle the oat mixture evenly over the apples in each ramekin. Press it down gently with your fingers so it stays put during baking.
- Bake. Place the ramekins on the prepared baking sheet and bake for 30-35 minutes, or until the topping is golden brown and the filling is bubbly around the edges. Your kitchen will smell like heaven at this point.
- Cool slightly. Let the ramekins cool on a wire rack for 5-10 minutes. This allows the filling to set up a bit so it doesn’t run all over your plate.
- Serve. Top each ramekin with a scoop of vanilla ice cream, a generous drizzle of extra salted caramel sauce, and a sprinkle of flaky sea salt. Serve warm and watch your guests’ eyes light up.
Pro tip: If the topping is browning too quickly but the apples aren’t bubbling yet, loosely tent the ramekins with foil for the last 10 minutes of baking. I learned this the hard way after burning my first batch.
Cooking Tips & Techniques
I’ve made this recipe at least twenty times, and I’ve learned a few things along the way. Here’s what I wish someone had told me.
Don’t skip the lemon juice. I did once because I was out of lemons, and the apples turned an unappetizing brown color. The lemon juice keeps them looking fresh and adds a brightness that cuts through the sweetness.
Cold butter is your best friend. If your butter is even slightly soft, your topping will turn into a paste instead of crumbly bits. Pop the butter in the freezer for 10 minutes before cutting it into the flour mixture if your kitchen is warm.
Let the apples macerate. That 5-minute rest after tossing them with sugar and spices isn’t just for show. It draws out the natural juices, which combine with the caramel to create that luscious sauce. I once rushed this step and ended up with dry, sad apples.
Multitask like a pro. While the apples are resting, make your topping. While the crisp is baking, set the table and scoop the ice cream into bowls so it softens slightly. It’s all about timing.
Watch for doneness. The biggest mistake people make is underbaking. You want the apples to be tender when pierced with a fork, not crunchy. If you’re unsure, give it an extra 5 minutes. Better overbaked than underbaked.
Variations & Adaptations
This recipe is endlessly adaptable. Here are some of my favorite twists.
- Gluten-Free Version: Substitute the all-purpose flour with a 1:1 gluten-free baking flour blend. I use Bob’s Red Mill, and it works perfectly. The oats should be certified gluten-free if needed.
- Dairy-Free Version: Use vegan butter in the topping and serve with coconut whipped cream or dairy-free ice cream. The caramel sauce should also be dairy-free—many store-bought versions are.
- Spiced Up Version: Add 1/4 teaspoon of cardamom or ginger to the apple mixture for a more complex flavor profile. I did this for a holiday party, and people couldn’t stop asking what my “secret spice” was.
- Nutty Crunch: Add 2 tablespoons of chopped pecans or walnuts to the topping mixture. Toast them first for extra flavor. This adds a lovely crunch that contrasts with the soft apples.
- Bourbon Caramel: Stir 1 tablespoon of bourbon into the caramel sauce before drizzling it over the apples. The warmth of the bourbon pairs beautifully with the apples and caramel. Just don’t tell the kids.
Serving & Storage Suggestions
This dessert is best served warm, straight from the oven. The contrast between the hot, bubbly filling and the cold, creamy ice cream is what makes it unforgettable.
Presentation tips: Place each ramekin on a small plate or a linen napkin. Add a sprig of fresh mint or a cinnamon stick for a pop of color. Drizzle the caramel sauce in a zigzag pattern over the ice cream—it looks intentional and pretty.
What to serve alongside: A cup of strong coffee or a glass of dessert wine, like a late-harvest Riesling, complements the caramel and apple flavors beautifully. For a non-alcoholic option, spiced apple cider is perfect.
Storage: If you have leftovers (unlikely, but possible), cover the ramekins with plastic wrap and store in the refrigerator for up to 3 days. The topping will soften, but it’s still delicious.
Reheating: Reheat in a 350°F oven for 10-15 minutes until warmed through. The microwave works in a pinch, but the topping won’t be as crispy. I won’t judge you, though—I’ve done it myself at 2 AM.
Make-ahead tip: You can assemble the ramekins up to 24 hours in advance. Keep them covered in the refrigerator, and add 5 minutes to the baking time. This is a lifesaver when you’re hosting a dinner party.
Nutritional Information & Benefits
Let’s be real—this is a dessert, not a health food. But it does have some redeeming qualities.
- Calories per serving: Approximately 420 calories (without ice cream)
- Apples: A good source of fiber and vitamin C. The skin contains antioxidants, which is why I leave it on.
- Oats: Provide soluble fiber, which is great for heart health and keeping you full.
- Dietary considerations: This recipe can easily be made gluten-free and dairy-free (see variations above). It contains nuts only if you add them.
- Potential allergens: Contains wheat (flour), dairy (butter, caramel, ice cream), and possibly nuts (if added).
I’m not one to pretend dessert is a health food, but I do feel better about serving this than a boxed cake mix. The whole ingredients, the real butter, the fresh fruit—it’s indulgence done right.
Conclusion
This salted caramel apple crisp for two is more than just a dessert. It’s the dish that turns skeptics into believers, the one that makes your guests ask for the recipe before they’ve even finished their first bite. It’s simple enough for a Tuesday night, fancy enough for a dinner party, and delicious enough to become your new go-to.
I love this recipe because it reminds me that you don’t need complicated techniques or exotic ingredients to create something memorable. Just good apples, a little patience, and a generous drizzle of caramel. That’s it.
So go ahead—make this for your next date night, your next dinner party, or just because it’s Tuesday. And when your guests scrape the last bit of caramel from their ramekins (they will), come back and tell me about it. I’d love to hear your Mark story.
Share this recipe with someone who needs it, and don’t forget to tag me when you make it!
Frequently Asked Questions
Can I use a different type of apple?
Absolutely. Honeycrisp and Granny Smith are my favorites because they hold their shape and balance the sweetness. But Fuji, Braeburn, or even Gala work well. Avoid Red Delicious—they get mushy and bland.
Can I make this in one large dish instead of two ramekins?
Yes! Use a small 6-inch cast iron skillet or a 5×5-inch baking dish. The baking time will be about the same, but check for doneness at 30 minutes. The topping should be golden and the filling bubbly.
Can I use quick oats instead of rolled oats?
I don’t recommend it. Quick oats absorb liquid faster and turn mushy during baking. Rolled oats maintain their texture and give you that satisfying crunch. Steel-cut oats are too chewy for this recipe.
How do I make my own salted caramel sauce?
It’s easier than you think. Melt 1 cup of granulated sugar in a saucepan over medium heat until amber-colored. Stir in 6 tablespoons of butter and 1/2 cup of heavy cream (careful—it will bubble up). Add 1 teaspoon of flaky sea salt and stir until smooth. Let it cool before using. Store leftovers in the fridge for up to two weeks.
Can I freeze the unbaked ramekins?
Yes! Assemble the ramekins completely, but don’t bake them. Cover tightly with plastic wrap and foil, then freeze for up to 3 months. To bake, place the frozen ramekins directly in a 350°F oven and add 15-20 minutes to the baking time. You might need to tent with foil if the topping browns too quickly.
PrintBest Salted Caramel Apple Crisp for Two

This perfectly portioned apple crisp for two features a buttery oat topping, tender apples, and a luscious salted caramel sauce baked right in. It’s the dessert that turns skeptics into believers, ideal for date night or a cozy treat.
- Prep Time: 15 minutes
- Cook Time: 30 minutes
- Total Time: 45 minutes
- Yield: 2 servings 1x
- Category: Dessert
- Cuisine: American
Ingredients
- 2 medium apples (Honeycrisp or Granny Smith)
- 2 tablespoons granulated sugar
- 1 tablespoon all-purpose flour
- 1 teaspoon ground cinnamon
- Pinch of nutmeg (optional)
- 1 tablespoon lemon juice
- 1/4 cup store-bought or homemade salted caramel sauce
- 1/3 cup old-fashioned rolled oats
- 1/3 cup all-purpose flour
- 1/3 cup packed light brown sugar
- 1/4 teaspoon salt
- 1/4 cup unsalted butter, cold and cubed
- 1/2 teaspoon vanilla extract
- Extra salted caramel sauce for drizzling
- Flaky sea salt (e.g., Maldon)
- Vanilla ice cream or whipped cream for serving
Instructions
- Preheat your oven to 350°F (175°C). Place a baking sheet on the middle rack to catch any drips.
- Wash apples thoroughly. No need to peel. Cut in half, remove core, and slice into 1/4-inch thick pieces (about 2 cups).
- In a small bowl, toss apple slices with granulated sugar, flour, cinnamon, nutmeg, and lemon juice. Let sit for 5 minutes.
- In a medium bowl, combine rolled oats, flour, brown sugar, and salt. Add cold cubed butter and vanilla extract. Use a pastry cutter or two forks to cut butter into dry ingredients until mixture resembles coarse crumbs with some pea-sized butter pieces.
- Divide apple mixture evenly between two 8-ounce ramekins. Drizzle 2 tablespoons of salted caramel sauce over each ramekin. Do not stir.
- Sprinkle oat mixture evenly over apples in each ramekin. Press down gently with fingers.
- Place ramekins on prepared baking sheet and bake for 30-35 minutes, until topping is golden brown and filling is bubbly around edges.
- Let cool on a wire rack for 5-10 minutes.
- Top each ramekin with a scoop of vanilla ice cream, a generous drizzle of extra salted caramel sauce, and a sprinkle of flaky sea salt. Serve warm.
Notes
If topping browns too quickly, tent ramekins with foil for last 10 minutes. For best texture, use cold butter and let apples macerate for 5 minutes. Can be assembled up to 24 hours in advance; add 5 minutes to baking time if refrigerated.
Nutrition
- Serving Size: 1 ramekin
- Calories: 420
- Sugar: 40
- Sodium: 320
- Fat: 18
- Saturated Fat: 10
- Carbohydrates: 62
- Fiber: 5
- Protein: 4
Keywords: apple crisp, salted caramel, dessert for two, apple dessert, easy apple crisp, small batch


