Love this? Save it for later!
Share the inspiration with your friends
It was 10:47 PM on a rainy Tuesday, and I had a very specific cookie craving. You know that feeling when only a thick, soft, chewy chocolate chip cookie will do? Not the thin, crispy kind, not the cakey ones. I needed something with a serious chew and a soft center. The problem was, it was late, and I had zero energy for a full batch of cookies. I didn’t have the energy to stand there scooping out two dozen portions, and honestly, I didn’t need that many cookies sitting around the kitchen. That’s a dangerous situation for a late-night snacker.
So, I stared into my pantry. I had a half-empty bag of chocolate chips, some butter, and the usual baking suspects. The idea that hit me was simple: what if I just made a small batch? Like, just six perfect cookies. Enough to satisfy the craving, but not so many that I’d regret it in the morning. I grabbed my smallest mixing bowl and got to work. I forgot to set a timer and almost over-baked them because I was scrolling on my phone. But when I pulled them out of the oven, they were golden, puffy, and absolutely perfect. Maybe you’ve been there, standing in a dim kitchen at midnight, just wanting one perfect cookie. This recipe is for that moment. It’s the one that stayed with me because it proved you don’t need a big production for a seriously satisfying result.
Why You’ll Love This Recipe
Let me tell you why this small-batch cookie recipe has become a staple in my house. It’s not just another cookie recipe; it’s the one that solves all the little problems that come with baking for a family on a budget.
- Quick & Easy: From start to finish, you’re looking at about 20 minutes. No chilling required, no complicated steps. Perfect for when a cookie emergency strikes after dinner.
- Simple Ingredients: You probably have everything in your pantry right now. Butter, sugar, an egg (you’ll use just the yolk), flour, and chocolate chips. No fancy grocery trips needed.
- Perfect for Small Families: This recipe makes just six large, thick cookies. It’s the ideal amount for a family of four without a ton of leftovers that go stale. It’s budget-friendly because you’re not wasting ingredients or food.
- Crowd-Pleaser: My kids go absolutely wild for these. They are thick, soft, and loaded with chocolate. They have that bakery-style chew that picky eaters and adults both love. They reheat beautifully, too.
- Unbelievably Delicious: The texture is the star here. A slightly higher ratio of brown sugar to white gives them that deep, caramel-like flavor and that signature chew. The melted butter makes them extra rich without being greasy.
What makes this recipe different from the rest is the technique. Using an egg yolk instead of a whole egg gives you a denser, chewier cookie without the extra moisture that makes them cakey. It’s a simple swap that makes a huge difference. This isn’t just another version of a chocolate chip cookie—it’s the best version for a quick, satisfying treat that feels special. It’s the kind of cookie that makes you close your eyes after the first bite. It’s comfort food, perfected for a small batch and a sensible budget.
What Ingredients You Will Need
This recipe uses simple, wholesome ingredients to deliver that perfect thick and chewy texture without any fuss. Most of these are pantry staples, which makes this a great last-minute treat.
- Unsalted Butter (4 tablespoons, melted and slightly cooled): I use unsalted so I can control the salt level. Melting the butter is key for a chewy texture—it helps create a denser crumb than creaming cold butter. I recommend using a good quality brand like Land O’Lakes for consistent results.
- Light Brown Sugar (¼ cup, packed): This is the secret to the chew. Brown sugar has molasses in it, which adds moisture and a deep, caramel-like flavor. Make sure you pack it firmly into your measuring cup for the right measurement.
- Granulated Sugar (2 tablespoons): Just a little bit of white sugar helps with spreading and gives the edges a slight crispness. The balance of mostly brown sugar is what gives you that soft, chewy center.
- Large Egg Yolk (1): This is the magic ingredient. Using just the yolk gives you richness and tenderness without the extra protein from the white, which can make cookies cakey. Save the egg white for an omelet or scramble it into your breakfast.
- Vanilla Extract (½ teaspoon): Pure vanilla extract adds a warm, sweet flavor that enhances the chocolate. I prefer pure over imitation for a cleaner taste, but imitation works in a pinch.
- All-Purpose Flour (½ cup plus 1 tablespoon, spooned and leveled): Standard all-purpose flour gives the perfect structure. The key is to spoon it into your measuring cup and level it off with a knife. Scooping directly from the bag packs in too much flour, leading to dry cookies.
- Baking Soda (¼ teaspoon): This helps the cookies spread just a little and gives them a nice lift. It also helps with browning.
- Salt (¼ teaspoon): Salt is crucial. It balances the sweetness and enhances all the other flavors. Don’t skip it! I use fine sea salt.
- Semi-Sweet Chocolate Chips (⅓ cup): I love semi-sweet because it’s not too sweet and balances the sugary dough. You can use milk chocolate chips if your kids prefer a sweeter cookie, or dark chocolate for a more intense flavor. I often use Ghirardelli or Toll House.
Equipment Needed
You don’t need any fancy gadgets for this recipe, which is part of its charm. Here’s what you’ll need to pull it off.
- Mixing Bowls: One medium-sized bowl for the wet ingredients and one small bowl for the dry ingredients. I use a glass bowl because it’s easy to see if everything is mixed.
- Whisk or Fork: For mixing the wet ingredients together. A whisk works best to break up the egg yolk, but a fork will do the job.
- Rubber Spatula or Wooden Spoon: For folding the dry ingredients into the wet. A spatula is great for scraping the sides of the bowl.
- Measuring Cups and Spoons: Accurate measurements are important for baking. A set of dry measuring cups for the flour and sugar, and measuring spoons for the smaller amounts.
- Baking Sheet: A standard half-sheet pan works perfectly. No need to grease it if you use parchment paper.
- Parchment Paper or Silicone Baking Mat: This is non-negotiable for me. It prevents the cookies from sticking and makes for easy cleanup. A silicone mat also helps cookies spread evenly.
- Cookie Scoop (optional but recommended): A 1.5-tablespoon cookie scoop makes portioning the dough super easy and ensures all your cookies are the same size. If you don’t have one, just use two spoons.
- Cooling Rack: Letting the cookies cool on a rack prevents the bottoms from getting soggy.
Preparation Method
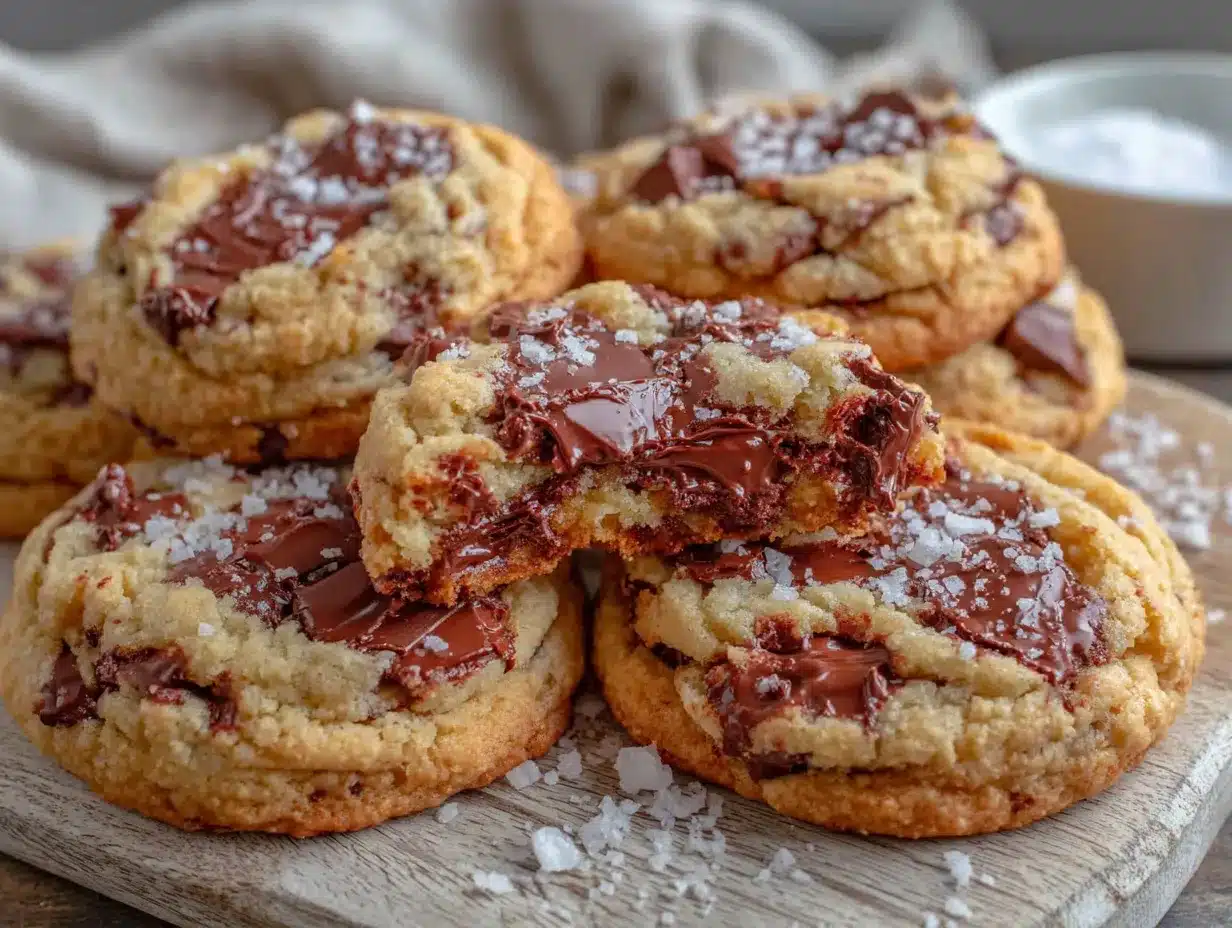
Let’s get to the fun part. Follow these steps, and you’ll have six perfect cookies in no time.
- Preheat and Prep: Preheat your oven to 350°F (175°C). Line a baking sheet with parchment paper or a silicone baking mat. This ensures the cookies don’t stick and helps them bake evenly.
- Melt the Butter: Place the 4 tablespoons of unsalted butter in a microwave-safe bowl. Heat it in 15-second intervals until it’s just melted. Don’t let it boil. Set it aside to cool for a minute or two while you gather the other ingredients. It should be warm, not hot.
- Mix the Wet Ingredients: In a medium mixing bowl, add the melted butter, ¼ cup packed light brown sugar, and 2 tablespoons granulated sugar. Whisk vigorously for about 30 seconds. The mixture will look like a thick paste. This step helps dissolve the sugar. Add the egg yolk and ½ teaspoon vanilla extract. Whisk again until everything is smooth and well combined. It will look glossy.
- Combine the Dry Ingredients: In a small separate bowl, whisk together the ½ cup plus 1 tablespoon all-purpose flour, ¼ teaspoon baking soda, and ¼ teaspoon salt. Whisking ensures the baking soda and salt are evenly distributed throughout the flour.
- Form the Dough: Pour the dry ingredients into the bowl with the wet ingredients. Use a rubber spatula to fold everything together. Mix gently until just combined. You don’t want to overmix, or the cookies will be tough. A few streaks of flour are okay at this point.
- Add the Chocolate Chips: Fold in the ⅓ cup of semi-sweet chocolate chips. Make sure they are evenly distributed throughout the dough. The dough will be thick and slightly sticky. If it feels too sticky to handle, you can pop it in the fridge for 10 minutes.
- Scoop the Dough: Use a 1.5-tablespoon cookie scoop to portion the dough into 6 equal balls. Place them on the prepared baking sheet, spacing them about 2 inches apart. They will spread a little, but not too much. For extra thick cookies, place the dough balls in the fridge for 15-20 minutes before baking. This step is optional but highly recommended for the thickest cookies.
- Bake: Place the baking sheet on the middle rack of your preheated oven. Bake for 9-11 minutes. The cookies are done when the edges are set and lightly golden brown, but the centers still look soft and slightly underdone. They will continue to cook on the hot baking sheet as they cool. My trick: I pull them out at exactly 10 minutes for a perfectly soft center.
- Cool: Let the cookies cool on the baking sheet for 5 minutes. This is an important step. It allows them to set up. Then, transfer them to a wire cooling rack to cool completely. If you move them too soon, they will fall apart.
Cooking Tips & Techniques
I’ve made a lot of cookies in my day, and I’ve learned a few things the hard way. Here are my best tips for getting these perfect every time.
Don’t Overmix the Dough. This is the number one mistake people make. Once you add the flour, mix just until it disappears. Overmixing develops the gluten in the flour, which will make your cookies tough and cakey instead of tender and chewy. You want that soft, melt-in-your-mouth texture.
Use a Cookie Scoop for Uniform Size. I cannot stress this enough. Using a scoop ensures all your cookies are the same size, so they bake evenly. If you have one giant cookie and one tiny one, the tiny one will burn while the giant one is still raw. A uniform size is the key to consistent results.
Chill the Dough for Thicker Cookies. If you have the extra 15 minutes, chill the dough balls before baking. This solidifies the butter slightly, which means the cookies will spread less in the oven. The result is a thicker, puffier cookie. I do this almost every time because I love a thick cookie.
Watch the Oven, Not the Clock. All ovens run a little differently. Your oven might run hot or cold. Start checking your cookies at the 8-minute mark. You want the edges to be golden brown and the centers to be pale and puffy. They will look underdone, but trust the process. They will set up perfectly as they cool.
The “Parchment Paper” Trick for Reheating. To bring back that fresh-from-the-oven softness, microwave a cookie for 10-15 seconds on a plate. For a slightly crisp edge, pop it in a toaster oven for 2 minutes. It’s like having a fresh batch all over again.
Variations & Adaptations
One of the best things about this recipe is how easily it adapts. Here are a few ways to switch it up based on what you have or who you’re feeding.
Dietary Adaptation: Gluten-Free. You can easily make this gluten-free by swapping the all-purpose flour for a 1:1 gluten-free baking flour blend. I’ve used Bob’s Red Mill and King Arthur’s blends with great success. The texture will be slightly different, but they will still be thick and chewy.
Flavor Variation: Chocolate Lover’s Dream. Swap 2 tablespoons of the all-purpose flour for 2 tablespoons of unsweetened cocoa powder. This will give you a chocolate cookie base. Use white chocolate chips or dark chocolate chunks for a double-chocolate experience. My kids think this is the best version for a special treat.
Allergen Substitution: Nut-Free. This recipe is naturally nut-free, which is great for school lunches. Just double-check your chocolate chip labels to ensure they are processed in a nut-free facility if that’s a concern for your family.
Mix-In Ideas. Instead of just chocolate chips, try folding in ¼ cup of mini M&Ms, some butterscotch chips, or a handful of shredded coconut. You can also add ¼ cup of chopped pecans or walnuts if you’re not worried about nuts. I once added a pinch of flaky sea salt on top right before baking, and it was a game-changer.
Serving & Storage Suggestions
These cookies are best served warm, when the chocolate is still a little melty. A glass of cold milk is the classic pairing, and for good reason. It’s the perfect balance to the sweet, rich cookie. For a fun dessert, serve them with a scoop of vanilla ice cream. They also make a great lunchbox treat for the kids.
Storage: Store any leftover cookies in an airtight container at room temperature. They will stay soft and chewy for up to 3 days. To keep them extra soft, toss a slice of bread into the container. The bread will absorb excess moisture and keep the cookies from drying out.
Freezing: These cookies freeze beautifully. You can freeze the baked cookies in a freezer-safe bag for up to 3 months. To enjoy, just thaw at room temperature or pop one in the microwave for 15 seconds. I also love to freeze the raw dough balls. Scoop the dough onto a parchment-lined baking sheet, freeze until solid, then transfer the balls to a freezer bag. You can bake them straight from frozen, just add 2-3 minutes to the baking time. This is a lifesaver for a quick treat after a long day.
Nutritional Information & Benefits
While these are a treat, they are made with simple, real ingredients. Here’s a rough estimate of the nutritional information per cookie (based on 6 cookies).
| Nutrient | Amount Per Cookie |
|---|---|
| Calories | ~250 |
| Fat | 14g |
| Saturated Fat | 8g |
| Carbohydrates | 32g |
| Sugar | 20g |
| Protein | 3g |
These cookies are a source of quick energy from the carbohydrates and healthy fats from the butter. Using semi-sweet chocolate chips means you get a bit of antioxidants from the cocoa. The smaller batch size means you’re not tempted by a whole plate of cookies. It’s a sensible portion for a satisfying dessert. This recipe is perfect for a family looking to enjoy a homemade treat without the waste or the guilt of a giant batch.
Conclusion
Honestly, this small-batch recipe has saved me more times than I can count. It’s the answer to a late-night craving, a rainy afternoon activity with the kids, or a quick dessert when you have nothing else planned. It proves that you don’t need a huge production to get a bakery-quality result. These cookies are everything you want: thick, chewy, loaded with chocolate, and made with ingredients you already have. They are forgiving, adaptable, and always a hit.
I really hope you give these a try. Don’t be afraid to make them your own. Swap the chocolate chips for M&Ms, add some nuts, or just keep them classic. The beauty is in the simplicity. If you make them, I would love to hear how they turned out. Drop a comment below and let me know if your kids approved them as much as mine do. Happy baking, friend!
Frequently Asked Questions
Can I use a whole egg instead of just the yolk?
You can, but the texture will be different. Using a whole egg adds more moisture and protein, which will make the cookies puffier and more cake-like. For the signature thick and chewy texture, stick with just the yolk.
Why are my cookies flat?
Flat cookies are usually caused by butter that is too warm or not enough flour. Make sure your melted butter has cooled slightly before adding the other ingredients. Also, be sure to spoon and level your flour—scooping it directly from the bag packs in too much flour or not enough, depending on how you measure.
Can I double this recipe?
Absolutely! This recipe scales up perfectly. Simply double all the ingredients. You will use 2 egg yolks instead of one. The baking time may increase by a minute or two if you are baking a full sheet of cookies.
How do I make these cookies softer?
For an even softer cookie, reduce the baking time by 1 minute. Pull them out when the centers still look very soft and puffy. Also, storing them with a slice of bread in the container will keep them soft for days.
Can I use margarine instead of butter?
I don’t recommend it. Butter provides the best flavor and texture for these cookies. Margarine has a higher water content, which can lead to spreading and a less chewy result. Stick with real butter for the best outcome.
Pin This Recipe!

Kid-Friendly Small-Batch Thick and Chewy Chocolate Chip Cookies

This small-batch recipe yields six thick, soft, and chewy chocolate chip cookies with a caramel-like flavor from brown sugar and a dense, tender crumb from using just an egg yolk. Perfect for late-night cravings or a quick treat without leftovers.
- Prep Time: 10 minutes
- Cook Time: 10 minutes
- Total Time: 20 minutes
- Yield: 6 cookies 1x
- Category: Dessert
- Cuisine: American
Ingredients
- 4 tablespoons unsalted butter, melted and slightly cooled
- 1/4 cup packed light brown sugar
- 2 tablespoons granulated sugar
- 1 large egg yolk
- 1/2 teaspoon vanilla extract
- 1/2 cup plus 1 tablespoon all-purpose flour, spooned and leveled
- 1/4 teaspoon baking soda
- 1/4 teaspoon salt
- 1/3 cup semi-sweet chocolate chips
Instructions
- Preheat oven to 350°F (175°C). Line a baking sheet with parchment paper or a silicone baking mat.
- Melt the butter in a microwave-safe bowl in 15-second intervals until just melted. Set aside to cool slightly.
- In a medium mixing bowl, whisk together the melted butter, brown sugar, and granulated sugar for about 30 seconds until it forms a thick paste.
- Add the egg yolk and vanilla extract, whisk until smooth and glossy.
- In a small separate bowl, whisk together the flour, baking soda, and salt.
- Pour the dry ingredients into the wet ingredients. Fold with a rubber spatula until just combined; do not overmix.
- Fold in the chocolate chips until evenly distributed. The dough will be thick and slightly sticky.
- Using a 1.5-tablespoon cookie scoop, portion the dough into 6 equal balls. Place them on the prepared baking sheet, spacing about 2 inches apart. For thicker cookies, chill the dough balls for 15-20 minutes.
- Bake on the middle rack for 9-11 minutes, until edges are set and lightly golden but centers still look soft.
- Let cookies cool on the baking sheet for 5 minutes, then transfer to a wire rack to cool completely.
Notes
For the thickest cookies, chill the dough balls for 15-20 minutes before baking. To keep cookies soft, store with a slice of bread in an airtight container. Reheat in microwave for 10-15 seconds for fresh-from-oven softness.
Nutrition
- Serving Size: 1 cookie
- Calories: 250
- Sugar: 20
- Sodium: 180
- Fat: 14
- Saturated Fat: 8
- Carbohydrates: 32
- Fiber: 1
- Protein: 3
Keywords: small batch chocolate chip cookies, thick and chewy cookies, kid-friendly cookies, easy cookie recipe, quick cookies


