Love this? Save it for later!
Share the inspiration with your friends
I was standing in the freezer aisle of our local grocery store last November, staring at a bag of frozen dinner rolls, when the smell hit me. It wasn’t actually in the store — it was in my memory. That warm, yeasty, honey-sweet scent that meant someone in the house was making something special. And suddenly I was seven years old, standing on a step stool in my Aunt Clara’s tiny kitchen, watching her pull a baking sheet of golden rolls from the oven. She’d let me brush the melted butter on top while they were still steaming, and I remember thinking I had the most important job in the world.
Aunt Clara passed away a few years ago, and honestly, I hadn’t thought about those rolls in ages. But standing there in that chilly aisle, I could almost feel the warmth of her kitchen on my face. I could hear her humming some old country song while she worked. I could see the way the honey butter would pool in the crevices of the rolls, catching the light like little amber puddles. I grabbed my cart and walked away from the frozen section. I was going to figure out how to make them myself, even if it took all week.
It took three tries, let me tell you. The first batch came out like hockey pucks. The second was too dense. But the third? That third batch was the one. The texture was pillowy soft, the tops were glossy and golden, and the honey butter soaked into every nook and cranny just the way I remembered. I brought them to a friend’s potluck that weekend, and someone actually asked me if I’d bought them from a bakery. I just smiled and said nope — these came from my kitchen. Maybe you’ve been there, chasing a taste from your past that you just can’t quite get right until suddenly, you do.
These honey butter dinner rolls are my love letter to Aunt Clara, and they’re the one thing I bring to every Thanksgiving table now. They disappear before the turkey even gets carved.
Why You’ll Love This Recipe
Look, I’ve tested a lot of dinner roll recipes over the years. Some are too complicated for a holiday when you’re already juggling a dozen other dishes. Others are so simple they taste like cardboard. These honey butter Thanksgiving dinner rolls hit that sweet spot between show-stopping and doable, even when you’ve got guests arriving in a few hours.
Here’s what makes them special:
- Perfect for a Crowd : This recipe makes two dozen rolls, which means you’ll have plenty for your Thanksgiving table and maybe even leftovers for the next day’s turkey sandwich. Trust me, that’s a good thing.
- Simple Ingredients : You probably already have most of these in your pantry. No weird specialty flours or hard-to-find extracts. Just butter, honey, flour, yeast, and a few other basics.
- Make-Ahead Friendly : You can prep these rolls the day before and bake them fresh on Thanksgiving morning. Your future self will thank you when you’re not scrambling at the last minute.
- Unbelievably Soft Texture : The secret is in the tangzhong method — it’s a simple technique that keeps these rolls incredibly tender for days. I’ll explain more below.
- That Honey Butter Glaze : This isn’t just brushed on top. The honey butter gets mixed right into the dough and then slathered on again after baking. It’s the kind of flavor that makes people close their eyes when they take a bite.
These rolls are different from every other recipe you’ll find because they’re built for hosting. The dough is forgiving, the timing is flexible, and the result is consistently gorgeous. I’ve served these at Thanksgiving dinners, Christmas brunches, and Easter lunches, and they always steal the show. It’s the kind of recipe that makes you look like a hero in the kitchen without actually having to work that hard.
Plus, there’s something about homemade rolls that just says “I care.” When your guests see that basket of golden, glossy rolls on the table, they know you went the extra mile. And when they taste that honey butter sweetness? They’ll be asking for the recipe before dessert even comes out.
What Ingredients You Will Need
This recipe uses simple, wholesome ingredients to deliver that soft, sweet, buttery flavor that makes these rolls so unforgettable. Most of these are pantry staples, which is exactly what you want when you’re planning a big holiday meal.
For the Tangzhong (Flour Paste)
- 3 tablespoons bread flour — This gets cooked with water to create a paste that keeps the rolls extra soft. I prefer King Arthur brand for consistent results.
- ½ cup water — Just regular tap water works fine here. No need to get fancy.
For the Dough
- 4 cups bread flour (500g) — Bread flour gives these rolls their structure and chew. You can use all-purpose in a pinch, but bread flour really does make a difference in texture.
- 2 ¼ teaspoons active dry yeast (one packet) — Make sure your yeast is fresh. Nothing worse than waiting an hour for dough that never rises.
- ⅓ cup honey (113g) — Use a good-quality honey here. The flavor really comes through, so you want something you enjoy eating straight from the jar.
- ⅓ cup warm milk (80ml), heated to about 110°F — Whole milk works best for richness, but 2% will do just fine.
- ¼ cup unsalted butter (57g), softened to room temperature — I use Land O’Lakes. The unsalted butter lets you control the salt level yourself.
- 2 large eggs, room temperature — Cold eggs will shock your dough and slow down rising. Leave them on the counter for an hour before starting.
- 1 ½ teaspoons salt — Don’t skip this! Salt balances the sweetness of the honey.
For the Honey Butter Glaze
- ¼ cup unsalted butter (57g), melted — This gets brushed on twice: once right out of the oven, and again a few minutes later for maximum shine.
- 2 tablespoons honey — Warm this slightly so it mixes easily with the melted butter.
- Flaky sea salt (optional but highly recommended) — A tiny sprinkle on top takes these rolls from great to unforgettable.
Ingredient Tips from My Kitchen
When I’m making these for a big Thanksgiving dinner, I always buy extra butter and honey. You’d be surprised how quickly you go through them when you’re making two batches. Also, if your kitchen is cold (mine is drafty in November), warm your mixing bowl with hot water before adding the dough ingredients. It helps the yeast activate faster.
For the honey, I’ve tried fancy wildflower honey and basic store-brand honey, and honestly, they both work great. The main thing is to use liquid honey, not the crystallized stuff. If your honey has gotten thick and grainy, microwave it for about 10 seconds to loosen it up.
Equipment Needed
You don’t need a professional bakery setup for these rolls, but having the right tools makes the process smoother. Here’s what you’ll need:
- Stand mixer with dough hook — You can knead by hand, but the mixer saves your arms and gives more consistent results. I use a KitchenAid Artisan, and it handles this dough beautifully.
- Large mixing bowl — Glass or ceramic works best because they retain heat better than metal.
- 9×13-inch baking dish (or two 8-inch round pans) — Glass or ceramic dishes work great. Metal pans also work, just keep an eye on browning.
- Pastry brush — For applying that gorgeous honey butter glaze. Silicone brushes are easier to clean, but natural bristle brushes apply more evenly.
- Kitchen scale — Not required, but highly recommended for consistent results. Flour measurements can vary wildly with cups.
- Instant-read thermometer — Helps you check milk temperature and dough temperature. I use a Thermapen and love it.
- Plastic wrap or clean kitchen towel — For covering the dough while it rises.
- Cooling rack — Lets air circulate around the rolls so they don’t get soggy bottoms.
If you don’t have a stand mixer, don’t worry. You can knead by hand for about 10-12 minutes. It’s actually kind of therapeutic, especially if you’ve had a long day. Just make sure you’re using a sturdy surface and maybe put on some music.
Preparation Method
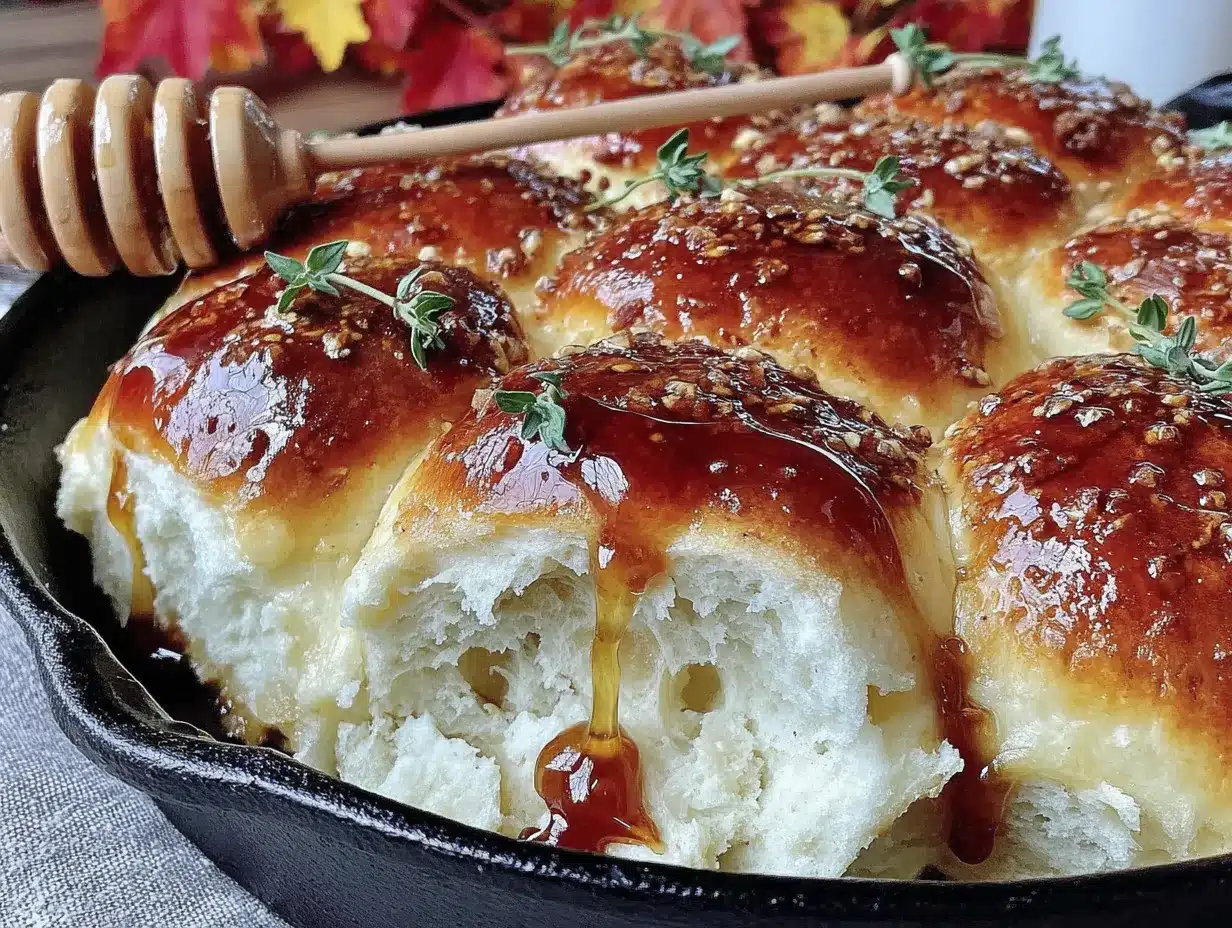
Let me walk you through this step by step. I’ve made these rolls at least two dozen times now, so I’ve learned all the little tricks that make the process smooth and the results perfect.
- Make the Tangzhong : In a small saucepan, whisk together 3 tablespoons bread flour and ½ cup water until smooth. Cook over medium heat, stirring constantly, until the mixture thickens into a paste — about 2-3 minutes. It should look like thick glue. Remove from heat and let it cool to room temperature. This step is the secret to those ultra-soft rolls that stay fresh for days.
- Activate the Yeast : In the bowl of your stand mixer, combine the warm milk (about 110°F), 1 tablespoon of the honey, and the yeast. Let it sit for 5-10 minutes until it gets foamy. If it doesn’t foam, your yeast might be dead. Start over with fresh yeast — trust me on this one.
- Mix the Dough : Add the remaining honey, the cooled tangzhong, eggs, and 4 cups of bread flour to the yeast mixture. Mix on low speed with the dough hook until everything comes together, about 2 minutes. The dough will look shaggy at this point — that’s normal.
- Add Salt and Butter : Sprinkle the salt over the dough, then add the softened butter in pieces. Increase the speed to medium and knead for 8-10 minutes. The dough should pull away from the sides of the bowl and feel smooth and elastic. If it’s still sticky, add flour one tablespoon at a time until it comes together.
- First Rise : Transfer the dough to a lightly greased bowl, cover with plastic wrap, and let it rise in a warm place for 1-2 hours, or until doubled in size. I usually put mine in the oven with the light on — it stays perfectly warm in there.
- Shape the Rolls : Punch down the dough and turn it onto a lightly floured surface. Divide it into 24 equal pieces — I use a bench scraper and a kitchen scale to keep them even. Shape each piece into a smooth ball by tucking the edges underneath and rolling it against the counter. Place the rolls in your greased 9×13-inch baking dish, spacing them evenly.
- Second Rise : Cover the dish with plastic wrap and let the rolls rise for another 45-60 minutes, until they’re puffy and touching each other. This is when they get that soft, pull-apart texture.
- Bake : Preheat your oven to 350°F. Brush the tops of the rolls with a little melted butter (this helps them brown beautifully). Bake for 20-25 minutes, until the tops are golden brown and the rolls sound hollow when tapped. My oven runs hot, so I check mine at 18 minutes.
- Glaze While Warm : As soon as the rolls come out of the oven, brush them generously with the honey butter glaze. Let them sit for 5 minutes, then brush again. The rolls soak up that first layer, and the second layer gives them that gorgeous glossy finish.
- Finish with Flaky Salt : If you’re using flaky sea salt, sprinkle a tiny pinch over each roll right after the second glaze. The salt crystals add a little crunch and balance the sweetness beautifully.
A few things I’ve learned the hard way: Don’t rush the rising time. If your kitchen is cold, those rolls will take longer to double in size, and that’s okay. Also, when you’re shaping the rolls, make sure your hands aren’t sticky — keep a little flour nearby to dust them if needed. And whatever you do, don’t skip that second glaze. It’s what makes these rolls look like they came from a fancy bakery.
Cooking Tips & Techniques
After making these rolls more times than I can count, I’ve picked up a few tricks that make a real difference. Let me share the ones that matter most.
The Tangzhong Makes All the Difference
This Japanese technique is what gives these rolls their incredible softness. The flour-water paste traps moisture in the dough, which means your rolls stay fresh for 3-4 days instead of getting stale overnight. Don’t skip this step — it’s not complicated, and the payoff is huge.
Temperature Matters More Than You Think
I ruined my first batch because my milk was too hot and killed the yeast. Your milk should feel like warm bath water — about 110°F. If you don’t have a thermometer, test it on your wrist. If it feels hot, it’s too hot. Also, make sure your eggs and butter are at room temperature. Cold ingredients will slow down the rise and give you dense rolls.
Don’t Overwork the Dough
It’s tempting to keep kneading, especially if you’re using a stand mixer. But over-kneaded dough becomes tough and chewy. Stop as soon as the dough is smooth and elastic — usually about 8-10 minutes. You should be able to stretch a small piece of dough thin enough to see light through it without it tearing. That’s the windowpane test, and it’s your best friend.
My Biggest Fail
Last Thanksgiving, I got distracted while the rolls were doing their second rise. I left them for almost two hours, and they rose so much they looked like a giant puffball. I baked them anyway, and they collapsed in the middle. Lesson learned: set a timer for your rises. Once those rolls are puffy and touching, they’re ready to go in the oven.
Timing Strategy for Hosts
Here’s my pro tip for Thanksgiving: Make the dough through step 5 the day before. After the first rise, punch it down, cover it tightly, and refrigerate overnight. The next morning, take it out, shape the rolls, and let them do their second rise while you’re prepping other dishes. This saves you a ton of time and stress on the big day.
Variations & Adaptations
These honey butter dinner rolls are pretty perfect as-is, but I love experimenting with different flavors. Here are some variations I’ve tried that turned out great.
Herb and Garlic Rolls
Add 2 tablespoons of fresh chopped rosemary and 3 minced garlic cloves to the dough during the mixing stage. The herbs infuse the rolls with savory flavor that pairs beautifully with turkey and gravy. I made these for a Friendsgiving last year, and they were gone before the mashed potatoes.
Cinnamon Honey Swirl Rolls
After the first rise, roll the dough out into a rectangle, brush with melted butter, sprinkle with cinnamon sugar, and roll it up like cinnamon rolls. Slice and bake in a round pan. These are amazing for Thanksgiving brunch or as a sweet side for dinner.
Whole Wheat Version
Substitute half the bread flour with whole wheat flour. The rolls will be a bit denser and nuttier, but they’re still soft and delicious. Add an extra tablespoon of honey to balance the earthy flavor of the whole wheat.
Dairy-Free Adaptation
Use plant-based butter and oat milk instead of dairy. I’ve tested this with Miyoko’s vegan butter and it works beautifully. The rolls are slightly less rich but still soft and satisfying.
Gluten-Free Option
I’ll be honest — I haven’t perfected a gluten-free version of this recipe yet. But I’ve heard good things about using Cup4Cup gluten-free flour blend. If you try it, let me know how it turns out in the comments!
Serving & Storage Suggestions
These rolls are at their absolute best warm from the oven, but they’re still fantastic at room temperature. Here’s how to serve and store them like a pro.
Serving Temperature
I like to serve these rolls warm, right after that second honey butter glaze. The butter is still melty, the honey is glossy, and the flaky salt is just starting to dissolve. If you’re making them ahead, warm them in a 300°F oven for 5-7 minutes before serving. They’ll taste fresh-baked all over again.
What to Serve Alongside
These rolls are the perfect companion for a big Thanksgiving spread. Pair them with roasted turkey, creamy mashed potatoes, green bean casserole, and cranberry sauce. They’re also amazing with a pat of extra butter and a drizzle of honey for dipping. For a lighter meal, serve them alongside a big bowl of soup or a hearty salad.
Storage Instructions
Store leftover rolls in an airtight container at room temperature for up to 3 days. Don’t refrigerate them — the cold air dries them out. If you need to keep them longer, freeze them. Wrap each roll individually in plastic wrap, then place them in a freezer bag. They’ll keep for up to 3 months.
Reheating Tips
To reheat, wrap the rolls in foil and warm them in a 300°F oven for 10 minutes. If you’re in a hurry, microwave one roll for about 15 seconds. Just be careful not to overheat them, or they’ll get tough. The honey butter glaze will re-melt and make them taste fresh again.
How Flavors Develop
Here’s something interesting: these rolls actually taste better the next day. The honey butter soaks into the bread overnight, making every bite even more flavorful. So don’t worry if you have leftovers — they’re still going to be amazing.
Nutritional Information & Benefits
Let’s be real — these are dinner rolls, not health food. But they’re made with real ingredients, and there are some redeeming qualities worth noting.
Estimated Nutritional Values (per roll)
- Calories: 180
- Fat: 7g
- Carbohydrates: 26g
- Protein: 4g
- Fiber: 1g
- Sugar: 8g
Health Benefits of Key Ingredients
Honey is a natural sweetener that contains antioxidants and has antibacterial properties. It’s also easier on your blood sugar than refined sugar. Butter, in moderation, provides healthy fats and fat-soluble vitamins like A, D, and E. And bread flour gives you energy from complex carbohydrates — perfect for fueling a long day of cooking and celebrating.
Dietary Considerations
These rolls contain gluten, dairy, and eggs, so they’re not suitable for those with allergies to those ingredients. If you need a dairy-free or gluten-free version, check out the variations section above for my tested adaptations.
My Wellness Perspective
I believe in enjoying food without guilt. These rolls are a treat, and that’s okay. Thanksgiving is about gathering with people you love and sharing food that makes you happy. One roll (or two) isn’t going to derail your healthy habits. So go ahead, enjoy that honey butter goodness. You deserve it.
Conclusion
These honey butter dinner rolls are more than just a side dish — they’re the kind of recipe that becomes a tradition. Every time I make them, I think of Aunt Clara and her tiny kitchen, and I feel like she’s right there with me, humming that old country song and showing me how it’s done.
What I love most about this recipe is how forgiving it is. Even if you’ve never made bread before, you can pull these off. The tangzhong technique practically guarantees soft, fluffy rolls, and that honey butter glaze is foolproof. Plus, they’re perfect for hosting — you can make them ahead, they scale up beautifully, and they always impress your guests.
I’d love to hear how yours turn out! Did you try any of the variations? Did you add your own twist? Drop a comment below and let me know. And if you’re looking for more Thanksgiving recipes to round out your menu, check out my best Thanksgiving turkey recipe and my creamy mashed potatoes — they pair perfectly with these rolls.
Thanks for stopping by, and happy baking! Remember, the best meals are the ones shared with people you love. Now go make some rolls and make some memories.
Frequently Asked Questions
Can I make these rolls ahead of time?
Absolutely! You can prepare the dough through the first rise, then refrigerate it overnight. The next day, shape the rolls, let them rise, and bake as directed. You can also freeze the baked rolls for up to 3 months.
Why didn’t my rolls rise?
This usually happens for one of three reasons: your yeast was old or expired, your milk was too hot and killed the yeast, or your kitchen was too cold. Make sure your milk is at 110°F and let the dough rise in a warm spot, like your oven with the light on.
Can I use all-purpose flour instead of bread flour?
Yes, you can substitute all-purpose flour, but the rolls won’t be quite as soft and chewy. Bread flour has more protein, which gives the rolls better structure and texture. If you’re in a pinch, all-purpose will work fine.
How do I get that glossy top?
The secret is brushing the rolls with honey butter twice — once right when they come out of the oven, and again 5 minutes later. The first layer soaks in, and the second layer stays on top and gives you that beautiful shine. A sprinkle of flaky sea salt adds extra sparkle.
Can I freeze the unbaked dough?
Yes! After shaping the rolls, place them on a baking sheet and freeze until solid. Transfer to a freezer bag. When you’re ready to bake, let them thaw and rise in the refrigerator overnight, then bake as directed. This is a great time-saver for busy holiday mornings.
Pin This Recipe!
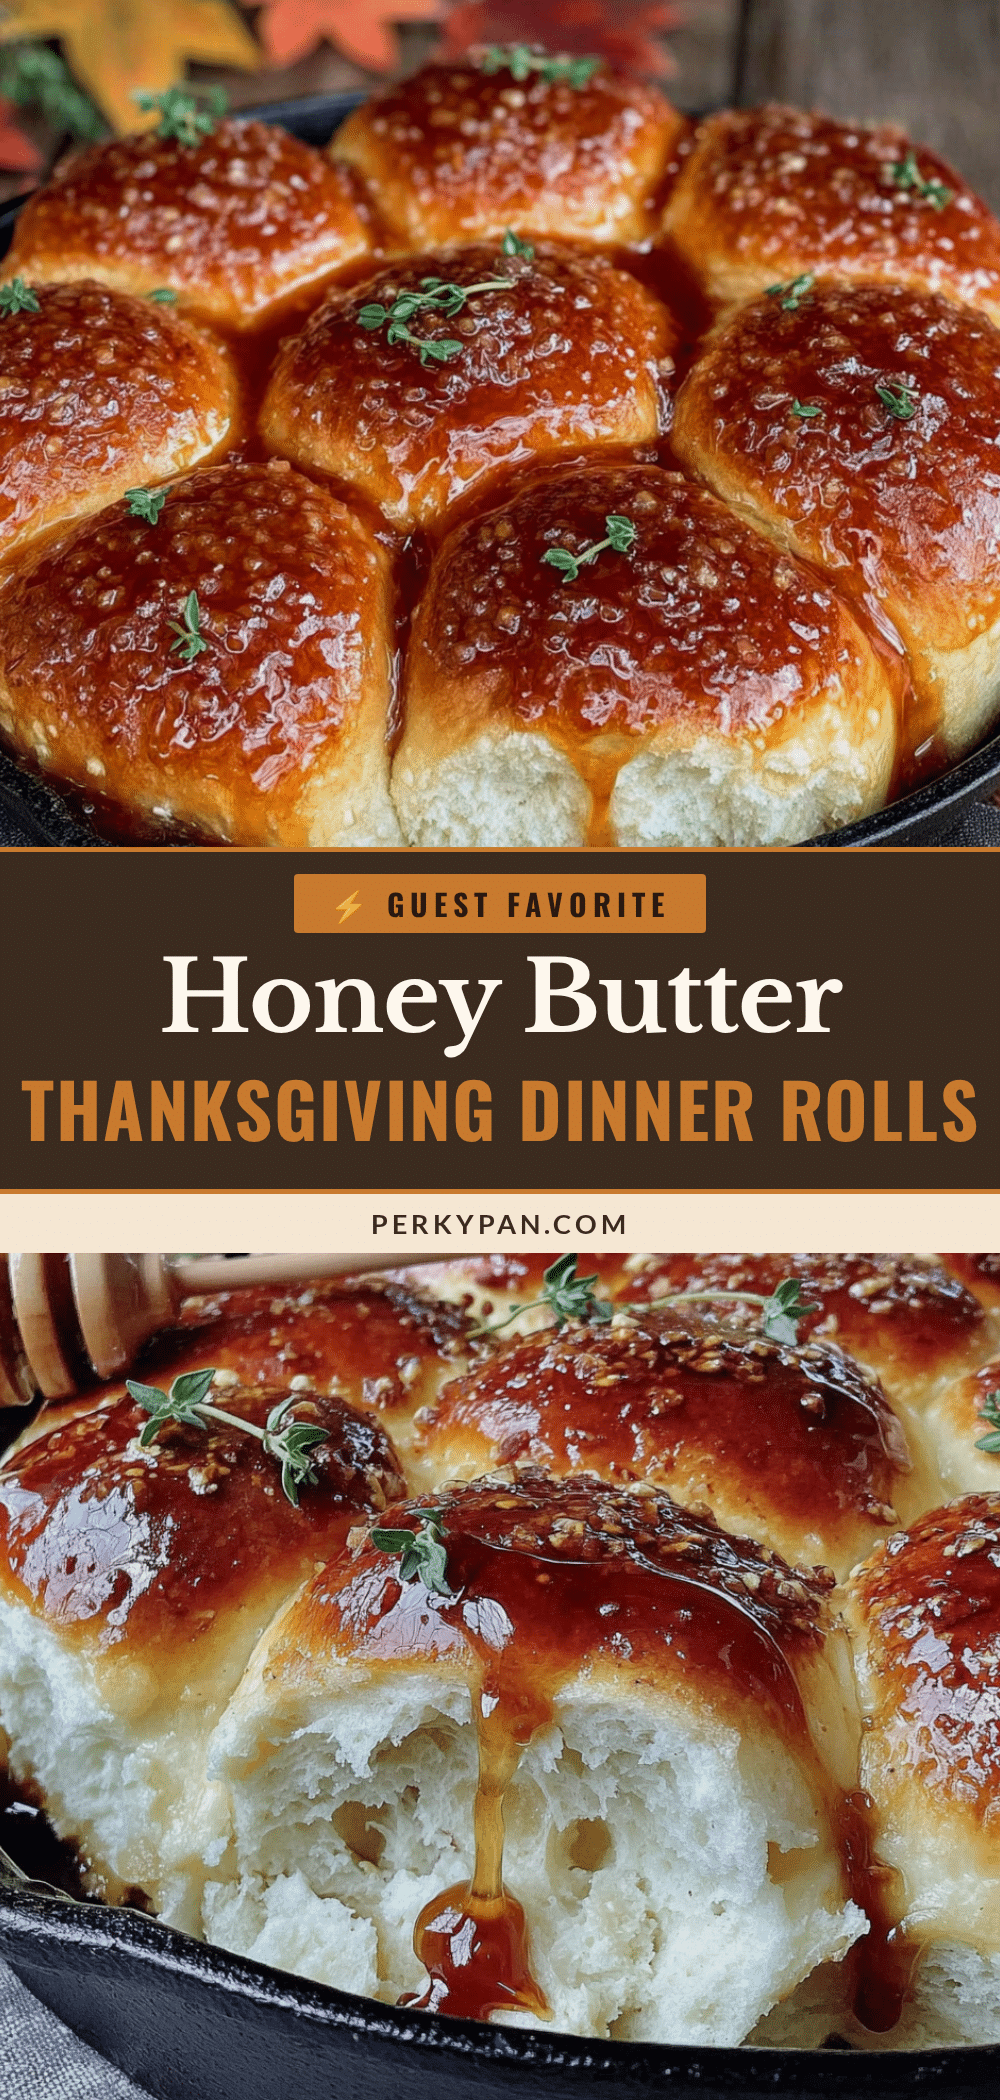
Best Homemade Honey Butter Dinner Rolls for Thanksgiving
These honey butter dinner rolls are incredibly soft, sweet, and buttery, made with a tangzhong method for extra tenderness. Perfect for Thanksgiving or any holiday gathering, they’re make-ahead friendly and disappear before the turkey gets carved.
- Prep Time: 30 minutes
- Cook Time: 25 minutes
- Total Time: 2 hours 55 minutes
- Yield: 24 rolls 1x
- Category: Side Dish
- Cuisine: American
Ingredients
- 3 tablespoons bread flour
- ½ cup water
- 4 cups bread flour (500g)
- 2 ¼ teaspoons active dry yeast (one packet)
- ⅓ cup honey (113g)
- ⅓ cup warm milk (80ml), heated to about 110°F
- ¼ cup unsalted butter (57g), softened to room temperature
- 2 large eggs, room temperature
- 1 ½ teaspoons salt
- ¼ cup unsalted butter (57g), melted
- 2 tablespoons honey
- Flaky sea salt (optional)
Instructions
- Make the Tangzhong: In a small saucepan, whisk together 3 tablespoons bread flour and ½ cup water until smooth. Cook over medium heat, stirring constantly, until the mixture thickens into a paste — about 2-3 minutes. Remove from heat and let it cool to room temperature.
- Activate the Yeast: In the bowl of your stand mixer, combine the warm milk (about 110°F), 1 tablespoon of the honey, and the yeast. Let it sit for 5-10 minutes until it gets foamy.
- Mix the Dough: Add the remaining honey, the cooled tangzhong, eggs, and 4 cups of bread flour to the yeast mixture. Mix on low speed with the dough hook until everything comes together, about 2 minutes.
- Add Salt and Butter: Sprinkle the salt over the dough, then add the softened butter in pieces. Increase the speed to medium and knead for 8-10 minutes until the dough is smooth and elastic.
- First Rise: Transfer the dough to a lightly greased bowl, cover with plastic wrap, and let it rise in a warm place for 1-2 hours, or until doubled in size.
- Shape the Rolls: Punch down the dough and turn it onto a lightly floured surface. Divide it into 24 equal pieces. Shape each piece into a smooth ball and place in a greased 9×13-inch baking dish, spacing them evenly.
- Second Rise: Cover the dish with plastic wrap and let the rolls rise for another 45-60 minutes, until they’re puffy and touching each other.
- Bake: Preheat your oven to 350°F. Brush the tops of the rolls with a little melted butter. Bake for 20-25 minutes, until golden brown and the rolls sound hollow when tapped.
- Glaze While Warm: As soon as the rolls come out of the oven, brush them generously with the honey butter glaze. Let them sit for 5 minutes, then brush again.
- Finish with Flaky Salt: If using flaky sea salt, sprinkle a tiny pinch over each roll right after the second glaze.
Notes
Don’t rush the rising time. If your kitchen is cold, the rolls will take longer to double in size. For make-ahead: prepare dough through first rise, refrigerate overnight, then shape and bake the next day. The tangzhong method keeps rolls soft for 3-4 days.
Nutrition
- Serving Size: 1 roll
- Calories: 180
- Sugar: 8
- Sodium: 150
- Fat: 7
- Saturated Fat: 4
- Carbohydrates: 26
- Fiber: 1
- Protein: 4
Keywords: honey butter dinner rolls, Thanksgiving rolls, soft dinner rolls, homemade rolls, tangzhong rolls, holiday rolls


