Love this? Save it for later!
Share the inspiration with your friends
It was the night before Halloween and I had completely forgotten that I volunteered to bring the snacks for my daughter’s classroom party. I mean, I’d remembered weeks ago when the sign-up sheet went around, but somewhere between work deadlines and soccer practice, it just slipped my mind completely. I got the reminder email at 9 PM and honestly, my heart sank.
Everyone else was probably planning elaborate themed treats—you know the kind, those incredible cakes that look like graveyards or those perfectly decorated cookies that belong in a bakery window. I had a half-empty fridge, a bag of shredded mozzarella, some pizza dough in the freezer, and about twenty minutes of energy left in me. Not exactly the stuff of Pinterest dreams.
So there I was, standing in my kitchen at 9:15 PM, staring at ingredients like they might magically transform themselves. And then it hit me—pizza bites. But not just any pizza bites. Mummy pizza bites. I mean, how hard could it be to wrap some dough strips around little cheese-stuffed meatballs and call them mummies? Turns out, not hard at all. The best part? They were the first thing to disappear at the party the next day. The other moms were asking for the recipe while their elaborate graveyard cake sat half-eaten. Maybe you’ve been there—the accidental win when you least expect it. That’s this recipe.
Why You’ll Love This Recipe
Let me tell you why these cozy mummy pizza bites have become my go-to for any spooky gathering. I’ve tested this recipe more times than I can count, tweaking the dough thickness and the cheese ratio until it was absolutely perfect. Here’s what makes them special:
- Quick & Easy: From start to finish, you’re looking at about 25 minutes. Perfect for those last-minute Halloween parties or a fun weeknight dinner when you want something playful without the stress.
- Simple Ingredients: No fancy grocery trips needed. You likely already have pizza dough, mozzarella, pepperoni or meatballs, and marinara sauce in your kitchen. I tested this with both homemade and store-bought dough, and honestly, the store-bought version works like a charm.
- Perfect for Spooky Nights: Whether it’s a classroom party, a family movie night with Hocus Pocus, or a cozy gathering with friends, these little mummies fit right in. They’re cute without being complicated.
- Crowd-Pleaser: Kids absolutely go wild for them, and adults can’t stop at just one. I’ve watched grown men eat six of these in a row without blinking.
- Unbelievably Delicious: The combination of crispy dough, gooey cheese, and savory filling is pure comfort food magic. The texture is next-level—crispy on the outside, soft and melty on the inside.
What makes this recipe different from every other pizza bite out there is the wrapping technique. I figured out that twisting the dough strips just slightly gives the mummies that authentic “wrapped” look without the dough unraveling during baking. It’s a small tweak, but it makes all the difference between a sad blob and an adorable mummy.
These mummy pizza bites aren’t just good—they’re the kind of snack that makes you close your eyes after the first bite. It’s comfort food reimagined for Halloween, with the same soul-soothing satisfaction as a warm slice of pizza but in a fun, festive package. Perfect for impressing guests without stress, or turning a simple movie night into something memorable.
What Ingredients You Will Need
This recipe uses simple, wholesome ingredients to deliver bold flavor and satisfying texture without the fuss. Most of these are pantry staples, and I’ve included some substitution notes based on my own trial and error.
For the Mummy Pizza Bites
- Pizza dough, 1 pound (450g) — store-bought works great, but if you have a favorite homemade recipe, go for it. I personally prefer Pillsbury pizza dough in the can for convenience, but Trader Joe’s refrigerated dough is my secret weapon for better texture.
- Mini pepperoni or meatballs, 24 pieces — I use frozen Italian meatballs (thawed) for a heartier bite, but mini pepperoni is classic and quicker. For a vegetarian version, use small cubes of firm tofu or store-bought veggie meatballs.
- Mozzarella cheese, 12 ounces (340g) — cut into 24 small cubes, about 1/2 inch each. Fresh mozzarella gives the best melt, but block mozzarella works too. Avoid pre-shredded as it doesn’t melt as smoothly.
- Marinara sauce, 1 cup (240ml) — for dipping. I like Rao’s Homemade for its rich flavor, but any good-quality jarred sauce works. You can also use pizza sauce if that’s what you have.
- Egg wash, 1 large egg + 1 tablespoon water — this gives the mummies that beautiful golden-brown crust. You can skip this and brush with olive oil instead for a slightly less shiny finish.
- Olive oil, 1 tablespoon — for brushing the baking sheet and the tops if you skip the egg wash.
For the Eyes (Optional but Adorable)
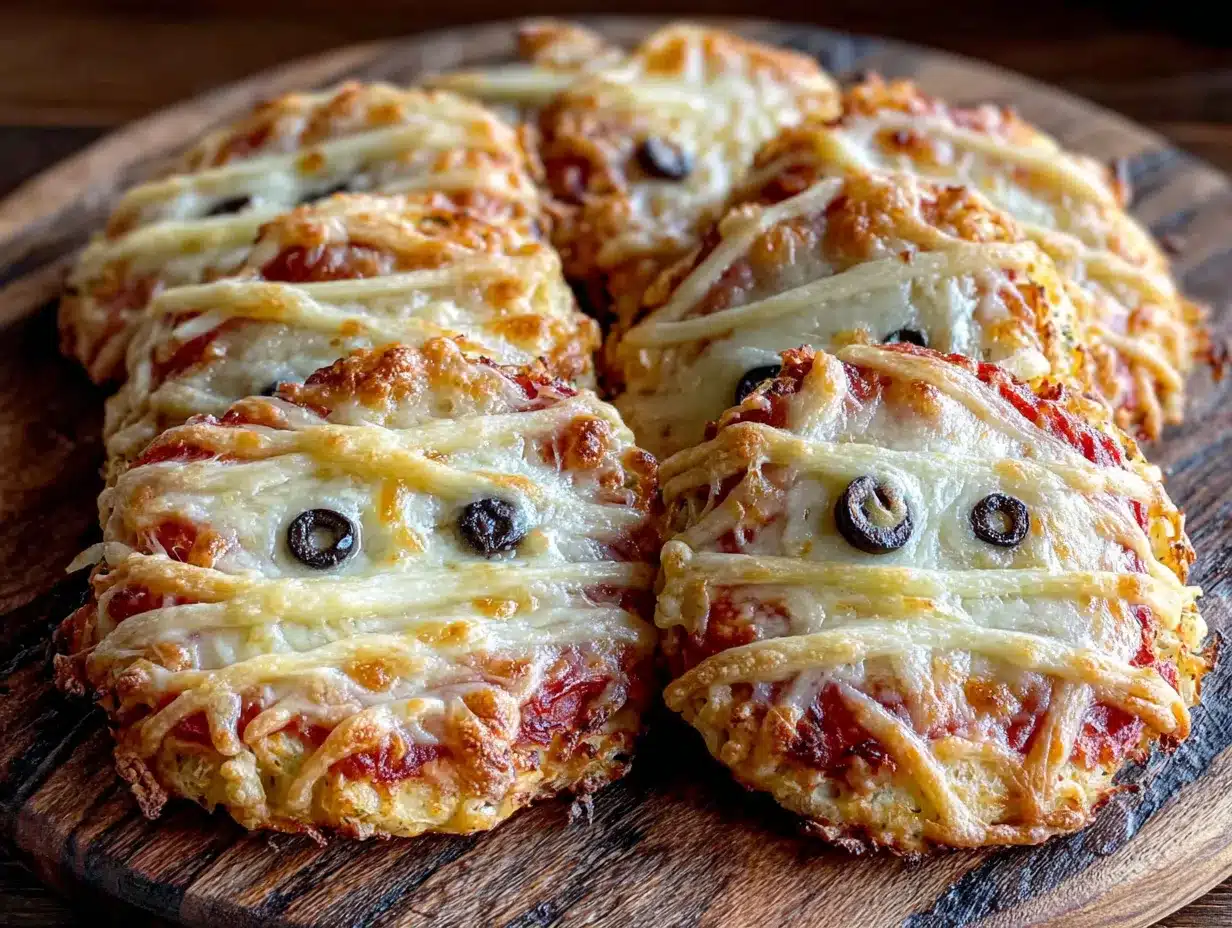
- Candy eyes, 48 small pieces — these are the classic mummy touch. You can find them at any grocery store near the baking aisle. If you don’t have them, use small dots of mustard or ketchup, or even black sesame seeds for a less sugary option.
- Mustard or ketchup, for dotting eyes — if you want to skip the candy, a tiny dab of yellow mustard looks surprisingly cute and adds a tangy pop.
Substitution Guidance: If you’re gluten-free, use your favorite gluten-free pizza dough. I’ve tested this with Caulipower brand and it worked beautifully—just handle it gently as it’s more delicate. For a dairy-free version, use vegan mozzarella shreds and dairy-free meatballs. I recommend Violife for the best melt. And if you’re short on time, refrigerated biscuit dough cut into strips works in a pinch—just adjust baking time by a few minutes.
Equipment Needed
You don’t need fancy equipment for this recipe, which is honestly one of the reasons I love it. Here’s what you’ll need:
- Baking sheet, 1 large — a standard half-sheet pan works perfectly. Line it with parchment paper for easy cleanup. I’ve learned the hard way that parchment is non-negotiable here; the cheese will stick to foil every single time.
- Rolling pin — for rolling out the dough evenly. If you don’t have one, a wine bottle works in a pinch. I’ve used a clean glass jar before in a rental kitchen and it did the job.
- Pizza cutter or sharp knife — for cutting the dough into strips. A pizza cutter makes this step so much faster, but a knife works fine.
- Pastry brush — for applying the egg wash. A silicone brush is my favorite because it doesn’t shed bristles. A paper towel dabbed in the wash works too if you’re in a pinch.
- Small bowl — for mixing the egg wash.
- Measuring cups and spoons — for accuracy, though honestly, I eyeball the marinara at this point.
Budget-Friendly Tips: Skip the specialty tools. Use a butter knife for cutting dough, a regular spoon for mixing, and your hands for brushing on oil. I’ve made these in a tiny apartment kitchen with zero counter space and they turned out perfect. The only thing I wouldn’t skip is the parchment paper—it’s cheap and saves you from scrubbing a baking sheet for twenty minutes.
Preparation Method
Alright, let’s make these cozy mummy pizza bites. I’ve broken this down step by step with all the little tricks I’ve learned along the way.
- Preheat your oven to 400°F (200°C). Line a large baking sheet with parchment paper. This is important—don’t skip the parchment. I once thought I could get away with just greasing the pan, and let me tell you, the cheese bonded to that metal like it was glued.
- Roll out the pizza dough. On a lightly floured surface, roll the dough into a rectangle about 12×9 inches, roughly 1/4 inch thick. Don’t stress about perfect edges—mummies aren’t supposed to be perfect anyway. If the dough keeps springing back, let it rest for 5 minutes and try again. That’s the gluten relaxing, not you doing something wrong.
- Cut the dough into strips. Using a pizza cutter or sharp knife, cut the dough lengthwise into 24 strips, each about 1/2 inch wide and 9 inches long. They don’t need to be perfectly uniform—some mummies can be chunky and others skinny. It adds character.
- Prepare your filling. Take your meatballs or mini pepperoni and your mozzarella cubes. If using frozen meatballs, make sure they’re fully thawed. I usually microwave them for about 30 seconds to take the chill off. For each mummy, you’ll need one piece of meat/pepperoni and one cube of cheese.
- Assemble the mummies. Take one dough strip and gently stretch it slightly to make it a bit longer. Place a meatball or pepperoni piece at one end of the strip, top it with a cheese cube, then wrap the dough strip around the filling, slightly overlapping as you go. Think of it like wrapping a tiny burrito. Leave a small gap at the top where the “face” will go—that’s where the eyes will live. Tuck the end of the strip underneath to secure it. Repeat with all 24 pieces.
- Place on the baking sheet. Arrange the wrapped mummies on the prepared baking sheet, leaving about 1 inch of space between each one. They’ll expand a bit as they bake, so give them room to breathe. I usually fit 12 per sheet and bake in two batches.
- Apply the egg wash. In a small bowl, whisk the egg with 1 tablespoon of water until smooth. Brush each mummy lightly with the egg wash. Don’t drown them—a thin, even coat is all you need for that golden glow. If you’re skipping the egg wash, brush with olive oil instead.
- Bake for 12-15 minutes. Place the baking sheet in the preheated oven and bake until the mummies are golden brown and the cheese is bubbly. At the 12-minute mark, check them. You’re looking for a deep golden color on the dough and little spots of melted cheese peeking through. If they need more time, give them another 2-3 minutes.
- Add the eyes. Let the mummies cool on the baking sheet for about 2 minutes—this is crucial because if you try to add candy eyes while they’re too hot, the eyes will melt into sad little puddles. Once slightly cooled, press two candy eyes into the gap you left at the top. If using mustard or ketchup, dab a tiny dot with a toothpick.
- Serve immediately. Transfer the mummies to a serving platter and serve warm with marinara sauce for dipping. They’re best within 15 minutes of coming out of the oven, when the cheese is still stretchy and the dough is perfectly crisp.
Sensory Cues: When the mummies are done, the kitchen will smell like a pizzeria crossed with a Halloween party. The dough should be golden with darker brown spots on the edges. The cheese might be bubbling out in places—that’s a good thing. If you tap a mummy gently, it should feel firm but give slightly under pressure. That’s the perfect texture.
Cooking Tips & Techniques
After making these mummy pizza bites about a dozen times (not an exaggeration), I’ve collected some hard-won wisdom. Let me save you from my mistakes.
Don’t overfill the dough. I know it’s tempting to stuff as much cheese and meat as possible into each mummy, but less is genuinely more here. If you overfill, the dough won’t seal properly and everything will ooze out during baking. You’ll end up with a tray of sad, exploded mummies. Trust me, I’ve been there. One cube of cheese and one piece of meat per mummy is the sweet spot.
Let the dough rest if it’s fighting you. If the pizza dough keeps snapping back when you try to roll it out, just cover it with a clean kitchen towel and let it sit for 10 minutes. The gluten needs to relax. I learned this after a particularly frustrating night where I was practically wrestling the dough. It’s not you—it’s the gluten.
Work in batches if needed. Don’t crowd the baking sheet. The mummies need space to bake evenly and get crispy on all sides. If they’re too close together, they’ll steam instead of bake, and you’ll end up with soggy spots. I’d rather bake two perfect batches than one crowded mess.
Use room temperature ingredients. Cold dough is harder to work with and doesn’t roll out as smoothly. Let your pizza dough sit on the counter for about 20 minutes before you start. Same goes for the cheese—cold mozzarella doesn’t melt as evenly. I usually take everything out while I preheat the oven.
Multitasking tip: While the first batch is baking, assemble the second batch on a separate piece of parchment. That way, when the first batch comes out, you can slide the second parchment right onto the hot baking sheet and keep going. It cuts the total time almost in half.
Variations & Adaptations
One of the best things about this recipe is how flexible it is. I’ve tried several variations over the years, and here are my favorites:
Vegetarian Mummies
Skip the meat entirely and use a cube of roasted red pepper or a slice of sun-dried tomato along with the cheese. The smoky sweetness of roasted red pepper pairs beautifully with the mozzarella. I made these for a vegetarian friend’s Halloween party and they were gone before the meat versions.
Spicy Buffalo Mummies
Swap the marinara for buffalo sauce and use shredded rotisserie chicken mixed with cream cheese as the filling. Dip them in ranch or blue cheese dressing. These are dangerously addictive—I made them for a football watch party and didn’t get to eat a single one myself.
Breakfast Mummies
Use cooked breakfast sausage links (cut into 1-inch pieces) and cheddar cheese instead of mozzarella. Serve with maple syrup for dipping. I tested this on a lazy Saturday morning and my kids declared it “the best breakfast ever.” The sweet and savory combo is surprisingly perfect.
Gluten-Free Adaptation
Use gluten-free pizza dough and handle it gently—it’s more fragile than regular dough. I’ve had good luck with the King Arthur Flour gluten-free pizza crust mix. Just roll it between two sheets of parchment paper to prevent sticking.
Air Fryer Method
Preheat your air fryer to 375°F (190°C). Arrange the mummies in a single layer in the basket (you’ll need to work in batches). Cook for 8-10 minutes, flipping halfway through, until golden and crispy. The air fryer makes the dough extra crunchy—my preferred method when I’m not feeding a crowd.
Serving & Storage Suggestions
These mummy pizza bites are best served warm, straight from the oven. The cheese is at its stretchiest and the dough is perfectly crisp. Arrange them on a platter with a small bowl of warm marinara sauce in the center for dipping. For a spooky touch, I like to add a few plastic spiders or skeleton decorations around the platter—my kids get a kick out of it.
What to Serve With Them: These mummies pair beautifully with a simple green salad for a full meal, or with other Halloween-themed snacks like “witch finger” breadsticks or pumpkin-shaped cheese balls. For drinks, a warm mug of apple cider or a glass of red wine (for the adults) complements the savory flavors perfectly.
Storage Instructions: Leftover mummies can be stored in an airtight container in the refrigerator for up to 3 days. The candy eyes might soften a bit, but they’ll still look cute. To reheat, pop them in a 350°F (175°C) oven for 5-7 minutes, or in the air fryer at 350°F for 3-4 minutes. The microwave works in a pinch, but the dough will be softer and less crispy.
Freezer Tips: You can freeze the assembled but unbaked mummies on a baking sheet until solid, then transfer them to a freezer bag for up to 2 months. Bake directly from frozen, adding 3-5 minutes to the baking time. I do this every October—make a big batch, freeze them, and then I’m ready for any last-minute Halloween emergency.
Flavor Development: Honestly, these are best fresh. The magic is in that first warm, cheesy bite. But if you do have leftovers, they’re still delicious the next day—just not quite as crispy. The flavors actually meld together nicely overnight, so they taste even more pizza-like the next day.
Nutritional Information & Benefits
Here’s a rough estimate for one mummy pizza bite (based on using mini pepperoni and part-skim mozzarella):
| Nutrient | Amount per Bite |
|---|---|
| Calories | 85 |
| Total Fat | 4g |
| Saturated Fat | 2g |
| Cholesterol | 15mg |
| Sodium | 180mg |
| Total Carbohydrates | 8g |
| Protein | 4g |
Health Benefits: Mozzarella cheese is a good source of calcium and protein, which supports bone health and muscle function. The pizza dough provides carbohydrates for energy—perfect for fueling a night of trick-or-treating. If you use whole wheat pizza dough, you’ll add fiber and B vitamins to the mix. And the marinara sauce counts as a serving of vegetables (yes, tomatoes count!), providing lycopene, an antioxidant linked to heart health.
Dietary Considerations: This recipe can be made gluten-free, dairy-free, or vegetarian with simple substitutions (listed above). It’s not suitable for vegan diets as written, but you could use vegan cheese and plant-based meatballs. The candy eyes contain sugar, so skip them if you’re avoiding added sugars—mustard dots work great instead.
I’m not a nutritionist, so take these numbers as rough estimates. But honestly, I believe food should be enjoyed without guilt. These are party snacks, not health food, and that’s okay. One batch makes 24 bites, so they’re easy to portion control if that’s your thing.
Conclusion
These cozy mummy pizza bites are proof that you don’t need hours in the kitchen or fancy ingredients to create something truly special. They came from a moment of panic and a fridge full of basics, and now they’re the recipe my kids request every single October. That’s the kind of magic I love—simple, accessible, and full of joy.
I hope you make these for your next spooky night, whether it’s a big Halloween party or just a quiet evening watching scary movies with the family. Don’t be afraid to make them your own—swap in your favorite fillings, experiment with different dipping sauces, or let the kids help with the wrapping. The imperfections are what make them charming.
If you try these mummy pizza bites, I’d love to hear about it. Drop a comment below and tell me how they turned out, or share a photo of your mummy creations. Did your kids love them? Did they disappear at your party? Did you come up with a brilliant variation I haven’t thought of? Let’s keep the conversation going. Happy Halloween, and happy snacking!
Frequently Asked Questions
Can I make these mummy pizza bites ahead of time?
Absolutely! You can assemble them up to 24 hours in advance and keep them covered in the refrigerator. Just add a few minutes to the baking time since they’ll be cold going into the oven. You can also freeze them unbaked for up to 2 months—bake directly from frozen, adding 3-5 minutes.
What if I don’t have candy eyes?
No problem at all! You can use small dots of yellow mustard, ketchup, or even black sesame seeds to create the eyes. I’ve also used tiny pieces of black olive sliced thin. The mummies will still look adorable and taste just as delicious.
Can I use crescent roll dough instead of pizza dough?
Yes, you can! Crescent roll dough works in a pinch, but keep in mind it has a buttery, flaky texture rather than a chewy pizza crust texture. The baking time will be slightly shorter—check them at 10 minutes. I’ve done this when I was out of pizza dough and they turned out surprisingly good.
How do I prevent the cheese from leaking out during baking?
The key is not overfilling and making sure the dough is sealed well. Tuck the end of the dough strip underneath the mummy so it’s secure. Also, make sure your cheese cubes aren’t too large—about 1/2 inch is perfect. A little bit of cheese leakage is actually charming—it looks like mummy bandages coming loose!
Can I make these in an air fryer?
Definitely! Preheat your air fryer to 375°F (190°C) and arrange the mummies in a single layer in the basket. Cook for 8-10 minutes, flipping halfway through, until golden and crispy. You’ll need to work in batches depending on the size of your air fryer. The air fryer version is actually my favorite for the extra-crispy texture.
Pin This Recipe!
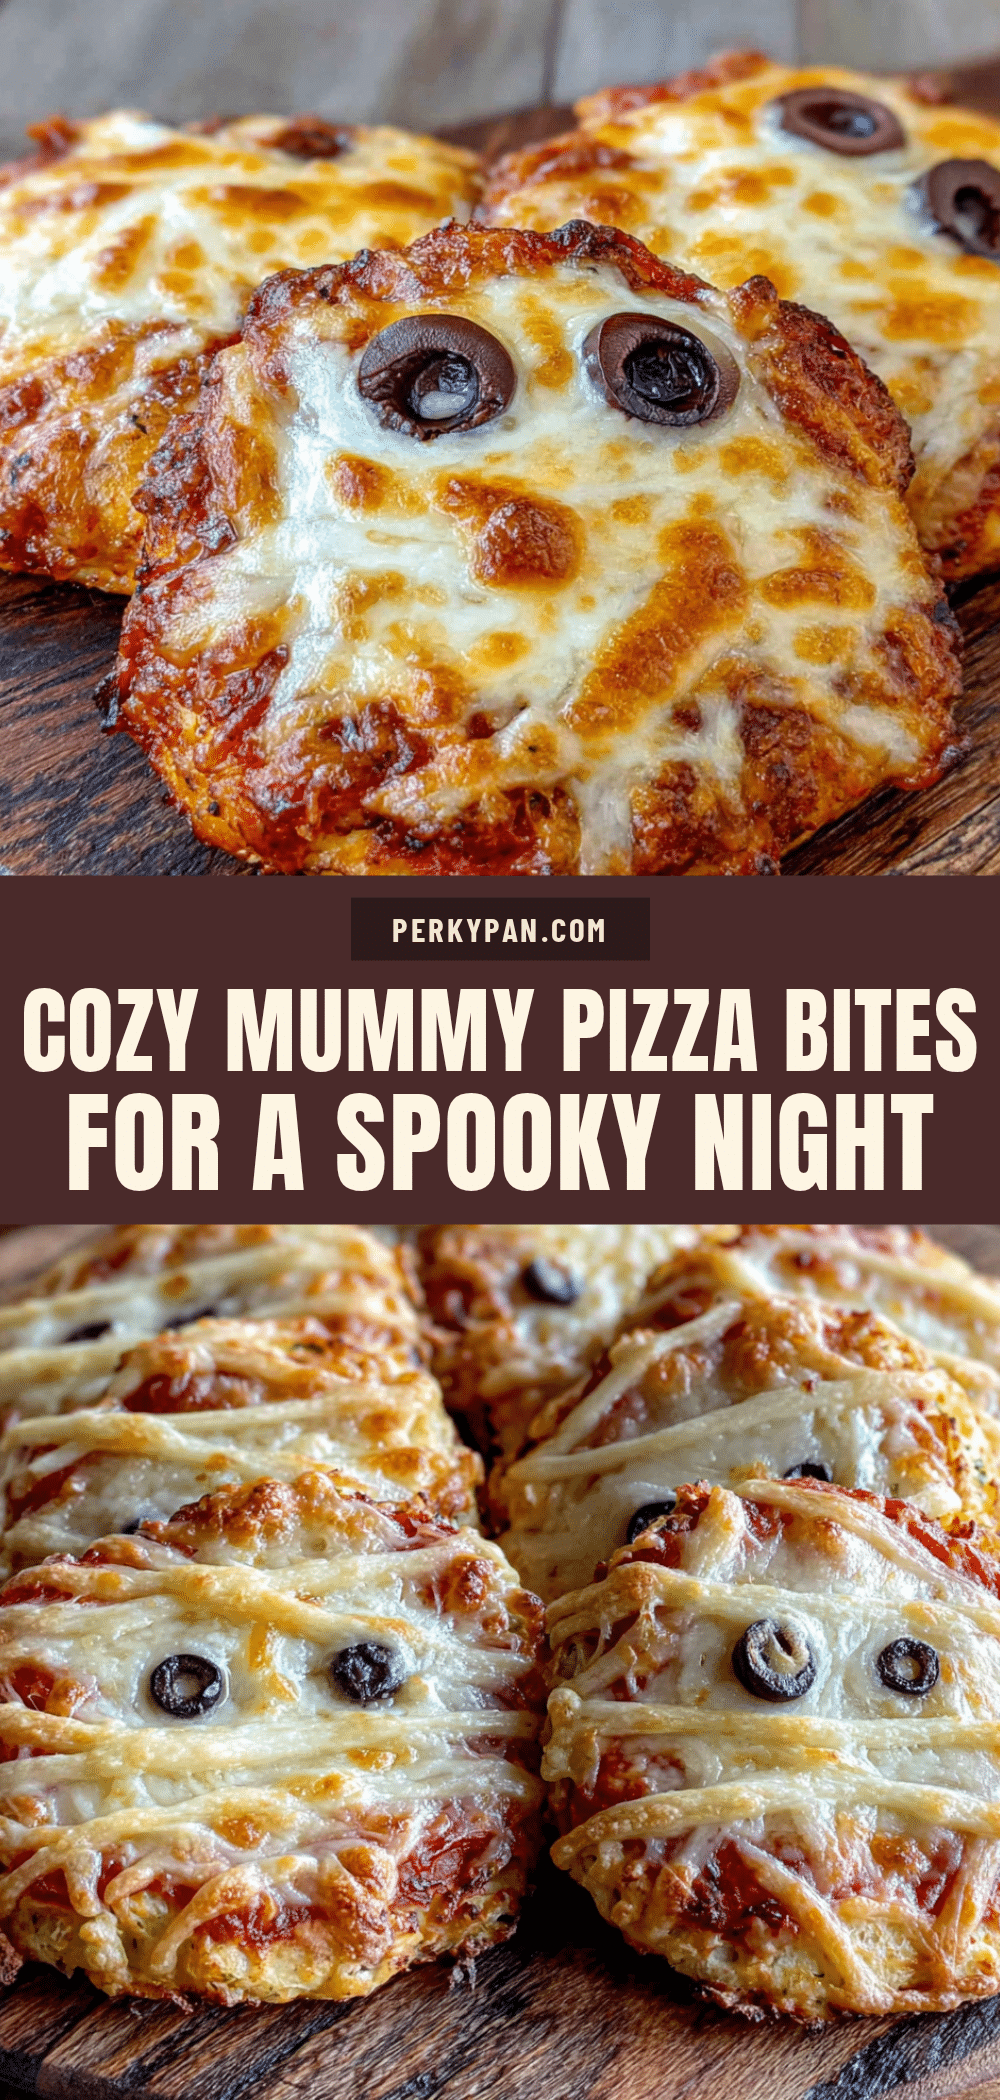
Cozy Mummy Pizza Bites: Best Easy Spooky Night Recipe
These adorable mummy pizza bites are quick, easy, and perfect for Halloween parties or spooky movie nights. Made with simple ingredients like pizza dough, mozzarella, and mini pepperoni or meatballs, they’re a crowd-pleasing snack that comes together in just 25 minutes.
- Prep Time: 10 minutes
- Cook Time: 15 minutes
- Total Time: 25 minutes
- Yield: 24 bites 1x
- Category: Appetizer
- Cuisine: American
Ingredients
- 1 pound (450g) pizza dough
- 24 mini pepperoni or meatballs
- 12 ounces (340g) mozzarella cheese, cut into 24 small cubes
- 1 cup (240ml) marinara sauce, for dipping
- 1 large egg + 1 tablespoon water (for egg wash)
- 1 tablespoon olive oil
- 48 small candy eyes (optional)
- Mustard or ketchup for dotting eyes (optional)
Instructions
- Preheat your oven to 400°F (200°C). Line a large baking sheet with parchment paper.
- On a lightly floured surface, roll the pizza dough into a rectangle about 12×9 inches, roughly 1/4 inch thick.
- Using a pizza cutter or sharp knife, cut the dough lengthwise into 24 strips, each about 1/2 inch wide and 9 inches long.
- Take one dough strip and gently stretch it slightly. Place a meatball or pepperoni piece at one end, top with a cheese cube, then wrap the dough strip around the filling, slightly overlapping. Leave a small gap at the top for the eyes. Tuck the end underneath to secure. Repeat with all 24 pieces.
- Arrange the wrapped mummies on the prepared baking sheet, leaving about 1 inch of space between each.
- In a small bowl, whisk the egg with 1 tablespoon of water until smooth. Brush each mummy lightly with the egg wash.
- Bake for 12-15 minutes, until golden brown and the cheese is bubbly.
- Let the mummies cool on the baking sheet for about 2 minutes, then press two candy eyes into the gap at the top. If using mustard or ketchup, dab a tiny dot with a toothpick.
- Serve immediately with warm marinara sauce for dipping.
Notes
Don’t overfill the dough to prevent leakage. Let the dough rest if it springs back. Work in batches if needed. Use room temperature ingredients for best results. For air fryer: cook at 375°F for 8-10 minutes, flipping halfway.
Nutrition
- Serving Size: 1 bite
- Calories: 85
- Sugar: 1
- Sodium: 180
- Fat: 4
- Saturated Fat: 2
- Carbohydrates: 8
- Protein: 4
Keywords: Halloween, pizza bites, mummy, appetizer, party snack, easy, kid-friendly


